The South Padre Island Flip Flop Foodie Brownsville restaurants

Search The South Padre Island Flip Flop Foodie Blog!

Wednesday, November 24, 2010

Peanut Butter Crunch

When I was a little girl in the 1960's, the Austin public school cafeterias sold an "extra" dessert called Peanut Butter Crunch.  It was my favorite thing they had - the nearest second were the yeast rolls they served almost daily!  I never wondered, at the time, how they were made, I just knew we were all excited when they were available!  However, as I got older, I thought about them...my sisters and I talked about them...everyone who remembered them always ended the conversation with "I sure wish I had the recipe for those". 

In the late 1970's, one of my co-workers brought a tray of them to work one day.  I thought I had died and gone to heaven!  She said they weren't difficult to make, and I wrote down the recipe.  At the time, I didn't even consider owning a candy thermometer...and my Peanut Butter Crunches never turned out the same.  I even put them in a cook-book we made at work and used a "number of minutes" for the cooking time, instead of a temperature.  One of my co-workers said "hey, I made your recipe and they turned out hard as a rock".  Lesson learned - recipe testing is important!  I got to the point I would not share it with anyone...it was top secret!  MINE always turned out "pretty much" right because I had gotten the "look" down - but I couldn't communicate that in writing.  And, they weren't 100% consistent.

After time, I became a better cook, and I learned to cook sugar syrups to temperature...or you could end up with rock candy instead of chewy bars!  So, really, if you are going to make this recipe - make sure you have a candy thermometer - it makes all the difference!


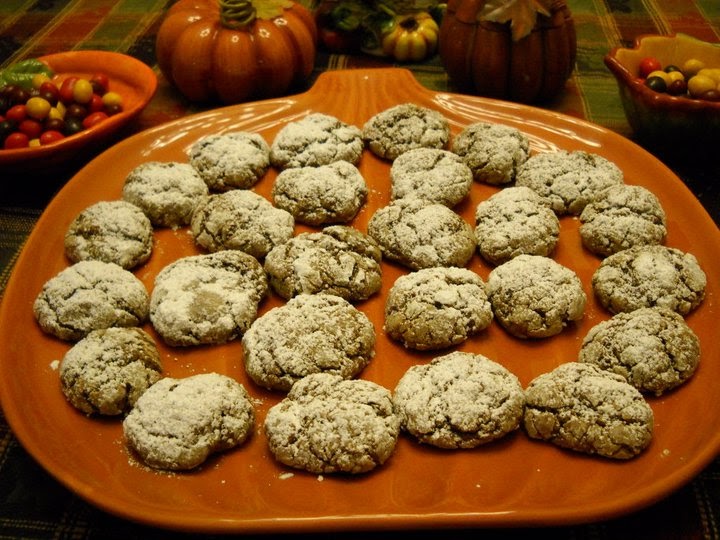
I'm sharing this recipe now - because it is my children's favorite dessert - and I want it to be available for them to make themselves.  If you love peanut butter and chewy things - you will love this confection!  I've made them as a bar, I've made them as a drop cookie, and I've made them in mini-muffin pans.  They are good any way you make them.

This would be a wonderful addition to a cookie tray at Christmas, a dessert buffet at Thanksgiving, or individually wrapped for a bake sale.

I hope you love these as much as my family loves them...I can't believe I'm releasing my recipe publicly...my friends will laugh, because I've kept it so secret after the private cook-book debacle! (although I'm sure you can Google it and it's in a dozen different places!)

PEANUT BUTTER CRUNCH

Ingredients:
1 cup light Karo syrup (store brand corn syrup has worked fine for me as well)
1 cup granulated white sugar
12 oz. creamy peanut butter (I prefer Peter Pan or Jif - and I've tried all brands)
5 cups Kellogg's Corn Flakes (again, I've tried store brands - these just work best)

Method:
In a pan large enough to hold the final product completely, mix the corn syrup and granulated sugar together and bring to a boil over a medium heat.  Cook until candy thermometer reaches 210 to 220 degrees F.  - stirring frequently - be very careful not to splatter or touch the hot liquid with your fingers!
Remove from heat as soon as it hits 210 degrees, and carefully stir in the peanut butter until smooth.  Add five cups of corn flakes and fold until well-coated - reaching to the bottom of the pan and folding the sauce over the flakes.  It's industrious work - but the payoff is great :-)  Don't worry if you hear the flakes crunching a bit.
Spread in 9x13 pan, pressing into corners, and smoothing the top.  May spoon into mini muffin pans or drop onto wax paper coated cookie sheet using a medium cookie scoop for easy mounding.  Allow to cool at least 2 hours at room temperature. (I'm laughing as I write that - I finished these last night and within 30 minutes 3 people had cut pieces out of the pan....two hours...riigghhhtt!
Recipe doubles very well!  I made two pans last night.  Gotta say, they are pretty darn awesome!

Scooped into a mini muffin pan for individual servings

I've decorated them a variety of ways - put some holiday sugar on them while still warm, I've drizzled chocolate across them - my kids really just prefer them without any enhancements.  That speaks well of a good dessert.  It's chewy and gooey and I've never had anyone say they didn't like them (if they like peanut butter).

Hope you enjoy this - and, as always, Bon Appetit Y'all!StumbleUpon

Tuesday, November 23, 2010

Dirt Cake

My friend, Sandy, made this back in the late 80's and early 90's, and it is so delicious that I've decided to make it in a clear trifle dish for one of our upcoming parties.  Normally, Sandy served it in a lined flower pot because the topping of crushed Oreos looks like dirt (hence the name).  Sandy used to put a silk flower in the middle.  It was always a hit when she brought it to a pot luck or for someone's birthday at work.

It's not really a cake at all - it's more like a creamy rich pie with oreo layers instead of crust.  I think it will be a pretty presentation in a trifle bowl with the "dirt" layers visible instead of hidden in the flower pot.  I don't have a picture, because I haven't made it yet...the party's a few weeks out.  However, I'll post it as soon as I do.  It's a delicious concoction and so easy to make, you'll love it! 

I just wanted to share it now - in case you need an EXTRA Thanksgiving dessert - you might want to give this great no-cook treat a try!

DIRT CAKE

INGREDIENTS:
2 small packages Oreos (I'm not sure they come in large and small any longer - so I'm going to buy 2 of the only package I see on the shelf these days - I can save left-over crumbs for another recipe)
2 8-ounce packages Cream Cheese - softened
3/4 cup sugar
1/2 stick butter (4 Tbsp) - softened
1 small package Instant Chocolate pudding
1 small package Instant French Vanilla pudding
2 3/4 cup milk
1 tsp. vanilla extract
12 ounces Cool Whip

METHOD:
Crush cookies - set aside. (Use food processor OR a Ziploc gallon-size bag and crush with your wooden rolling pin)
In small bowl, cream the butter, cream cheese, and sugar.
In large bowl, mix puddings, vanilla extract, and milk.
Add creamed mixture and mix thoroughly.
Add Cool Whip and mix thoroughly.

Layer cookie crumbs and pudding mixture - ending with cookies.

(Line flower pot and decorate with silk flowers for serving alternative - makes it look like dirt)

Bon Appetit Y'all !!!StumbleUpon

Monday, November 22, 2010

Bacon Cheese Bread Bowl

Lots of people like to serve an hors d'oeuvre while folks are waiting for the final preparation of the Thanksgiving dinner.  Lots of us eat in the middle of the afternoon, long after breakfast, and the masses might need a little snack while they wait.  There's always the healthy crudite tray...but, if you are looking for something to wow the crowds, you might consider this recipe.

My friend of over 30 years, Pamlets, gave me this recipe after I sampled it at one of her fun Ornament Exchange parties.  It was "eyes rolled back in the head" good.  I wish I'd gotten the recipe for ALL of her hors d'oeuvres...because they were all delicious!  She's definitely a hostess with the mostest.  Hopefully, she won't mind my sharing this delectable warm appetizer recipe.  It's a GREAT addition to anyone's appetizer table!  I know my family loved it...my notes show I served it for Christmas Eve appetizers in 2003 - geez, I'm anal about keeping lists of what I serve...  Whatever!!!  As Popeye said, I yam what I yam :-)

BACON CHEESE BREAD BOWL

INGREDIENTS:

1 loaf Round Hawaiian Bread (cut off top and scoop out bread - save top)
1 package Bacon, fried crisp and crumbled (I used a 12-14 ounce package - I use a regular or thin  slice,not thick, as it is easier to crisp and crumble)
8 ounces Colby Jack cheese (grated)
1 cup Parmesan cheese (grated)
1 cup mayonnaise
1 small onion chopped (I would say, finely chopped)
1 clove garlic chopped (or 2 tablespoons if using prepared) - that's what the recipe say...but one clove of garlic is a lot less than 2 Tbsp - so maybe she meant 2 teaspoons...I made it with a fresh garlic clove - a large one - finely minced.

METHOD:

Mix all ingredients together and add to bread bowl.  Place top on bread bowl and cover (wrap) with aluminum foil.  Put on cookie sheet and bake at 350 degrees for 1 hour.  If still not quite hot enough after baking time finishes - can put in microwave for a minute or two.

Serve with crackers or, my preference, toasted baguette rounds.  This is scrumptious!!!

Bon Appetit Y'all!!!StumbleUpon

Sunday, November 21, 2010

Crudite Dip

Many crudite trays will be served over the upcoming holidays...the only outstanding difference between yours and the last party's offering, will likely be the dip in the center.

I don't know where this recipe came from.  It's in my notebook on a torn piece of paper - hand written.  That's the way I did it before the days of the Internet, while I'd watch a cooking show on PBS (the only cooking shows back in the day).  I've tried this recipe a couple of times, and people seem to love it.  So, if you are looking for a change from "Ranch Dip" in the middle of the crudite tray, this is a good one to try!  If you have leftover cooked carrots at Thanksgiving - throw a couple of cups in the Food Saver and freeze.  That will get you prepped for this dip!

CRUDITE DIP

INGREDIENTS:
2 cups cooked carrots
1 cup chopped shallot
2/3 cup fresh ginger (peeled and rough chopped)
7 ounces Rice Wine Vinegar (I used the seasoned kind - sweeter)
3 ounces Lite Soy Sauce
7 ounces Vegetable Oil

METHOD:
Put everything except the vegetable oil in the food processor and pulse until thoroughly combined.
Drizzle in vegetable oil through the chute to emulsify.

Serve as a crudite dip OR use on chicken or fish as a sauce, or even a marinade before cooking.  Delicious!

Now, that's how I wrote it down - so that's the way I made it the first time.  The second time, I was in a hurry, and I used a cup  of the vinegar and I didn't even measure the oil - I looked for the emulsification consistency I wanted.  It tasted fine.  Tweak to your taste is what I always say!

A cute way to serve dip on your crudite tray is to hollow out a vegetable (like a bell pepper) - stabilize the bottom so it doesn't wiggle - and fill it with your dip.  It's easy and, as Emeril says, it "kicks it up a notch".

Bon Appetit Y'all!!!StumbleUpon

Saturday, November 20, 2010

Indiana Noodles by way of Texas

One of the more startling things I learned when my husband and I were in our dating years was that he wanted homemade noodles for the holidays.  Noodles?  What for?  "We spoon them over our mashed potatoes - instead of gravy"...huh?  I was, however, game to try anything that would make my honey feel comfie in his new home of Texas (well, he'd been here for a while - so maybe just OUR newness together I guess).  He made the noodles, after consulting with his Mom...and I helped.  Of course, I didn't "do them right" so each year we went through the process of calling his Mom for directions. After the current teen was born, the Grandparents made the trek down from Hoosier Land from time to time and I asked the mother-in-law to show me how to make them.  It's stressful being in the kitchen for the first time with your mother-in-law...doesn't matter that you're 37 years old and quite an okay cook...I made the mistake of responding to her moving stuff on the counter to make room for the noodle making by saying "I usually make them at the table so there's more room - do you want to do it there?" And she responded "do YOU want to make them?" GULP

If you've ever met my spousal unit - you know he says anything that pops in his head around family - not much censoring of the tongue.  Well, he got it from his Mom!  Despite that heart-lurching moment, to which I replied "uh, no, I'll just keep quiet and watch"...I did watch and learn.  There is nothing like a hands on visual instruction to learn a cooking process.  Hers were sooo much better than ours had been.  Unfortunately, I was so discombobulated I didn't take notes.  So, the very next year, the first Christmas in our new home, I made asked the honey pot to please call his mom and write down the steps!  This is what he wrote:

Yeah, very thorough recipe...step by step. <yes Sheldon, that is sarcasm>  Anyway, I've grown to deeply love and appreciate my mother-in-law through the past 20 years.  As I've grown to love my hubby's irreverence, I have grown to enjoy the same thing in my mother-in-law.  She's a wonderful cook and has an amazing wit.  Now that I'm not so nervous about being around her, like I was in the beginning, I've enjoyed all of the visits.  I haven't seen her in several years.  They don't travel any longer - and the hubby just finished an assignment close to his roots, where he got to see his parents several times.  I didn't get to make the trip...somehow now that we live in vacation-land, our vacations have revolved around hubby's assignments...and I didn't make it this summer.  So, Kate, I miss you and I appreciate the noodles and all the goodies you've sent in the past when you canned - it helped me learn about John's gastronomical roots in a way that can't be duplicated (I still contend that what you guys call chili, just can't be...spaghetti in it???)

My husband's mother's family is of German descent - and the Amish were located nearby - both make noodles.  Whatever the source of their particular noodle's heritage - now my Texas family has embraced the noddle heritage as well.  We don't make giblet gravy...we make noodles and top our mashed potatoes.  It is to die for!  Carb overload - but we don't care - not on Thanksgiving!

So, today, I made the annual noodles (I make a batch and cut it in half - freeze them - some for Thanksgiving and some for Christmas).  I talked to our Thanksgiving host (my oldest son) who said "I got the potatoes Mom" and I said "I'm making the noodles"...so everyone is set.


It's a messy endeavor....  but so worth it.  This year, and last year, I used the stand mixer instead of doing it by hand...I couldn't tell the difference.  So, I mix up 4 eggs in the bottom of the stand mixer bowl, and put in 1/2 tsp or less of white vinegar...then I start adding flour with the mixer running (dough hook on) and keep adding flour until it comes together into a ball (it is still very tacky).  I plop it on the flour-dusted counter (yes, the counter) and work in some more flour until I get a good elastic dough...very stiff.  I cut the ball in half (because I only do half at a time) and start rolling and rolling and rolling, turn, roll, flip (flour counter some more, flour rolling pin some more) and roll, roll, roll.  It is verrrryyy elastic and needs to be quite thin...egg noodles.

The first batch drying - one is always wocky shaped


The second batch drying

I can't measure the flour - because every time is different - it depends on the humidity.  We are quite humid today...so it will take longer to dry to the "perfect stage" - not too dry and not too wet.  My husband always dries them on a paper sack, cut open and laid out...so that's what I do.  If they crack at the edge, they are too dry, so get a move on and finish them up...again, it can be all day...or it can be a few hours. 

Once no longer sticky, but still pliable, you roll the sheet of dough into a long log and get your sharpest knife and slice them as thin as you can.  After starting out WRONG in the cutting - I called my husband and said "they don't look right - are they supposed to be long?  I thought they were supposed to be short...I did this wrong last year".  My husband is the cutter - I don't do it right...and it all comes back to me when I see the long noodles :-)  He told me I have to cut them on an angle and then turn and angle the other way - alternating to get sort of "v" shaped noodles.  Ahhh...that looks right. 
The WRONG way to do it
The RIGHT way to do it

Now, I will, after they are cut...sprinkle them with flour (so the cut edges are coated) and let them dry for another "little bit".  Then, I will package them (with all the loose flour left on the paper bag) in a gallon Ziploc bag...and pop them in the freezer.


Ready to Ziploc and freeze!

When it's time to cook them, on Thanksgiving Day, I will grab the drippings from the turkey pan, and while the turkey is resting, add drippings to 1 quart of chicken broth and set it to boil (I will have more broth on hand in the event I need to add more to get the right consistency).  Salt and pepper to taste...I admit I add a pinch of poultry seasoning for flavoring, <yikes, dare I admit that?> I haven't heard any complaints - but it's not in the original heritage-approved version.  Once it hits a good boil, I add the FROZEN (do NOT thaw) noodles to the boiling broth a handful at a time so they don't clump together (dusting in the flour from the bag also)  and we cook them anywhere from 20-30 minutes.  My husband tastes for seasoning and doneness.  The  broth thickens from the noodles and the flour and it's similar to a gravy!  Sometimes it is less thick and sometimes it is more thick.  If it's too thick, add a little more broth if the noodles aren't done.  If the noodles are ready and it's too thin, scoop the noodles out, and reduce the broth a bit more at a big boil then add the noodles back in, stir and serve.  You know, I'm noticing I have lots of "fixes"...because without a standardized recipe...you get different results...and that is okay - 'cause I ain't messin' with this recipe!  This is how my man likes it...and by golly you just don't mess with heritage cooking!

There's nothing better than answering his "what are you up to?" when we talked - and I said "making noodles" and he said "REALLY?" with the happiest sound - like I'd just given him a wonderful gift.  It surely does make all the effort worthwhile!

So, let me know how they turn out if you decide to make some - Bon Appetit Y'all!


StumbleUpon

Friday, November 19, 2010

Cake Pops - I'm exhausted!

This is going to be brief...because I'm exhausted...and I have about 2 dozen more cake pops to dip.  I forgot how labor intensive this is.  Bakerella makes it look so easy :-)

So, if you read my review of her fabulous book, and look at my photos...you will see that I am in the infant stages of cake poppery!  The teen has already snatched one and he had a big smile when he bit into the pop...so I guess they taste good anyway!  My granddaughters like Tinkerbell, so I bought some Tink sprinks...purple and green jimmies, purple sugar, and some candy butterflies.  I bet they will be a hit when I arrive in Austin in a few days!  Those cute girlies are never critical of Grandma's goodies...they are happy to dig in.

These cake pops are spice cake and cream cheese frosting with white chocolate coating.
Don't laugh at my cake pops ...I'll keep trying!!!

The teen ate the two unsprinkled pops before I could type this blog post!
StumbleUpon

Tuesday, November 16, 2010

Hot Crab and Artichoke Dip

A couple of holidays ago, I wanted an exciting new dip to serve at a party.  I wanted to use my new chafing dishes I got at Bed, Bath, and Beyond as well...so I needed something hot.  A hot dip.  The search began.

I found a recipe that sounded really good - one I knew I could tweak to my tastes - from the Food Network web site and it was sourced from Gourmet Magazine.  It turned out to be just delicious!  I thought of it today while I was walking on the beach snapping pictures of the waves (which, of course, I put in a slide show and put on youtube - because that's just what I do).  Why, you might wonder?  A tiny little sand crab scampered across my toes as I was standing in the sand taking pictures of the waves!  Naturally (???) my mind moved to crab dip.  Really - that's what happened. 

So, now that I've finished playing with photos - I thought it would be high time that I share this delicious recipe with my peeps.  I looked for the original recipe on Food Network so I could give you a link if you didn't want my take on the original - but it said "no match found".  My printout is from 2007, so I guess it's off the site now.

Well, here's how I did it - and it was darn good if I do say so myself (my guests ate up every bit of it so I guess they thought so too).

HOT CRAB, ARTICHOKE, AND JALAPENO DIP
WITH PITA TRIANGLES

Ingredients:
2 (14 oz.) cans or bottled artichoke hearts, drained and chopped finely
2 cups bottled mayonnaise
1/2 cup thinly sliced scallions (green and white parts)
1/2 cup drained and chopped bottled pimento, or roasted red pepper (I used bottled roasted red peppers)
1 cup freshly grated Parmesan cheese
1 1/2 tablespoons fresh lemon juice
4 teaspoons Worcestershire sauce
1 bottled  (NOT one BOTTLE - just one out of the bottle) pickled jalapeno pepper, seeded and minced (may want to wear rubber gloves)
1 teaspoon celery salt
1 pound crab meat, drained and picked.  If you use frozen, make sure it is thawed and drained
1/3 cup sliced almonds, lightly toasted

Pita Triangles for dipping (you can use store bought - or recipe for home-baked follows - it's what I did)

Now, before I get started, I'll tell you that the original recipe called for a large chopped green bell pepper, sauteed in 1 tablespoon vegetable oil...and instead of one jalapeno pepper - it called for three.  That's just too much pepper for me.

Method:
In a large bowl combine the artichokes, mayonnaise, scallion, pimento or roasted red peppers, Parmesan, lemon juice, Worcestershire sauce, jalapeno peppers, and celery salt (and the cooled bell pepper if you are going with the original - but I didn't use it).  Thoroughly blend the mixture (by hand) until it is combined well, and gently fold in the crab meat.  Transfer the mixture to a buttered ovenproof 2 quart chafing dish or baking dish and sprinkle it with the almonds.  The dip may be prepared up to this point 1 day in advance and kept covered and chilled.  I did this - and I was careful to let the mixture sit on the counter a bit before popping a cold glass chafing dish into a hot oven.  If you use a fridge-to-oven approved dish - well, then you don't have to worry about that!
Bake the dip in a preheated 375 degree F oven for 25 to 30 minutes, or until the top is golden and the mixture is bubbly.  Serve with pita triangles.


PITA TRIANGLES
8 Large pita rounds, with pockets.  I used whole wheat
1/2 cup (1 stick) unsalted butter, melted
Salt

Cut each pita round into 8 wedges and separate each wedge into 2 triangles.  (OK - that's what the recipe said - but I quickly found it was faster to run a sharp knife along the seam of the pita round and then cut the triangles - it was less labor intensive...and I had a party to get ready for...no time to separate each little triangle!)  Arrange the triangles, rough side up, in 1 tight layer in a sheet pan with edges (a jellyroll type pan).  Brush them lightly with the butter and season lightly with salt.  Bake the triangles in the upper third of a preheated 375 degree F oven for 10 to 12 minutes, or until they are crisp and lightly golden.  Let them cool in the pans.  The triangles may be made 1 day in advance and kept covered in an airtight container at room temperature.

I told myself if I ever did this again, I would buy the pita triangles...but I didn't.  The next time I made this, I made the pita triangles again.  They just tasted so good.  So many people asked "where did you buy these?" and I liked saying "I made them" with a big old grin :-)

So, as the holidays approach - you might want to give this a try.  It is a great alternative to the standard hot dip of chile con queso you will most often find at holiday gatherings here in Texas!

Bon Appetit Y'all (and hope you get the hankerin' to visit South Padre Island if you take 5 minutes to watch the youtube...it's verrry relaxing!)StumbleUpon

Monday, November 15, 2010

My Sister's Favorite Pasta Salad

Another requested holiday item - sister Cynthia wants this on the Thanksgiving table - I love the mix of White Balsamic Vinegar and Champagne Vinegar (white wine vinegar works if you can't find the champagne vinegar).  The marinated artichokes at Central Market Westgate (South), in Austin, TX, are to die for - they are marinated in a champagne vinegar as well...nice continuity of flavors. Their Greek Olive mix is extraordinarily tasty as well.  (Damn, I miss Central Market!)


This is one recipe I made up myself.  I've tweaked it and used it a variety of ways over the years...I've been making it for about 15 years now! (see Quinoa Salad for an alternate version)  This version, though, is the Austintacious version...made with Central Market products that make it "perfectly" delicious.  (oh dear, I'm feeling homesick for Austin)


Debbi's Austintacious Pasta Salad


Ingredients:

¼ cup Champagne Vinegar
¼ cup White Balsamic Vinegar
½ cup sugar
½ cup canola oil (can use EVOO)
1 tsp kosher salt
1 tsp fine ground black pepper

1 or 2 English Cucumber, peeled, seeded, halved and sliced (I like two because I love cukes!)
1 medium red onion, halved and very thinly sliced…or sometimes I use 3 shallots instead
1 small container cherry tomatoes (halved) or grape tomatoes (halved or whole)
1 cup mixed pitted Greek olives (I use the Central Market bulk mix – their small container)
1 cup marinated artichoke hearts (I use the Central Market bulk mix – their small container – if pieces are too large, cut them in half or quarters)
1 small container Athenos Traditional Feta Cheese crumbles – not the herbed ones
1 pound bow tie or spiral pasta, cooked al dente (prefer Central Market whole wheat organic)

If you like them, add thin red bell pepper slices or thinly sliced carrots

Can easily be made into a main dish by adding boiled shrimp or chopped breast of rotisserie chicken at the end.


Instructions:

First, make dressing. 
Whisk together vinegars, sugar, salt and pepper (not oil) and set aside (this allows the sugar and salt to fully dissolve which it won’t do in oil). 
Prepare veggies while pasta cooks, rinse pasta in cool water, drain and set aside. 
Whisk oil into dressing mixture, toss pasta into dressing first, and then dump in all the other things except the cheese. 
Toss to coat thoroughly. 
Add Feta cheese last and stir in gently (or it will dissolve too much). 
Put in fridge for at least 2-3 hours to marinate (overnight is even better), stirring every hour or so (or put it in a big plastic container with a tight lid and roll and shake gently instead of stirring).

StumbleUpon

Sunday, November 14, 2010

Family Recipes and Family History - Write them down! And...My Family's Recipe for Cranberry Salad

My Mom 1946


In the early part of this new century, my Mom had the idea that she wanted to create a cookbook of some of our old family recipes and give them to each of her daughters for Christmas.  She wrote down the things she could remember and brought them to my house.  We sat down at my computer and she talked about each recipe and we tried to come up with written recipes to record for posterity.  We did our best.  She bought some fund-raiser "blank" cookbooks from one of my nieces (I think - could have been a nephew - but I remember it was a school fundraiser).  She took what I typed to a copy service with the books and they printed them and cut them to the non-standard size of the "blank" cookbooks.  We all got them for Christmas that year.  We treasure them greatly!

It's difficult to create recipe for cooks, like my Mom, who cook without measuring!  Some of the recipes, we just wrote down what she did - without true measurements.  Others, she came pretty close to measurements we could grasp sufficiently to "sort of" recreate her dishes.  Do they ever taste "just like Mom's?"  Not really.  For several Thanksgivings after that, I asked her to spend the night at my house Wednesday night, and to just sit there and let me recreate some of her dishes...or let me watch her prepare her dishes.  Then I took notes on the recipe pages she had put in her little recipe book.  I believe I have perfected her cornbread stuffing - it's now what I'm asked to prepare if I am attending a Thanksgiving that my Mom is not attending. 

Our family used to get together - the entire horde - for Thanksgiving.  As our family expanded to a massive size with children, grand-children, great-grandchildren and assorted partners...my Mom would have us to the Fraternity or Sorority House wherever she was a House Mother at that time...after a long a industrious work life - her "retirement" job was as a House Mother for several University of Texas Greek Houses.  She finally retired from the last sorority job and now travels from family to family for the holidays.  None of us can handle the multitudes...and actually, as we've all gotten older...we like to have our own Thanksgiving in our own homes.  Oddly enough, I'm now in the same position my mother found herself...I travel to my son's house for holidays.  I live so far away from the family that with working schedules, melting pot families who have to fit in many "stops" for the holidays...no one can come to my house now.  So, I go there.  I take the cornbread stuffing and a few other favorites.  It's a mixed emotion.  I miss my Mom's Thanksgivings, I miss MY Thanksgivings, but I love watching my oldest grow into the excellent cook and host that he has become.

I've got my Mom's Recipe Book out today, and am reading what we typed, sitting there together in my computer area (MOM, we made lots of mistakes!).  I have become more adept at cooking and creating recipes myself so the errors are glaring to me :-)  but, it is a marvelous walk down memory lane.

Mom camping with 5 kids on the beach - Port Aransas, TX - mid 1960's

My parents started taking us to the coast when we were tiny tots - mostly Port Aransas - but I do remember visiting the Port Isabel lighthouse as a child.  I attribute those frequent week-ends as the basis for my long-standing desire to live at the coast.  My Dad grew up in Donna, right here in the Rio Grande Valley.  My Mom likes to talk about being a newly wed at 17 years of age and moving to The Valley and working for the Singer Sewing Machine Company.  She said they would take the long drive over towards Brownsville and go to Boca Chica Beach on week-ends off.  That had to have been in the late 1940s.  She didn't stay long in The Valley - she returned home to Austin on a bus after Singer told her she and her husband could not both work for them.  My Dad soon followed and they started their career in the grocery business in Austin.  It's odd that I ended up living in The Rio Grande Valley, driving the same roads my Mom drove in the 40's.  When she visits, she always shakes her head at how much it has changed. 

In October 2009, she celebrated her 80th birthday on South Padre Island - full circle it seemed.  We had a grand time for several weeks of birthday activities. 


The back of Mom's b-day tee

Mom's custom b-day tee - "Buck Up Getting Old Ain't for Sissies"
Mom on the jetties at South Padre
Mom with her 80th birthday cake

This year - beginning her 82nd year of life - she will be having Thanksgiving with one of my sisters...maybe two!  I will be travelling to Austin to share it with my son...and I will take the dressing.  Thanks, Mom, for all the good meals and many happy holidays.


My son carving his first turkey

I encourage each of you who are lucky enough to still have your parents with you, to write down the family recipes.  The opportunity is NOW.  Don't let it be lost!  This year, I'll be trying, for the first time, and without Mom's supervision, her Cranberry Salad - which was handed down from my Grandmother (lovingly called Good Witch since I was a little girl and heard Sugar Bear use the term "Granny Good Witch" in a commercial).  Good Witch has been gone for over 20 years now - but her recipe lives on.  My husband loves this dish...so I'll do my best.  Here's the recipe as dictated by my Mom - it's simple and delicious.  I hope I don't mess it up :-)  It's kind of funny - I wouldn't eat this as a child - I didn't like cranberries or nuts in my food.  Now, it is considered primo.  I love going to the fridge and having a bite of this before bed on Thanksgiving night.  Bon Appetit Y'all !!!

Updated with photo Thanksgiving 2011 - my Mom's Cranberry Salad!

Updated 2013 - my Mom, Mary Helen Culp, passed away in December 2012.
This was the last batch of Cranberry Salad she ever made.  So glad I
was with her that year and in the moment she crossed over.  When I tell
you "get those recipes"... I mean it... I can't tell you how many times
I've reached for the phone to ask her a question...and she's no longer here.
It's the saddest feeling in the world!

CRANBERRY SALAD

Ingredients:
1 pound fresh cranberries
1 1/2 cups granulated sugar
1 pound red seedless grapes
2/3 pound of fresh pecan halves
1 pint whipping cream
1 tsp. vanilla
2 Tbsp. granulated sugar

Method:
The day before you plan to make the salad, grind fresh cranberries in blender until chopped (or use food processor or hand chop into small pieces)
Pour 1 1/2 cups sugar over them and put in freezer overnight.
The next day, remove cranberry mixture and allow to sit out for 1 hour.
Split grapes in half, stir into cranberry mixture, add pecan halves.
Just before serving, whip the cream, add vanilla and 2 Tbsp. sugar.
Fold whipped cream into cranberry mixture and serve.

BON APPETIT, Y'ALL!!!

StumbleUpon

Saturday, November 13, 2010

Book Review: "Cake Pops" by Bakerella

"Cake Pops" by Bakerella aka Angie Dudley
I've been a cake ball fan for just a bit over a year now.  My sister brought a box of them down to the coast during a visit, and I have been hooked ever since.  They were, I found out, quite an expensive treat from a specialty bakery!  I thought...hmmm... maybe I can do this?  Last Thanksgiving I made my cake ball debut and boy was it challenging for a first timer!  They are a decadent treat, though, and I kept at it until I wasn't embarrassed to share the goodies with my family at our Thanksgiving feast. (The teen ate the gross failures - and he hoped I would mess up more!)

I found Bakerella's web site shortly after my sister's visit and have enjoyed surfing through it on a regular basis.  I like her down-to-earth style of baking and writing.  It made me feel like I, too, could make all of the yummies she has on her web site.  I found her Facebook page and follow her there as well.

Not too long ago, I read that she had released a new book and I was THRILLED... ordered it immediately.  Now that I've read it from cover to cover, I wanted to write a brief review of this book.  It's about cake pops... which are, of course, cake balls on a stick!

Things I love:
  • The photos are full color and fabulous.
  • It is hard back with wire bound pages - which allows the book to lay flat on the kitchen counter.  Yes!  Why aren't all cookbooks this way?
  • The pages are sturdy - I'm not worried I'm going to tear them.
  • Each recipe is self-contained.  That might seem repetitious to some, re-stating the process of making the cake ball to prepare the pops...but, frankly, for me it is perfect.  I'm not having to flip back and forth.
  • She clearly explains the techniques, provides tricks and tips, details supply resources, and decorating do's and don'ts.
There aren't really any things I don't love about this book!  :-)  I do hope it is "just" the first and she will create another with even more examples and detailed instructions for her beautiful confections!

If you want to make some stunning holiday treats - start practicing now.  It's not quite as easy as it looks.  I did find, though, that once I got going, I got better and better (you can see the first set are pretty messy and they got slightly better looking as I progressed).  I finally found out, in her book, how to make them round and smooth, as well as how to get the messy edges off.  I can't wait to try again now that I have a good reference book right in front of me!  I'm hoping to graduate to cake pops instead of cake balls!


My first batch - messy but delicious - Spice Cake Calls

They got tidier the more I made

The kid's favorites - they didn't care if they weren't neat - Oreo cookie balls
My family LOVED the taste of these (although, they are really rich - you don't need as many as I made).  I'm going to start practicing for my Christmas Cake Pops very soon - I think I'm going to make the Trees and the Santa Hats this year.  I haven't made any since last year...I need to start now so I can ramp up my skills in time for Christmas!

If you love unusual dessert offerings, which are sure to wow your holiday guests, get this book right now!  You'll need to practice!!!  You can order this book online from Paragraphs on Padre Blvd.  Shop local - it keeps our little island a happy place!!!


Turkey Cake Pops by Bakerella
Cheery Christmas Trees from "Cake Pops" by Bakerella
StumbleUpon

Thursday, November 11, 2010

Chocolate Cures Depression!


I've been slumping around the house today, with a headache, dealing with insurance companies and doctor's offices (hence the headache) and I just felt BLAHHH. 

I wanted something sweet to eat and nothing in sight was doing it for me.  I kept coming back to the computer but I had finished all of my "work" for the morning...so started mentally considering Thanksgiving goodies and what I'd be taking to my son's for our big meal in just TWO WEEKS!  That started to perk me up.  Really?  Just two weeks?  I love Thanksgiving!  I wanted to find a recipe I'd seen before for some Amaretti cookies so I scanned through the search results on Martha Stewart.com, JoyofBaking.com, and FoodNetwork.com.  All my favorite "jumping off" points for cooking and baking.  I didn't find the one I was looking for (I'll keep searching) but I ran across a recipe from Paula Deen for her Chocolate Gooey Butter Cookies....and that sounded real good!  <imagine me saying it with a drawling Paula Deen accent>

Now, I've been a fan of this particular concoction since the late 70's, long before anyone ever heard of Paula Deen or Food TV (as it was called in the beginning).  A co-worker of mine entered a recipe into a cookie contest at my old place of employment, Shoal Creek Hospital in Austin, and I have made it for nearly every holiday since then.  It's a bar cookie and it is basically the Ooey Gooey recipe Paula made so famous! (not this cookie recipe - but the actual cake)  Now, my friend's recipe is made in a pan and cut into bars - and uses a yellow cake mix.  She called them Chess Squares.  Paula's cookie recipe had the magical word "chocolate" in it...which I was in dire need of today.  I decided to give it a whirl.

So, I sat the butter and cream cheese out to soften and looked in my "baking" cabinet and found that I had a German Chocolate "moist" cake mix - so thought that would surely do.  I have the batter chilling in the fridge right now.  I think it's about right for rolling!  (hmmm...guess I'll eat that sample piece of dough) <hee hee hee> It tastes delicious.  So, I'll get to baking!


the prepared dough
the rolled dough
the cookies right out of the oven
Here's the recipe - it is oh-so-simple...and these are a yummy cookie. 

Chocolate Gooey Butter Cookies
Recipe from FoodNetwork.com courtesy of Paula Deen

Ingredients:
1 8-ounce brick cream cheese, room temperature
1 stick butter, at room temperature
1 egg
1 teaspoon vanilla extract
1 18-ounce box moist chocolate cake mix
Confectioners' sugar, for rolling and dusting

Directions:
In a large bowl with an electric mixer, cream the cream cheese and butter until smooth.  Beat in the egg.  Then beat in the vanilla extract.  Beat in the cake mix (I needed to scrape the bowl and beater a couple of times).  Cover and refrigerate for 2 hours to firm up so that you can roll the batter into balls.
Preheat oven to 350 degrees F.  Roll the chilled batter into tablespoon sized balls and then roll them in confectioner's sugar.  Place on an ungreased cookie sheet 2 inches apart (I used a baking mat).  Bake 12 minutes.  The cookies will remain soft and "gooey".  Cool completely and sprinkle with more confectioners' sugar if desired.

Now - here's what I found... the original recipe says to roll into tablespoon sized balls - and I did, using my 1Tbsp scoop.  My cookies look smaller than the picture on FoodNetwork.com.  The recipe also said it made 24 cookies.  Well, I rolled up and baked 24 cookies and I had about half the dough left...so I'm GUESSIN' they are more like 2 tablespoon cookies as shown in the online photo.  Since I like the smaller size, though, I'm sticking with the designated measurement and just counting it a bonus that there are more cookies than I expected!  When all was said and done - I had 3 and 1/2 dozen cookies.  Yay!

Guess what - these cookies are so good and chocolatey...I'm no longer down in the dumps and I no longer have a headache!  It's a miracle medicinal cookie :-)  You should try it!

Bon Appetit Y'all!!!StumbleUpon

Tuesday, November 9, 2010

Dolphins Came For a Visit!

This has nothing to do with recipes or restaurants or food....however, it has everything to do with the special joys of living at the coast.  Two male adolescent dolphins visited our condominiums for about 24 hours.  There was a particularly low tide and they seemed to be temporarily land-locked.  They were entertainment for the residents all day long...I didn't see them this morning, so I assume their visit is over.  I took some pictures...and shot a bit of video...it's really hard to catch a dolphin with a digital camera as slow as mine...I always seemed to get a fin and not much more.  The video was slightly better and you could get the sense that they were biding time for a high tide so they could return to their family tribe.  If you've read my blog before - you know I'm a dolphin lover and the few peeks I get of them are always magical.  Imagine the joy of having them right in front of me for hours on end.  It was beyond description! 

I actually got a little sun burned because I wasn't prepared to be out there - I got the call, grabbed my camera, and headed down to the sea wall.  It was a gorgeous November day, the clouds reflected in the calm bay, you can see the grassy plain that is normally under water except at low, low tide.  Flip flops, tee shirt, and dolphins.  Gosh I love living here!

If you feel like seeing what I got to see, click on the link above.  I gotta say - it was one of my best coastal moments ever!

A special thanks to Dolphin Whisper, Scarlet Colley, and her husband, for coming over and letting us know they were adolescent boys (we'd thought the dolphins were a mom and juvenile - wrong!) and that they would be okay so long as they weren't stranded for more than a couple of days.  They had plenty of fish and a captive audience appreciating them - they surely didn't look distressed at all.  I would have loved for them to hang around - but it's not "dolphin safe" in a dock area.  Props are their enemy.  If you'd like to know more about Scarlet's passion, check out the South Padre Island Dolphin Research link.  If you are interested in more about Scarlet and George's excursions, check out this link.  They seem like really, really nice folks (and they have a cute "dolphin dog" too!).

Thanks Scarlet...and thanks dolphins for providing such a magical day!StumbleUpon

Sunday, November 7, 2010

World's Championship Shrimp Cook-Off


The Agency rocked the main tent

What a glorious day for an outdoor festival in Port Isabel today!  The sun was shining - 72 degrees - slight breeze - happy crowds - good food - good music.  Woo Wee!  You just can't beat it.

Whoever the organizer was this year, rocked their job!!!  I heard people commenting about the quality of the food, the excellent music, the increase in number and quality of booths, the improved kids activities.  Everything was just bigger and better all around!

I knew the turnout was huge before I walked in the gates...because there was NO parking to be found without a significant hike to GET to the gates at the noon hour.  Some of the lines to the crowd-pleasing booths had 20 minute waits!  I stood in one of those lines (Hilton Garden Inn) for 20 minutes and they ran out - it would be another hour before they had more...and I'm sorry to say I just was too tired and sun-drained to wait.  I did have the opportunity to sample 4 contestants' entries (you paid $3-$4 for a sample - which is kind of pricey for a couple of shrimps in my opinion - but I was prepared, this being my 3rd time at the festival).  I suspect Hilton Garden Inn may win first place if the line is to be any indicator.  I shared a table with a couple who had made it through and their plates made me go get in that long line!  They had a stuffed shrimp Rockefeller served on a oyster shell, topped with shaved Parmesan with a seaweed-type salad on the side.  Beautiful presentation and it looked delectable.  You can see pictures of all of the entries at the link in my page title.

MY first place winner was nearly a tie (just my own personal preference) - PadreRitaVille narrowly edged out Gabriella's for my first and second place.  The other two I tried aren't likely to be in the running - so I'm not naming names...they just weren't good IMHO and I threw them away after a couple of bites.  One of my usual favorites is Cap'n Roys...and they ran out right when I was next in line... and I never made it back around.  I just think the crowds surprised everyone!  I bet Cap'n Roys would have been in my top 3 had I gotten the opportunity to sample some of theirs.

PadreRitaVille's entry - delicious AND beautiful!
PadreRitaVille's booth was ably manned by Cathy and Micheal Lafferty, with Micheal casually asking walk-ups if they wanted to get "lei'd", in his sexy southern drawl...as he handed you a lei to help you get into a tropical mood if you weren't already there.  There entry was as pretty as it was delicious.  The flavors just sang to me - this was a phenomenal, fresh tasting shrimp dish.  Micheal described it as wild-caught fresh Gulf shrimp stuffed with Baffin Bay crab, wrapped in bacon - grilled - with a creamy ancho sauce (I think it was ancho - I won't swear to it).  It was perfect - something I would love to order at a restaurant.  Not over-cooked - not too spicy...as Goldilocks says, "it was just right!"
Gabriella's offered a grilled shrimp pizza - a crispy crust with bacon, grilled shrimp, some arugula, and topped with what I'm guessing was an Alfredo sauce.  It was delicious!
Gabriella's entry - yummo!

Overall, it was a really happy outing and I encourage any shrimp lovin' individuals to make sure it is on your agenda of "things to do" in 2011... if you missed it in 2010. 

I'll be eagerly awaiting the announcement of the winners.  I'll drop a comment in as soon as I hear!

On the way out, I grabbed a huge bag of kettle corn and some "puppy chow" from a booth near the front...there's a tag on it that says "Coastal Insurance Agency" but I don't remember the sign saying that.  I was getting sun "giddy" by that point, so it might have.  I glugged down a bottle of water on my hike back to the vehicle...and the teen had the gall to say "can we go to Dairy Queen?"...and, I, being the awesome mom that I am, said "okay"...and off we rolled, ending another exciting outing in beautiful Port Isabel, Texas!  Go Tarpons!

11/8/2010 UPDATE!
And the winners are...
Winners in the Professional category are:
1st Place: Hilton Garden Inn – Great American Grill (SPI)
2nd Place: PadreRitaville (SPI)
3rd Place: Papa’s Restaurant (Port Isabel)
Winners in the Amateur Category are:
1st Place: Beatriz Zapata
2nd Place: Angelcare Home (TSTC cooking team)
3rd Place: The Brew Crew
Showmanship:
PadreRitaville (SPI)


StumbleUpon

Layered Tostado Bake - A Walk Down Memory Lane

When I was a young woman - in the late 70s - waaayyyy before Internet, home computers, or even office computers... in the days of recipe "clipping" - I started accumulating so many clipped recipes (which of course didn't fit on recipe cards unless you re-wrote them) that I started my own little recipe book by using a photograph album with those peel-back plastic sheets to safely encase my favored recipes... and those I thought looked interesting.  I also accumulated a HUGE number of the Food Sections from the Austin American-Statesman newspaper.  Every Wednesday I snatched the section from the newspaper and read it cover-to-cover - carefully saving "special" editions...for YEARS I did this.  Then we moved to the coast.

I had to "get rid of" things I couldn't have imagined ever discarding - but I truly had no choice.  Downsizing from a large 4-bedroom home with a filled attic and garage, to a tiny 2-bedroom condo 375 miles away required relentless re-evaluation of "what was really important".  I've looked everywhere in storage for those newspaper sections I saved for 30 years - and I can't find them - so I must have finally taken the plunge and tossed them.  I know I was getting desperately ruthless as we neared the move.  I got rid of things I had been hoarding for ages (not really hoarding - but my husband and I both tend to "collect" things).

What I did NOT get rid of was about 15 of my favorite cookbooks (out of over 100 - because I had acquired my Mom's as well).  One of those I saved was my old "photo album-cum-cookbook".  I take it out from time to time and browse through it.  It is a walk down memory lane.  This morning was one of those times.

I, again, realized how very disorganized it was - although, at least, I had confined it to a "sort of" savory section and a "sort of" sweets section.  So today, I made two dividers...the book will hardly close it is so stuffed - and all I could do was manage two dividers.  My brain is prone to desiring organization...people laugh because I make spreadsheets for everything.  My Christmas gift lists are on Excel - my address database is in Access - I make Word forms utilizing tables for my son's homework assignments - new book releases are on an Excel spreadsheet - I make slide shows of my photographs which are in computerized files by year and event...so, it is almost painful to go to a collection of recipes that are so disorganized.  However... it is familiar.  It is comforting.  And, somehow, I know where each item can generally be found. 

I looked, this morning, at old recipes I made for my kids when they were tots (the oldest is now 34!) and I know I will not likely throw this away...ever.  I hope at least one of the kids will recognize the value and history enclosed in the plumped up ancient book and take it with them on that day (hopefully FAR into the future!) when they have to clean out my condo :-)

So, today, since I was looking for recipes that maybe the persnickety teen would enjoy - I found one that I used to serve at least a couple of times per month through the mid-1980s.  I think he would like it (so long as I leave out the olives).  I'm sure it isn't all that wholesome...but it was filling and the family loved when it landed on the table.  I'll share it with you and hope that if you decide to make it, you too will enjoy this filling concoction.  It came from a magazine (or perhaps an insert) and it is grouped with several recipes that use Bisquick baking mix.  That was a STAPLE of my 1970s and 1980s pantry.  I don't think I've bought a box of Bisquick in maybe 7 or 8 years...but I might have to do that again...because I remember this as being a great week-night meal!

Update 1/13/2011 - Made it for dinner!

LAYERED TOSTADO BAKE

1 pound ground beef
1/2 cup chopped onion
1 envelope (1 1/4 ounces) taco seasoning mix
1 can (8 ounces) tomato sauce
1 can (16 ounces) refried beans (I bet they'll be 15 oz now!)
1 can (4 ounces) whole green chilies, drained, seeded and chopped
1/2 cup sliced ripe olives
1 cup Bisquick baking mix
1/2 cup yellow cornmeal
1/4 cup milk
1 egg, beaten
2 tablespoons vegetable oil
1 cup dairy sour cream
1 egg
2 cups shredded Cheddar cheese (about 8 ounces)

Heat oven to 375 degrees.  Grease rectangular baking dish (12x7 1/2x2 inches).  Cook and stir ground beef and onion in 10-inch skillet until beef is brown; drain.  Stir in seasoning mix, tomato sauce, beans, chilies, and olives.

Mix baking mix, cornmeal, milk, 1 beaten egg, and oil until moistened; beat vigorously 30 seconds.  Spread in dish.  Spoon beef mixture over dough.  Mix remaining ingredients; spoon over beef mixture.  Bake 30 minutes.  Let stand 10 minutes before cutting.  6 to 8 servings.

High Altitude Directions (3500 to 6500 feet) - Heat oven to 400 degrees.  use rectangular baking dish, 13x9x2 inches.


A scanned copy of the original recipe

So, enjoy a blast from my past and Bon Appetit, y'all!
It was yummy - served with extra toppings...
avocado, green onion, and salsa...made it even better!
StumbleUpon