The South Padre Island Flip Flop Foodie Brownsville restaurants

Search The South Padre Island Flip Flop Foodie Blog!

Tuesday, May 31, 2011

MEATLESS LASAGNA


This is not vegetarian lasagna...because it has cheese and eggs in it...but if you are cutting back on meat, it is a pretty delicious casserole!

I probably should have used a bigger pan...but I was wanting a tall lasagna...and it was!  It was just about over the edge before I baked it...and rose about an inch above the edge after all was said and done...but it DIDN'T spill over...the eggs did their work perfectly.  However, when I do it again, I might use a 9x13 pan instead of the smaller 2-quart pan.

MEATLESS LASAGNA
by Debbi Hook

Ingredients:

9 pieces whole wheat lasagna noodles - uncooked - I used Hodgson Mill brand - they were great!
1 1/2 jars pasta sauce - I used Bertolli 5-Cheese spaghetti sauce - about 3 1/2 to 4 cups
1/2 cup water
3 carrots - peeled, cut into chunks, and processed to very fine chop in food processor
1/2 large onion or 1 small onion - chopped
2-3 Tablespoons olive oil
Large pinch kosher salt
1/2 tsp garlic powder
1/2 tsp onion powder
1/2 tsp dried basil
1 pound homemade Ricotta Cheese, room temperature
2 Tablespoons chopped fresh basil
2 large eggs - whipped
1/2 tsp garlic powder
1/2 tsp onion powder
1/2 tsp Italian seasoning
A few grinds of fresh black pepper
8 ounces Mozzarella cheese - shredded
1 cup Parmesan cheese - grated

Method:
In large saucepan, heat enough olive oil at medium heat to cover bottom of pan, add onions, 1/2 tsp garlic powder, 1/2 tsp onion powder, dried basil, and kosher salt - cook until onions softened.
Add processed carrots and stir until cooked to soft texture.
Add spaghetti sauce and rinse jars with water, adding to pot.
Allow to simmer.


In separate bowl, mix Ricotta Cheese, fresh basil, eggs, 1/2 tsp garlic powder, 1/2 tsp onion powder, Italian seasoning, and fresh black pepper until all ingredients are thoroughly incorporated.


Preheat oven to 325 degrees Fahrenheit
Prepare baking dish with spray oil (makes for easier clean up!).  I used a rectangular 7x11 Pyrex dish...I like to see the layers.  9x13 might have been better.
Place 1 cup of spaghetti sauce in bottom of baking dish
Place 3 pieces of uncooked lasagna on top of sauce - gently press into sauce.
Place 1 cup of spaghetti sauce over uncooked lasagna.
Dab 1/2 of ricotta mixture all over sauce.

Sprinkle 1/3  Mozzarella on top of ricotta.
Sprinkle 1/3 of Parmesan on top of Mozzarella.

Gently press 3 pieces of uncooked lasagna into cheese.

Cover lasagna with 1 cup of spaghetti sauce.
Dab 2nd half of ricotta mixture over spaghetti sauce
Sprinkle 2nd 1/3 of Mozzarella on top of ricotta
Sprinkle 2nd 3rd of Parmesan on top of Mozzarella
Gently press last 3 pieces of uncooked lasagna into cheese mixture
Top with the last of the sauce and ensure all of the lasagna is covered with sauce.

Sprinkle the last of the Mozzarella cheese over the top of the sauce.
Place baking dish on top of edged baking sheet.

Place in pre-heated oven for 45 minutes.
Pull lasagna from oven and top with the remaining Parmesan cheese and return to the oven for 10 minutes.  Lasagna should be bubbly and lightly browned.
Remove from oven and allow to sit for 10 to 15 minutes before cutting and serving.


Hokie Smokie...this stuff is capital D "Delicious"!  The family inhaled it :-) and that makes me happy. 

I served it with a refreshing cucumber, tomato, and pickled red onion salad...garlic toast made from slices of the previous night's Pillow Bread, and fresh Valley Watermelon for dessert (well, maybe it is North Mexico Watermelon...whatever it was, it was sweet).  The teen didn't notice the carrot secretly added, and ate a big piece of lasagna.  We all agreed we would enjoy some mushrooms added next time I make it!  Who knew I could "sell" a meatless lasagna so that everyone was happy!  Wheeee!!!!


Bon Appetit, Y'all!!!

SHARED WITH:
StumbleUpon

Monday, May 30, 2011

PILLOW BREAD

Alton Brown's Pillow Bread is one of my son's favorite breads.  He likes soft-textured foods and this is a wonderful soft bread!  I've been trying to stay on the whole wheat thing lately...but he was adamant that we stick to the core recipe as much as possible.  I agreed, but reminded him that last time the loaf was HUGE and I just didn't want that much white bread around for us to gorge on.  I said he could make it IF he halved the recipe.  He seemed alarmed, but I helped, and it turned out great.

I didn't have Bread Flour and insisted we could just use AP flour...I was NOT fighting the Memorial Day Week-end traffic heading to the island just to get some flour from the grocery store.  The teen did most of the work - I stood around and answered questions...just call me the kitchen consultant.  It turned out great and this is how we did it.

PILLOW BREAD
Adapted from Alton Brown's I'm Just Here For More Food

INGREDIENTS:

The Wet Goods:
3/4 cup 2% Milk
1/2 cup water plus 1/3 cup water - divided
3 tablespoons honey
2 tablespoons butter (we used salted because that's what we had)

The Dry Goods:
1/4 cup cornmeal
2 teaspoons salt
3 1/4 cups unbleached all purpose flour
1/4 ounce active dry yeast

METHOD:

Bring 1/2 cup water to boil in small sauce pan and slowly whisk in the corn meal and cook, about 30 seconds to 1 minute, until thickened.  Remove from heat to cool.

Put cooled cornmeal mixture into bowl of a stand mixer with dough hook attached.
Add dry yeast and salt to flour and stir to mix.
Add flour to mixer bowl and combine until you can run your fingers through the flour mix and not feel big clumps of cornmeal.

In small saucepan, add milk, the rest of the water, honey, and butter.
Bring to 105 to 115 degrees Fahrenheit.
Pour warmed mixture into flour mixture and turn on stand mixer.
Allow to mix for 6 to 8 minutes.  It will come together completely within a couple of minutes and the rest of the time it is kneading.

Turn dough out onto lightly floured surface and finish kneading by hand 1-2 minutes for it to form a nice ball of fully developed dough.  Form the dough into a loaf.

Place a silpat on a baking sheet or prepare the pan with Baker's Joy if you don't have a silpat.
Place loaf on top of silpat/prepared pan, cover with a cloth, and allow to rise for 1 1/2 hours in a no-drafty warm place.  If I'm not baking other things, my preferred rising location is an oven that I have turned on for 60 seconds at 250 degrees and turned off while I'm preparing the dough...it takes any chill off the oven but doesn't really get it too warm.  It makes for a perfect rising environment.

After the dough has risen (it will double at least), remove from oven if that is where it is rising.  Preheat oven to 350 degrees, place oven rack in the middle position.  Bake bread until the temperature reaches 190-195 degrees internally on an instant read thermometer**.  It will be slightly golden on top and it takes about 20-25 minutes.

Remove immediately from baking sheet onto a cooling rack.  Allow to cool completely before slicing.
It is certainly delicious with butter and honey...and it was slightly warm when we dug in :-)

You can see from the picture that this half recipe is a generous loaf of bread.  When we made the full recipe it was overflowing the pan...so, the recipe above is halved - the way we made it.  If you want Alton's recipe, the cookbook is available online from Paragraph's on Padre Blvd.  The teen has a signed copy from when Alton visited Austin.  We stood in line for 2 hours...and he values it greatly!  It is a wonderful cookbook for teaching "technique".

The teen doesn't allow photos during cooking...so I had to make do with finished product :-)


** I used my Pyrex digital probe thermometer.  This is one of my favorite purchases from years ago.  You stick the probe into the dough (or whatever) and the heat proof cable attaches to a counter top digital controller.  I set it to alert me when the temp is 190 and viola, perfectly baked bread.  Alton Brown's is one of the few cookbooks that gives internal temps for bread.  I like it...takes the guessing out of the game!

The bread is excellent toasted for breakfast too...really good stuff!


Bon Appetit, Y'all!!!StumbleUpon

Sunday, May 29, 2011

OUR MEATLESS WEEK-END

My hubby is currently on a meat-free diet...just eating healthier...and since he's working away from home, it's easier for him to fix meatless meals.  Lots of rice and beans and salads...tofu when he goes out.  Seems like he does this every few years...

A couple of weeks ago when he was home, I didn't plan accordingly, and I felt bad that he was eating meat...knowing he really didn't want to do so.  This time I had a talk with the teen about how we could accommodate Dad's eating habits and still accommodate the teen's eating habits (which are fairly rigid thanks to Asperger's).

If my husband eats meat, he'd rather it be fish...and he will eat cheese and a few eggs are okay.  So, I decided to make a stir fry with mushrooms as the "meaty tasting" component, instead of our usual chicken, for one of our meals.  The teen has recently brought cremini mushrooms into his allowables from the "sort of like a vegetable" category.  Mushrooms are a fungus, of course, but they do have some fiber and vitamins...so it's thumbs up for me.  We tossed our stir fry with whole wheat capellini...because the teen won't eat rice.  I snuck in some grated carrots I had leftover from the carrot cake cookies...I thought he'd notice, but they were pretty finely diced so he didn't.  After he finished a huge bowl of the stir fry I said "I see you ate the carrots, they were okay?" and his eyes got big and he was hacked off that I snuck them in...I'll work on that later because once he realizes they are okay in things (like cookies and stir fry) he might voluntarily accept them.  Added lots of basil from my deck plant, some fresh thyme from my new deck plant, lots of limes, garlic chili paste, chunks of sweet yellow onions, green onions, sesame oil, olive oil, soy sauce, and a touch of duck sauce...it was a very yummy dinner - with heaping pasta bowls of food...I couldn't eat but half of mine...but my dear husband finished it off for me! 

The teen desired Alton Brown's Pillow Bread to go with dinner...not exactly a bread I would normally serve with stir fry...but, we can be flexible!  He made it under my supervision - did a good job.

Finished off with a bowl of fresh sweet pineapple - a fairly nutritious meal.

Tonight's meal will be a meatless lasagna.  I'm going to puree cooked carrots and add to the sauce (sneaky me) to up the nutritional value...and I'll make some homemade ricotta.  The hubby brought me some whole wheat lasagna from Austin so that kicks it up even more.  I'd like to slip some fresh spinach in...but I think I'm going to have to do that via our salad...he's not going to like to see any green in the lasagna besides fresh basil...hmmm, I could maybe chiffonade a bit of spinach...jeez, I feel sneaky!  The teen will make homemade focaccia to go with our dinner.  We're going to try whole wheat focaccia this time...I think it will be delicious.

I didn't take photos because it was a rush getting it together while overseeing the teen's creation of Pillow Bread...if I remember to take pictures of the lasagna I will, but no guarantees!  Thinking up meatless meals...harder than you'd think.  I'm going to have to check out some of the blogs for ideas...I welcome any suggestions in the comments section!!!

Bon Appetit, Y'all!!!StumbleUpon

Friday, May 27, 2011

OATMEAL CARROT CAKE COOKIES

Reading another of those Joanne Fluke mysteries with recipes and they were eating Carrot Cake Cookies.  I thought that sounded pretty darn delicious...but the recipe made 10 DOZEN COOKIES.  Holy smokes... can't have that.

I decided, after reading all the notes about the recipe, that I would be brave and adapt it to a smaller size and mix up the ingredients a bit.  I'm using my food processor a lot, thinking that I don't want chunks of fruit and vegetables in my cookies (I had bad luck with that in a previous cookie recipe).  So, I'm processing and draining off juice and busy prepping everything.

Here's how I did it.


OATMEAL CARROT CAKE COOKIES
Adapted from Terry's Carrot Cake Cookies
in the book "Cream Puff Murder" by J. Fluke
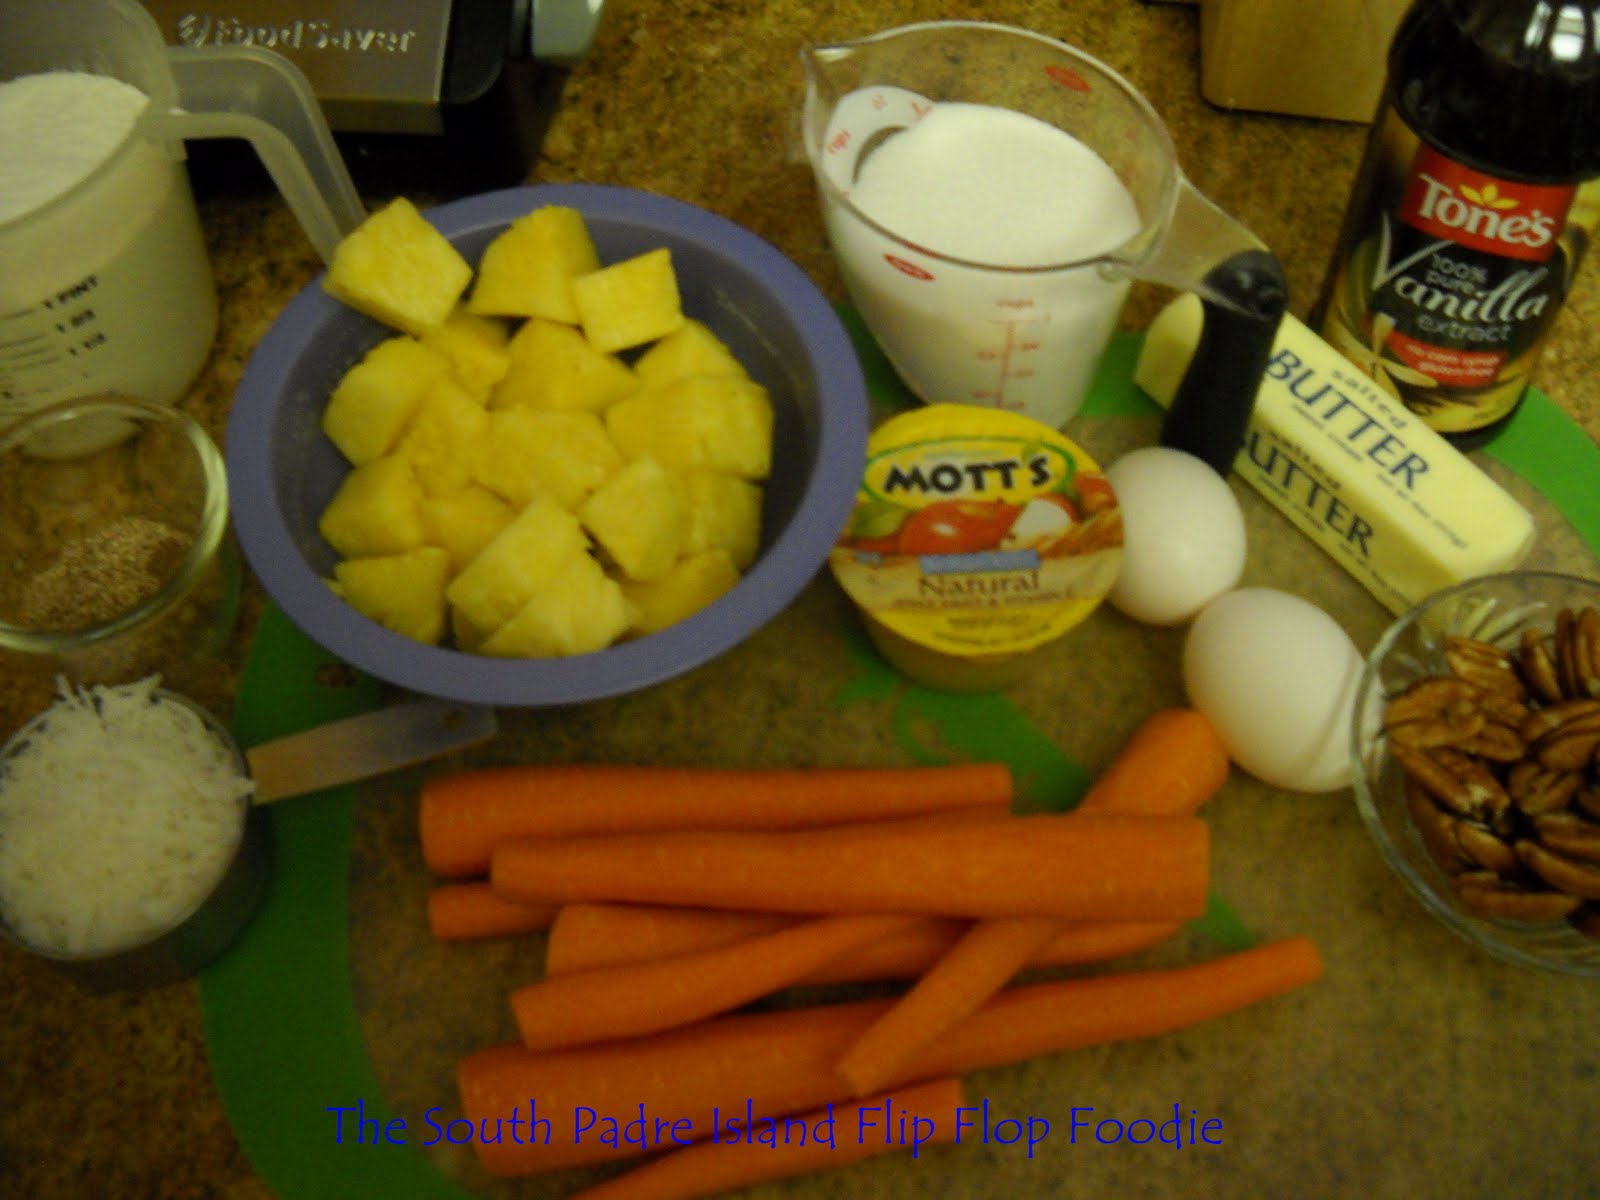
INGREDIENTS:

  • 1/2 cup butter (1 stick) at room temperature
  • 1 cup white granulated sugar
  • 2 eggs, room temperature
  • 1/2 cup unsweetened applesauce (I used a Mott's single serve and it was 3.9 ounces) - allow juice to drain through fine sieve for a few minutes)
  • 1 1/2 teaspoon pure vanilla extract
  • 1/2 teaspoon baking soda
  • 1/2 teaspoon baking powder (aluminum free if you can find it)
  • 2 teaspoons ground cinnamon
  • 1/4 teaspoon freshly grated nutmeg
  • 1/2 teaspoon fine grind sea salt
  • 10 ounces by weight of fresh pineapple - cubed and then processed until nearly pureed - pressed and drained through a fine strainer (be sure to save the juice for a smoothie or something else - good stuff)
  • 1/2 cup chopped pecans or walnuts - I used the small bowl of processor and pulsed 5-7 seconds until small chunks (I used pecans)
  • 2 cups white unbleached flour (not lightened - pressed into cup)
  • 1./2 cup shredded coconut - chopped by running my chef's knife through the pile to get it a bit finer
  • 1 1/2 cups finely grated carrots - pulsed to finer chop in food processor after initially grating on grating disk in food processor.
  • 1 cup rolled oats (not instant)

METHOD:

1.  Beat the butter and sugar until light and fluffy in the bowl of a stand mixer with paddle attachment.  2.  Add eggs one at a time until thoroughly incorporated and smooth.
3.  After applesauce is drained, add applesauce and vanilla extract to bowl and mix in thoroughly.
4.  In separate bowl, combine flour, baking soda, baking powder, cinnamon, nutmeg, and salt.  Set aside.
5.  Add well-drained pineapple
10 ounces of fresh pineapple cubed and into food processor bowl
Pineapple processed - still has texture
Pressing pineapple in sieve over a bowl to capture juice
quite a bit of juice - save it for a smoothie!

and chopped nuts (pecans or walnuts) to sugar mixture and mix.

I chopped pecan halves in the small bowl of the food processor

6.  Add the flour mixture 1/3 at a time, mixing on low speed after each addition.
7.  If using a stand mixer, add the coconut and mix, add the carrots and mix,
grated carrots - measure at this point
pulsed grated carrots in food processor to get a fine grated carrot

and add the oatmeal and mix.  If using a hand mixer, manually add the coconut, shredded carrots, and oatmeal by hand.  Mixing until incorporated.

Dough before chilling in refrigerator

8.  After dough is thoroughly blended, it will be sticky and like a very thick cake batter.  You now need to cover the bowl with plastic wrap and 
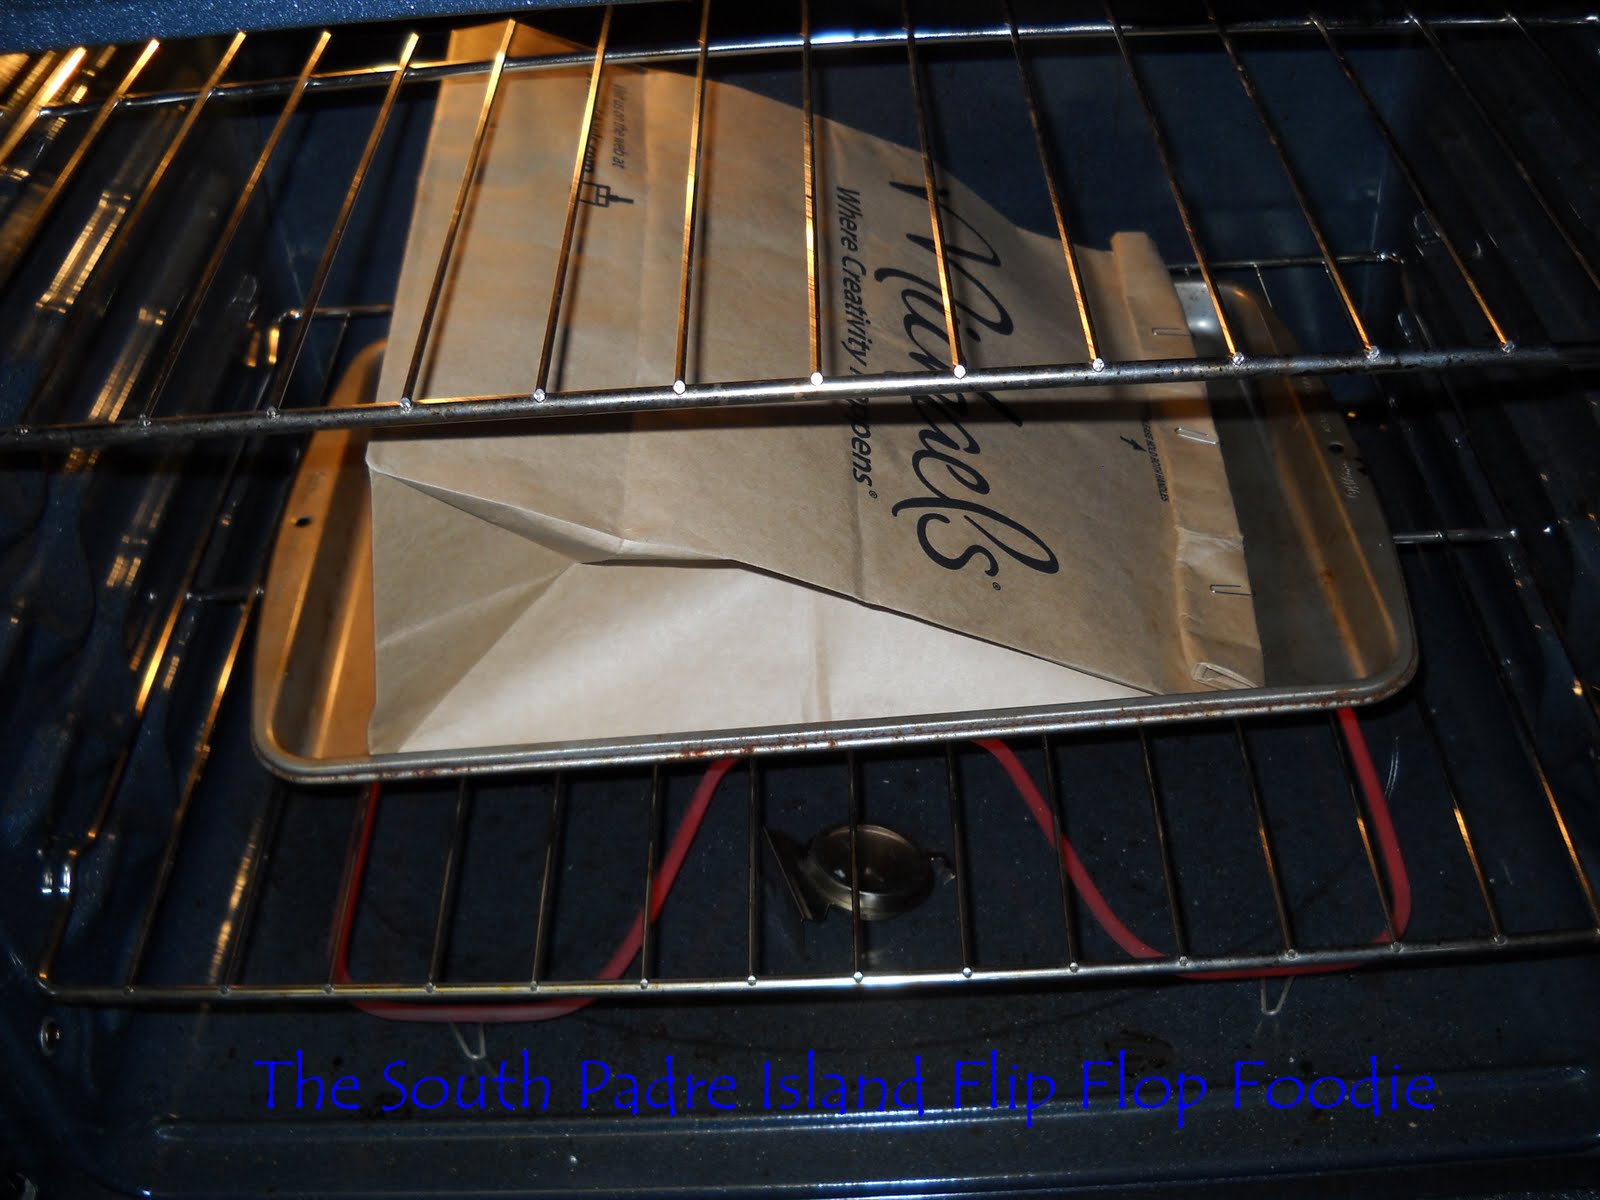
refrigerate at least 2 hours, up to overnight.  I let them sit exactly two hours.  I thought it would be firmer but the original recipe said this will bring the dough to a consistency you can scoop out for cookies.  It was correct!  I did pop the scooped cookies on the baking tray in the freezer for 5 minutes to ensure they were thoroughly chilled.  I pulled the dough right when I started pre-heating the oven...and that always takes longer than anticipated.  Seemed like the dough was getting soft, so I used the quick chill to get them to the right consistency.

When ready to bake, preheat the oven to 350 degrees Fahrenheit with the oven rack in the middle position.  Avoid my issue by waiting to pull the dough until your oven is pre-heated.  The scooping doesn't take long!

Prepare baking sheet with parchment paper or a Silpat (I use Silpats).

Using a medium sized cookie dough scoop (about 2 tbsp) scoop level scoopfuls of dough onto baking sheet - 12 per baking sheet.
They scooped up very nicely after dough was chilled

If needed, dampen fingers and smooth cookies.  I didn't do that.  I did smooth a few edges though.  My yield was 46 cookies.

Bake at 350 for 13-15 minutes.  I liked the 15 minute cookies best.  Leave cookies on baking sheet on cooling rack for about 10 minutes then remove them to wire rack to cool completely.  They don't look terribly brown but they are firm to the touch so don't over bake.  They are kind of like eating a muffin top :-)  Not crispy on the bottom...almost like you cut them off a muffin, literally!  Therefore, use a metal spatula to remove them from the Silpat or parchment paper...and wipe your spatula in between each cookie with a paper towel or clean cloth.  Just makes things slide more easily.  I may experiment with these again and use whole wheat flour.  I think they could handle it.

out of the oven and cooling on baking sheet on top of cooling rack
moved to the cooling rack


Also, a note... put your cooling racks inside baking sheets...the bottoms made a lot of crumbs on my table where I had them cooling.

When they've cooled completely, frost them with Vanilla Bean Cream Cheese Frosting.

Ready to frost in the morning - I'm tired and heading to bed!

VANILLA BEAN CREAM CHEESE FROSTING

8 ounces cream cheese at room temperature
1stick butter at room temperature (1/2 cup)
1 tablespoon vanilla bean paste
3 1/2 to 4 cups sifted confectioner's sugar

I did this frosting in the food processor.  It is fast and makes it very smooth and creamy.
Mix the cream cheese and butter together until they are smooth and blended to a uniform color.  Mix in the vanilla paste.
Blend in confectioner's sugar one cup at a time until frosting is smooth and creamy.  If frosting is too thick to spread, mix in a few drops of milk or cream to thin it.  If too thin, add more confectioner's sugar.  I used 3 1/2 cups and it was "just right"

These are deliciously moist cookies and I will definitely bake them again.  The original recipe had golden raisins in it.  If you like raisins, I think that would be a lovely addition to this recipe too.  I, nor the teen, care for cooked raisins...although we'll eat them by the handful straight from the package!  Go figure...it's a texture thing.

UPDATING THE MORNING AFTER...
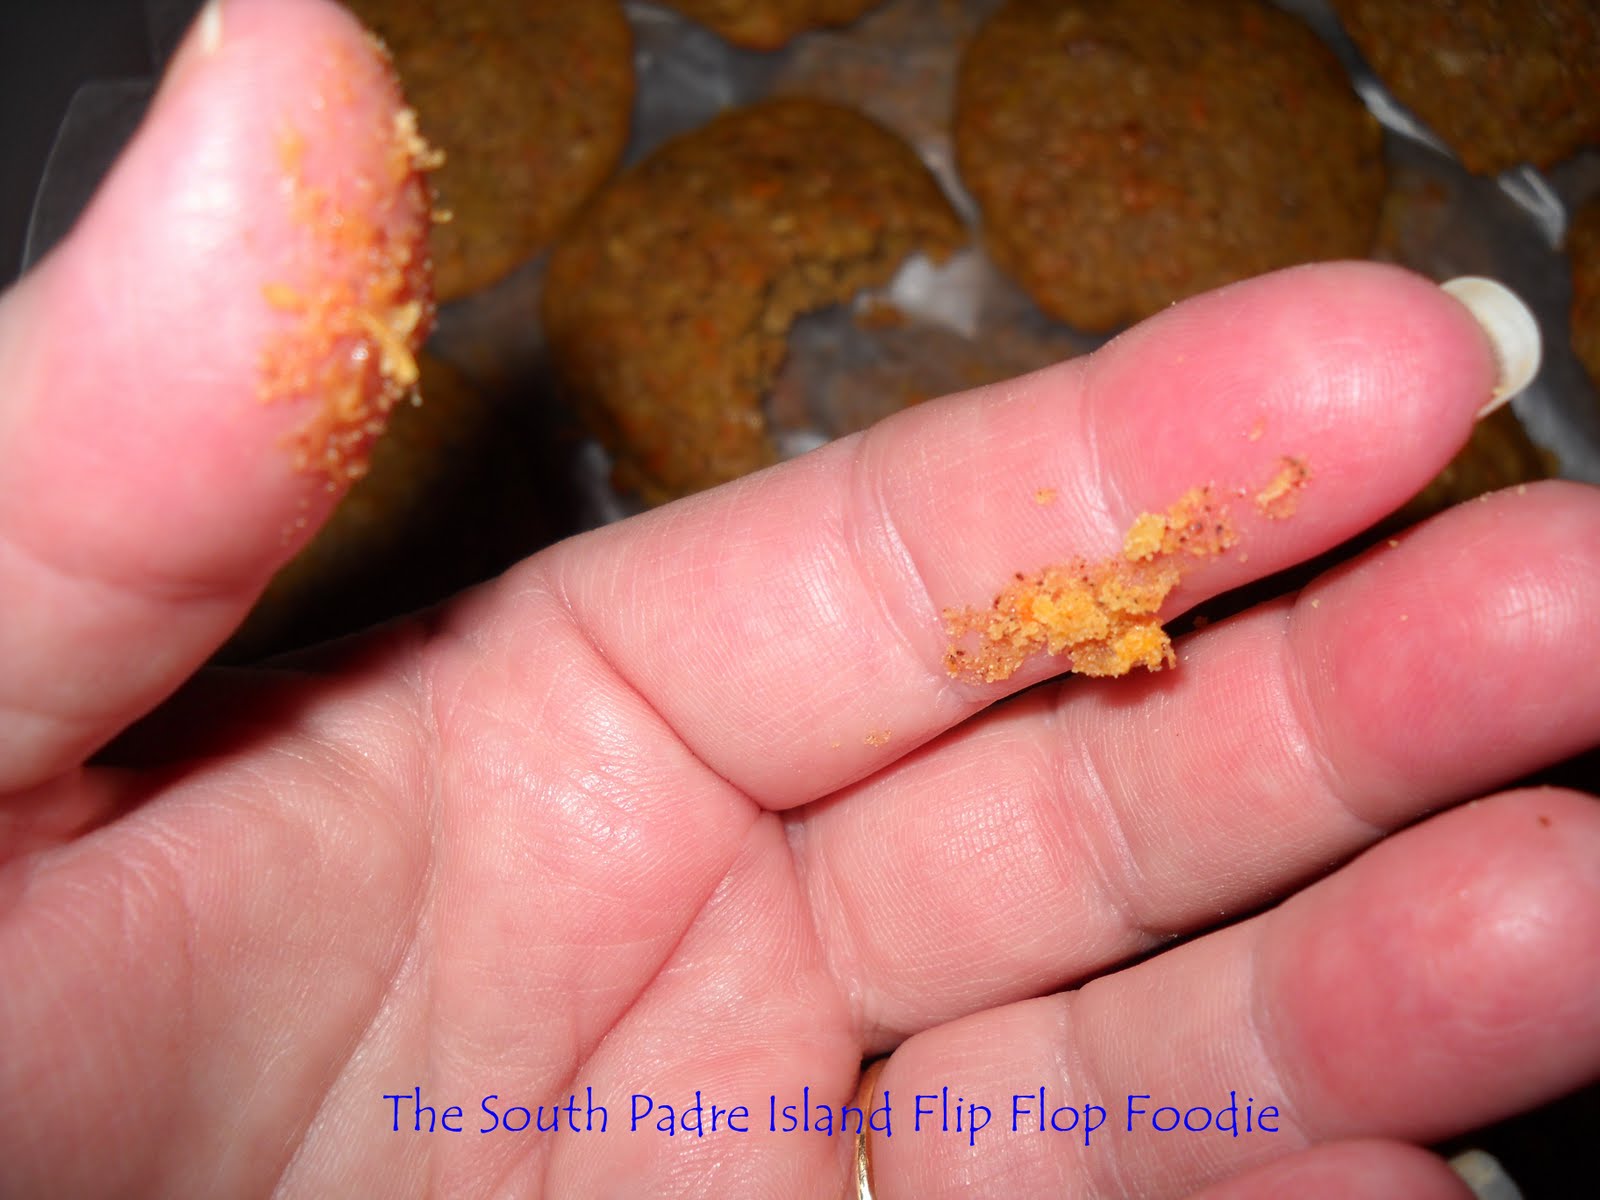
I fleshed out this posting before going to bed...and I'm glad I waited to post.  Ya know that bad luck I talked about above? It happened again. The cookies feel almost wet on top this morning (I didn't get them frosted before bedtime). I put them in a plastic sealable container (it is actually real Tupperware) separated by wax paper. They were completely cool at bedtime when I sealed them. This morning I touch them and they feel "overly moist and sticky" on top. It is extraordinarily humid here this week...but really???? I ate one (okay, three) this morning with coffee and it was they were superlative in flavor and still have an excellent mouth feel...  I just wonder why I can't seem to bake any cookies with fruit that don't get sticky after they cool.  I'm bummed.  A friend suggested squeezing all of the fruits in a clean cotton cloth to get them as dry as possible.  That's a good idea.  I sort of did that with the squash sugar cookies I made last year.  I don't really want to mix up the frosting now because I fear it will be wasteful.  If the top of the cookie stuck to my finger, I don't see how I'll ever get them frosted. 

UPDATE THE AFTERNOON AFTER!
If you noted the photo at the top, I gave into the desire for the frosting later this afternoon...and it went on smoothly and I guess frosting is no more sticky than the tops of those cookies!  NOW, they are awesome :-)  It totally made a huge difference!
Tasty but sticky the next morning
Oh no...a sticky mess - not at all "Cookie-like"...DANG!
The only good thing is that they still taste awesome...
Cookies turned out after all...woo hoo!!!

Oh well, if you live in a dry area of the country/world...these would be a cookie worth baking over and over again...wonderful flavor...I think this batter would have made a wonderful carrot loaf as an alternative to a cookie.  Something to eat with a fork!  I guess I'll just continue seeking a good veg/fruit cookie that will stand up to humidity.  Any suggestions?

Bon Appeit, Y'all!!!

SHARED WITH:


StumbleUpon

Wednesday, May 25, 2011

GABRIELLA'S CELEBRATION DINNER

In celebration of the teen passing his exit exams required by the lovely State of Texas, I offered to take him out for a nice dinner.  He had considered a couple of options and then when we drove off the bridge onto the island he said "can we reconsider my choice and go to Gabriella's instead?"  Sure, I said, being in the euphoria of the moment.  I always love Gabriella's food!


Unfortunately, I'm none too fond of the sometimes snail pace of Gabriella's service.  I had my fingers crossed we would get our usual attentive and very entertaining waiter...but not today.  They were packed and we were lucky to get a seat inside.  Since we were still in the upper 80's when we arrived, I wasn't in the mood for sidewalk seating.

We waited, and we waited...finally the waiter came and offered to take drink orders.  I ordered tea and asked the teen if he wanted a Sprite.  He said "no, Decaf".  I said "are you sure you don't want to wait until after dinner for that?"  He responded "No", so I looked at the waiter...and he was already gone.  When he'd asked how we were doing and I said "fine, and you?"...his response was a curt "busy"...I guess he really meant "I don't have time to wait, so get a move on".  Good grief!

We finally (and I do mean that with an irritated emphasis) got our drinks and gave our order.  And we waited and we waited...and he brought 2 bread plates and some dipping olive oil and balsamic vinegar for the bread...but no bread...and we waited and we waited.  Finally, after a longgggg wait, he showed up with a salad and the bread and scampered off.  Not 3 minutes later - and about 4 bites into the salad, our main courses arrive.  Oh good grief, I thought.  The teen finished his entire meal before I finished my salad (because you know HE wasn't eating any salad).  He also finished off the whole 4 skinny pieces of bread in our basket.

Anyway, you get the picture.  Things improved and we got some attention after things were thinned out a bit. We came early...left our house at 5:45...and didn't leave Gabriella's until after 8:00.  The last 30 minutes we got drink and bread refills...and an inquiry if we wanted more salad...huh?

Normally, I enjoy an evening of good food and good company.  The teen is deaf.  There is no table conversation because Gabriella's...and most restaurants...are so loud he can't hear conversational speech with his cochlear implants over the "noise".  We both had a book.  I know people look at us weird, but we neither one care :-)  Two hours over dinner with a non-conversationalist is pretty grueling.

So, let's talk about the good part of the evening...the food!  I'll apologize in advance for the cell phone photos - my camera was in the car...and I didn't want to get up and go get it.  Anyway, the teen ordered a Ravioli Dinner with the house marinara sauce.  Since he slurped up the 3 or 4 ravioli on the plate in record time, I assumed it was good.  I finally got someone to bring us some more bread so he could sop up the marinara.  He offered me a taste and it was quite delicious.

Ravioli dinner with Marinara


I had something different than my usual choices, and boy, am I glad I did.  It was soul-warmingly good!  There was so much food (as compared to the teen's meager looking dish) that I brought home a full half of the order for lunch tomorrow!  I had Roast Beef Papparadelle.  It was described as tender slow roasted beef with red onions, garlic, peas, carrots, a creamy tomato sauce (I'm going from memory because it is not listed on their online menu).  All tossed with Northern Italian wide cut egg noodles - papparadelle.  The beef was falling apart tender - just the way I like roast beef.  The vegetables were perfect - not too much, not too little...and very tasty; the sauce was very flavorful and the papparadelle cooked perfectly al dente.  A smattering of mozzarella topped it off perfectly.
IT
WAS
AWESOME!!!!
Roast Beef Papparadelle

We decided to forgo dessert (I think we were both tired of sitting there after two hours and ready to move around) so we paid our bill and hopped into the car to head for home. 

Crossing the bridge was gorgeous as the sun was setting and shining through the clouds over the bay.  A perfect ending to a nice celebratory dinner...despite the slow service!  I heard our favorite waiter say "there's nothing 'fast' about Gabriella's food...but the food is really good" and that is the absolute truth!

♫ "we're on our way home...we're goin' home..." ♫

Bon Appetit, Y'all!!!

Gabriella's Italian Grill & Pizzeria on UrbanspoonStumbleUpon

Tuesday, May 24, 2011

CHEESY YEAST ROLLS

I was looking for a yeast roll recipe that didn't make 2 dozen or more rolls...just wanted a pan of rolls to go with dinner....with maybe a couple leftover for breakfast :-)

I found a recipe on the Taste of Home site which was called "Baker's Dozen Yeast Rolls" and I slightly modified it to leave off garlic (not so great in the morning).  I also didn't roll them into balls, but made them the way my granny-in-law made hers...all kinds of wacky sizes but they have a dent in the middle which facilitates opening them.  Anyway, they turned out deliciously tasty, so here's how I did it.

CHEESY YEAST ROLLS
Adapted from Tasteofhome.com


INGREDIENTS:

2 to 2 1/2 cups all purpose unbleached flour
2 tablespoons granulated sugar
1 tablespoon active dry yeast
1/2 teaspoon salt
3/4 cup hot tap water
2 tablespoons melted butter
3/4 cup shredded cheddar cheese

4 teaspoons melted butter
2 teaspoons honey

METHOD:
In the bowl of a stand mixer, add 1 1/2 cups flour, sugar, yeast, and salt.  Mix until blended.  Add water and melted butter and mix for 3 minutes.
Add cheddar cheese and mix thoroughly.
Replace paddle with dough hook.
Add 1/2 cup flour and as much of the 2nd half cup as needed to form a soft dough.


Allow machine to knead dough until it all comes away from the side of the bowl and then go one more minute.

Flour a surface, pull the dough off the hook and manually knead until smooth and elastic.
Cover with cloth and allow dough to rest for 10 minutes.


Prepare round cake pan by spraying with cooking spray or greasing with shortening.

Cut dough into 12 pieces. (mine were not even...I'm sure you'll do better) and roll into balls.  I push my thumb into the middle to make a mushroom shaped top and fold over.  Place in pan and repeat with all the balls.


Cover and allow to rise 30-45 minutes in a warm dry location.


Bake at 375 degrees for 11 to 13 minutes.  They should be lightly browned.


Melt remaining butter and add honey and mix.
Remove rolls from oven and brush with butter and honey mixture.
Move to wire rack until ready to serve.

These were much more dense than typical yeast rolls (the cheese I'm sure) but they were very, very good.  My son ate 3 with his meal.  The little one in the middle didn't brown and it tasted "doughy" so do try to get them all the same size.  Plus, I used an 8 inch round pan and the original recipe called for 9 inch round pan...space makes a difference.

While they were good - very good - I really am searching for a lighter, more traditional yeasty dinner roll.  A recipe that can be halved or is already the right size for a round pan of rolls.  Any more than that and it gets wasteful here - we tire of too much of one kind of bread...and freezing them never seems to get them eaten with all the fresh baking I do.

So, if you have a suggestion for a good small-batch yeast roll...please pass it on!

Bon Appetit, Y'all!!!StumbleUpon

Monday, May 23, 2011

Tenderloin in a Bag (Pork or Beef)

My mom used to cater for a few years of her life...she did a BIG party once, where I helped out, and she served several awesome beef tenderloins...cooked in brown paper bags.  They were ooohed and ahhhed over by all!

I called her back in the early part of the year and asked if she had the recipe - I thought it would be an exceptionally good idea for our upcoming anniversary dinner back in February.  She called me back and left a message saying she had sent me a message on facebook with the recipe - had I gotten it?  I responded back - no message from mom.  Sometimes she forgets to hit send :-p  but she's 81, so who cares...it's pretty rock n roll that she's ON Facebook!

So, she called me and gave me what she remembered.  We talked about it a bit...and I think we have it down.  I told her I was hesitant to guinea pig this recipe with a whole beef tenderloin!!!  I thought, maybe I'd try it with a pork tenderloin and see how that does.

One problem might be finding a paper grocery bag!!!  I have a small supply from Central Market in Austin.  Check the specialty food stores, they might have brown paper bags!  Don't try to use a white bakery sack...too thin.  You need the old school brown grocery bags, heavier the better.  If they have handles on them, gently remove them.  We are fortunate to live close to Brownsville, a city that prohibits the use of plastic bags - so I got a paper bag from the Michael's store when I was there last and had forgotten to take in a reusable bag (I'm great at the grocery store - not so good about taking them into the non-grocery retail stores).

Mom doesn't remember bread crumbs...but I distinctly do remember bread crumbs...so that's what I'm trying.  So here goes! 

TENDERLOIN IN A BAG
Adapted from Recipe by Mary Helen Culp

Ingredients:

Two pork tenderloins or a beef tenderloin (or large portion of a beef tenderloin)
1 stick of softened butter - (not melted) to coat the tenderloin thoroughly. (more if you have a larger tenderloin and 1/2 stick if you are cooking just one pork tenderloin - and frankly I halved everything for one pork tenderloin which I was cooking today)
2 tablespoons of roughly cracked black pepper
1 teaspoon garlic powder (my addition)
1 teaspoon salt (my addition)
1 cup grated cheddar cheese - use sharp cheddar with beef (I was out of cheddar so used a colby jack instead - it worked fine!)
1 cup bread crumbs (my addition - I used some leftover multigrain sesame seed bread processed in my food processor)

Method:

Lay down a piece of wax paper - this is a messy job!
Coat tenderloin(s) with softened butter - use your hands - there's really no other good way to do it.

Combine pepper, salt, and garlic powder.

Sprinkle and press the seasonings into the butter on the tenderloin
Process the bread crumbs in the food processor

Combine the cheddar cheese and processed fresh bread crumbs


Press the bread crumb mixture firmly all over the tenderloin ensuring adherence


Put the tenderloin into a large paper grocery sack and fold the ends.

Secure with paper clips or staples.


Set one oven rack in the highest position and the other in the second from the bottom position.
Place sack on baking sheet and place baking sheet on bottom rack (the top rack ensures your bag doesn't accidentally touch the top heating element and catch on fire - that would be bad).


Bake at 375 degrees for 30 min for medium rare beef.
For medium doneness bake 15 min. more. Leave in bag for 5 minutes to rest.

May serve by placing the bag on a serving platter, cutting bag open and roll back each side. 

Cut a chunk for each person - the size of a filet mignon. 

This is a delicious and "different" way to serve tenderloin.  Your family or your guests will enjoy it!!! 

Bon Appetit, Y'all!!!

SHARED WITH:

StumbleUpon