The South Padre Island Flip Flop Foodie Brownsville restaurants

Search The South Padre Island Flip Flop Foodie Blog!

Tuesday, August 30, 2011

PASTA FAGIOLI SALAD

A pasta salad was on my menu to go with our Sunday night hamburgers.  I've made so many pasta salads I could do it in my sleep!  Today I added an ingredient I don't usually add - but it really sounded good - so I did it.  Great Northern Beans were sitting up in my cupboard (I'd accidentally bought them when I intended to by cannellini).  It turned out fabulous!  The creamy beans were a great addition - giving the salad another layer of texture.  Really, really good!

PASTA FAGIOLI SALAD
By Debbi Hook

Ingredients:

1/6 cup white wine vinegar
1/6 cup white balsamic vinegar
1/4 cup olive oil
1/4 cup white granulated sugar
1 tsp. salt
1 tsp. pepper

1/2 pound whole wheat rotini pasta
Peel, slice in half, scoop the seeds with a tablespoon,
quarter and dice for bite-sized cucumber pieces

1 1/2 cucumber - peeled, seeded, and cubed
2 vine ripe tomatoes - cored and cut into generous chunks
1/2 cup halved Kalamata olives
1/2 purple onion - diced
15 ounce can Great Northern beans - rinsed and drained
3-4 ounces crumbled feta cheese
1 tsp. chopped Greek Basil

Method:

In a container with a spill-proof lid, combine both vinegars, sugar, salt, and pepper.  Stir well and allow to sit while you prep the rest.  This will allow the salt and sugar to dissolve.
Be sure to let the salt and sugar dissolve in the vinegar before adding oil

Rinse the beans and allow to drain.

Add the olive oil to the dressing and add the beans.
Cook the pasta to al dente doneness.  Allow to drain thoroughly and cool down until easy to touch.  Okay if slightly warm - but not hot.

Add pasta to bean and dressing container.  Place the lid on and shake to coat.
Adding the pasta and beans while pasta slightly warm allows them to soak up the tart flavors of the dressing

Add the cucumber, tomato, olives, onion, and basil to pasta container and stir to mix throughout.  Add the feta cheese and gently work it in. 
Prepping everything in advance allows an easy put-together for your salas

Put the lid on it - gently turn upside down a few times and place in refrigerator for at least 2 or 3 hours to allow all of the flavors to marry.  Every hour or so - gently shake and turn to get the dressing over everything.

Serve!  It makes about 1/2 gallon of pasta and bean salad - it is delicious!

Bon Appetit, Y'all!!!

SHARED WITH:

StumbleUpon

Monday, August 29, 2011

HAPPY BIRTHDAY TO MY BLOG!

I just realized today, August 29th, is the 1 year birthday for my blog.

I have had 19,601 views in the past 365 days.

I remember being extremely excited when my page views hit 100 in a week.
I remember being wildly excited when my page views hit 2700 in a month.
This week I expect to exceed 20,000 annual page views. 
That's not all that huge in the big blog world...but these number make me feel joyful!

I can't begin to say how much I enjoy this!

My high season is always around any holiday.
I have recently started participated in Linky parties (those "shared with" notations).
I have recently started participated in FoodBuzz - a site for bloggers sharing blogs.
I have maintained the #1 Blogger spot on UrbanSpoon for my area for many months.

My top 10 audience origins are:

United States
15,703
Canada
 654
United Kingdom
 452
Germany
 196
Russia
 141
Australia
 135
South Korea
 121
India
 107
Philippines  
103
Netherlands
 55

My number one referring site is google, followed closely by facebook.
My number one searched word is "cake pop"/
My number two searched word is "chicken and dumplings".

My top posts have been:
Apr 27, 2011, 2 comments
 379 Pageviews
Jan 10, 2011, 5 comments
 331 Pageviews
May 14, 2011, 6 comments
 266 Pageviews
May 20, 2011, 5 comments
 218 Pageviews
Dec 21, 2010, 2 comments
 216 Pageviews
Feb 27, 2011, 1 comment
 172 Pageviews
Jul 8, 2011  
159 Pageviews
Sep 27, 2010  
139 Pageviews
Jul 21, 2011, 1 comment
 123 Pageviews
Mar 14, 2011  
110 Pageviews
 
THANK YOU!!!
 
StumbleUpon

HOMEMADE HAMBURGER BUNS

I had gone to the grocery store in preparation for the week-end's meals while my hubby (or is it hubbie?  I never know) was in town.  I looked at the hamburger buns because we were going to do burgers at home Sunday night...and I wondered "can I make hamburger buns at home"?  I love the taste of hamburger buns - they have a different texture than a lot of other rolls.  It is also one of the few items I still waffle back and forth between... whole wheat or white.  Man, I love those white hamburger buns.

So, I skipped buying them to force myself to make them.  Fingers crossed all the way.

I googled and found a few recipes but one blogger's photo sold me.  It looked like a real hamburger bun!  So, I based my recipe on hers...but I used the technique I generally use to make bread.  Sheesh I hope that doesn't mess things up.  Of course, you readers will know before the end of the post (and since there's a photo at the beginning of the post you know it turned out!).  So, here goes.

HOMEMADE HAMBURGER BUNS
Adapted from www.creationsbykara.com

Ingredients:

3/4 cup hot water
2 tsp. instant yeast
2 Tbsp granulated white sugar
2 Tbsp oil (I used 1 Tbsp vegetable oil and 1 Tbsp olive oil)
1 egg
1 tsp. salt
2 3/4 cup to 3 cups of unbleached AP flour

Method:

Add hot water, instant yeast, and sugar to bowl of a stand mixer with dough hook attached.  Allow to prove for about 4-5 minutes (until good and foamy).

Mix the salt into the flour and mix the oil and egg together.

Add all but 1 cup of flour to the yeast mix and turn on the mixer. 

Add the liquid ingredients and allow to incorporate.  You will have an extremely sticky dough. 

Add all but 1/4 cup of the flour and mix until a good tacky dough has formed.  It should all be pulled away from the side of the bowl...maybe a bit still on the bottom, but the sides should be pulled away.  Allow to knead for 4-5 minutes.  Touch the dough and see if it sticks to your hands - if it does add a bit more flour and let it incorporate.  I used the full 3 cups of flour.

Put the dough out on a floured surface and knead by hand for about 1 minute.  Form a ball and allow to rest.  You should have a nice soft but elastic dough at that point.

Shape dough into a log and cut into 8 fairly equal pieces with a bench scraper or knife. 

Roll into balls and place on a well-greased baking sheet (I used a Silpat instead).  Gently press down with the palm of your hand (if it sticks - add a small amount of flour to your hands - and try to make yours more even than I did - I have multi-sizes).

Place in warm non-drafty place to rise.  I covered mine with a cotton cloth although the original recipe didn't say to do that.  It's an old habit.  Let rise until doubled.  Mine took about 45-50 minutes.

Bake in preheated 350 degree Fahrenheit oven for 15-18 minutes.  If you desire sesame seeded hamburger buns (which I did) - bake for 10 minutes, remove from oven, brush lightly with beaten egg white and sprinkle with sesame seeds. 

Return to oven for remaining cook time.


Slice in half and serve your burgers. 

I can't tell you how wonderful my house smells.  When I was a little girl living in Austin, we routinely drove by the Butter Krust bakery - and when they were baking, the blocks surrounding the factory smelled the way my kitchen smells right now.  Warm yeasty bread baking.  Nothing like it.  I couldn't wait for dinner - I cut one open and ate it out of hand.  It tastes absolutely incredible...I may never buy another hamburger bun at the grocery store again.  Wow!

Bon Appetit, Y'all!!!

SHARED WITH:
StumbleUpon

Sunday, August 28, 2011

Strawberry Breakfast Crepes

When the hubby and I were doing a "no reservations" meandering vacation through New Mexico about 19 years ago, we went to Silver City enroute to a hike to the Gila Indian Ruins.  It was a gloriously beautiful mountain Spring day.  Crisp and clear with a bit of chill in the air.  We stopped in for breakfast at a cute little restaurant - can't recall the name - in a revitalized section of the old town.  It was wonderful - kind of New Agey vibe.  Just our kind of place.

I was barely on the cusp of broadening my gastronomical experiences and almost always ordered a standard American breakfast anywhere we went.  We went to that restaurant two mornings in a row and the first morning my hubby got breakfast crepes with yogurt and the second morning I got breakfast crepes with cream cheese.  His were the best and every so often I recreate them for us for a special breakfast.

It's Sunday morning and he's home for a 4 day week-end at the coast so I decided, on the spur of the moment, to grab the strawberries and yogurt from the fridge and surprise him with some breakfast crepes.

STRAWBERRY BREAKFAST CREPES
Adapted from the 1979 Better Homes and Gardens All-Time Favorite Recipes
and that unknown restaurant in Silver City, New Mexico

The Crepes:

(The original recipe is double this size - I halved it - and the half recipe is below)

Ingredients:
1/2 cup unbleached all purpose flour
3/4 cup milk (I used 2%)
1 large egg
1 tablespoon white granulated sugar
1/2 tablespoon vegetable oil
pinch Kosher salt

Method:
Prepare this first so the batter can rest. 
In mixing bowl, blend all of the ingredients until very smooth and you see all the lumps have disappeared. 

Allow batter to rest while you prepare everything else.  When ready to cook - you need your complete attention on the crepes - they go fast. 
Heat a lightly greased omelet pan or small frying pan (or a crepe pan if you have it) over a medium high heat.  Remove pan from heat and ladle in about 2 tablespoons of batter.  Swirl pan until batter covers the bottom of the pan and just slightly up the side (really, just slightly).  Return pan to fire and allow to lightly brown.  You will see the batter dry up on top. 
The directions say not to flip them...and I'm sure that is the proper way...but I flip mine.

I use a heat proof rubber spatula to lightly release the edge and carefully pick it up with my finger tips and flip it to the other side....just takes a few seconds to get a bit of color on the other side. 
Invert pan over paper toweling and continue making more. 

This half recipe made about 7 crepes.  I threw the first one away (I always throw the first one away - it's like a pancake - the first is never good).

Yogurt Topping:

1 cup unflavored natural yogurt
2 tablespoons honey
1/2 teaspoon ground cinnamon

Stir together and allow to sit while you prep the strawberries.


Strawberries:

Slice about 3/4 pound of fresh strawberries that have been washed and dried and hulled.  Hold out a couple of nice ones to fan across the top of the dish.  If your strawberries are not very sweet, sprinkle with a teaspoon of granulated sugar and toss.  Allow to sit while you prepare the crepes. 

PUT IT ALL TOGETHER:

Set up a station with crepes, yogurt with a spoon, and strawberries and plates.
Place a crepe on the plate and spoon a good dollop of yogurt down the center. 

Pile on some strawberries and spoon another dollop of yogurt on top of the strawberries. 

Pull one side of the crepe up over the strawberries and then pull the other side up over the crepe - and roll it over so the seam is on the bottom.  As you roll it - move it to the edge of the plate.

I generally plate 2 or 3 depending on who is eating them (I eat two - my husband eats 3 or 4!).  After all are rolled and placed, drizzle more yogurt over the all the crepes, place a pretty fanned strawberry in the center and sprinkle the whole thing lightly with powdered sugar.

Viola!  It's easy but it has a certain wow factor.  I served with bacon cooked in the oven so it stayed nice and flat.  A hot cup of good coffee - oo la la!  We were both so happy - instant memories of a great vacation and a very happy husband.

Bon Appetit, Y'all!!!


SHARED WITH:

Everyday Sister's Sharing Sundays Blog Hop #10


StumbleUpon

Friday, August 26, 2011

Apple-Cream Cheese Bundt Cake

Apple-Cream Cheese Bundt Cake with Praline Frosting
When I received my September issue of Southern Living, the cover displayed a gloriously decadent cake  topped with, what almost looked like, pecan pralines!  I flipped through rapidly to find it and I found a full spread of luscious apple desserts.  Even though we are still in August and pulling 100 degree temperatures in the Rio Grande Valley, autumnal apples are making their appearance in cooking magazines, cooking shows, and blogs.  Now, if we could just get some cool mornings into the picture, it might feel Fallish.  For me though, living on the Gulf Coast, not likely to feel coolness until November.  That's quite alright; nothing beats living on this lovely expanse of salt water outside my window.  Missing the seasons is a small price to pay!
The Laguna Madre on the Texas Gulf Coast near Port Isabel/South Padre Island

I decided I was going to make a couple of apple desserts this and next week to ease myself back into the kitchen and, hopefully, some more regular blogging.  School's back in session, life is settling down, and I'm ready to bake, cook, and write once again.

So, let's get started with this lovely Apple-Cream Cheese Bundt Cake with Praline Frosting. 

APPLE-CREAM CHEESE BUNDT CAKE
Adapted from Southern Living Magazine, September 2011,
further attributed to Robert Kindred of Seagoville, Texas

INGREDIENTS:

Cream Cheese Filling:

8 ounce package cream cheese, softened
1/4 cup butter, softened
1/2 cup granulated white sugar
1 large egg
2 Tbsp. unbleached all purpose flour
1 tsp. pure vanilla extract

Apple Cake Batter:

1 cup finely chopped pecans (I toasted before chopping and measuring)
3 cups unbleached all-purpose flour (I used white whole wheat flour)
1 cup granulated white sugar (I used vanilla sugar I made with some vanilla beans)
1 cup firmly packed light brown sugar
2 tsp. ground cinnamon
1 tsp. salt
1 tsp. baking soda
1 tsp. freshly ground nutmeg
1/2 tsp. ground allspice
3 large eggs, lightly beaten
3/4 cup canola or vegetable oil
3/4 cup applesauce
1 tsp. pure vanilla extract
3 cups peeled, cored, and finely chopped Gala apples (about 1.5 lbs)
   (I used a mix of Gala and Fuji apples)

Praline Frosting:

1/2 cup firmly packed light brown sugar
1/4 cup butter
3 Tbsp. milk
1 tsp. pure vanilla extract
1 cup powdered sugar
Toasted Pecans for garnishing

METHOD:

1.  Prepare Filling
Filling Ingredients


Beat cream cheese, butter, and granulated sugar at medium speed with an electric mixer until blended and smooth.  (I used the food processor - it's fast and smooth)
Add egg, flour, and vanilla, beating until just blended.
Prepared Filling

2.  Prepare Batter. 
Preheat oven to 350 degrees Fahrenheit. 
Bake pecans (including those to be used for garnish) in a shallow pan 8 to 10 minutes or until toasted and fragrant, stirring halfway through.  Set aside to cool.
Toasted Texas Pecans...yummie!

Stir together flour, both sugars, cinnamon, salt, baking soda, nutmeg and allspice.
Dry ingredients for batter before whisking to evenly blend

Add eggs, oil, applesauce and vanilla extract, just until dry ingredients are moistened.
Very dense batter - do not over blend


Dig deep to the bottom of the bowl - fully incorporate dry goods

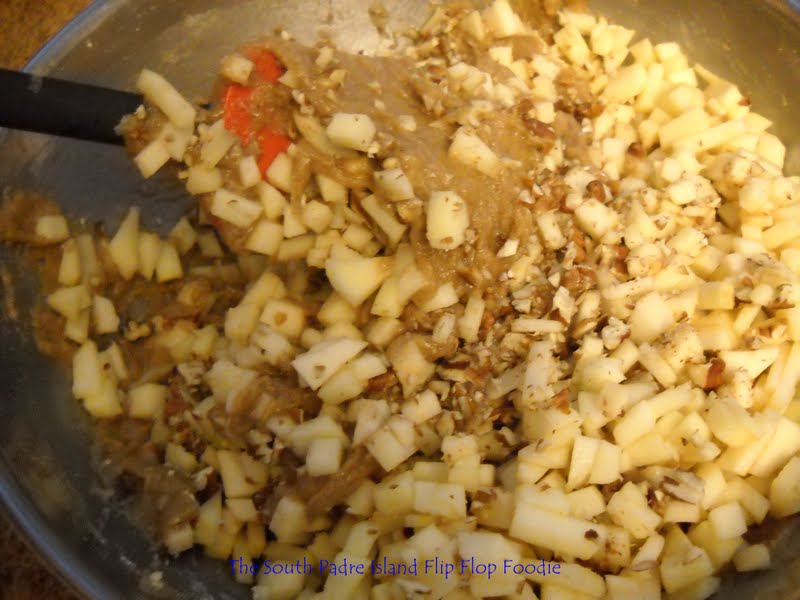
Prepare and stir in 3 cups finely chopped apples and 1 cup finely chopped pecans.
Amazing that 3 apples made 4 cups of diced apples!

I peeled, quartered, cored, sliced each quarter across the thick part

Sliced each quarter into thin slices

Diced 4 cups worth!  Beautiful crisp apples!

Rough chopped the pecans - not as fine as could be -
but I wanted to see a little bit of nut in the cake

Incorporating the apples and pecans in the batter...
Dang - that's heavy!  Don't use a weak handled spatula or you will break it!


3.  Spoon two-thirds of apple mixture into a greased and floured 14-cup Bundt pan.
Spoon cream cheese filling over apple mixture leaving a 1 inch border around edges of pan.
Swirl filling through apple mixture using a paring knife.
Spoon remaining apple mixture over cream cheese filling.
In the oven and ready to bake

4.  Bake at 350 degrees Fahrenheit for one hour to one hour and 15 minutes or until a long wooden pick inserted in center comes out clean.
Cool cake in pan on a wire rack for 15 minutes.
Remove from pan to wire rack and cool completely (about 2 hours).  I let mine sit under a cake cover over night after allowing it to cool.  This was a long endeavor.  I was tired :-)

Ahhhh, the smell of baked apples and nuts and cinnamon and nutmeg...
smells like Autumn to me!

5.  Prepare Frosting.
Bring 1/2 cup brown sugar, 1/4 cup butter, and 3 Tbsp. milk to a boil in a 2 quart saucepan over medium heat, whisking constantly. 
Frosting ingredients melting together in sauce pan

Everything melted - keep whisking


Allow to boil for 1 minute, whisking constantly.
Use a timer - just needs exactly 60 seconds of boiling time

Remove from heat, stir in vanilla.
Gradually whisk in sifted powdered sugar until smooth. (Important to sift every single lump out of that powdered sugar before adding!)
Took a little time - but got it all through a fine sieve - no lumps desired!

Stir gently 3 to 5 minutes or until mixture begins to cool and thickens slightly.

at the 4 minute point.  By the time I spooned on the cake, it was starting to firm up and it didn't
drizzle the way I wanted it to - not bad, just a tad too thick

Pour immediately over cooled cake.
Garnish with extra toasted pecan chunks.
Garnish rapidly or the pecans won't stick - this frosting cools and firms rapidly

Soooo, you know up above where it said a 14 cup Bundt pan?  Well, turns out I have a 10 cup Bundt pan...BUT I have 4 one cup mini Bundt pans... so I got out my scale and weighed the batter.  I got just over 69 ounces of batter so I put 23 ounces in one bowl so I had my 1/3 for the top (to be the bottom) of the cake.  As usual, I'm scared of things rising and going overboard so I tried to really be methodical this time.  I eyeballed the 2/3 left in the mixing bowl and gave each mini a good scoop or two and then put the remaining into the bigger Bundt pan.  Good so far (the batter is damn heavy though - I think the change to white whole wheat flour made this even more dense than I expected.  I then spooned the cream cheese mixture over the batter in the pans, trying really hard to leave a border - but it was liquidy enough that it just spread out.  Swirling with a knife didn't work very well either.  I might have done better to use two knives, holding the batter apart so the cream cheese mixture could head south.  I used the remaining 1/3 for a very sparse top - soon to be bottom - and was even more sparing with the little minis - because I didn't care if they turned out all that pretty.  So, into the oven they went - minis on a baking sheet (they baked in a perfect 25 minutes).  The larger cake, because it was smaller than called for, should have been taken out at the hour mark.  It smelled on the verge of burning about 5 minutes before the timer went off...so I scurried and got it out of the oven.  It was fine - slightly darker than the little minis but all-in-all smells awesome!

I decided to guinea pig one of the little minis that had made my kitchen smell like the home of a Kitchen Goddess...it smells like Fall!  If I don't look at my outdoor thermometer I could almost believe it!  I cracked open one of the minis and OMG - it looked and smelled delicious...but you couldn't really see much of the cream cheese part at all!  That was disappointing. 

What was NOT disappointing was the big mouthful of pleasure I felt after popping a big hot piece of cake in my mouth.  I admit to eating the whole thing - no frosting needed.  These would be a wonderful addition to a Christmas breakfast if made in muffin format!  So rich and spicy with the moist apple pieces and background flavor of toasted pecans.  Just delicious.

Mine doesn't look like the cover of  Southern Living - but it tastes damn good!

My take on the September 2011 Southern Living cover cake!

Labor intensive (heck, that was a lot of small dicing - I measured 4 cups of diced apples) and finely chopped pecans and heavy delicious batter.  I will definitely do this cake again.  Not sure why the inside cream cheese didn't work - but I can taste the background flavor of the cream cheese.  I think it needed to be more dense...I'll have to think about it - maybe with ricotta cheese instead of cream cheese?  Wonder if it would "hold its own" against the heavy batter a bit better.  Might have to give it a try!  Maybe I just need to give up on the whole wheat flour substitution...but dang I like a more wholesome cake (I feel better about myself when I pig out).  I'll report back if I do this again and see improvement in my second go round!  I'd slice it and show you the inside - but my honey is home for the first time in 3 weeks and I'm waiting for him before slicing.  He's gonna love this cake!

Bon Appetit, Y'all!!!

SHARED WITH:


Cast Party Wednesday


Everyday Sisters Sharing Sundays #13


StumbleUpon