The South Padre Island Flip Flop Foodie Brownsville restaurants

Search The South Padre Island Flip Flop Foodie Blog!

Showing posts with label pastry. Show all posts

Saturday, October 20, 2012

Pumpkin Spice Madeleines

Pumpkin Spice Madeleines
As I have written before, I do have an addiction to those luscious shell-shaped sponge tea cakes known as Madeleines.  I have never strayed far from the David Lebovitz recipe that has always worked so well for me.  However, sometimes you just have to take a walk on the wild side and hope it works!  Here are links for the Lemon-Glazed Madeleines and the Vanilla Bean Madeleines I have made in the past....just in case you want to check them out.

I looked at a lot of blog posts and online recipes, trying to find a recipe very close to Chef Lebovitz's, with the addition of some Autumnal spices...and I was focused on adding pumpkin.  Not much luck.  There were several out there...some with pumpkin, some with just the spices.  None of the recipes were very close though.  So, I got brave and just decided to experiment.  Flop or fabulous?  It's never really wise to mess with a classic recipe...especially when you are hoping to take the goodies to a special occasion (going to take some to author William J. Cobb's The Bird Saviors book signing at Paragraph's on Padre Blvd).  Mehh, I'm doing it anyway....and here's how I did it.

Pumpkin Spice Madeleines
Based on Recipe from David Lebovitz
Makes 24 Madeleines

Ingredients:

3 large eggs, at room temperature (important to be at room temp)
2/3 cup (130g) granulated sugar
rounded 1/8 teaspoon salt
1 1/4 cup (175g) flour
1 teaspoon baking powder
1 teaspoon ground cinnamon
1/4 teaspoon freshly grated nutmeg
1/8 teaspoon ground cloves
1/8 teaspoon ground ginger
9 tablespoons (120g) unsalted butter, melted and cooled to room temperature, plus additional melted butter for preparing the molds
1 teaspoon pure vanilla bean paste
1/4 cup pumpkin puree (I used canned pumpkin)


Glaze:
(this is double the original recipe)
1 1/2 cup (300g) powdered sugar, sifted
1 1/2 tablespoon vanilla bean paste
4-5 tablespoons water (you judge the thickness you like)

Method:

1. Brush the indentations of a Madeleine mold with melted butter. Dust with flour, tap off any excess, and place in the fridge or freezer. (I use a non-stick pan, so I wipe with softened butter instead, using a paper towel...I have found the melted butter pools in the bottom of the non-stick pan causing flour to clump and uneven browning...lesson learned)

2. In the bowl of a standing electric mixer, whip the eggs, granulated sugar, and salt for 5 minutes until frothy and thickened. (it routinely takes me 7 minutes to get to a ribbon stage)
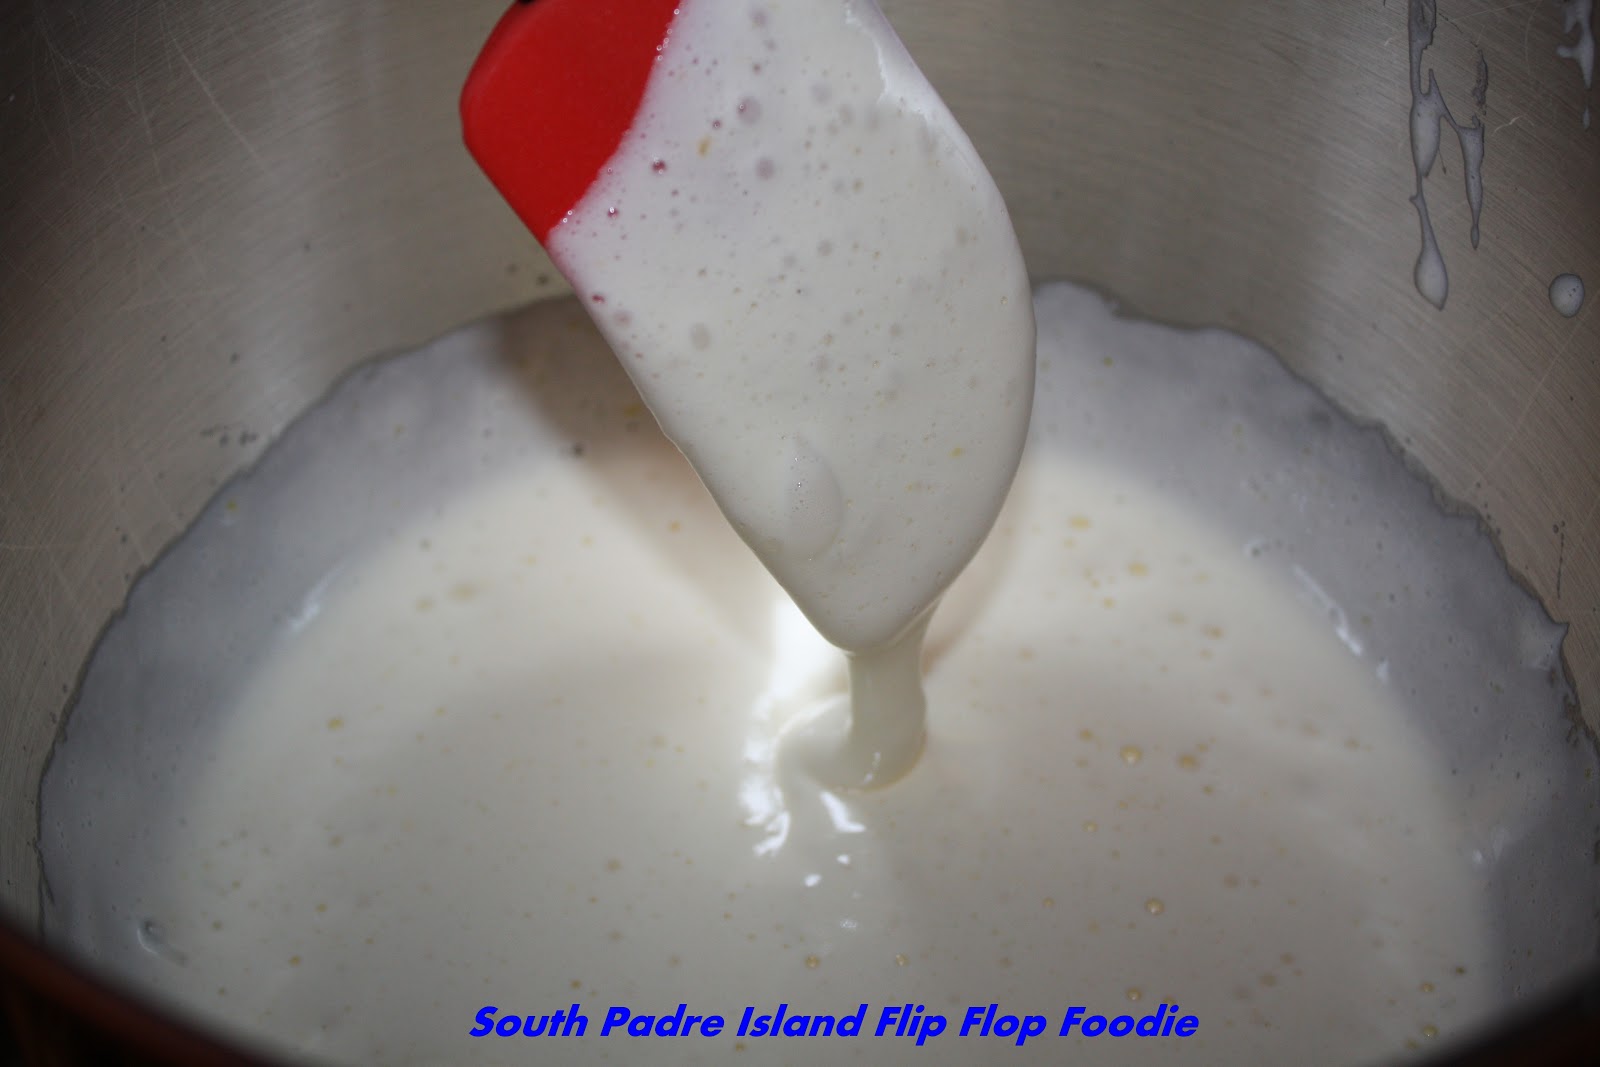
3. Whisk together the flour, baking powder, and dry spices.  Spoon the flour mixture into a sifter or mesh strainer and use a spatula to fold in the flour as you sift it over the batter. (Rest the bowl on a damp towel to help steady it for you.)  Remember to fold gently - you want to keep the air incorporated into the mixture for a light sponge.

4. Add the vanilla bean paste and pumpkin puree to the almost cooled butter and whisk until completely smoothed out (and allow it to cool all the way).  Dribble the butter mixture into the batter, a few spoonfuls at a time, while simultaneously folding to incorporate the butter. Fold just until all the butter is incorporated.  Again, being cautious to fold gently to maintain incorporated air.
I prefer making the pumpkin butter before you need it

Gentle folding is integral

5. Cover the bowl and refrigerate for at least 1 hour. (Batter can be chilled for up to 12 hours)

6. To bake the Madeleines, preheat the oven to 425 degrees.

7. Plop enough batter in the center of each indentation sufficient to fill it by 3/4's (you'll have to eyeball it, but it's not exact science, don't worry if it's not perfect - mine are never all the same size) Do not spread the batter - let it stay the way it lands.**(See note below)
This is the second batch

8. Bake for 8-9 minutes or until the cakes just feel set when pressed gently with your finger. (These took exactly 8 minutes in my oven)

9. While the cakes are baking, make a glaze in a small mixing bowl by stirring together the sifted powdered sugar, vanilla bean paste, and water until smooth.  Use a bowl suitable for dipping the Madeleines.
I like a thicker glaze so I doubled the original recipe amount.
I ended up with leftovers this time...oh well, rather too
much than not enough!

10. Remove from the oven and tilt the Madeleines out onto a cooling rack.

The moment they're cool enough to handle, dip each cake in the glaze, turning them over to make sure both sides are coated and scrape off any excess with a dull knife (or the side of the bowl)  After dipping, rest each one back on a cooling rack, scalloped side up, until the cakes are cool and the glaze has firmed up. (Put a baking sheet under your cooling rack to catch any stray drips). 

Storage: glazed Madeleines are best left uncovered, or not tightly-wrapped; they're best eaten the day they're made. They can be kept in a container for up to three days after baking, if necessary. Freezing a glazed Madeleine doesn't really work - the glaze melts.

Have I mentioned how much I adore Madeleines?  To me, they are the ultimate bite-sized treat (okay, 3 bites).  A happy middle ground between a cookie and a cupcake; glazed not frosted.  They are, in my humble opinion, one of the absolute best treats you can have with a cup of good coffee or hot tea.  I will admit, also, that I love the traditional lemon-glazed the best.  I'm a lemon lover.  The rest of my household, not so much.  Thus, the "always thinking about it" search for different ways to make a favorite treat and make it family-friendly.  I think they are going to love the Pumpkin Spice Madeleines.  They are really tasty and the recipe tweaking worked out mostly okay.

What's different?  Well, they are much more dense, although still spongy.  They only vaguely taste of pumpkin because there was not much in it.  The spices are just right in my opinion, but it could handle a touch more to enhance the pumpkin pie flavor I was going for.  The mixing of the pumpkin and butter is, I believe, the reason they did not spread as much as usual.  **They didn't make it to the top or bottom of the mold shape.  They puffed up more than usual...they are supposed to have a "bump" - but these were completely round on the bottom.  Probably the mixing of the pumpkin butter instead of straight up melted butter is again the blame...I believe anyway.  The batter was "tighter" than usual - again the density result of adding pumpkin?  More "air holes" in the Madeleines as well.  I even tried give the pan a good bang after filling the second pan - but that did nothing - in fact there were more air holes in the second batch than the first.  I tried to fill the holes with glaze with my fingers...that didn't particularly work.  If I make them again, I am going to try skipping the pumpkin to keep the texture more true to traditional...and maybe bump up the spices a tad.  I like the little bump on traditional Madeleines and that was totally missing on these...a fully rounded bottom instead.

Still, the shape looks okay because it had all the mandatory scallops.  They taste delicious and pretty much how I imagined.  I give them a thumbs up for a nice Fall version of a traditional French cakelet.  I suspect purists would NOT agree.  I've never claimed to be pure, now have I? (batting my eyes)

Bon Appetit, Y'all!!!

Shared With:

Ali Bee's Bake Shop Pumpkin Linky Party

Sweet Treats and Swanky Stuff Linky Party

FriDays Made Sweet

Chef In Training

 
HungryLittleGirl
 
 
StumbleUpon

Sunday, August 28, 2011

Strawberry Breakfast Crepes

When the hubby and I were doing a "no reservations" meandering vacation through New Mexico about 19 years ago, we went to Silver City enroute to a hike to the Gila Indian Ruins.  It was a gloriously beautiful mountain Spring day.  Crisp and clear with a bit of chill in the air.  We stopped in for breakfast at a cute little restaurant - can't recall the name - in a revitalized section of the old town.  It was wonderful - kind of New Agey vibe.  Just our kind of place.

I was barely on the cusp of broadening my gastronomical experiences and almost always ordered a standard American breakfast anywhere we went.  We went to that restaurant two mornings in a row and the first morning my hubby got breakfast crepes with yogurt and the second morning I got breakfast crepes with cream cheese.  His were the best and every so often I recreate them for us for a special breakfast.

It's Sunday morning and he's home for a 4 day week-end at the coast so I decided, on the spur of the moment, to grab the strawberries and yogurt from the fridge and surprise him with some breakfast crepes.

STRAWBERRY BREAKFAST CREPES
Adapted from the 1979 Better Homes and Gardens All-Time Favorite Recipes
and that unknown restaurant in Silver City, New Mexico

The Crepes:

(The original recipe is double this size - I halved it - and the half recipe is below)

Ingredients:
1/2 cup unbleached all purpose flour
3/4 cup milk (I used 2%)
1 large egg
1 tablespoon white granulated sugar
1/2 tablespoon vegetable oil
pinch Kosher salt

Method:
Prepare this first so the batter can rest. 
In mixing bowl, blend all of the ingredients until very smooth and you see all the lumps have disappeared. 

Allow batter to rest while you prepare everything else.  When ready to cook - you need your complete attention on the crepes - they go fast. 
Heat a lightly greased omelet pan or small frying pan (or a crepe pan if you have it) over a medium high heat.  Remove pan from heat and ladle in about 2 tablespoons of batter.  Swirl pan until batter covers the bottom of the pan and just slightly up the side (really, just slightly).  Return pan to fire and allow to lightly brown.  You will see the batter dry up on top. 
The directions say not to flip them...and I'm sure that is the proper way...but I flip mine.

I use a heat proof rubber spatula to lightly release the edge and carefully pick it up with my finger tips and flip it to the other side....just takes a few seconds to get a bit of color on the other side. 
Invert pan over paper toweling and continue making more. 

This half recipe made about 7 crepes.  I threw the first one away (I always throw the first one away - it's like a pancake - the first is never good).

Yogurt Topping:

1 cup unflavored natural yogurt
2 tablespoons honey
1/2 teaspoon ground cinnamon

Stir together and allow to sit while you prep the strawberries.


Strawberries:

Slice about 3/4 pound of fresh strawberries that have been washed and dried and hulled.  Hold out a couple of nice ones to fan across the top of the dish.  If your strawberries are not very sweet, sprinkle with a teaspoon of granulated sugar and toss.  Allow to sit while you prepare the crepes. 

PUT IT ALL TOGETHER:

Set up a station with crepes, yogurt with a spoon, and strawberries and plates.
Place a crepe on the plate and spoon a good dollop of yogurt down the center. 

Pile on some strawberries and spoon another dollop of yogurt on top of the strawberries. 

Pull one side of the crepe up over the strawberries and then pull the other side up over the crepe - and roll it over so the seam is on the bottom.  As you roll it - move it to the edge of the plate.

I generally plate 2 or 3 depending on who is eating them (I eat two - my husband eats 3 or 4!).  After all are rolled and placed, drizzle more yogurt over the all the crepes, place a pretty fanned strawberry in the center and sprinkle the whole thing lightly with powdered sugar.

Viola!  It's easy but it has a certain wow factor.  I served with bacon cooked in the oven so it stayed nice and flat.  A hot cup of good coffee - oo la la!  We were both so happy - instant memories of a great vacation and a very happy husband.

Bon Appetit, Y'all!!!


SHARED WITH:

Everyday Sister's Sharing Sundays Blog Hop #10


StumbleUpon

Saturday, August 6, 2011

Bella e Deliziosa CALZONE !!!


The teen likes to have homemade pizza on Friday nights.  For some reason he thought Saturday was Friday...that just means it is time for summer to be over!  When the days start running together... it's time to hit the structure of SCHOOL!!!

Anyway, I made some homemade pizza dough for him and while it was rising he said "Mom, I think I want to make a calzone".  Uh, okay - never made one but I think it's basically a pizza in a pocket.  He, however, wanted a BIG calzone...so we gave it a try.

We used our standard pizza dough that I use to make focaccia and pizza.  It's a Martha Stewart recipe and has never failed me.  I have blogged it before - see link in previous sentence.  Actually, I just make the dough and the teen always takes it from there.    Today, as we so often do, I made a half recipe, because I was having a salad for dinner.

I lightly rolled the dough into a rectangular shape on a floured surface and transferred it, on a rolling pin, onto a cookie sheet dusted with cornmeal.  While I cleaned up, the teen built the calzone.  He laid down his ingredients on one side of the dough - pizza sauce, his special herb mix (basil, Italian seasoning, garlic, onion powder, and pepper), layered on some Asiago cheese and a good bit of mozzarella, a layer of pepperoni, some bacon crumbles, and lastly more mozzarella cheese.  He carefully pulled up the second half of the dough to cover the side with toppings, and began pinching together the edges.  We considered several options for sealing - a fork (hard to do with a pan with an edge), a finger pinch, and lastly - he sort of rolled it up and then pinched it all around.  Looked good to me.  I next told him he should dust off the cornmeal that had stuck to the bottom of the pizza dough he'd pulled over the toppings - so he did, using a pastry brush.  Next I showed him how to make an egg wash, which he then painted all over the calzone.  I explained this would give it a nice brown crust.  He likes a soft crust so he was leery...but he did it.  Lastly I recommended sprinkling on some Parmesan or Asiago  on top.

He had the oven pre-heated to 400 degrees and carefully placed his rather large calzone onto the middle rack in the oven.  He started with 15 minutes on the timer and then checked it - felt like it needed a bit more time so we both agreed - set it for 7 minutes more and then check again.

He deemed it perfect at the 22 minute mark and removed it from the oven to rest for about 5 minutes before slicing into it.  It slid easily onto a cutting board and he asked me to make the first cut.  I think he wasn't sure what might bubble out!  It was quite pretty on the outside and equally nice on the inside.  His eyes got kind of big and said "it's like stuffed Italian bread!"... and it was!  The sauce had mostly been absorbed into the dough and the cheesy stuffing looked mighty good. (It WAS delicious - I did have one small piece ;-)


I do believe he was very proud.  And, I... I was once again, a very proud mom!  I also have no doubt this will become one of the regulars on "pizza night".

Bon Appetit, Y'all!!!StumbleUpon

Wednesday, June 15, 2011

CHOCOLATE SPONGE CAKE WITH DECADENT FILLING

This week has been slow to get back to a normal week.  There's been so much to do and to prepare to do next week...I have not baked at all...and dinners have been fly by the seat of your pants and "hope there's something in the pantry" to pull together!

I saw Stephanie Jaworski, of JoyofBaking.com, posted a video demonstrating chocolate sponge cake, rolled up with a raspberry cream filling.  I watched the entire video and started thinking about how much I'd always wanted to make a sponge cake, but for some reason, I've shied away from them.  Her demonstration made it look "doable".  If you decide to make this and have not made one before, I'd greatly encourage you to link to her video (below the title of the recipe) and watch the entire thing.  Great demonstration.  I am not a big fan of raspberry cream filling - it's not one of my favorites...but the stuff inside woopie pies IS a favorite...and I started asking myself if I couldn't just whip up some marshmallow fluff and some whipped cream and lay that down for the "roll up" part of the deal...sounded REAL good to me...so Wednesday, that was my afternoon activity.

CHOCOLATE SPONGE CAKE
Adapted From Stephanie Jaworski at JoyofBaking.com

Ingredients:

  • 6 eggs, separated while cold, allow to come to room temperature
  • 1/4 cup granulated white sugar, plus 2 tablespoons more, separated
  • 1 teaspoon pure vanilla extract
  • 4 ounces semi-sweet chocolate, melted, and cooled to room temperature (I used Callebaut Semi-sweet chocolate chunks and melted them in the microwave) 
  • 1/2 tsp cream of tartar


Chocolate melted and cooled

Eggs Separated and to room temperature


Method:

Preheat oven to 350 degrees Fahrenheit with rack in middle position.  Prepare a 17x12 inch sheet pan by spraying pan with vegetable spray (like Pam or Mazola or one of those).  Cut a piece of parchment paper the size of your sheet pan, place it on top of the sprayed surface, then spray it and the sides of the pan with a baking spray (like Baker's Joy) that has both oil and flour in it.  Set aside.


In the bowl of a stand mixer, beat the 6 egg yolks and 1/4 cup of granulated sugar on high speed until the mixture becomes thick and light yellow and fluffy.  This will take about 5 minutes.  When you raise your beater the mixture will fall back on itself in a slow ribbon. 
Egg yolks and sugar to slow ribbon stage


Next add the vanilla extract and mix well.  Add melted room temperature chocolate just until incorporated.
Chocolate mixed into egg yolk mixture


If you are like me and only have one bowl for the stand mixer, transfer this mixture to a large bowl, scraping out every little bit!  Wash your mixer bowl thoroughly, with soap and hot water to ensure no oil is left in the bowl and dry thoroughly.  Squeaky clean!!!


Return mixing bowl to stand mixer and add the egg whites.  Attach the whisk attachment and beat on medium until foamy.  Add the cream of tartar and beat at medium-high until soft peaks form.  Raise the speed to high and slowly add, bit by bit, the 2 tablespoons of granulated sugar.  Beat until stiff peaks form.
Stiff peaks!


Place 1/3 of the egg whites in the egg yolk and chocolate mixture and mix well to lighten.  Fold in the 2nd third of the egg whites, being careful not to deflate.  You'll have noticed there is no leavening in this cake - the egg whites do all the work.  Add the last of the egg whites and gently fold.  It's okay if there are a few white streaks...it comes together in the oven.
After lightening, added another 1/3 of the egg whites to chocolate mix
the batter is ready!


Spread the batter into the prepared baking sheet and using an offset spatula, evenly distribute it to the edges of the pan.  Gently tap the pan and you'll see bubbles popping. 
batter in the pan - gently tapped - to pop some of the bubbles

Bake until cake has lightly puffed and has lost its gloss (15-17 minutes).  It will spring back when lightly touched.  Remove from oven and place on cooling rack.  Cover the entire cake with a clean, lightly dampened cloth while cooling so cake top does not dry out and crack when you try to roll it.  I sprayed my cloth with a spray bottle.  It takes at least 30 minutes to cool.


Slide the cake, still on the parchment paper off of the pan.  If any sides are attached, loosen them with a sharp knife before removing the cake.  Mine slid out like "buttah".
Cooled cake removed to counter on parchment


MARSHMALLOW WHIPPED CREAM


1 cup heavy whipping cream
1 7 oz. jar Marshmallow Cream
1 1/2 tsp pure vanilla extract


In bowl of stand mixer with whisk attachment, whip heavy cream and vanilla until soft peaks.
Whipped cream

Add the entire jar of marshmallow cream and whip on high until well incorporated and firm peaks form. 
The Marshmallow Creme mixed into whipped cream - yum!


Spoon all of this decadent whipped topping onto the top of the cake (still on the parchment) and spread evenly to all sides with an offset spatula.
Filling on the cake - and rolling begins - gently separate from paper


You can roll the cake long or short...obviously short gives you a taller cake with more rolls.  Long will give you a shorter cake and would be nice for "small bites".  Since this cake is literally melt-in-your mouth, I wanted big pieces :-)


This is where I might advise, once again, to take a peek at Stephanie Jaworski's video.  It really helps you get the technique of using the paper to help roll the cake with the filling.
Sprinkled with powdered sugar...or some cocoa would be good


Holy deliciousness Batman...I ate two pieces already...and it's not dinner yet!  I did share a piece with the teen...who was, surprisingly, not as impressed as I was.  He said "it's okay".  Perhaps you need to have a more mature palate to appreciate the melt-in-the-mouth light chocolately AWESOMENESS of this cake.  I don't care if I have to eat the whole thing by myself.  I'll just go swim laps or something...
OMG - this is so light and delicious...melts in your mouth - you'll notice - NO FLOUR in the cake!

I think the teen thought this was going to be like a Little Debbie Swiss Roll...but it's not...although, I may have to work on that...hmmmm...

BON APPETIT, Y'ALL!!!

SHARED WITH:


StumbleUpon