My brain is in hyper-organization mode this week. We have the teen's benefit 5k, Run To Hear, this week-end, with all the associated travel and prep work, and directly after that I have various family in town for a total of nine days. LOTS of planning to do. I woke up this morning and started making lists (gosh, I love lists). When to shop, what can I pre-bake, what activities to do, checking the fishing reports, considering sleeping arrangements while travelling as well as the guests in our tiny condo, alotting sufficient travel times, the teen's volunteer schedule, my Zumba schedule ...it's a busy two weeks!
I'll be making chocolate chip and sugar cookie dough today, scooping it, and freezing it...baking it off for fresh homemade cookies (an expectation at Grandma's house) when the kidlets are here. I've planned the menus...we don't eat out much with the grandkids for dinner. They are tired and irritable after hours in the sun - on the beach, in the pool, at Schlitterbahn - dining out is not all that fun with irritable children and tired parents. I made homemade pizza dough today and froze individual pizza sized balls. They will thaw and rise and they'll be happy to each stretch their crusts and make their own pizzas one night. A big crockpot of spaghetti will be a wonderful thing after their first day at the beach - when everyone is drained and not up to much cooking. We can prep salads and garlic toast before leaving the house...upon return all we have to do is cook the pasta and broil the toast...voila, dinner will be served. I'll also lay in paper plates...because I am not doing all those dishes!!! Fajitas another night are an easy meal...with some frozen leftover beans from a previous meal, refries will be a fast side dish. I'll have to make a Dulce de Leche Banana Cream Pie one morning ...because I know my kids are gonna love that addition to Mom's repertoire!
Two of my adult children will be here - they'll want time to have a little night life (I'll happily crash with the kids!). Add the upcoming Fourth of July traffic to the mix. Holy smokes! It's quite the production.
I'm up for it...but don't be surprised if you don't see new posts here for a while...if I find time, and have anything new to present, I'll sure post it...but I think it will be sparse posting for this blogger for the next two weeks. Lots of my blogger friends are asking others to be guest bloggers while they go out of town...this is obviously an issue for lots of foodies out there! I hope my readers don't abandon me...but mostly I hope everyone is having a happy summer...I'll be back before you know it!
Bon Appetit, Y'all!!!
Wednesday, June 22, 2011
Preparing for the Grandkids
Sunday, June 19, 2011
Slow Cooker Beef Fajitas
When the temperature outside is consistently nearing 100 on my deck in the afternoon, grilling out doesn't sound appealing. Besides that, everything is so very dry, even though I use a propane grill on my 2nd story deck, I'm deathly afraid of fire in the midst of this drought. So, when I saw a post on the flipflop wine Facebook page talking about slow cooker fajitas I knew I would want to try that. I scanned the recipe and thought, "hmmm, how about adding some Pinot Noir to that?" and filed it in my mental recipe box :-)
Last night I moved a skirt steak down from the freezer into the fridge thinking it would be a good day for a slow cooker meal...we have a long list of cleaning chores to do because company is coming and this is the only week-end we have available for "deep cleaning" before they arrive. The teen is volunteering, he has speech therapy, we have a benefit 5k to work on this week, and that just fills our calendar to overflowing. So, good day for slow cooker meal!
I took the meat out this morning to finish the thaw but sliced it when it was slightly frozen...makes for much easier slicing when it has a bit of a freeze on it - not solid, of course, just firm enough to make the job a tad easier.
So, let's get started!
SLOW COOKER BEEF FAJITAS
Adapted from My Happily Ever After Recipe
Ingredients:
1 1/2 pound skirt steak - sliced against the grain
1 large jar of Salsa (I used Clint's Texas Salsa and Pace Thick and Chunky because I didn't have 1 whole jar)
1/2 large sweet yellow onion - sliced in half moon slices and broken apart
1 bunch green onions, cleaned and large chopped (both white and green parts)
1 large or 2 medium cloves garlic, thinly sliced
1 Persian lime or 3 key limes - juiced (I needed to use up some key limes I had, so used them)
1/2 teaspoon cracked black pepper
1/2 teaspoon Lawry's season salt
1 teaspoon chili powder
1 teaspoon ground cominos
1/2 teaspoon garlic powder
1 cup flipflop Pinot Noir
If you compare the original recipe you will note I do not add peppers to the slow cooker. The teen is not a pepper fan, and I'm hoping he'll like this a lot - didn't want to risk it by adding a known dislike.
Method:
Prepare your slow cooker with a liner if desired. I hate scrubbing a crock pot since mine is in no way "non-stick". I like to prep all my meat and vegetables first...it makes the "putting it together" so much easier.
Put 1/3 of your salsa into the bottom of the slow cooker.
Place your sliced beef skirt steak pieces in next.
Add the 2nd 1/3 of your salsa on top of the skirt steak.
Add your sliced onions, green onions, garlic slices, and lime juice for the next layer.
Add the dry seasonings next.
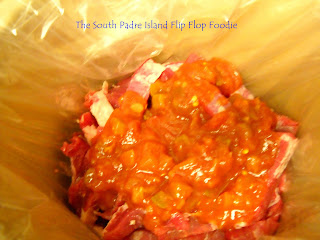
Top with the final 1/3 of the salsa. (I rinsed my jar with about 1/4 cup water and half of the wine and added that too).
Pour in the red wine....it will make its way down to all the levels :-)
Put the lid on the slow cooker and cook on high for 1 hour, stir everything around, reduce to low and cook for at least 6 more hours...more is fine, it just gets more fall-apart tender.
Drink the rest of your Pinot Noir with your fajitas.
You'll need grated cheese, sliced avocado, cilantro, sour cream, fresh tomato, some pickled red onion...whatever toppings you enjoy...and of course some deliciously fresh warm tortillas to envelope all the tasty deliciousness. (Also, don't forget to have some extra salsa for serving - I used all mine in the recipe!) My family always laughs because I put so much on my fajitas I can barely get it into my mouth. Well, why not, I say! This time was no different. The only thing I'd do different is turn the slow cooker off while the pieces of meat were still intact. The teen didn't like that it was little pieces of meat (because they fell apart they were so tender). I also would not make two tacos at a time when serving. There is so much juice, even using a slotted spoon and allowing draining time, that the second tortilla was unpleasantly soggy half way through eating it...and I ended up using a fork to finish it off. The flavor was delicious though! What an easy dinner after a busy day...maybe not the traditional smoky grilled goodness of fajitas...but definitely a nice alternative for the slow cooker kind of day!
If you wanted, you could also serve any leftovers over a mound of rice the next day...or even topping some scrambled or fried eggs for a take-off on huevos rancheros if you reduced the broth a bit. I'm going to remove the beef and any solids to a container and reduce the sauce by half...I may even put in a couple of teaspoons of masa harina to thicken it up....and then add the meat back in before storing for another day. Yum!
BON APPETIT, Y'ALL!!!
Shared With:
Last night I moved a skirt steak down from the freezer into the fridge thinking it would be a good day for a slow cooker meal...we have a long list of cleaning chores to do because company is coming and this is the only week-end we have available for "deep cleaning" before they arrive. The teen is volunteering, he has speech therapy, we have a benefit 5k to work on this week, and that just fills our calendar to overflowing. So, good day for slow cooker meal!
I took the meat out this morning to finish the thaw but sliced it when it was slightly frozen...makes for much easier slicing when it has a bit of a freeze on it - not solid, of course, just firm enough to make the job a tad easier.
So, let's get started!
SLOW COOKER BEEF FAJITAS
Adapted from My Happily Ever After Recipe
Ingredients:
1 1/2 pound skirt steak - sliced against the grain
1 large jar of Salsa (I used Clint's Texas Salsa and Pace Thick and Chunky because I didn't have 1 whole jar)
1/2 large sweet yellow onion - sliced in half moon slices and broken apart
1 bunch green onions, cleaned and large chopped (both white and green parts)
1 large or 2 medium cloves garlic, thinly sliced
1 Persian lime or 3 key limes - juiced (I needed to use up some key limes I had, so used them)
1/2 teaspoon cracked black pepper
1/2 teaspoon Lawry's season salt
1 teaspoon chili powder
1 teaspoon ground cominos
1/2 teaspoon garlic powder
1 cup flipflop Pinot Noir
If you compare the original recipe you will note I do not add peppers to the slow cooker. The teen is not a pepper fan, and I'm hoping he'll like this a lot - didn't want to risk it by adding a known dislike.
Method:
Prepare your slow cooker with a liner if desired. I hate scrubbing a crock pot since mine is in no way "non-stick". I like to prep all my meat and vegetables first...it makes the "putting it together" so much easier.
Put 1/3 of your salsa into the bottom of the slow cooker.
Place your sliced beef skirt steak pieces in next.
Add the 2nd 1/3 of your salsa on top of the skirt steak.
Add your sliced onions, green onions, garlic slices, and lime juice for the next layer.
Add the dry seasonings next.
Top with the final 1/3 of the salsa. (I rinsed my jar with about 1/4 cup water and half of the wine and added that too).
Pour in the red wine....it will make its way down to all the levels :-)
Put the lid on the slow cooker and cook on high for 1 hour, stir everything around, reduce to low and cook for at least 6 more hours...more is fine, it just gets more fall-apart tender.
Five hours into the cooking process - smells incredible! |
Drink the rest of your Pinot Noir with your fajitas.
You'll need grated cheese, sliced avocado, cilantro, sour cream, fresh tomato, some pickled red onion...whatever toppings you enjoy...and of course some deliciously fresh warm tortillas to envelope all the tasty deliciousness. (Also, don't forget to have some extra salsa for serving - I used all mine in the recipe!) My family always laughs because I put so much on my fajitas I can barely get it into my mouth. Well, why not, I say! This time was no different. The only thing I'd do different is turn the slow cooker off while the pieces of meat were still intact. The teen didn't like that it was little pieces of meat (because they fell apart they were so tender). I also would not make two tacos at a time when serving. There is so much juice, even using a slotted spoon and allowing draining time, that the second tortilla was unpleasantly soggy half way through eating it...and I ended up using a fork to finish it off. The flavor was delicious though! What an easy dinner after a busy day...maybe not the traditional smoky grilled goodness of fajitas...but definitely a nice alternative for the slow cooker kind of day!
If you wanted, you could also serve any leftovers over a mound of rice the next day...or even topping some scrambled or fried eggs for a take-off on huevos rancheros if you reduced the broth a bit. I'm going to remove the beef and any solids to a container and reduce the sauce by half...I may even put in a couple of teaspoons of masa harina to thicken it up....and then add the meat back in before storing for another day. Yum!
BON APPETIT, Y'ALL!!!
Shared With:
Friday, June 17, 2011
MANUEL'S in Port Isabel
It was late, I'd barely had any breakfast, I'd Zumba'd away what there was...and the teen and I were starved for lunch. We were just down the road from Manuel's, and after hearing good local feedback, we decided to try it for the first time.
I don't carry much cash, and having heard it was a "cash only" establishment, I am frequently "out of luck" when I'm in the area. The sign on the door definitely says No Credit Cards, No Checks...Cash Only. I had cash today so we stopped in.
The teen is a huge Al Pacino fan so seeing about 6 Scar Face posters as soon as walked in gave him a happy buzz from the get go. Friendly faces abound, despite it being at the end of their day (breakfast and lunch only...they close at 2:00 and are closed on Mondays). That's always a good sign!
We were seated and ordered our Diet Coke and Sprite to drink. Our efficient and happy wait staff took our orders...the standard burger and fries for the teen and I had the 3 beef enchilada plate with rice and beans. (You know I'm always on the lookout for good Mexican food). Man, I should have come here before. I was watching the other table deliveries as well...everything looked delicious that was being served!
Warm chips and some muy caliente salsa were served while we waited for our meals...it's the kind of salsa that doesn't burn immediately but you can't stop eating it because your mouth is on fire...so long as you are eating it, it's tolerated...just don't stop. I should have known...lots of jalapeno seeds visible! Good chips and good salsa.
The teen said the burger was excellent. The patty was large...and he orders it plain and dry, so the meat is of prime consideration. The bun was toasted and fresh looking. The fries were thick steak cut fries and he said they were good. My order was outstanding. Tasty enchiladas, excellent refried beans and Spanish rice...you can tell these were sides that didn't come out of a can - they were made, I would guess, right there in the kitchen.
The price for lunch was $18.69 plus tip. We were filled to the point of feeling stuffed and needing a siesta...but no time for siestas today :-)
I'm happy to find another great local restaurant that makes good enchiladas. Other reviews I've read rave about their breakfast. I don't go out for breakfast much, but when I do, I'll be sure to remember Manuel's and give them another try!
Bon Appetit, Y'all!!!
I don't carry much cash, and having heard it was a "cash only" establishment, I am frequently "out of luck" when I'm in the area. The sign on the door definitely says No Credit Cards, No Checks...Cash Only. I had cash today so we stopped in.
The teen is a huge Al Pacino fan so seeing about 6 Scar Face posters as soon as walked in gave him a happy buzz from the get go. Friendly faces abound, despite it being at the end of their day (breakfast and lunch only...they close at 2:00 and are closed on Mondays). That's always a good sign!
We were seated and ordered our Diet Coke and Sprite to drink. Our efficient and happy wait staff took our orders...the standard burger and fries for the teen and I had the 3 beef enchilada plate with rice and beans. (You know I'm always on the lookout for good Mexican food). Man, I should have come here before. I was watching the other table deliveries as well...everything looked delicious that was being served!
Warm chips and some muy caliente salsa were served while we waited for our meals...it's the kind of salsa that doesn't burn immediately but you can't stop eating it because your mouth is on fire...so long as you are eating it, it's tolerated...just don't stop. I should have known...lots of jalapeno seeds visible! Good chips and good salsa.
The teen said the burger was excellent. The patty was large...and he orders it plain and dry, so the meat is of prime consideration. The bun was toasted and fresh looking. The fries were thick steak cut fries and he said they were good. My order was outstanding. Tasty enchiladas, excellent refried beans and Spanish rice...you can tell these were sides that didn't come out of a can - they were made, I would guess, right there in the kitchen.
The price for lunch was $18.69 plus tip. We were filled to the point of feeling stuffed and needing a siesta...but no time for siestas today :-)
I'm happy to find another great local restaurant that makes good enchiladas. Other reviews I've read rave about their breakfast. I don't go out for breakfast much, but when I do, I'll be sure to remember Manuel's and give them another try!
SPI FLIP FLOP FOODIE RATING:
3 1/2 – Yummy - I feel my flip flops wanting to head back from time to time!Bon Appetit, Y'all!!!
Wednesday, June 15, 2011
CHOCOLATE SPONGE CAKE WITH DECADENT FILLING
This week has been slow to get back to a normal week. There's been so much to do and to prepare to do next week...I have not baked at all...and dinners have been fly by the seat of your pants and "hope there's something in the pantry" to pull together!
I saw Stephanie Jaworski, of JoyofBaking.com, posted a video demonstrating chocolate sponge cake, rolled up with a raspberry cream filling. I watched the entire video and started thinking about how much I'd always wanted to make a sponge cake, but for some reason, I've shied away from them. Her demonstration made it look "doable". If you decide to make this and have not made one before, I'd greatly encourage you to link to her video (below the title of the recipe) and watch the entire thing. Great demonstration. I am not a big fan of raspberry cream filling - it's not one of my favorites...but the stuff inside woopie pies IS a favorite...and I started asking myself if I couldn't just whip up some marshmallow fluff and some whipped cream and lay that down for the "roll up" part of the deal...sounded REAL good to me...so Wednesday, that was my afternoon activity.
CHOCOLATE SPONGE CAKE
Adapted From Stephanie Jaworski at JoyofBaking.com
Ingredients:
Preheat oven to 350 degrees Fahrenheit with rack in middle position. Prepare a 17x12 inch sheet pan by spraying pan with vegetable spray (like Pam or Mazola or one of those). Cut a piece of parchment paper the size of your sheet pan, place it on top of the sprayed surface, then spray it and the sides of the pan with a baking spray (like Baker's Joy) that has both oil and flour in it. Set aside.
In the bowl of a stand mixer, beat the 6 egg yolks and 1/4 cup of granulated sugar on high speed until the mixture becomes thick and light yellow and fluffy. This will take about 5 minutes. When you raise your beater the mixture will fall back on itself in a slow ribbon.
Next add the vanilla extract and mix well. Add melted room temperature chocolate just until incorporated.
If you are like me and only have one bowl for the stand mixer, transfer this mixture to a large bowl, scraping out every little bit! Wash your mixer bowl thoroughly, with soap and hot water to ensure no oil is left in the bowl and dry thoroughly. Squeaky clean!!!
Return mixing bowl to stand mixer and add the egg whites. Attach the whisk attachment and beat on medium until foamy. Add the cream of tartar and beat at medium-high until soft peaks form. Raise the speed to high and slowly add, bit by bit, the 2 tablespoons of granulated sugar. Beat until stiff peaks form.
Place 1/3 of the egg whites in the egg yolk and chocolate mixture and mix well to lighten. Fold in the 2nd third of the egg whites, being careful not to deflate. You'll have noticed there is no leavening in this cake - the egg whites do all the work. Add the last of the egg whites and gently fold. It's okay if there are a few white streaks...it comes together in the oven.
Spread the batter into the prepared baking sheet and using an offset spatula, evenly distribute it to the edges of the pan. Gently tap the pan and you'll see bubbles popping.
Bake until cake has lightly puffed and has lost its gloss (15-17 minutes). It will spring back when lightly touched. Remove from oven and place on cooling rack. Cover the entire cake with a clean, lightly dampened cloth while cooling so cake top does not dry out and crack when you try to roll it. I sprayed my cloth with a spray bottle. It takes at least 30 minutes to cool.
Slide the cake, still on the parchment paper off of the pan. If any sides are attached, loosen them with a sharp knife before removing the cake. Mine slid out like "buttah".
MARSHMALLOW WHIPPED CREAM
1 cup heavy whipping cream
1 7 oz. jar Marshmallow Cream
1 1/2 tsp pure vanilla extract
In bowl of stand mixer with whisk attachment, whip heavy cream and vanilla until soft peaks.
Add the entire jar of marshmallow cream and whip on high until well incorporated and firm peaks form.
Spoon all of this decadent whipped topping onto the top of the cake (still on the parchment) and spread evenly to all sides with an offset spatula.
You can roll the cake long or short...obviously short gives you a taller cake with more rolls. Long will give you a shorter cake and would be nice for "small bites". Since this cake is literally melt-in-your mouth, I wanted big pieces :-)
This is where I might advise, once again, to take a peek at Stephanie Jaworski's video. It really helps you get the technique of using the paper to help roll the cake with the filling.
Holy deliciousness Batman...I ate two pieces already...and it's not dinner yet! I did share a piece with the teen...who was, surprisingly, not as impressed as I was. He said "it's okay". Perhaps you need to have a more mature palate to appreciate the melt-in-the-mouth light chocolately AWESOMENESS of this cake. I don't care if I have to eat the whole thing by myself. I'll just go swim laps or something...
I think the teen thought this was going to be like a Little Debbie Swiss Roll...but it's not...although, I may have to work on that...hmmmm...
BON APPETIT, Y'ALL!!!
SHARED WITH:
I saw Stephanie Jaworski, of JoyofBaking.com, posted a video demonstrating chocolate sponge cake, rolled up with a raspberry cream filling. I watched the entire video and started thinking about how much I'd always wanted to make a sponge cake, but for some reason, I've shied away from them. Her demonstration made it look "doable". If you decide to make this and have not made one before, I'd greatly encourage you to link to her video (below the title of the recipe) and watch the entire thing. Great demonstration. I am not a big fan of raspberry cream filling - it's not one of my favorites...but the stuff inside woopie pies IS a favorite...and I started asking myself if I couldn't just whip up some marshmallow fluff and some whipped cream and lay that down for the "roll up" part of the deal...sounded REAL good to me...so Wednesday, that was my afternoon activity.
CHOCOLATE SPONGE CAKE
Adapted From Stephanie Jaworski at JoyofBaking.com
Ingredients:
- 6 eggs, separated while cold, allow to come to room temperature
- 1/4 cup granulated white sugar, plus 2 tablespoons more, separated
- 1 teaspoon pure vanilla extract
- 4 ounces semi-sweet chocolate, melted, and cooled to room temperature (I used Callebaut Semi-sweet chocolate chunks and melted them in the microwave)
- 1/2 tsp cream of tartar
Chocolate melted and cooled |
Eggs Separated and to room temperature |
Method:
Preheat oven to 350 degrees Fahrenheit with rack in middle position. Prepare a 17x12 inch sheet pan by spraying pan with vegetable spray (like Pam or Mazola or one of those). Cut a piece of parchment paper the size of your sheet pan, place it on top of the sprayed surface, then spray it and the sides of the pan with a baking spray (like Baker's Joy) that has both oil and flour in it. Set aside.
In the bowl of a stand mixer, beat the 6 egg yolks and 1/4 cup of granulated sugar on high speed until the mixture becomes thick and light yellow and fluffy. This will take about 5 minutes. When you raise your beater the mixture will fall back on itself in a slow ribbon.
Egg yolks and sugar to slow ribbon stage |
Next add the vanilla extract and mix well. Add melted room temperature chocolate just until incorporated.
Chocolate mixed into egg yolk mixture |
If you are like me and only have one bowl for the stand mixer, transfer this mixture to a large bowl, scraping out every little bit! Wash your mixer bowl thoroughly, with soap and hot water to ensure no oil is left in the bowl and dry thoroughly. Squeaky clean!!!
Return mixing bowl to stand mixer and add the egg whites. Attach the whisk attachment and beat on medium until foamy. Add the cream of tartar and beat at medium-high until soft peaks form. Raise the speed to high and slowly add, bit by bit, the 2 tablespoons of granulated sugar. Beat until stiff peaks form.
Stiff peaks! |
Place 1/3 of the egg whites in the egg yolk and chocolate mixture and mix well to lighten. Fold in the 2nd third of the egg whites, being careful not to deflate. You'll have noticed there is no leavening in this cake - the egg whites do all the work. Add the last of the egg whites and gently fold. It's okay if there are a few white streaks...it comes together in the oven.
After lightening, added another 1/3 of the egg whites to chocolate mix |
the batter is ready! |
Spread the batter into the prepared baking sheet and using an offset spatula, evenly distribute it to the edges of the pan. Gently tap the pan and you'll see bubbles popping.
batter in the pan - gently tapped - to pop some of the bubbles |
Bake until cake has lightly puffed and has lost its gloss (15-17 minutes). It will spring back when lightly touched. Remove from oven and place on cooling rack. Cover the entire cake with a clean, lightly dampened cloth while cooling so cake top does not dry out and crack when you try to roll it. I sprayed my cloth with a spray bottle. It takes at least 30 minutes to cool.
Slide the cake, still on the parchment paper off of the pan. If any sides are attached, loosen them with a sharp knife before removing the cake. Mine slid out like "buttah".
Cooled cake removed to counter on parchment |
MARSHMALLOW WHIPPED CREAM
1 cup heavy whipping cream
1 7 oz. jar Marshmallow Cream
1 1/2 tsp pure vanilla extract
In bowl of stand mixer with whisk attachment, whip heavy cream and vanilla until soft peaks.
Whipped cream |
Add the entire jar of marshmallow cream and whip on high until well incorporated and firm peaks form.
The Marshmallow Creme mixed into whipped cream - yum! |
Spoon all of this decadent whipped topping onto the top of the cake (still on the parchment) and spread evenly to all sides with an offset spatula.
Filling on the cake - and rolling begins - gently separate from paper |
You can roll the cake long or short...obviously short gives you a taller cake with more rolls. Long will give you a shorter cake and would be nice for "small bites". Since this cake is literally melt-in-your mouth, I wanted big pieces :-)
This is where I might advise, once again, to take a peek at Stephanie Jaworski's video. It really helps you get the technique of using the paper to help roll the cake with the filling.
Sprinkled with powdered sugar...or some cocoa would be good |
Holy deliciousness Batman...I ate two pieces already...and it's not dinner yet! I did share a piece with the teen...who was, surprisingly, not as impressed as I was. He said "it's okay". Perhaps you need to have a more mature palate to appreciate the melt-in-the-mouth light chocolately AWESOMENESS of this cake. I don't care if I have to eat the whole thing by myself. I'll just go swim laps or something...
OMG - this is so light and delicious...melts in your mouth - you'll notice - NO FLOUR in the cake! |
I think the teen thought this was going to be like a Little Debbie Swiss Roll...but it's not...although, I may have to work on that...hmmmm...
BON APPETIT, Y'ALL!!!
SHARED WITH:
Sunday, June 12, 2011
Kemp's Ridley Sea Turtle Hatchling Release
A slide show of some pictures and unedited video I took early Sunday morning.
The second release of babies this season (the first was Saturday) on South Padre Island.
For more information on these highly endangered creatures, check out Sea Turtle, Inc., home of our local sea turtle rescue and rehab facility.
The second release of babies this season (the first was Saturday) on South Padre Island.
For more information on these highly endangered creatures, check out Sea Turtle, Inc., home of our local sea turtle rescue and rehab facility.
Saturday, June 11, 2011
LASAGNA FOR A CROWD
I didn't take photos while I was preparing this huge recipe of lasagna...but I'll tell you, it was quite the endeavor to find pans in my house large enough to do the deed! I wasn't going to do a post, but I decided I would so I could share what I found out through the process. Little things like "don't overfill the pan if you have to travel with it"...duh!
I made a quadruple recipe of lasagna, tried a new dessert recipe, and I had to transport all our beach accoutrement, drinks, 5 bottles of flipflop wine, paper goods...so, needless to say, I learned a bit about how I might do it differently in the future. So, here goes...
BIG-ASS PAN OF LASAGNA
Ingredients:
Sauce:
1/4 cup extra virgin olive oil
2 pounds ground chuck
2 pounds ground sirloin
3/4 really large sweet yellow onion (or 2 medium yellow onions) - diced
3-4 large garlic cloves - finely minced (I used my Martha Stewart garlic press)
4 bottles Bertolli 5-Cheese Pasta Sauce
5 8-ounce cans tomato sauce
About 1 cup of water (rinsing bottles of sauce and cans of sauce)
1 tsp Italian Seasoning
1 tsp kosher salt
1 tsp ground black pepper
1 tsp onion powder
1 tsp garlic powder
Creamed Ricotta:
4 recipes of homemade Ricotta Cheese
1 cup fresh basil leaves
8 large eggs
2 teaspoons kosher salt
1 heaping teaspoon Italian Seasoning
1 1/2 pounds grated Mozzarella Cheese
1 cup grated Parmesan Cheese
3 Large boxes Ronzoni Healthy Harvest Whole Grain Lasagna Noodles - uncooked
Method:
Place olive oil in a large dutch oven over medium heat. Add chopped onions and salt and saute until onions are nearly translucent. Add garlic and saute for another 2 minutes. Crumble in ground chuck and ground sirloin and brown. Drain excess oil from pan and add Bertolli sauce and tomato sauce, rinsing bottles and cans with the water and adding it to the pot too.
Add the rest of the seasonings listed in the sauce section. Simmer while you prepare the rest of the ingredients. This amount of sauce came to the very top of my dutch oven. I did get a smaller sauce pan out and transferred some of the meat and onions over to cook it in two separate pans. It was too unwieldy in one pan. If you have a stock pot - that would work best.
Place the ricotta cheese in the large bowl of your food processor. Add eggs, fresh basil, salt, and Italian seasoning and pulse until creamy. If you have really dry ricotta (as in, you let it drain more than called for in the recipe like I did), and end up with big lumps, add some whole milk or half and half and pulse until you get a creamy texture. That really helped things along.
Set up your assembly line to prepare the lasagna. I used a commercial catering pan that I happen to have. A roasting pan will work also. The pan I used was 19 1/2 inches long and 12 inches wide and 3 inches deep...4 inches deep would have been better!
Using a large ladle, scoop 1/4 of the sauce into the bottom of the pan. Lay pieces of uncooked lasagna side by side to completely cover the bottom of the pan. I first laid them long-ways but they didn't fit well...so I rearranged them and laid them along the 12 inch direction...and they fit perfectly.
Ladle another 1/4 of the sauce over the noodles.
Cover the sauce with dollops of 1/2 of the ricotta mixture. It will expand - it doesn't have to be perfectly smoothed out. Many small dollops work fine.
Layer 1/2 pound of grated Mozzarella cheese over ricotta mixture.
Gently press another layer of uncooked lasagna noodles into the cheese.
Ladle another 1/4 of the sauce over the noodles.
Cover the sauce with dollops of the rest of the ricotta mixture.
Layer 1/2 pound of grated Mozzarella cheese over the ricotta mixture.
Gently press another layer of uncooked lasagna noodles into the cheese.
Layer the last of the sauce over the noodles.
Cover the sauce with 1/2 pound of grate Mozzarella cheese.
Caution when lifting the pan into the oven. It is extraordinarily heavy!!! If you use a disposable pan, you MUST have something underneath it to support the weight.
Bake at 275 degrees for 1 1/2 hours to 2 hours.
Add 1/2 of Parmesan cheese to top and bake 10 more minutes.
Remove from oven and allow to sit for at least 15-20 minutes before cutting with a sharp knife and serving with a sturdy spatula/pancake turner. Pass the extra Parmesan cheese when you serve.
It was a delicious lasagna - lots of work - but worth every minute!!! We had a big bowl of salad and some garlic toast to go with it (yum), some tasty flipflop wines, and topped it off with a Dulce de Leche Banana Cream Pie. Can you say "waddle"? What is it about being at the beach, in the sun, that makes you ravenous? Whatever - good food, good friends, good times!
Bon Appetit, Y'all!!!
Thursday, June 9, 2011
DULCE de LECHE BANANA CREAM PIE
For one of our beachy dinners for the Deaf Club (a group of over 20 folks) I made a version of Food Network's Marcela Valladolid's Dulce de Leche Banana Cream Pie. I made a few alterations...and boy was it good! If you want to take a yummy dessert to a pot luck or serve something slightly different for dessert, this is a great one to try. I'm recording my larger recipe...because one little pie wouldn't have done the trick.
We didn't quite finish it Wednesday night, so we had coffee and pie after the beach on Thursday. Even better the next day :-)
DULCE de LECHE BANANA CREAM PIE
Adapted from Marcela Valladolid's recipe
Ingredients:
2 7-ounce packages Marias Cookies (a Mexican cookie, tastes a lot like animal crackers in my opinion) - available in the cookie aisle of most grocery stores - with the Hispanic cookie selection
1/4 teaspoon salt
2 sticks (1 cup) unsalted butter, melted (or if you use salted butter, don't add the salt above)
8 ounces cream cheese, room temperature
1 stick (1/2 cup) unsalted butter, room temperature
4 tablespoons powdered sugar
4 teaspoons ground cinnamon
2 cups heavy whipping cream
2 cans dulce de leche (used Nestle's La Lechera Dulce de Leche)
6 medium bananas, sliced
Method:
For the crust:
Place the Maria cookies in the bowl of your food processor and process until coarsely ground.
Add the salt and pulse until everything is finely ground.
Add melted butter and pulse until combined.
When pressing with fingers, crumbs will hold together when proper texture.
Transfer the crust mixture into a 9x13 glass dish (I used a Pyrex dish). Spread the crumbs evenly and use the bottom of a measuring cup to press and form the crust evenly across the bottom and up the sides of the pan. Refrigerate for 20 to 30 minutes to solidify the butter.
For the cream filling:
In the bowl of a stand mixer with the beater attachment, whip the cream cheese and butter at medium speed until fluffy with minimal lumps. Add the powdered sugar and cinnamon, whipping just until combined. Replace the beater with the whip attachment and pour the whipping cream and whip to soft peaks. It goes pretty fast so be careful - I went a little further than I should have and nearly had stiff peaks.
To assemble the pie:
Spread the dulce de leche on top of the chilled crust. I put a lot in the crust and spread with an offset spatula. Careful not to dislodge crumbs from the crust. It smoothed on surprisingly easily. I used about 1 1/2 cans of Dulce de Leche.
Top generously with sliced bananas, forming 2 layers if necessary. I used an overlapping line method to insure every bite had banana.
Pour the whipped cream filling on top and spread evenly to completely cover the banana layer. I actually covered the edge of the crust too.
Refrigerate and chill until set - about 2 hours.
I put the remaining Dulce de Leche in a quart sized freezer Ziploc bag and piped drops onto the top of the pie.
Cut into squares with a sharp knife, wiping the knife between slices. When serving, I stuck a whole Maria cookie into the top of each dollop of Dulce de Leche.
I must say, it got rave reviews. Deliciosa!
Bon Appetit, Y'all!!!
SHARED WITH:
We didn't quite finish it Wednesday night, so we had coffee and pie after the beach on Thursday. Even better the next day :-)
DULCE de LECHE BANANA CREAM PIE
Adapted from Marcela Valladolid's recipe
Ingredients:
2 7-ounce packages Marias Cookies (a Mexican cookie, tastes a lot like animal crackers in my opinion) - available in the cookie aisle of most grocery stores - with the Hispanic cookie selection
1/4 teaspoon salt
2 sticks (1 cup) unsalted butter, melted (or if you use salted butter, don't add the salt above)
8 ounces cream cheese, room temperature
1 stick (1/2 cup) unsalted butter, room temperature
4 tablespoons powdered sugar
4 teaspoons ground cinnamon
2 cups heavy whipping cream
2 cans dulce de leche (used Nestle's La Lechera Dulce de Leche)
6 medium bananas, sliced
Method:
For the crust:
Place the Maria cookies in the bowl of your food processor and process until coarsely ground.
Add the salt and pulse until everything is finely ground.
Add melted butter and pulse until combined.
When pressing with fingers, crumbs will hold together when proper texture.
Transfer the crust mixture into a 9x13 glass dish (I used a Pyrex dish). Spread the crumbs evenly and use the bottom of a measuring cup to press and form the crust evenly across the bottom and up the sides of the pan. Refrigerate for 20 to 30 minutes to solidify the butter.
For the cream filling:
In the bowl of a stand mixer with the beater attachment, whip the cream cheese and butter at medium speed until fluffy with minimal lumps. Add the powdered sugar and cinnamon, whipping just until combined. Replace the beater with the whip attachment and pour the whipping cream and whip to soft peaks. It goes pretty fast so be careful - I went a little further than I should have and nearly had stiff peaks.
To assemble the pie:
Spread the dulce de leche on top of the chilled crust. I put a lot in the crust and spread with an offset spatula. Careful not to dislodge crumbs from the crust. It smoothed on surprisingly easily. I used about 1 1/2 cans of Dulce de Leche.
Top generously with sliced bananas, forming 2 layers if necessary. I used an overlapping line method to insure every bite had banana.
Pour the whipped cream filling on top and spread evenly to completely cover the banana layer. I actually covered the edge of the crust too.
Refrigerate and chill until set - about 2 hours.
I put the remaining Dulce de Leche in a quart sized freezer Ziploc bag and piped drops onto the top of the pie.
Cut into squares with a sharp knife, wiping the knife between slices. When serving, I stuck a whole Maria cookie into the top of each dollop of Dulce de Leche.
I must say, it got rave reviews. Deliciosa!
Bon Appetit, Y'all!!!
SHARED WITH:
Subscribe to:
Posts (Atom)