 |
| My second attempt at painting a cookie |
I tried using Karen's Cookies Meringue Powder Buttercream this week...I had printed her recipe - but it's been over a year since I watched the video...and I missed some key things this time around...now duly noted on my printed copy.
1. Need to measure loose powdered sugar, not packed (I was in a hurry and dug it right out of the bag). Which follows rapidly with, don't make anything at midnight right before going to bed - the reason "I was in a hurry"!
2. Those living in more humid areas were advised to use extra meringue powder. I did not. Two days of being under the fan and I still have a softness under the crust. (not me, silly, the COOKIES).
3. Either #2 is in play, or you cannot use food color markers without breaking through Meringue Powder Buttercream.
4. Air brushing is different on MPB than on RI...I guess the buttercream aspect makes it slick and much harder to use a stencil. I wrecked a couple of cookies trying to work that out. I'll stick to Royal Icing for stenciling and air brushing in my immediate future! Here's a photo of a couple of the fails (my friends tell me they want to see the fails too - so I am begrudgingly showing the ones that have not been eaten yet - the hubs gets the fails).
 |
| Mr. Flip Flop said (as he was biting into the sister failure of this cookie) that it looks like a tile - kind of an old tile...he thought I did it on purpose. In reality, I used an adhesive back stencil (which never has damaged a RI cookie) and it ripped the crust right off the cookie after I airbrushed it. Yikes. |
 |
| I used a lot of "stuff " to cover up the defects in this cookie. The pearl sheen pink air brush color on a vinyl stencil seemed gummy...and then I touched it... after I mushed the not totally crusted white base. This cookie didn't have a chance. So, I over-decorated it with some dots and royal icing ribbon roses I had on hand. It ended up being "okay" - but a wee bit too busy! |
5. MPB works beautifully for flowers - I have not had much luck with getting my royal icing to an appropriate consistency to hold up well, yet not cramp my hand while piping it. The blue cookie flower was RI and the orange one below was MPB - you can really see the difference in how they stood up - same tip was used (#102 or #103 Wilton - can't recall which one I ended up with)
 |
| Royal Icing flower accented with a RI transfer I made last month |
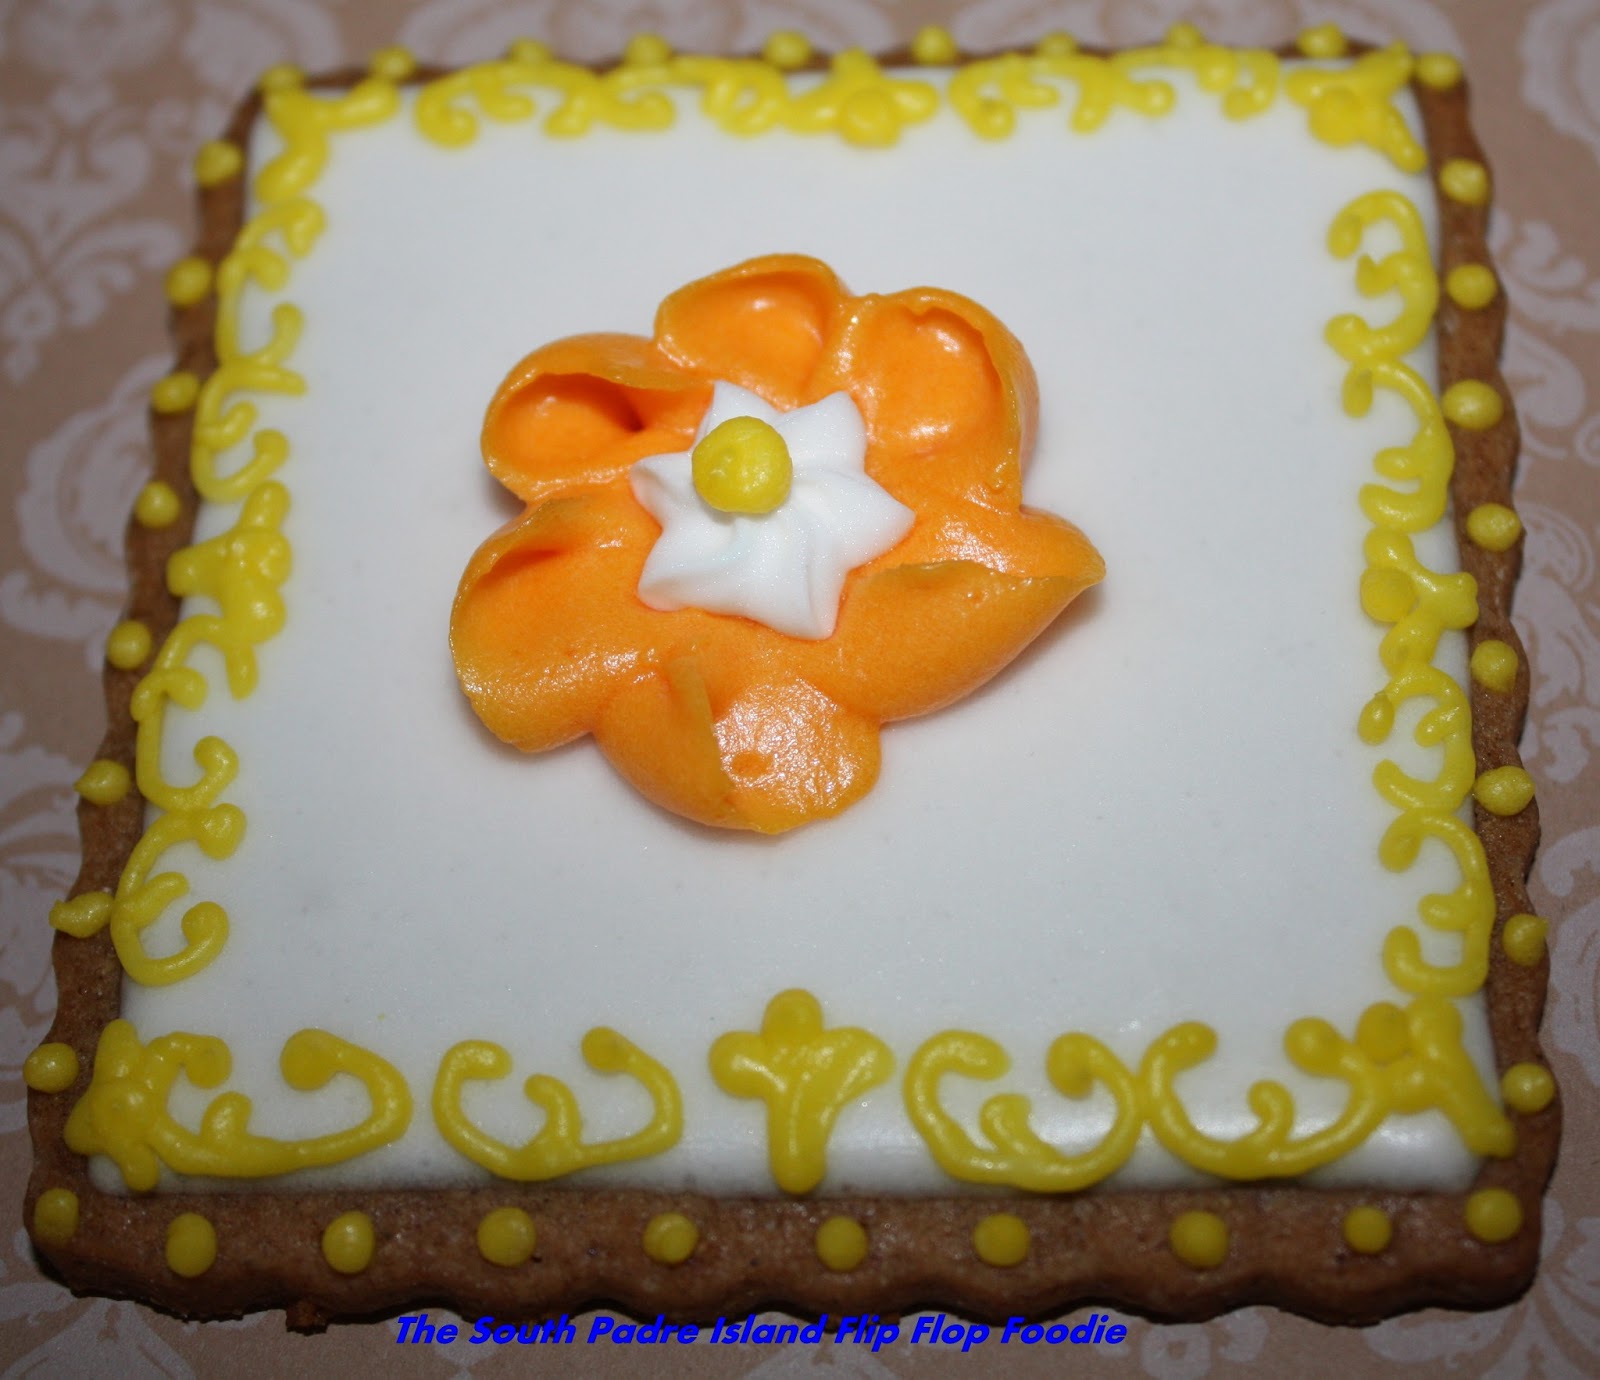 |
| The Meringue Powder Buttercream really held the shape better although it did not do so well with the border piping...I used a PME 1.5 tip so I know it was the icing that was the issue. |
I wanted to make some Zinnia's to honor my late sister and they turned out pretty good. They do, however, have a LOT of icing on them. Who knows how long it will take for these to dry!!! I also did some mini leaf cookies topped with royal icing that I had left over in the fridge. I managed to use up the last of all I had saved via several of these cookies.
 |
| MPB Zinnia and RI leaves! |
I also experimented with the airbrush (as noted above) and used the technique learned from Montreal Confections wherein one places a piece of lace over the cookie and then airbrushes over it. I tried it on mini butterfly cookies - they turned out cute! Was able to do 4 cookies at a time under one piece of lace. The lace was light enough not to disturb the crust and it cleaned up beautifully after the experiment too. I went ahead and embellished afterwards - not my best piping, but again, working late at night is not my best time for keeping an even hand. Note to self...when spraying straight downwards, don't tip the air gun to the point food color runs out onto your cookies - not pretty. Lots of blue splatter on one cookie...which was eaten before anyone saw the evidence.
 |
| Lace Airbrush Butterfly Minis |
The larger butterflies were all airbrushed with pink sheen air brush by AmeriColor. It took a long time to dry. My completion of the butterflies was at a point where I just wanted to use up some of the colored icing I had on hand. I actually like the pink,gray, and white theme I ended up with...maybe not so much the blue one - it was a bit "busy"...but...week of experiments, right?


I made some Sea Gulls with fairly basic feathering...couldn't seem to get the perspective right though. I've seen different Sea Gull cookie cutters - I may have to get one so I'm not making this so hard on myself.

Last, but not least, I took the scary, heart-pounding leap and decorated two cookies by hand painting them. I am so NOT an artist. The first one is a better bird, with a kindergardenish sun in the background...the second one the bird's beak is way too big and his legs are too fat...and I messed up by painting yellow into blue...which magically became green (duh)! I love looking at the blue herons wading in the shallow bay outside my window. This was my homage to herons. I need to take an art class - I need help with perspective and simple "how to draw things". It does not come naturally to me at all!


Well - that's this week's enterprise. I'll be seeing family this week-end so I hope they are willing to eat the experiments!
All cookies used this week were Apple Butter Sugar Cookies (recipe linked here). It is a wonderful spicy cookie and is tender to the tooth. I do bake the large ones a little longer so they don't break - better to be a little hard than too soft when decorating. My icing was flavored with pure vanilla extract and 1/4 tsp cinnamon extract. The combo goes beautifully with this cookie.
Thanks for sticking with me, I finally feel like I'm getting back into the swing of baking and decorating after several months of not being able to gather the energy... and that is a VERY good thing!
Bon Appetit, Y'all!!!
Shared With:

Great post!! Loved that you showed the bad, too! Well done.
ReplyDeleteThank you Patti :-)
DeleteThese are wonderful!
ReplyDeletei thought the heron was a little china plate when I saw the thumbnail on anything blue party! such detail!
I have an art degree and have yet been able to decorate a decent cookie!
Christina that nearly brought tears to my eyes! Thanks for a world class complement! There are some cookie painting tutorials on youtube that are really helpful - all you have to do is get a flat base coat on a really flat cookie - then it's just gel food color and vodka to thin it...away you go! Some use water - I like that the vodka dries rapidly. Check out this cookie artist demonstration: http://www.youtube.com/watch?v=KrVsUApwDRI Arty McGoo is awesome!
Delete