The South Padre Island Flip Flop Foodie Brownsville restaurants

Search The South Padre Island Flip Flop Foodie Blog!

Sunday, October 31, 2010

Booooooo.... Happy Halloween!

It's Halloween today - one of the holidays I have always enjoyed.  When I lived in Austin, we decorated the house and yard and had pumpkin carving parties...it was great fun.  I also had my little grandbabies who enjoyed coming to Grandma's house because there were lots of bowls of candy and spooky decor for several weeks before the 31st!

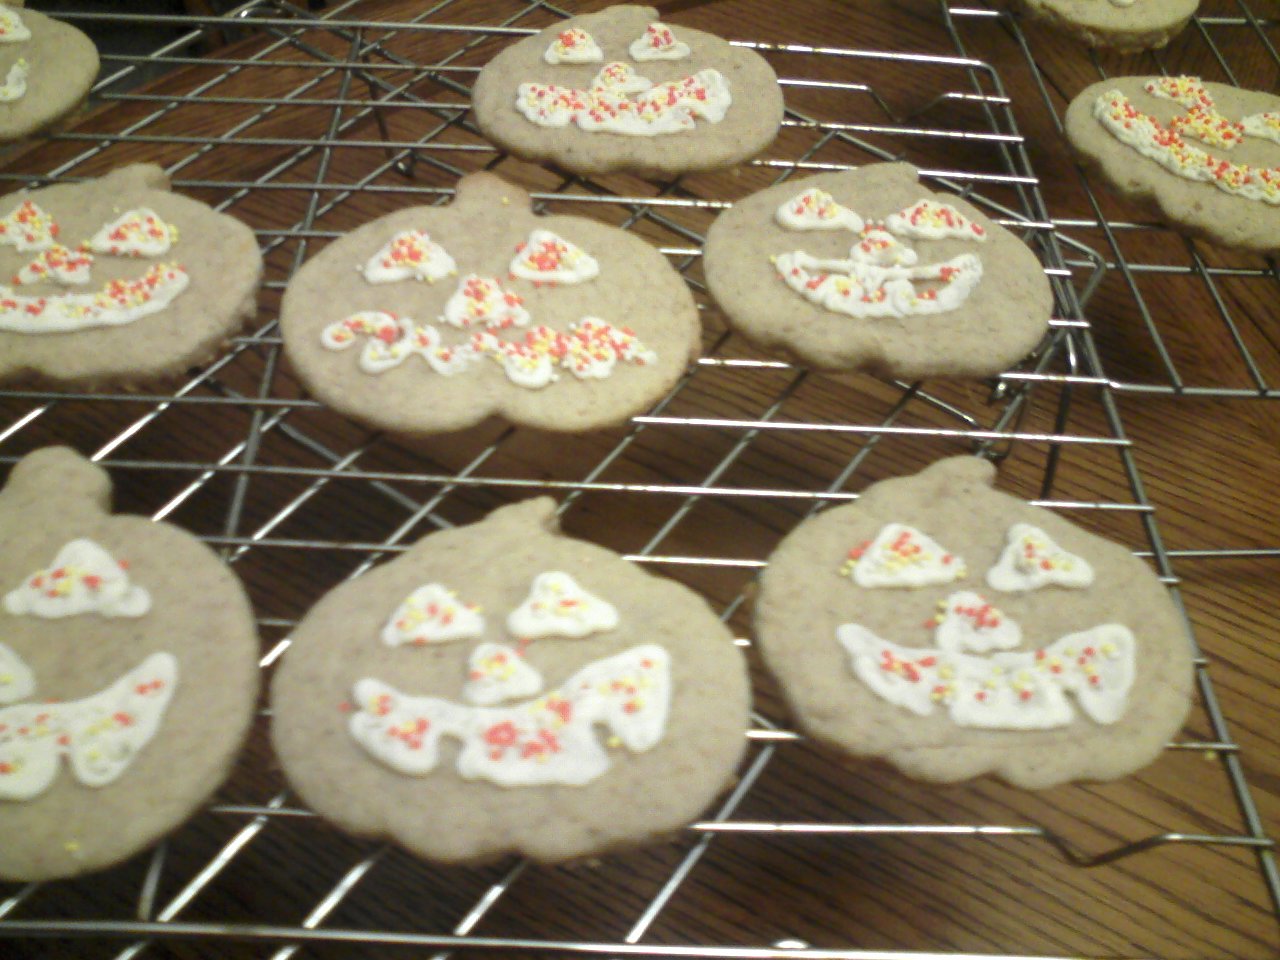
Now, well, the celebration is pretty limited.  I have a couple of Halloween shirts that are cool enough to wear here at the coast...I do very minimal decorating...and I'm keeping the candy to a negligible amount as well (or else I eat too much)!  What I do enjoy, though, is the baking that starts to gear up around this time of year.  It's like the prelude to Thanksgiving and Christmas...sort of sticking in your toes to test the water.  In earlier posts I wrote about the pumpkins and ghosts that I baked using a cookie recipe I tweaked to incorporate some acorn squash I had.  Those are long gone...and today is the day, so I wanted something fairly easy to do, yet still delicious.

I am a fan of Joy of Baking on Facebook...and her website too!  The recipes have always been good and I like that she has pictures.  Today's offering was Fudgy Chocolate Brownies and that sounded fabulous.  I just took them out of the oven and my condo smells like Willy Wonka's factory!  My goodness - that pound and a half of chocolate made an incredibly thick batter and a resulted in a oh-so-chocolatey smell that lured the teen from his man cave (it takes a lot to do that!).

I linked the web site - but I'm going to type in the recipe here for future reference - specifically the way I made it.

Fudgy Chocolate Brownies:
1 1/2 pounds of semi-sweet or bittersweet chocolate, chopped (I used 12 oz of 60% cacao chocolate chips and 12 oz of semi-sweet chocolate chips - because that's what I had)
1 cup (2 sticks) of butter, cut into pieces
6 large eggs (I had mine at room temperature)
2 cups granulated sugar
1 tablespoon pure vanilla extract
1 1/2 cups all-purpose flour (I use unbleached flour whenever possible)
1 teaspoon baking powder
1/4 teaspoon salt

Pre-heat oven to 350 degrees and place rack in center of oven. 
Butter (or spray with a nonstick cooking spray, which is what I did) a 9 x 13 inch pan. 
Then line the pan with parchment paper. (I lined only the bottom and ran a sharp knife along the edge of the pan before removing - I wish I had completely lined with parchment - it would have been easier to remove...especially if I had left some excess sticking up so they could be lifted out)
Melt the chocolate and butter in a large heatproof bowl placed over a saucepan of simmering water. Stir to incorporate to a smooth consistency.
Remove from heat and set aside. 
Meanwhile, in a large bowl whisk (I used a stand mixer) together the eggs and sugar.
Fold in the melted chocolate mixture and vanilla extract. (I didn't really fold - I put the mixer on slow and carefully poured the chocolate in)
Whisk together the flour, baking powder, and salt
and then fold the dry ingredients into the chocolate and sugar mixture until well combined.
(I had about 1/2 cup of milk chocolate morsels leftover from previous baking - I tossed those in the batter whole - you could also chop and toss in some nuts if desired)
Pour batter into the prepared pan and bake for about 40-50 minutes (mine took 50 minutes), or until a toothpick inserted in the center comes out with a few moist crumbs. (Don't overcook - makes for dry brownies)  Remove from oven and let cool on a wire rack.  Serve at room temperature or chilled.  Store leftovers in the refrigerator.  These freeze very well.
Makes about 32 brownies (I cut my batch into large pieces - 24 brownies to accommodate the decor).

It took a long time for them to cool to room temperature because they are some THICK brownies...call it baked fudge and it's a more apt description.  They are dy-no-MITE.  I decorated with powdered sugar and some Halloween stencils I had on hand.  I frosted a couple with some leftover frosting I had in the fridge - the top is crackly so that didn't work so well.  I did have fun...so I count my Halloween as complete.  Now, I need to take some of these to my neighbor, to get them OUT of my house... or I will be sorry!!!
 
I'd certainly recommend this recipe - and have printed it and put it in my old fashioned recipe box - it will become a favorite I'm sure! (sorry about the format issues - Blogspot apparently has ghosts and goblins in their platform today...it is NOT doing what I tell it - and I give up!  BOO! The trick's on me I guess :-)

Happy Halloween y'all !!!


StumbleUpon

Friday, October 29, 2010

Eating with Gusto!

My niece and her husband were visiting the island this week.  It was soooo windy all week that they only got one good day on the beach.  I think they enjoyed the after-festival viewing of the sand castles from Sand Castle Days and just hanging out at their hotel.  We had dinner together at Gabriella's on Tuesday evening and enjoyed talking smack with our jovial waiter.  We plowed through the delectable calamari with marinara sauce in under 5 minutes.  I need to teach the teen how to truly "share" a shared appetizer!  He ate most of it, the piggy!  Holly and I both had Bowtie Pasta Carbonara - it was awesome.  The intensely flavorful asiago cheese has just the right bite for the rich creamy sauce.  Big pieces of bacon didn't hurt either as well as thin bite sized pieces of chicken!  Really, it was about perfect.  We both took leftovers home (and I greatly enjoyed mine for lunch the next day).  Her husband had Pasta a la Tonno which featured a flaky yellow fin tuna over linguini with a creamy pink sauce - sun dried tomatoes, fire roasted red peppers, garlic and mushrooms.  It looked delicious and he cleaned his plate - so I'm guessing it was!  The teen had, surprisingly, a new dish (for him) - Shrimp fra Diava - which was a big pile of onions and peppers and Gulf shrimp over pasta with a white wine sauce.  He put a good sized dent in the dish but did say the sauce tasted too much like alcohol for him.  I think he would have been happier with a buttery garlic sauce - but I was glad he tried something new!  After the salad and bread and small antipasti plate, we had no room for dessert.  It lived up to my expectations again!  Gabriella's has a new website which I've linked here.  My complaint is that you can't see the entire menu at a reasonable size.  Hopefully their web master will get that fixed.  My old eyes can't handle that small print!  They are also now on Facebook - so "like" them here!

On Thursday we had scheduled to go to Louie's Backyard for the sunset and buffet when I saw this photo appear on Facebook!  Instead of Joe vs the Volcano...it was TONY vs the PadreRitaVille Nacho Volcano!!!

Photo by Holly Monnich
They went for a late lunch and thought they were "just getting an appetizer" when they saw what Cathy and Micheal have to offer.  It really can't be beat!  I messaged them that we could forgo dinner if desired - but they said no "you only live once" and they would meet us there before sunset!  They enjoyed watching several of the island's sand sculptors carving pumpkins at PadreRitaVille and got to meet a few as well.  I'm glad they had a good time.  I couldn't believe they still wanted dinner - but I was glad.  I haven't been to the Louie's buffet in a good while and was looking forward to it.

The evening was so windy, though, we sort of "waved" at the sun going down and scurried into the inside dining area.  We gorged on crab legs, prime rib, fried shrimp, a spicy shrimp scampi sort of dish, (I had salad I might piously add), baked potato, corn on the cob, barbecued ribs, boiled shrimp...and I don't know what else everyone had... unbelievably, we ordered a huge piece of chocolate cake for dessert.  With 4 forks though - we shared :-)

We stayed for over 2 hours and I bet they were glad when we left!  Although, I will say, we didn't eat the whole time.  We chatted and told old family stories and just had a great visit.  Service was great - they weren't crowded and our table was kept cleared and our drinks filled.  That's always a plus! 

They left this morning and are safely back in Austin.  I miss them already.  They are fun people.

As a side note, the teen was very social - he knew people working there (from school) and went out on the deck and met another person he knew out there.  It's nice to see that he's settled in so nicely here.  It was a good move for us.

Anyway - thanks Holly and Tony for the good times - and the great photo of the Nacho Volcano.  It's fun to dine out with other foodies!

Gabriella's Italian Grill & Pizzeria on Urbanspoon
Louie's Back Yard on UrbanspoonPadreRitaVille on UrbanspoonStumbleUpon

Tuesday, October 26, 2010

Sand Castle Days...our fun week-end

Many of you know that my hubby has been in town and we've been having a grand time.  We had a wonderful home cooked meal (if I do say so myself) on Saturday night.  I used the Snapper recipe I wrote about before and this time added 12 super jumbo shrimp to the two large snapper filets I got at Quik Stop to send the dish over the top.  You KNOW you have fresh seafood when you open the package, handle the fish, peel the shrimp...and your hands don't smell like seafood.  The seafood smelled like fresh ocean water.  Simply superb.  I used the chef's pan style of preparation instead of the individual packets.  We gorged!  It was rockin' good food.  We were stuffed to the gills <chuckle chuckle - pun intended>.

Sunday we went over to Sand Castle Days - they said they had 20,000 people there on Saturday.  Considering how long we sat in the traffic jam on Sunday, I'm glad we waited!  It was a gorgeous day and we spent a couple of hours snapping photos and walking around all of the beautiful sand sculptures.  They held up wonderfully, considering the wind.  I put together a little slide show (as I do every year) and posted it on youtube.  It is rather long this year.  They had so many more entrants than I've ever seen before and I snapped multiple photos of everything...so it got a bit lengthy.  I hope you enjoy it if you decide to take a look!

Next stop, lunch!

Cold Shrimp Salad after he dug in
After leaving there we went to PadreRitaVille for lunch since my husband had not had the opportunity to dine there yet.  I've blogged about it a couple of times already so I will just hit the highlights.  A Sunday special - $6 Bean and Cheese Nacho Volcano.  OMG.  The hubby had a cold shrimp salad with excellent avocado slices and some fruit slices on the side.  He said it was pretty good!  I snapped a few photos since I actually had the camera with me this time!  LOOK at the size of those nachos.  They were soooo delicious!

Bean and Cheese Nacho Volcano

Sunday night I prepared the Cornish Game Hens I bought from the SPI Farmer's Market with some squash, carrots, and onions - and baked sweet potatoes...all from the SPI Farmer's Market.  Love a local meal!  Dessert was the Acorn Squash Chocolate Cheese Cake I wrote about...and it was just delicious.  I think my hubby has enjoyed being home - I hope so - I have sure enjoyed him being here! 

I love to cook - but the teen is not very outgoing gastronomically speaking :-)  That's okay though - my husband makes up for the teen's disdain of trying new things and HE is very appreciative when he gets home.

Today, we went back over to Isla Blanca Park to take more photos.  I took my usual pit stop at the Dolphin Point area and YAY - the dolphin tribe was frolicking in full force in the middle of the ship channel.  We watched them cresting and then diving down (I'm sure they were fishing not frolicking) until a Coast Guard Cutter came along and they followed it out.  It was magical for me.  My husband didn't seem as impressed.  He said "maybe if we were closer I'd be more excited" and "you are a water person and I'm not".  Hmmmm....oh well, he couldn't dampen my enthusiasm.  For me - each and every visual encounter is absolutely magical.  My heart literally soars with happiness!

We moved on over to beach front and took more photos of the sand sculptures with some morning light instead of the shadow invoking noon day sun we encountered yesterday.  We were so sad that some idiot had walked through one of the beautiful sculptures on the north side of the pavilion.  Fortunately, most held up just fine.

For breakfast we tried Pier 19 since we'd not gone there for breakfast before.  Service was great and the food was outstanding.  I had a ham and cheese omelet with seasoned country potatoes and a perfectly toasted biscuit.  The mister had a veggie omelet (their whiteboard special) with the same sides.  Several cups of coffee later we had cleaned our plates and enjoyed the excellent morning view. 

It's been a great few days - as I'm sure you can tell from my happy post :-)

I LOVE living la vida isla!


PadreRitaVille on Urbanspoon

Pier 19 on UrbanspoonStumbleUpon

Friday, October 22, 2010

Squash Chocolate Cheese Cake - oh yes indeed!

Another chapter in the "using the acorn squash gift" saga.

Slice and Bake Squash Cookies
Today I was sitting around making some homemade Chex Mix for my hubby and baking off the last few cookies from the squash sugar cookie dough I made last week-end.  I saved the pieces I didn't want to re-roll and formed a log - froze them - and today did slice and bake.  They are still yummy!  Anyway - on to the cheese cake...

For the past 20 years, my husband has requested a cheese cake baked from scratch for his birthday cake.  It's what he loves.  He wasn't home on his birthday this year so I wanted to bake a cheese cake for him for this week-end's "make up for missing it" birthday dinner.  I laughingly told him the other night that I might make him an acorn squash cheese cake.  "Ha ha", I said, "I was just joking".  He said, "well, I like pumpkin cheese cake...go for it".  So I thought and thought and decided, okay, let's see what I can do!

I saw a recipe for some pumpkin bars earlier this week but didn't have, nor could I find, all the ingredients, so I mish-mashed a couple of recipes together and I think it will work.  I just threw it together and it is in the oven now.  It surely does smell good!  I'll let you know after the birthday dinner Saturday night.  (I tasted the batter - so I have no doubt it will taste as good as it smells)

Into the oven it goes!

So, here's the recipe I came up with....

ACORN SQUASH CHOCOLATE CHEESE CAKE

Crust:
14 Oreo Cookies
Filling:
2 – 8 ounce packages cream cheese
1 cup white granulated sugar
1 cup roasted acorn squash, squished (that's a technical term) and dried*
3 Tbsp. unbleached flour
1 tsp cinnamon
1/4 tsp. ground ginger
1/4 tsp. freshly ground nutmeg
1/8 tsp. ground allspice
½ tsp. sea salt (fine grind)
1 tsp good vanilla extract
3 large eggs
1 cup Milk Chocolate morsels
DIRECTIONS:
Set out eggs and cream cheese to reach room temperature
Squeeze (or mash) roasted acorn squash until pureed consistency and drain until as dry as possible using strainer and paper towels – or a clean cotton cloth.
Preheat oven to 350 degrees
Prepare bottom and lower sides of a 9 inch spring form pan with cooking spray.
Set aside
In a food processor, pulse Oreo cookies until finely ground.
Transfer crumb mixture to the prepared pan and press gently into bottom – use a measuring cup bottom to firm the crust to ensure it bakes firmly together.
Bake crust for no more than 10 minutes.
Remove from oven and set aside to cool.
Place cream cheese in clean food processor bowl (wipe out the cookie crumbs) and pulse until smooth.  Add sugar, acorn squash puree, flour, spices, vanilla, and salt.  Pulse until thoroughly smooth.  Scrape down sides of processor as needed (I had to scrape down 3 times until everything was fully incorporated).
Add eggs one at a time (break into measuring cup and pour through shoot while processor is on – blending each egg before adding the next).
Set aside.
In a 1 quart microwave safe bowl, place chocolate in microwave and microwave in 30-second increments, stirring between each until melted smooth - let cool for a few minutes but not to the point it is firming back up.  Add 1 cup of cream cheese mixture from food processor to chocolate and mix thoroughly.  This is what you will use to swirl into the cheese cake.
Use a paper towel to wipe down the sides of the cooled spring form pan to remove any crumbs.  Spray sides of pan with cooking spray (two times around for thorough coverage).
Pour remaining cheese cake mixture from processor bowl into prepared pan on top of baked crust.
Drop dollops of chocolate cheese cake mixture on top of squash cheese cake mixture.  Swirl with a butter knife or the handle of a spoon – taking care not to hit the crust on the bottom.  Don’t over-mix – just make swirly patterns.
Bake until cheese cake is set but jiggles a little bit when gently shaken.  Should take 45 to 50 minutes. (I just checked mine at 45 minutes and I'm going to let it go 3-4 more minutes)
After removed from oven allow to cool on counter until it can be safely placed in fridge.  Chill for at least 4 hours in pan (in refrigerator) but overnight is even better.  Run a warm sharp knife around edge of pan* and carefully release spring form.  Carefully remove side of pan.  It is quite challenging to remove the cheese cake from the bottom of the spring form pan.  I generally cut slices and serve on individual plates straight from the spring form bottom.  However, if you need to present the entire cheesecake – VERY carefully, use the same hot water and thin knife technique (see below) to release the cake from the bottom of the pan…very slowly.  Once totally released, you can nudge it onto a serving round.  I’ve never successfully done this without losing a hunk of crust because a spring form pan has a little lip on it.  There are special cheesecake pans – but I don’t have one.  I think I may order one from Amazon.
*Hot water and thin knife procedure for removing cheese cake from spring form pan...
Prepare a tall vessel of hot water and put your thinnest knife (a filet knife is great) into the water  – wipe it with a cloth and run it around the sides of the pan to release the cake (make sure the knife side is touching the pan so you don’t gouge the cake).  You may need to dip and dry it 2 or 3 times as you release the cake.

Oh, I hear the timer - gotta go - Bon Appetit Y'all!

(UPDATE - See comments for a slight tweak to improve the recipe)

2013 UPDATE:
Ian selected this cheese cake for his 20th birthday (he's no longer a teen!)  Here are a couple of photos of the finished product.


SHARED WITH:

StumbleUpon

Thursday, October 21, 2010

Bada Bing Bagels


 http://www.badabingbagel.com
It is truly a glorious morning here in deep South Texas!  The bay was quiet outside my window and when I drove the teen to school we both admired the beautiful sunrise over the island.  He said we needed some religious music it was so lovely.  There was a thick layer of rich pink and orange underneath a big bank of fluffy clouds and the upper edge of the clouds were rimmed with bright light with rays of sun reflected upwards in a divine display.  So I hummed some of Hallelujah. 
I don't think he was impressed but I liked it :-)

I have not been to the island for a couple of days and this seemed like the perfect morning to head over.  I love driving over the bridge - it always feels like the entrance to "a good place".  This morning I decided a bagel and some coffee would be a great accompaniment to a short trip to Isla Blanca Park.  I wanted to sit on the Dolphin Point side of the park and enjoy the pleasant weather and some breakfast.  I turned left off the bridge and headed to Bada Bing Bagels where I knew I could get a good cup of coffee and the best bagels to be found anywhere in Rio Grande Valley!  I was not wrong.

This morning I got a Cinnamon Raisin bagel - toasted - with plain cream cheese and a coffee to go.  Enjoyed  meeting the new manager for the Wells Fargo Bank island branch and got to chat with adults for a change.  That's always a good thing!  I felt my shoulders relaxing (they've been tight for days) and I could draw a deep breath of clean fresh air.  All was well in my world.

I love that I can find New York bagels right here on SPI.  I've had plain, whole wheat, multi grain, and now cinnamon raisin.  I need to drive over Saturday morning and get my hubby a pumpernickel bagel as he will be flying in this week-end.  The have an extensive menu of breakfast sandwiches and deli sandwiches for lunch - although I admit I haven't tried any of them, I have watched them being made though... they look fabulous.  I just happen to love bagels and cream cheese - so that's what I get!  The first time I went in, I chatted with the owner and he said they ship their bagels straight from New York - and I was sold.  They say New York bagels have a special taste because of the water.  I don't know - but these are seriously some of the best bagels I've ever eaten.  And, of course, they are just nice folks at Bada Bing.  I like stopping by.

So, with my white bakery bag and cup of coffee in hand, I headed out to Isla Blanca, parked my vehicle (hoping not to get stuck in the sand), and trudge over to sit on the big slabs of granite.  The bay was so peaceful and I munched on my bagels and sipped my coffee.  No one in the area within my eye sight except for a fishing boat out in the channel.  I just finished half of my bagel when I saw a dolphin fin arch up. YES!!!  My morning is complete - I got to have dolphin magic with my breakfast.  I watched the single fin go up and down, slowly moving toward the ocean - surface, dive, surface dive - until I could no longer see him (or her).  No buddies in sight - but nonetheless, it was the highlight of my morning.  I finished my breakfast and most of my coffee and loaded back up and drove over to see what was up with the Sand Castle Days folks.  Early though it was, the area was filled with sand sculptors and worker bees.  I didn't stop - they had the parking lot blocked off so I just kept on rolling because I needed to get home and do a little work.  I headed back across the bridge and there were wade fishermen up to their chest in water, a bunch of ducks flying in formation, gulls floating on the bay, pelicans in formation...and just as I began the ascent to the top of the bridge a beautiful straight line of Roseate Spoonbills flew in front of me in all their pink loveliness.  THAT is pink icing on my cake!

Roseate Spoonbills at the Convention Center on a different day
I started out to write about how much I love the bagels from Bada Bing...and ended up talking more about the fauna of the island.  Really though, they go hand in hand.  Good food, a beautiful setting, peace in my heart.

Visit Bada Bing if you have the chance - you will NOT be disappointed.  Here's a link to their menu.  They are indeed The Little Shop With the Big Taste!  Find them at 1817 Padre Blvd - on the bay side of the central island road - at Palm Street.  You will be glad you did!

SPI FLIP FLOP FOODIE RATING:
4 – Lip smackin’ - good quality – flip flops will definitely be parked under their table again!

BadaBing Bagels on UrbanspoonStumbleUpon

Sunday, October 17, 2010

Squash Sugar Cookies...Really!

My friend KM brought back some ginormous acorn squash from her Fall wanderings to the hinterland (OK, maybe not hinterland - up in Minnesota or Wisconsin or one of those chilly states)...she described them as Dolly Parton boob-sized squash.  She wasn't joking!  These are no b-cup size squash. 

So, I have never used squash this big - I'm used to little acorn squash...and I knew the teen wouldn't eat any and my hubby won't be back home for a bit - so I decided I would roast them and use my handy dandy Food Saver to package smaller packets of squash for baking and soup and other yummy things.  I washed them and vented them by stabbing them with a sharp knife and roasted them at 350 for 90 minutes...whole, on a cookie sheet with a silpat on it.  My house smelled like Thanksgiving.  That's a really happy smell!  After they cooled down I sliced the top off and cut them lengthwise, scooped the seeds and stringy stuff out, then scooped the good stuff out, mashed it and packaged in 1 and 2 cup sizes.  I got about 8 cups.  Popped it in the freezer - ready for future goodness.

I started Googling some recipes for pumpkin and squash and found lots of ideas - but I found one that sounded particularly perfect because I was in the mood to make some Halloween themed cookies.  The Recipe is Pumpkin Sugar Cookie presented by The Washington School Inn - and I found it on a bed and breakfast online recipe sharing site.  B&B food is generally pretty yummy so I hoped, substituting the squash would work...and yum, it did!

Here's a link to the original recipe and below is my version.

Acorn Squash Sugar Cookies

3/4 cup softened butter (1 1/2 sticks)
1 cup white granulated sugar
1/2 cup roasted acorn squash pulp - squeezed very dry*
1 egg
1/2 teaspoon pure vanilla extract
1 teaspoon cinnamon
1/2 teaspoon freshly grated nutmeg
1/2 teaspoon ground allspice
3 cups unbleached flour
1 teaspoon baking powder
1/2 teaspoon fine salt

Cream butter and sugar in stand mixer until light and fluffy.
Add squeezed-dry squash (*I let mine drain over paper towels in a colander - then replaced the paper towels and squished them until it was as dry as possible) and egg.
Add vanilla, and spices.
Mix flour, baking powder and salt together, then add gradually to mixer bowl to form a stiff dough.
Chill for at least one hour.
Preheat oven to 375 degrees.
Roll out dough with some bench flour mixed with a bit of sifted confectioner's sugar (a great trick for not making your cut sugar cookies taste floury - they taste sweet inside and out) and cut with your favorite shaped cookie cutters (or just do round if you want to make it easy on yourself).
Bake on a silpat covered cookie sheet 7-8 minutes.  Makes approximately 2 dozen cookies.

Unbaked Ghosts
Baked Pumpkins (not much color change)


I decorated with a stiff cream cheese frosting so I could pipe the designs I wanted on the pumpkins and sprinkle some sprinkles on them for the eyes, nose, and mouth (sprinkle quickly - the frosting dried faster than I expected)... and I just wanted to frost the ghosts and make eyes with a couple of those "currants", I brought home from Central Market in Austin, and a little piece of chocolate that I cut out with the bottom of a metal decorating tip and pushed out with a toothpick for a woooooo mouth.  You could easily make a basic powdered sugar and milk frosting (as the original recipe called for).  I would also love to use a nice royal icing if I wanted the icing to harden and hold the design.  Royal icing is challenging down here at the coast - royal icing and humidity are not friends :-)  I found that out the hard way last Christmas!

Frankly, the teen and I tasted a cookie unfrosted after a brief cool down.  They were great with NOTHING on them.  They are a delicious cookie (can they count as a vegetable???) and I would recommend them highly for an addition to your Fall cookie repertoire!


Bon Appetit, Y'all!!!

SHARED WITH:

Everyday Sisters Sharing Sundays #15

PhotobucketStumbleUpon

Friday, October 15, 2010

The Cafe on the Beach

♫♫ It's a beautiful day in the neighborhood, a beautiful day in the neighborhood.... ♫ ♫
Ahhhh, well, you get the gist!


A couple of lady friends and I had lunch at The Cafe on the Beach at the Palm Resort today and, boy howdy, what a great day for beachfront dining.  We sat for 2 hours visiting, nibbling, and enjoying the beautiful South Padre Island beach view.  The water was unusually blue and the sky was nearly cloudless, a cool 72-74 degrees, and a slight breeze - simply glorious.  I know you wish you were here (if you aren't already that is :-).


The other ladies enjoyed several cups of Seattle's Best coffee and I sipped on a lightly flavored glass of Tropical Tea.  I'm not usually one for flavored teas - I like traditional iced tea.  This, however, was refreshing and, well...tropical!  Perfect for the day.

We caught up for a good while before ordering lunch because they weren't busy - before long all the tables were full, so we went ahead and ordered.  It was to be a salad day for the two of us actually eating.  KM saves her calories for nighttime nibbles and splurges, so she just sipped her coffee.

I had one of the best salads I've had in a long time.  The Beachfront Salad - full size - was my choice for the day.  I had it with grilled chicken breast.  The menu describes it as "Fresh spring mix lettuce with tomato, kalamata olives, hearts of palm, maytag blue cheese, sliced pears, and a mandarin orange-balsamic vinaigrette. Topped with parmisan crisp and caramelized pecans..."  I describe it as dyn-o-mite!  The mandarin orange-balsamic vinaigrette married the salad to achieve gastronomic perfection, in my humble opinion.  It was pricey - and not all that big (although it was absolutely adequate in size).  My tea, $2.75, and my salad, $17.95, totalled $22 and some change with tax.  Kind of more than I like to pay for a lunch salad - but I would order it again and again.  It was that good.

My friend raved about her petite Caesar Salad.  She said the croutons were tender, not break-your-teeth crunchy and the dressing and butter lettuce just perfect.  We both cleaned our plates!

I have heard they have a very fine cheeseburger as well.  The link will connect you to their online menu.  I'll go again to try their Muffaletta - not a common restaurant offering down here!  The Grilled Red Snapper Sandwich sounds like something the teen might enjoy.  They serve breakfast too - I'll have to get over there some morning as well.  They can be found at 3616 Gulf Blvd, on the beach front side of the motel.  This is the first time I've gone for food - I've had coffee there before - and a cold beverage.  I enjoy going when the restaurant is open to the the ocean.  They do have plastic protectors for those nippy times and some heaters - but that's not my favored time to visit.  A glorious October day is primo dining time at The Cafe on the Beach!

The company, the view, the fresh air, the food - all the good reasons I enjoy living at the Texas Gulf Coast.... living la vida isla!

SPI FLIP FLOP FOODIE RATING:
4 – Lip smackin’ - good quality – flip flops will definitely be parked under their table again!


Cafe on the Beach at the Palms Resort on UrbanspoonStumbleUpon

Thursday, October 14, 2010

MILKY WAY CAKE

Today is October 14th - a couple of reasons I remember this day are:
1.  It is my youngest sisters' birthday
AND
2.  It is National Dessert Day (did you know that was a holiday?)

So, in honor of both of the above, I'm going to share a recipe that is loved in my family.  I got the recipe from an elderly mature co-worker in the Shoal Creek Hospital Business Office in the early 1980s.  She told me she copied it from an old church cookbook.  I love "old" recipes...and I still have the copied paper she gave me about 30 years ago.  It is stained and yellowed with age - a well-used recipe.  You know, I said she was elderly, but now, I'm rapidly approaching the age she was when she gave it to me!!!  Yikes!  I think I need to edit!!!

If you make this cake, you will find it to be the most decadent, sweet cake you may ever wrap your lips around.  It keeps well - I leave mine in the pan, just frosting the top - I think that helps the "keeping" ability - less exposed surfaces.  I have no idea of calories - heck, I really don't want to know.  This is for those special less-formal occasions when you want a really tasty cake - it travels well too.

MILKY WAY CAKE (the recipe contributor is listed as Mabel Ellison - bless you Mabel for sharing!)

I am typing it exactly as worded in the original recipe!

4 Regular Size Milky Way Candy Bars
2 Sticks Margarine
2 Cups White Sugar 
4 Eggs
2 1/2 C. Flour
1/2 tsp. Soda
1 C. Buttermilk
1 C. Chopped Nuts (we don't use - my kids don't like nuts in their sweets)
2 tsp. Vanilla

Icing:
2 Milky Way Bars
1 Stick Margarine
3 T. Cream
1 tsp. Vanilla
Powdered Sugar

Cake Instructions:
Melt 4 bars and one stick margarine in pan.  In another bowl, cream one stick of margarine with sugar.  Add eggs, one at a time.  Combine flour and soda and add to the creamed mixture.  Add the buttermilk, nuts (if desired) and vanilla.  Add Milky Way Mixture.  Bake in a 9x13 inch pan at 300 degrees for one hour.

Icing Instructions:
Melt bars and margarine together over low heat.  Add cream and vanilla.  Add enough powdered sugar for spreading consistency.

Now, I've noticed candy bars have gotten smaller over time, but I've not changed the recipe at all because when I tried it (I added 1/2 bar to each component) I noticed no difference!  So I stick to the original recipe.

Also, I found that it takes a long time for the bars to melt...I tear or cut my Milky Way bars into small pieces (the first time I just dropped full bars into the pan - that took FOREVER to melt).  No matter how long - all of the fluff doesn't melt - I whisk after they get really melty and that works best.  You will see little spots inside the cake where those little bits don't melt - just makes it better.

For the frosting - I find a little less than one box of Powdered Sugar works "just right" and if it needs thinning out - just add more cream.  It will firm up as the chocolate and butter in the mixture cools- so make sure it is not too thick or it will be too dense when firmed up.

It doesn't say, but do let the cake cool completely before frosting.  I have no photos of this cake in my files and if I make it...well, the teen and I would be forced to eat it and that would be a bad thing...you need a group to eat this cake!  When I make it again, I'll add a photo to the post.

So, bon appetit y'all - it is REALLY good eats! 

Happy National Dessert Day...
and Happy Birthday sister Karen,
and Happy Birthday up in Heaven sister Sharon!!!StumbleUpon

Monday, October 11, 2010

Cookies - I Need Cookies

I messed around with my iGoogle page - and added the Martha Stewart gadget.  It has a Cookie of the Day link and boy has that been luring me in to the kitchen!

Today I am preparing to get to see my traveling hubby for the first time in a good while (in person instead of on Skype) and I thought - hey I'll make some cookies :-)  Friday's Martha offering was Apple-Currant Cookies.  The picture was very "Autumnal" with chunky looking cookies with an apple ring on top - just up my sweetie pie's alley.  He always likes stuff with oats and raisins and spices...I don't care for cooked raisin type things - so this was definitely for him!  Now, currants aren't really raisins.  They are a small berry that look like a tiny raisin when dried - and I have not been able to find them down here at HEB or Wal-mart.  What is generally sold in grocery stores - and called currants - are a small Greek grape dried into small raisins - the Zante Raisin.  Huh, who knew?  We apparently couldn't grow currant bushes in the United States until 2003 because of some disease the shrub carried which could cause a problem for our timber.  So, in the early 1900s it became popular to import these little Greek raisins and call them currants.  If you want to know more about currants - here's the link I found when I started wondering "hmmm, what exactly is the problem with finding currants?"   

While I was waiting for my oil change at Wal-mart I picked up the few things I needed for the recipe and noticed dried BLUEBERRIES that actually looked similar to currants.  The teen won't eat cooked raisins (it's genetic I guess) but loves blueberries so I thought this might make everyone happy.

A few thing I learned today ....
1.  the proper tools, as in all things, make life so much easier
and
2. it is important to know how much cookie dough is in a 1oz. scoop. 

The recipe called for plumping the currants with apple cider - no apple cider but lots of apple juice - eh, good enough.  The package of dried blueberries only came out to a little over 1/2 cup - eh, good enough.  I wasn't making homemade Apple Butter - Bama is good enough for me and seemed to be good enough for the recipe.  Plus, I added 1 tsp. of vanilla - because I like vanilla with my spice based baked goods.

So, here's MY rendition of Martha's cookies.  Here's the link for Martha's cookies in case you think you might rather go with the "professional" on this issue!

Apple-Blueberry Cookies

Ingredients (Makes about 3 dozen cookies if you use the proper scoop)

1 cup apple juice
1/2 cup dried blueberries
2 cups all-purpose flour
1 tsp baking soda
1 tsp ground cinnamon
1 tsp ground cloves
1/2 tsp freshly grated nutmeg
1/2 teaspoon salt
1 cup (2 sticks) salted butter (unsalted was called for but I didn't have any) - room temperature
2 cups dark brown sugar - firmly packed
1 cup Bama Apple Butter
1 large egg - room temperature
1 tsp. pure vanilla extract
2 1/2 cups old-fashioned rolled oats (not instant)
3 Granny Smith apples (or any tart and crisp cooking apples)
Super fine granulated sugar for sprinkling (optional - but I used it)

Tools (Martha doesn't tell you this as a separate line item - I think it's important)
Stand Mixer with paddle attachment
Baking Sheet with Silpat (it will go faster if you have 3 or 4 of these)
Small saucepan
Small bowl for berries
Separate bowl for dry goods (one with a pour spout on the rim is a good plan)
Sifter
Measuring spoons
Dry measuring cup
Wet measuring cup
Big Spoon
Strong Spatula
Box Grater
Microplane (for nutmeg)
Apple corer
Mandolin (or very sharp knife for slicing apple very thin)
Paring Knife or Peeler
1 oz cookie scoop (that would be a scoop that scoops 2 TBSP of dough - not 3 TBSP of dough or 1 TBSP of dough - but TWO TBSP of dough - this is important if you want your cookies to look like Martha's)

So - if I'd known all of that - I probably would not have gotten gung ho on these cookies - my mandolin is in my storage unit, I don't have a box grater any longer and my hand held grater seems to be hiding - couldn't find it anywhere.  I usually use the food processor but I recently purchased a bigger, better, badder food processor and I would have had to figure out how to use the grating apparatus and that just seemed like too much trouble...so I used the microplane - big mistake - took FOREVER - and I grated my finger requiring paper towel and rubber band first aid (don't ask about the band-aids - it's another story).  I also have a large and a small cookie dough scoop but not a medium...and the medium is apparently 1 oz as called for in Martha's recipe.  Neither of my scoops are marked with the volume, by the way.  I had to go to Pampered Chef's website and look up the volume of the one I have (they have a large and a medium and I apparently own the large).  Then, I had to Google how many Tbsp were in an ounce.  Blah, blah, blah...I have a 1/2 ounce scoop and a one and a half ounce scoop - but no one ounce scoop.  Holy COW!  It took me FOREVER to make these cookies and it is a good thing they taste delicious because I am so freaking tired I just want to lay down now.  Anyway, back to the instructions.

Directions:
Preheat the oven to 350 degrees
Line a baking sheet with a Silpat nonstick baking mat (I have 4 because it makes cookies go so much faster)

1.  Heat apple juice in a small saucepan to a simmer.  Place blueberries in a bowl and pour warm juice over them.  Let them plump at least 10 minutes.

2.  Sift together the four, baking soda, cinnamon, cloves, nutmeg, and salt and set aside in bowl.

3.  In the stand mixer bowl, with paddle attachment, cream together room temperature butter and brown sugar until fluffy.  Scrape down sides of bowl, lower speed to slow, and add apple butter and beat until well blended.  Add egg and vanilla extract and continue beating until well blended.  The mixture will not be smooth - looks a little curdled - but that's okay.

4.  Add the bowl of dry ingredients, beating until just combined.

5.  Drain the plumped blueberries, discarding the juice.  Mix in berries and oats until just combined. 

6.  Peel one of the apples and using the largest holes on a box grater, shred the apple directly into the dough, rotating to avoid seeds and core.  Stir well to combine.

7.  Using a 1-ounce scoop (2 TBSP volume), scoop out six cookies evenly apart onto the prepared baking sheet. (really - don't put more than six - they really spread out)

8.  Peel and core the other 2 apples and slice thinly on a mandolin (I actually did one at a time so they didn't turn brown on me).  If you don't have a mandolin - very thinly slice with a sharp knife.  Place a thinly sliced apple ring on top of each cookie.  Sprinkle the top of each ring with a pinch of sugar if desired.

Bake in the pre-heated oven until dark brown.  18-20 minutes.  Repeat with remaining batter.

Now, I realized after 18 cookies that these cookies were just too big to handle (they were 2 handed cookies) so I used the rest of the batter and made small cookies with my 1/2 oz. scoop - since they were too small for an apple ring, I diced the remaining apple and sprinkled them on top of the dough.  The first batch of small ones I put 3 little pieces of apple on each and the 2nd and final batch I used a lot of smaller diced apple pieces - I liked them better!

So, folks, just another crazy day trying to act like Martha - and I am SO NOT!!!

NOTE:  I wrote this on Friday and thought it posted - got home Monday night and saw it had not.  Soooo, I am posting but with a footnote - these cookies, made my way, did not travel well.  The cookies I made and sampled on Friday were fabulous.  By Saturday, they had gotten really "moist" and by Saturday night I couldn't even pick them up, they were wet.  I think it was because of my faux pas with the apple grating - made it too juicy.  And, maybe even the blueberries - because when I found Zante Raisin "Currants" in Austin this week-end, they were REALLY tiny!!!  The blueberries plumped up to traditional raisin size and may have had too much moisture for the recipe.  Anyway.  Make them and eat them ... or use Martha's exact recipe - because hers say they last a long time.  Mine, not so much.
<sad face>  STILL, they tasted delicious - I will make them again and do a straight Martha method!
StumbleUpon

Friday, October 1, 2010

Cap'n Roy's

One of our family's "go to" dining spots on the island is Cap'n Roy's at 1313 Padre Blvd. ....everyone has their favorite and it's a frequent choice when we talk about grabbing a bite to eat on the island.  I tend to go for the Mexican food offerings, my husband goes for the seafood, and the teen either goes for a burger or fried shrimp.  No one has ever had any complaint about their food - and I don't think we've ever not 100% cleaned our plates!  Last time, I had the enchilada plate - beef enchiladas specifically.  I ordered chips and salsa for the side - and they are big freshly fried 1/2 tortilla sized chips and a cooked style salsa.  Only complaint is the bowl isn't big enough :-)  I always need more.  I have also had, on a cold dreary day, a revitalizing serving of excellent carne guisada.  Delicious.  My husband loves the grilled shrimp tacos or the fish tacos with the fumi salad.  And we never fail to seek out their booth at the annual Shrimp Cook-off in Port Isabel.  They always have an award-winning concoction of goodness to sample.  The teen - he loves, loves, loves the big old half pound burger with fries.  Their fried shrimp is always a good call - with french fries and the delicious tart fumi salad (a vinegary yet sweet slaw - really pairs well with fried food).

The only complaint I have is having to do a u-turn to get there when coming from the bridge.  But, that's no biggie to get to a guaranteed good meal.  If they are busy, there's lots of stuff on the walls to look at - old photos, big fish, other nautical "stuff".  It's a small joint - but that's the way I like it.  The prices are reasonable, the waitstaff are courteous and friendly.  It's a great island spot!

SPI FLIP FLOP FOODIE RATING:
3 1/2 – Really Yummy - I feel my flip flops wanting to head back from time to time!

Cap'n Roy's on UrbanspoonStumbleUpon