I've been studiously working on cookies all week. We are staying home this year because Mr. Flip Flop has to work Friday... so family Thanksgiving will be celebrated over the week-end (probably with Mexican Food because we'll all be stuffed with turkey already).
I wanted to get some cookies in the mail today for some of those family members we won't be able to see. I hope they make it there intact and on time for them to enjoy...I've happily played with this first set...and will be working on more to take with us for our little celebration when it finally happens. It's not the day you celebrate thankfulness and family that matters, it's the people you're with!
I used Vanilla Bean Sugar Cookie dough and you can find the
link to a printable recipe here. Scroll to the bottom of the recipe and it says "print page" below the comments box. I roll all of my cookies 3/8" thick and this dough does a great job of not spreading when well-chilled. For best results, chill overnight in the fridge. Give it a try! I like to use
Nielsen-Massey Vanilla Bean Paste...it's the best I've ever tried. If you can't find it locally, you can order it on Amazon in the U.S. If you can't find paste or order it...you can scrape whole vanilla bean pods of their seeds and add it to the dough instead. I would suggest 2 or 3 beans...you really want to see the little specks in this cookie and have a fragrant vanilla aroma when it bakes. The
Lor-Ann's emulsion is also available on Amazon if you can't find it locally. I have gotten it at Hobby Lobby and at Michael's down here in The Valley. It makes a delicious difference to the taste. Shake both the paste and emulsion before using for best results.
So - here's a sharing of photos...with some commentary. I'm still struggling with the stencils, but I assume, as my husband says, "it's a cookie...they will eat it".
I guess that is the absolute truth, but I really like them to be the best that they can be!
 |
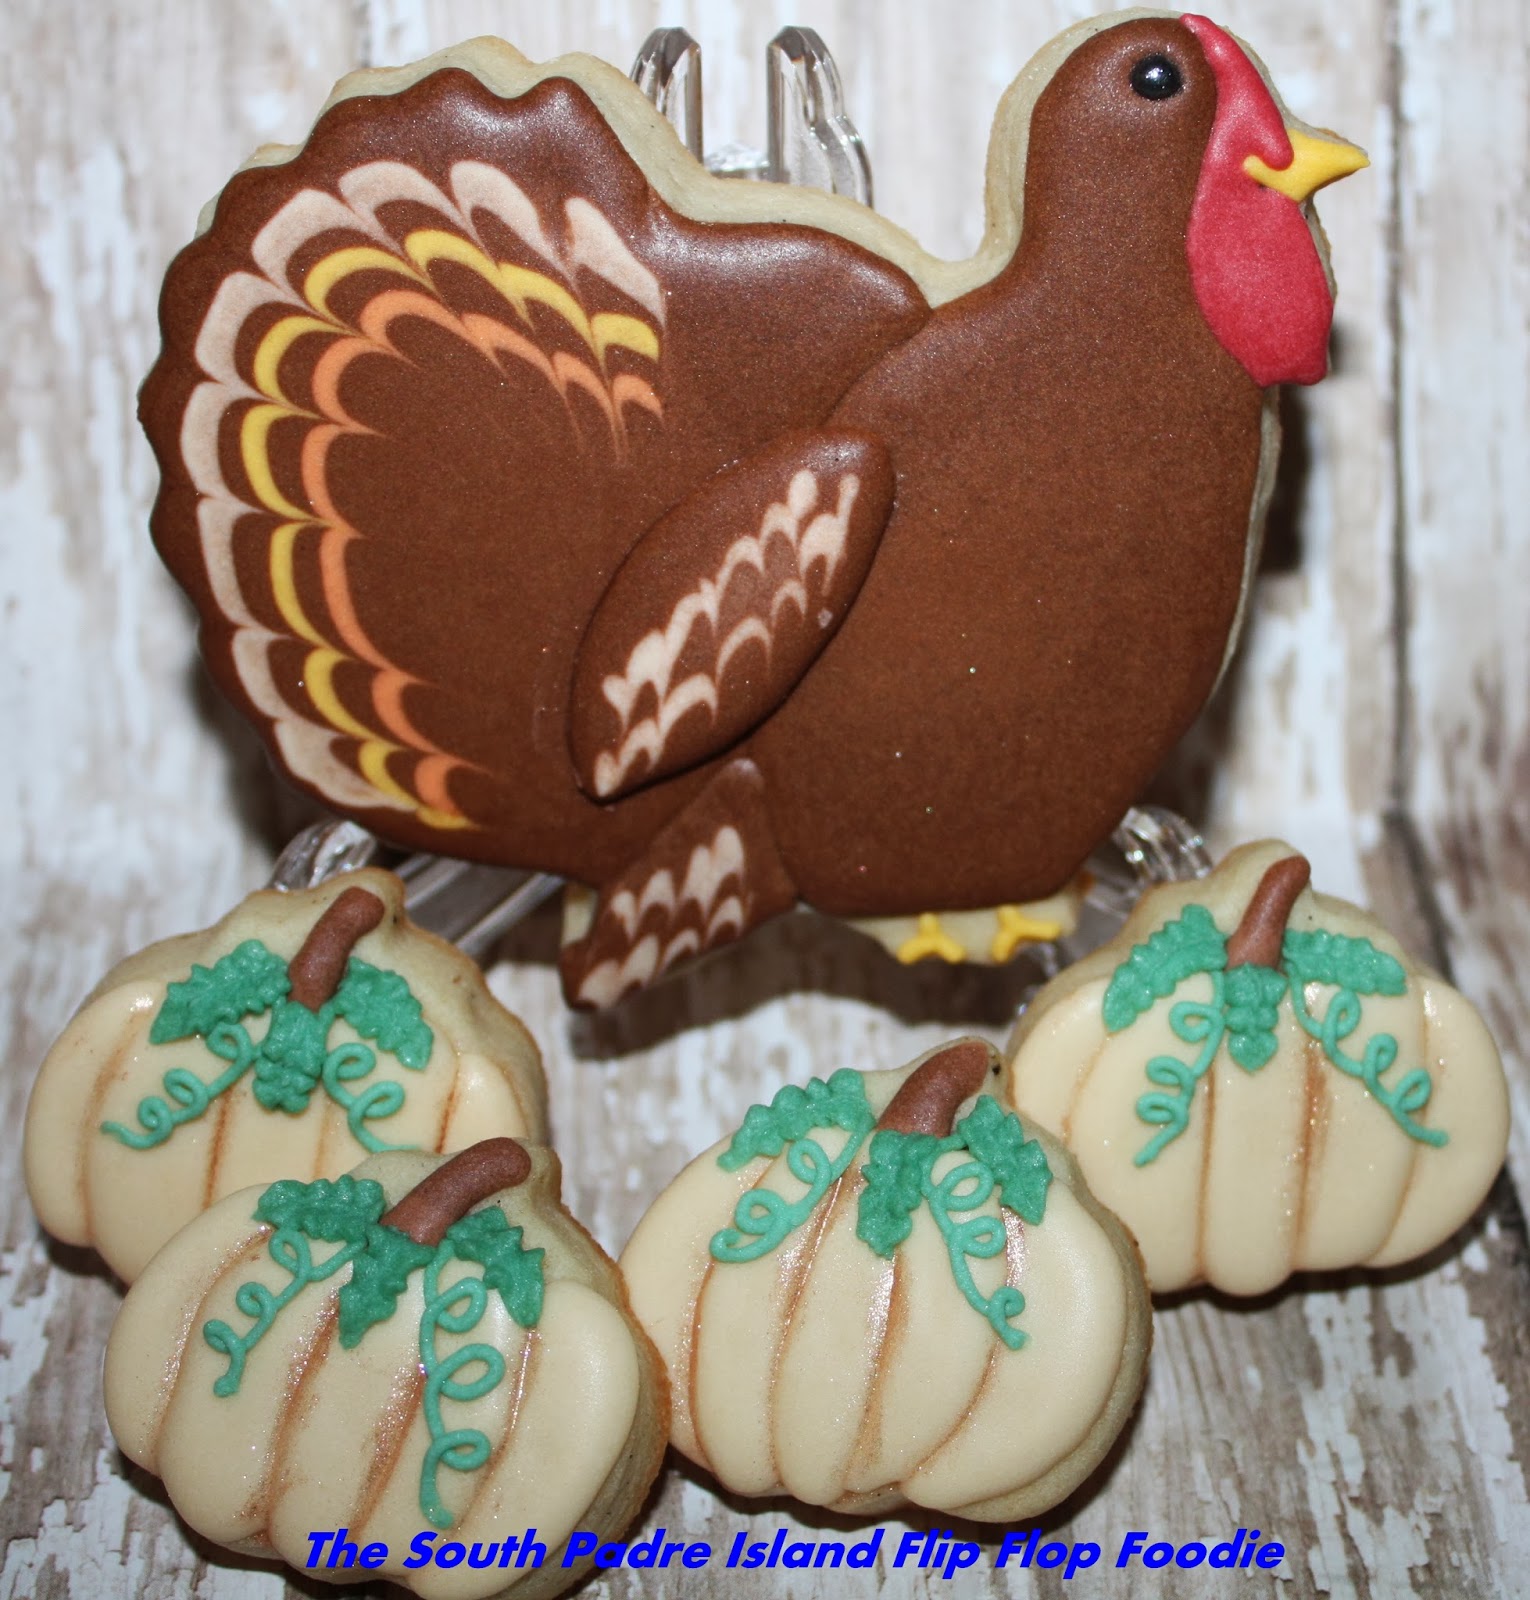
| Large Turkey and Mini Pumpkins |
I wrote a
Turkey Tutorial last year and I mentioned that I felt like it needed a wing. I finished my big turkeys this year and thought the same thing, but I had not remembered my comment that I would address that issue in 2013. So, I thought, "how about a royal icing transfer?" I'd finished everything last night and had some brown and ivory royal icing left over so I grabbed a piece of flat parchment paper and piped a brown "shape" and two lines of ivory...ran a needle tool down them for feathering and left it to dry last night. I glued them on with some more brown icing, used a dry paint brush to neaten up where some squished out after I applied the transfers, and voila! It was just the trick!
I see so many cookie artists' work that I worry I am using somebody's idea without giving credit. I try to go back and see if I can find pictures where I got the idea. These little pumpkins are one of those ideas I know I got "somewhere" and I can't remember where. I know I got the idea for the ivory pumpkin from
LilaLoa's blog. What I don't remember, is who I saw use lustre dust in the crevices to accent the pumpkin curves. It wasn't a white pumpkin, but an orange one. If I find it, I'll be sure to add in credit. I waited until the pumpkin sections were dried and then I dipped a dry paint brush in some bronze edible lustre dust, tapped off the excess and just ran it down the seams. I really like the effect! (Update 11/28/2013 - I was looking at some YouTube tutorials today and saw Haniela had done orange pumpkins painted with lustre dust...I think that may have been where I got the idea. Here's
the link to her tutorial if you are interested. She does great work!)
 |
Two different leaf techniques. I usually suck at leaves.
I love these front two! |
Okay - I had to stop in the midst of my blog post writing and try like crazy to find my inspiration for the front two cookies. I know it was a "chalkboard" style of cookie - dark background and light leaf veins. Checked
Cookie Connection clips, my Facebook feed, Google images...nada zip! Again, I'll apologize in advance. I think it was someone sharing someone else's cookies on Facebook. Any whoo.... I am not really very good at Fall Leaves as a subject matter. I think it is from living in Texas my entire life and we don't really get the colored leaves so I haven't any real-life experience to draw from. I coated everything with a different orange that I mixed up with orange, brown, and some other color I can't remember...it looked "Fallish" to me and less like Halloween. I based coated the leaves and let them dry. I remembered seeing a YouTube video from
Ali Bee's Bake Shop which demonstrated speckling leaves with lustre dust. So, I watched it again and did that on the back cookie. Then I watched a YouTube video from
SweetAmbsCookies that inspired me to paint the piped veins with lustre dust...so I did that! I was down to the last two leaves last night (I put aside stuff I'm not good at) and decided I was going to use an edible food marker (brown) and just draw veins. I was tired and I didn't really want to pipe anything any more. I let them dry but didn't like the way they looked so I got a brush and dipped dry bronze lustre dust and started dry painting the entire cookie. The lustre dust changed the brown to a kind of silvery bronze color and I perked right up. I loved it! Then, I used some of the wet to paint a border around the two leaves. They ended up being one of my favorites in the bunch! AND SO EASY! I don't use my markers enough.
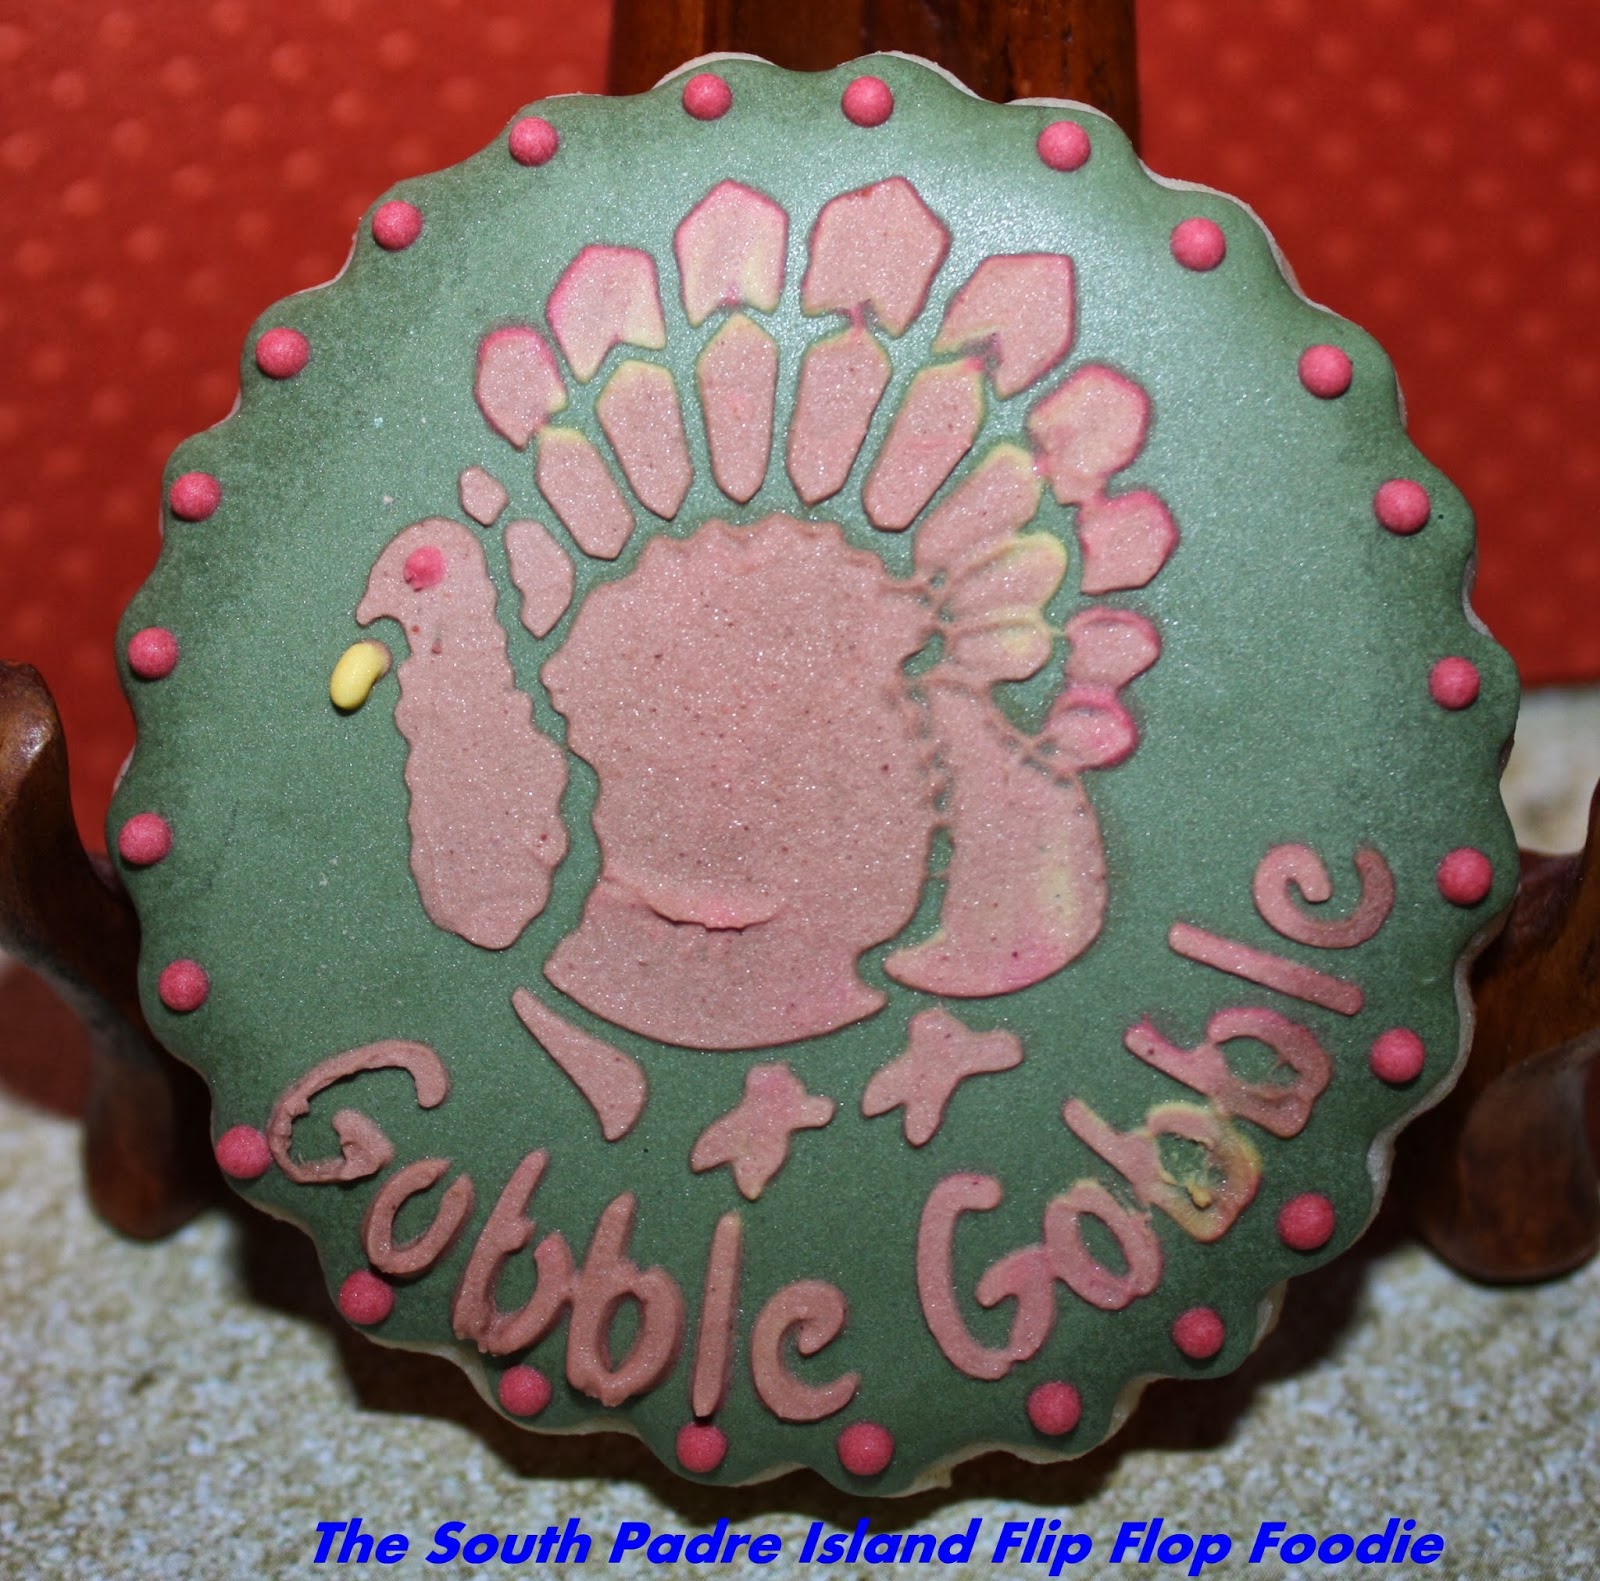
I made 6 larger rounds in hopes of having an easier time stenciling. Some luck...some not. I waited too long into the decorating process and my hands were tired and shaky...and my icing wasn't "just right" and I got some "under flow" with the stencil...not crisp and clean. Oh well - I'll keep trying. The pumpkins, acorns, and turkeys were much easier this year due to practice! The acorn was a larger cutter I found in a set at Michael's. I find I really like my mid-sized acorn better - it isn't so "round" and the caps look better when they are a bit smaller. Again...it's a cookie...they will eat it!
 |
| More efforts at stenciling.... |
The lower left cookie ... well, I moved it before I finished stenciling the words at the bottom...and once you do that - there's no going back. So, I used a food marker to write the words. Necessity is the mother of invention (not that invented anything, it just sounded like the thing to say). I am posting this picture mostly to show the cookie on the lower right side. The stencil skills were sucky on the leaves...but the words were crisp. Good grief! However, I liked the border I made. I used a tiny little leaf tip from PME... #ST50... to go with a scallop and dot border. I liked the way it looked, so I'm sharing.
This cookie was another experiment with borders. I like multiple borders and I had a tip I'd never used because I couldn't figure it out. It is a "spiked leaf" from PME and is #54. I had it in with my star tips and when I sorted tips the other day I found it and looked it up. I thought it was squished or something and then realized it was a leaf tip. Huh, who knew? Obviously not me! I tried it out on this cookie as a border and while it was bigger than I expected, it was kind of cool.
Tired of looking at cookie pictures yet? Yeah, me too...I have other things I should be doing...like packing these up to go out in the mail TODAY!
Here's the last one...
 |
| A stencil job I'm happy with! |
This stencil turned out just the way I imagined it in my mind. A little bit of maroon, some yellow, brown, and green leaf. It came out fairly well I thought and I liked the shell and dot borders too. Whew! (#13 Wilton star tip for the border). All of my dots are using a PME 1.5 tip and a looser consistency of RI than I used to use. I find if I space correctly, pipe straight up and down, and follow the Julia Usher school of "you should never have to push down a point if you have the right consistency of icing" (that's not a direct quote, but the general idea)...I get nicely rounded dots.
So, I have more cookies to make and I'll share those likely next week. I won't have time for more blogging as we are ramping up for the big Gobble Gobble day. Hope you have a wonderful Thanksgiving if you don't hear from me before then!
Bon Appetit, Y'all!!!