I've written a post about these last year, which you can find here. I've written a review on Bakerella's book "Cake Pops"...because she was my catalyst for making these most excellent creations. My 2010 blog post on Christmas Cake Pops has moved into the #1 all time post for my blog. I almost didn't post these - I wasn't sure I had much to add. However, since I'm not a pro at this, maybe another home baker might enjoy seeing my photos....although, they are not excellent.
That's part of the pure pleasure I get form blogging and reading other blogs. Many of us are just home bakers and cooks who enjoy sharing our antics with other like-minded readers. I can say this: my cake pops have gotten a lot smoother this year. I continue to make mistakes when trying to hurry. Keeping the cake pops chilled firm to the last possible moment was key to them not falling off the stick. Anytime I moved more than 2 out of the fridge at a time, the 3rd one fell off the stick. Lesson learned. Lesson eaten :-)
So, here are the photos. I encourage you to visit Bakerella.com for better instructions (and a lot better photos). You can also see a demonstration of exactly how to do it from start to finish in this link link, scroll down to "Related Media" and click on the link that says "cake pops" - it is a 3:49 minute tutorial and I've watched it about 5 times! While you are there, buy the book. Even better, go to an independent book store and buy it in person. Shop small businesses this season!!!
Go get your supplies (the book has infinite resources for the supplies - I live in the boonies and have to depend on Amazon, Wal-mart, and Michael's...and many other online vendors). Bake the cake, let it cool, crumble it to pieces, add in frosting, squish it up, roll it up, chill, set up your work area, melt, dip, and decorate It's that easy! Happy cake popping everyone.
 |
| Measured mixture with scoop for consistent sizing |
 |
| Rolled cake balls |
 |
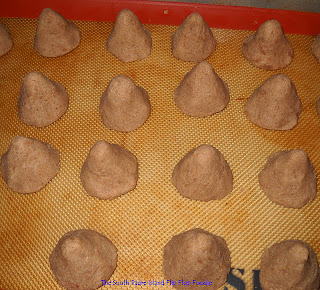
| Shaped cake trees |
 |
| Set up the work station - mis en place for this too! Have lots of paper towels and toothpicks ready. Wear an apron if you are as messy as me! |
 |
| Set up the sprinkles and get out the craft tweezers |
 |
| Wax paper covered baking sheets ready to set the cake balls on when finished dipping |
 |
| Add the tree toppers while chocolate is still soft. To make the "tree-like texture" of the tree pops, rapidly use the side of a toothpick and touch and pull up and down the cone. |
 |
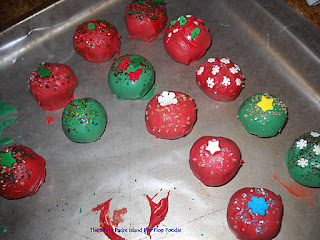
| The finished cake balls - 22 survived out of 24... we happily ate the 2 that perished! |
BON APPETIT, Y'ALL!
SHARED WITH:


Glad you are having so much fun with these. Thanks for the link, especially since I have never made cake balls. I am sure all the recipients will be pleased with the festive appearance as well as the delicious taste. Enjoy the season!
ReplyDeleteCake balls are my new obsession this holiday season! There are so many different fun flavors to experiment with...and yes, the family loves them. Your trees are so darn cute I can hardly stand it! I don't know if I would have the patience for all the decorating, but I'd be willing to give it a try. Nice job and happy holidays!
ReplyDeleteI'm going to have to make some of these, they are just too C U T E !
ReplyDeleteWOW the trees came out *perfect*! Great, adorable idea :)
ReplyDelete