The South Padre Island Flip Flop Foodie Brownsville restaurants

Search The South Padre Island Flip Flop Foodie Blog!

Showing posts with label cookies. Show all posts

Thursday, December 18, 2014

Santa Redux - but Miniaturized!


Last year I had the most fun making the wonderful Santa from a nesting doll cookie cutter.  The awesome Marlyn from Montreal Confections made an easy to follow tutorial and I made the big cookie twice within my Christmas cookie-baking season in 2013.  I made them for Mr. Flip Flop's co-workers and then I made some more later because I had extra RI Transfers and, well heck, couldn't let those go unused, right?

I mused on what to make this year - I always try to make something new and sometimes I just make one of a specific cookie.  Unless it's a "project" I rarely make more than 2 or 3.  This year, though, I decided to have two projects.  Shockingly, neither are new - but both are different.  The Snow Globes for 2014 were for my husband's co-workers this year and they took an unbelievable amount of time (because I went a little overboard) so I needed to make a second "project" of a smaller, more simple cookie.  I decided to use the smallest cutter of the nesting set I had gotten from Truly Mad Plastics.  I messed with Marlyn's template until I got it sized down to the size of the cookie cutter I was using.  I then used that template to make the tiny little gloves, nose, and belt buckles.  This year, using acetate for my transfers, wasn't the smartest thing because they released so easily that when I added the "fur" to the gloves, they fell off.  I got the loose ones "glued" back to the acetate sheet and quickly dunked them all in a row.  Whew, it worked.

These are the perfect size to add to a simple box of drop cookies when delivering little gifts to friends.  They get a sweet decorated Santa, but I'm not made insane with trying to do too much decorating at the last minute (which I may still do, but I'll be doing it to myself on purpose if I do).  Anyway, that's my plan...we'll see how it goes.

I'm heading North to visit family for an early Christmas so my cookie baking is on hold until next week...and next week is Christmas.  I fear this is all I'll finish.  So, all of the great ideas I have researched and drawn and listed...will likely be held over for next year.  Sometimes it happens that way.  I was sick when I should have been starting and, not desiring to share germs, I just couldn't get it all done.  Jeez, that's beginning to sound like a recurring theme... "I just couldn't get it all done".  I'll just repeat my mantra "it is what it is"!


Enjoy the look-see at this cute rendition of Marlyn's great cookie - which is sure to be a classic for me and mine!  Merry Christmas, friends!

Bon Appetit, Y'all!!!


StumbleUpon

Wednesday, December 3, 2014

My Favorite Cookies


It's December....

It's Time!

CHRISTMAS COOKIES!

I wanted to give you an easy to find list of my favorite cookies from past years.  Many I make over and over - some are reserved just for Christmas time.  I included my favorite brownies and homemade marshmallows...things that would go nicely on a "cookie tray" you might make for you friends or family.  So, here they are - enjoy!


DROP Cookies

Oatmeal Cookies

Whole Wheat Chocolate Chip Oatmeal Cookies

Cranberry, Chocolate, Oatmeal Cookies

3-Kinda Chocolate Chip Cookies

Toffee Chocolate Chip Cookies

Mint Chocolate Delights

Forgotten Meringue Cookies

Lemon Ricotta "lemon drop" Cookies

Meringue Kisses

Chewy Chocolate Meringue Cookies

Peanut Butter Kisses aka Blossoms

Melting Moments

Chocolate Gooey Butter Cookies

Spice Gooey Butter Cookies


BAR or SHAPED Cookies

Almond Joy Bar Cookie

Fudgy Chocolate Brownies

Homemade Marshmallows

Peanut Butter Crunch

Amish Friendship Bread made into bite-sized or mini cakelets

Fantasy Fudge

Lemon-glazed Madeleine

Pumpkin Spice Madeleine

Vanilla Bean Madeleine

Sugar Cookie Spirals


ROLLED Cookies
Free Christmas Clipart, Clip Art Pictures, Royalty Free Photographs...
Vanilla Bean Rolled Sugar Cookies

Acorn Squash Rolled Sugar Cookies

Applebutter Rolled Sugar Cookies

Chocolate Espresso Choc Chip Rolled Cookies

Red Velvet Rolled Cookies

Gingerbread Rolled Cookies


Bon Appetit, Y'all!!!


StumbleUpon

Saturday, January 18, 2014

South Padre Island KOA Care Camps Auction

I donated a cookie basket and a couple of boxes of extra cookies to the SPI KOA for their fundraising event for KOA Care Camps.  I love helping people who want to help kids with special health issues enjoy a fun camp experience.  For so many years we searched out special camps for our youngest and it was almost always a wonderful experience for him and a respite for the parents!  It was nice to not have to explain his differences...and I'm sure that's how the kids feel when they go to cancer camp.  What a blessing!


I worked really hard to make a basket of cookies I hoped would be appealing enough that the bids, at auction, would exceed its $75 retail value.  I included a nice basket that can be reused, a dozen coastal décor Vanilla Bean Sugar Cookies detail-decorated in royal icing.  I added a dozen Meyer Lemon Ricotta Cookies baked in my favorite Nordic Ware coastal theme teacake pan, and I loosened my tight grip on a pound of Callebaut Sensations Marbled Chocolate drops (acquired at Central Market in Austin) and mixed up a batch of my favorite Chocolate Chip Cookie dough, substituting the marbled drops instead of chocolate chips.  I included a dozen of those in the basket as well! (Mr. Flip Flop said they were delicious...thankfully...because Belgium Chocolate is a true luxury in a chocolate chip cookie).  All of my baked goods are made with quality ingredients...real butter, King Arthur flours, Meyer Lemons (when I can get them), vanilla beans, and pure extracts.  A cookie has to taste as good as it looks...or what's the point?


Everyone send up good thoughts into the ether, that some generous cookie-loving soul will peel open their wallet and make a goodly sized bid for this basket of deliciousness.  KOA Care Camps is a worthy cause!


My cookie art, this time, included palm trees, scallop shells, sand dollars, and some very detailed star fish!  I thought they looked pretty, and I know they taste good.  I roll my cookies 3/8" thick to ensure a good thick cookie for stability as well as value, and all of the decorated cookies were between 3 and 4 1/2" in size.

Close-up of the decorated sugar cookies - the star fish was based on
a tutorial from Glorious Treats...I didn't follow it exactly, but the look
is Glory's (her cookie art is always so pretty).

I don't know if they will use the donations of an extra dozen of Callebaut cookies and the box of individually packaged Lemon Ricotta cakelets for the bake sale table, or if they will auction the boxes intact.  Either way - hope to help raise more money to fund a wonderful camp experience for kids with cancer.


I'm used to sharing my cookies with family and friends - I rarely sell my cookie art.  I admit to feeling nervous (the reason I rarely sell my cookies).  My fingers are crossed really hard.  Here's wishin' my cookies luck!


Bon Appetit, Y'all!!!


StumbleUpon

Wednesday, November 27, 2013

Lemon Ricotta Acorn Cakelets

I'm in love with Nordic Ware pans.  I've posted about my seashell teacake pan (which I prefer to call cakelet pans) but I haven't shared my newest acquisition...the Acorn pan!  I saw it on Amazon and searched every local retailer possible to no avail so I finally broke down and ordered it online.  When you live in the boonies and you want something specific, Amazon can be a real life saver.  I am still a firm believer in shopping in local independent shops whenever possible...but sometimes...you gotta go with the big box in the sky.  This was one of those times.

It's been on my wish list for over a year.  I kept hoping the price would go down.  It didn't.  I also opted to buy a second seashell cakelet pan.  It gets really old to try to make batches of these and wait for cooling in between.  Nigh impossible for my patience level!  So, now, I have 4 Nordic Ware "teacake pans".  One, the first, is not my favorite, but I use it anyway.  I'm sure I just need to find the correct density batter/dough to make that first one work well.  I usually end up with a lot of holes and that's not always pretty!

Anyway, here's a picture of my new pan.  So cute!
Nordic Ware Acorn Cakelet Pan

I had every intention of creating or finding a pumpkin recipe for the acorn cakelets...but I ended up having 6 expensive Meyer lemons that were staring at me from my counter, and I needed to use them before they became over-ripe on me.  I search for them so I really don't want THAT to happen!  Therefore, I grabbed my absolute favorite lemon cookie recipe (which is quite cakey) and decided we would have lemon acorns...and lemon seashells too, because, I do live at the coast!

I whipped them all up and having 3 pans made life so much easier.  The recipe made exactly 2 pans worth of each cakelet (4 pans total).  Since I started the acorn first, it was great to have it cool and easily washed for the 4th round.  I did up the glaze recipe a bit because I tend to run out when I use the original recipe instructions.  Here's the link to the original recipe from Giada De Laurentis.  I don't change anything in the dough. However, I do give a quick spritz of Pam or other cooking spray to the pan before filling.  I use a 1 Tbsp. scoop to fill (and actually liked the second batch of acorn cakelets where I used a heaping Tbsp scoop instead of it leveled off).  For a more ample amount of glaze, I make it thusly:

Lemon Drop Glaze

2 cups powdered sugar
4 Tbsp fresh-squeezed lemon juice
1 lemon finely zested (a Microplane is perfect for this task)

Combine ingredients with a small whisk.  Cover and let sit for 15 minutes or so to ensure any sugar lumps dissolve.  Re-stir before using.

Place the cakelets on a rack over a baking sheet.  Ensure they are completely cool.  Dip the cakelet upside down into the glaze, allow to drip a second or two over the bowl, then turn right side up and place back on rack for glaze to harden.
The glaze is hardened and the cakelets are now
easy to handle.  If you look close you can see
the zest in the glaze.  OMG - so good!

I call it Lemon Drop Glaze because my family says these cookies/cakelets taste like lemon drops.  They are deliciously sweet and tart and my eyes roll when I bite into one!

I have no idea how long these cookies or cakelets last.  They don't stay around in my house long enough to find out!  Keep covered and enjoy (I love a cup of coffee or hot tea with 2 or 3 of these babies).

See you on the other side of Thanksgiving my friends!

Bon Appetit, Y'all!!!
StumbleUpon

Friday, May 17, 2013

Three-Kinda-Chocolate Chip Cookies


Yesterday afternoon my son walks into the kitchen and notices a pound of butter out and softening, some vanilla bean paste out, and a few eggs laying on the counter coming to room temperature.  His eyes lit up and he said "what are you making Mom?".  When I said "cookies" - he smiled and asked what kind.  I knew that smile would dim when I said I was decorating cookies...so I decided, instead, on the spot, to make some cookies that the men of the household would pounce on.  They tend to hold off from pouncing on the decorated sugar cookies.  Neither are overly fond of royal icing at this point.

I slid over to my stash of chips and found a bag of chocolate chunks, a 3/4 bag of milk chocolate morsels, and a bag with about 1/3 of it filled with white chocolate morsels.  I grabbed them all and decided to just make a "dump in what I have" cookie!

I've said before, and I'll say again, I like the base mixture of a Toll House Cookie - really, it's hard to beat!  So, you'll notice the basics of this cookie are just that...with a few tweaks that really, IMHO, make it special.

Here it is:

THREE-KINDA-CHOCOLATE CHIP COOKIES
Adapted from Toll House Chocolate Chip Cookie Recipe


Printable Recipe Here

Ingredients:

2 1/4 cups Unbleached All Purpose Flour (I am a King Arthur flour fan)
1 teaspoon ground cinnamon (brings a wonderful warmth to the cookie)
1 teaspoon baking powder (Toll House recipe uses baking soda - but I went from memory and didn't check and already had the baking powder out for my sugar cookies...it seemed to work okay!)
3/4 tsp. fine sea salt (I don't use kosher salt in these cookies)
1 cup (2 sticks) butter, softened (I use salted butter - usually do, because that's what I grew up with)
3/4 cup packed brown sugar
3/4 cup granulated white sugar
1/2 tsp. vanilla extract
2 Tbsp vanilla bean paste (needed a stand-up-to-the-chocolate flavor)
2 large eggs - room temperature
12 ounces Semi-Sweet Chocolate Chunks - Nestle Toll House brand
8 ounces Milk Chocolate Morsels - Nestle Toll House brand
4 to 6 ounces White Chocolate Morsels - Ghirardelli brand (I didn't measure and would have been happier with 8 ounces - to equal the Milk Chocolate volume)

Method:

Preheat oven to 375 degrees Fahrenheit.  Prepare baking sheets with parchment paper or silicone mats.  I prefer the mats.

Whisk dry ingredients in large measuring cup and set aside.

In bowl of a stand mixer, beat butter and both sugars until fluffy.  Add eggs one at a time, while beating, and then add the vanilla bean paste and the vanilla extract.

With mixer on low, add the whisked dry ingredients about 1/3 at a time, mixing between each addition. Stop mixer to add chips and chunks.

Add the chunks and, on low, mix just until barely combined.  Stop and add the other two morsels and pulse a couple of times to mix gently.  Remove the beater, scrape all the way to the bottom of the bowl and gently mix a couple of times with a sturdy spoon.

This batch made 2 dozen that I baked...and I froze twenty balls of cookie dough for later use.  I used a medium size cookie scoop to get that number of cookies.

Bake 12 at a time on the baking sheet and bake 10-12 minutes for a chewy cookie.  For the frozen ones, I will generally bake at 350 for 11 to 13 minutes from a frozen state.  I don't thaw or put in fridge first.  They turn out beautifully straight from the freezer.
Frozen bag of cookie dough balls are great to keep in the freezer.
I allow to freeze on a smaller cookie sheet in the freezer,
then remove them to a freezer zipper bag.
Remove as much air as possible before freezing.
Double bagging won't go amiss! 

The men in the house were very pleased and I notice there are less than a dozen left...that's a good thing!

Dark, Milk, White...a great combination of chocolate with
the underlying cinnamon and vanilla flavors.
Made a really tasty cookie!


StumbleUpon

Thursday, May 9, 2013

The Cookie Decorating Experiment

My second attempt at painting a cookie
This week has been "experiment" week.  I have learned many lessons!  Good lessons and "eek" BAD lessons!

I tried using Karen's Cookies Meringue Powder Buttercream this week...I had printed her recipe - but it's been over a year since I watched the video...and I missed some key things this time around...now duly noted on my printed copy. 

1.  Need to measure loose powdered sugar, not packed (I was in a hurry and dug it right out of the bag).  Which follows rapidly with, don't make anything at midnight right before going to bed - the reason "I was in a hurry"!
2.  Those living in more humid areas were advised to use extra meringue powder.  I did not.  Two days of being under the fan and I still have a softness under the crust. (not me, silly, the COOKIES).
3.  Either #2 is in play, or you cannot use food color markers without breaking through Meringue Powder Buttercream. 
4.  Air brushing is different on MPB than on RI...I guess the buttercream aspect makes it slick and much harder to use a stencil.  I wrecked a couple of cookies trying to work that out.  I'll stick to Royal Icing for stenciling and air brushing in my immediate future!  Here's a photo of a couple of the fails (my friends tell me they want to see the fails too - so I am begrudgingly showing the ones that have not been eaten yet - the hubs gets the fails). 

Mr. Flip Flop said (as he was biting into the sister failure of this cookie)
that it looks like a tile - kind of an old tile...he thought I did it on purpose.
In reality, I used an adhesive back stencil (which never has damaged
a RI cookie) and it ripped the crust right off the cookie after
I airbrushed it.  Yikes.

I used a lot of "stuff " to cover up the defects
in this cookie.  The pearl sheen pink air brush color
on a vinyl stencil seemed gummy...and then I touched it...
after I mushed the not totally crusted white base.  This
cookie didn't have a chance.  So, I over-decorated it with
some dots and royal icing ribbon roses I had on hand.
It ended up being "okay" - but a wee bit too busy!


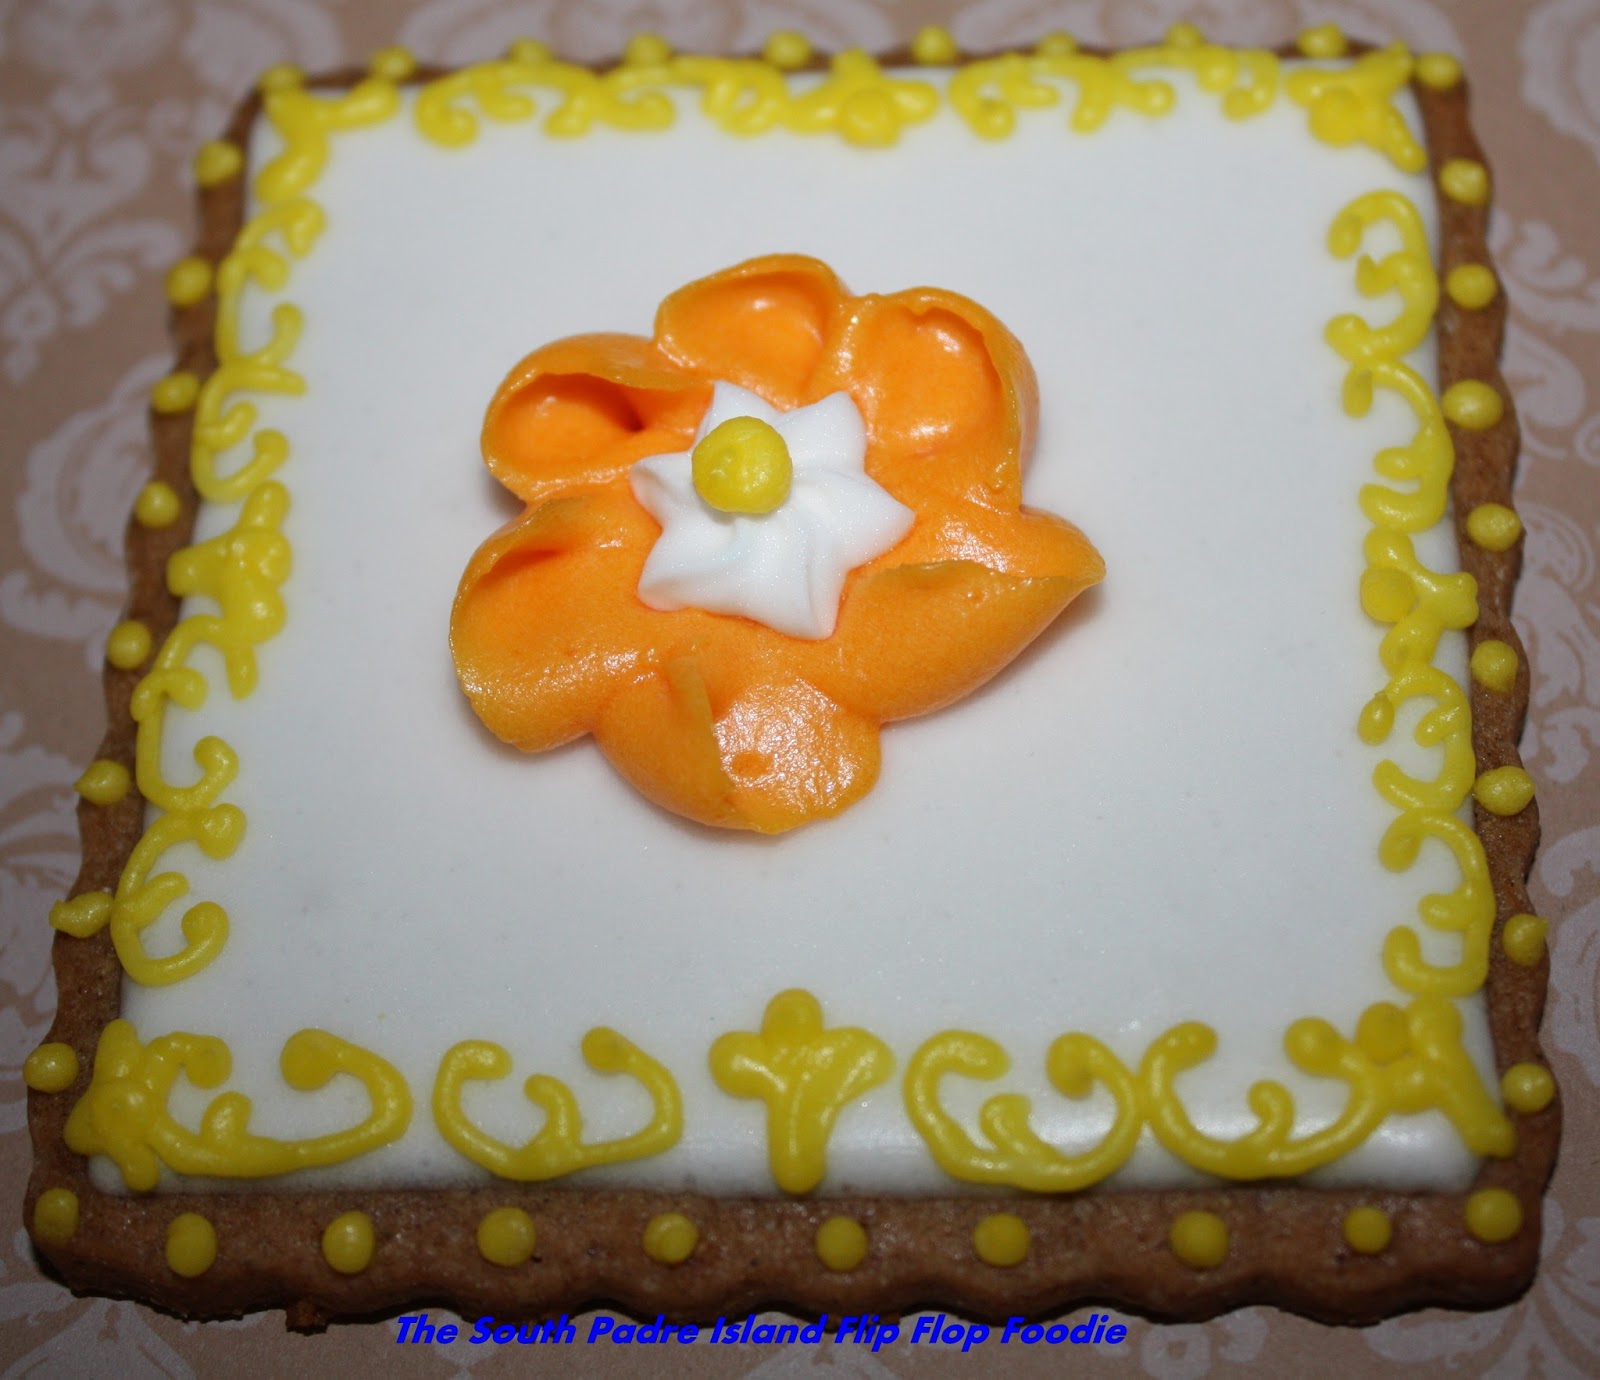
5.  MPB works beautifully for flowers - I have not had much luck with getting my royal icing to an appropriate consistency to hold up well, yet not cramp my hand while piping it.  The blue cookie flower was RI and the orange one below was MPB - you can really see the difference in how they stood up - same tip was used (#102 or #103 Wilton - can't recall which one I ended up with)

Royal Icing flower accented with a RI transfer I made last month

The Meringue Powder Buttercream really held
the shape better although it did not do so well with
the border piping...I used a PME 1.5 tip so I know
it was the icing that was the issue.

I wanted to make some Zinnia's to honor my late sister and they turned out pretty good.  They do, however, have a LOT of icing on them.  Who knows how long it will take for these to dry!!!  I also did some mini leaf cookies topped with royal icing that I had left over in the fridge.  I managed to use up the last of all I had saved via several of these cookies.
MPB Zinnia and RI leaves!


I also experimented with the airbrush (as noted above) and used the technique learned from Montreal Confections wherein one places a piece of lace over the cookie and then airbrushes over it.  I tried it on mini butterfly cookies - they turned out cute!  Was able to do 4 cookies at a time under one piece of lace.  The lace was light enough not to disturb the crust and it cleaned up beautifully after the experiment too.  I went ahead and embellished afterwards - not my best piping, but again, working late at night is not my best time for keeping an even hand.  Note to self...when spraying straight downwards, don't tip the air gun to the point food color runs out onto your cookies - not pretty.  Lots of blue splatter on one cookie...which was eaten before anyone saw the evidence.

Lace Airbrush Butterfly Minis

The larger butterflies were all airbrushed with pink sheen air brush by AmeriColor.  It took a long time to dry.  My completion of the butterflies was at a point where I just wanted to use up some of the colored icing I had on hand.  I actually like the pink,gray, and white theme I ended up with...maybe not so much the blue one - it was a bit "busy"...but...week of experiments, right?


I made some Sea Gulls with fairly basic feathering...couldn't seem to get the perspective right though.  I've seen different Sea Gull cookie cutters - I may have to get one so I'm not making this so hard on myself.

Last, but not least, I took the scary, heart-pounding leap and decorated two cookies by hand painting them.  I am so NOT an artist.  The first one is a better bird, with a kindergardenish sun in the background...the second one the bird's beak is way too big and his legs are too fat...and I messed up by painting yellow into blue...which magically became green (duh)!  I love looking at the blue herons wading in the shallow bay outside my window.  This was my homage to herons.  I need to take an art class - I need help with perspective and simple "how to draw things".  It does not come naturally to me at all!


Well - that's this week's enterprise.  I'll be seeing family this week-end so I hope they are willing to eat the experiments!

All cookies used this week were Apple Butter Sugar Cookies (recipe linked here).  It is a wonderful spicy cookie and is tender to the tooth.  I do bake the large ones a little longer so they don't break - better to be a little hard than too soft when decorating.  My icing was flavored with pure vanilla extract and 1/4 tsp cinnamon extract.  The combo goes beautifully with this cookie.

Thanks for sticking with me, I finally feel like I'm getting back into the swing of baking and decorating after several months of not being able to gather the energy... and that is a VERY good thing!

Bon Appetit, Y'all!!!


Shared With:

StumbleUpon

Friday, April 12, 2013

Cookies for Book Signing


I love to take baked goods to share when our wonderful indie bookstore, Paragraphs on Padre Blvd, hosts a book signing.  I haven't been in my baking groove (as you can tell from the lack of posts) for some time.  Last night and this morning, however, I was "on" and ready to bake!  Both of these cookies have been blogged about before - but I decided to go ahead and re-post anyway!  The Lemon Ricotta Cookie below was changed only by the utilization of Meyer Lemons this time around.  Have to say I LOVE them.  I made one tiny change to the glaze by zesting two lemons instead of one in the glaze.  Meyer Lemon zest is much less tart (to my taste) than the usual lemons used in the past.  They are a cake-like cookie which I find very appealing.  I think they turned out great.

The other treat is a Vanilla Bean Madeleine.  Also, the perfect joining of cookie and cake!  Sometimes I make excellent Madeleines with no effort...and other times, like today, each batch was a struggle.  Nonetheless, they turned out okay and taste quite yummy.

If you are a local, and want to try any of these treats, come by the Pat McGrath Avery signing and discussion of her book "Emergence - The John Bax Story".  It's bound to be a good activity; an informative discussion of John Bax's life as a self-taught filmmaker who loved birds and captured incredible and beautiful scenes of birds in the wild.  He spent many years of his life in South Texas so I can't wait to learn more!  It is today, April 12, 2013, from 1:00 p.m. to 3:00 p.m.  Paragraphs is located at 5505 Padre Blvd. South Padre Island, TX.  Hope to see you there!

Bon Appetit, Y'all!!!StumbleUpon

Friday, November 30, 2012

Peanut Butter Blossoms... or as we call them, PB Kisses

My boys love Peanut Butter Blossoms...or even just plain Peanut Butter Cookies.  They often search them out before any other cookie on the platter.  We have always called them Peanut Butter Kisses in our house...had never even heard them called PB Blossoms until I started following a multitude of blogs and cooking/baking sites.

As I wrote last year, and the year before, they are a really easy last minute cookie to bake using store-bought refrigerated peanut butter cookie dough in a roll.  It's what I usually do!  This year, though, I decided to mix up some homemade dough and freeze it for later baking.  Short cuts are all good and well, but homemade is what I really like during the holidays.  This year, I'm getting in front of the insanity!

I have frozen the store-bought dough, but have never frozen the homemade dough.  I froze, and then baked off a dozen cookies so we could have a look at how they do!  They taste mahvelous dahling!


Peanut Butter Blossoms
Adapted from Joy of Baking.com
(Basically I just doubled her recipe because it looked closest to what I used to make years ago when I made these from scratch on a more regular basis)

Ingredients:

1 cup butter, softened to room temperature
1 1/2 cups creamy peanut butter
2/3 cup brown sugar
2/3 cup granulated white sugar
2 large eggs - room temperature
2 teaspoons pure vanilla extract
1/4 cup milk

3 cups unbleached all-purpose flour
2 teaspoons baking soda
1/2 teaspoon fine sea salt

96 Unwrapped Hershey Kisses

Method:

In the bowl of a stand mixer, beat the butter until light and creamy.  Add the peanut butter and both sugars and mix on medium until color has lightened and it is smooth and fluffy.  Scrape the bowl and beater to ensure all the peanut butter is incorporated.

Add eggs, one at a time, beating after each addition.  Add vanilla extract and mix.  Add milk and mix.  Your batter will be light and creamy at this point.

In a large measuring cup, combine the flour, baking soda, and salt.  Whisk by hand until combined.  Add half of the dry goods to the wet mixture in the mixer bowl.  On very low, begin to mix, bring the speed up once you know there won't be a cloud of flour and then add the second half of the dry good...again slow to start, then raise the speed and beat until totally incorporated - scrape down the bowl ALL THE WAY TO THE BOTTOM (voice of experience) to insure all the ingredients are together and smooth.

Cover the bowl and place in refrigerator for 1 or 2 hours.  This will allow the butter to firm back up and make rolling the balls easier.

I used a small cookie scoop to ensure a uniform size to the cookies.  Scoop out your dough on one cookie sheet (covered with a baking mat for easy removal) and pop back into the fridge while you scoop the next tray.  Keeping this dough cold is pretty important.

Alternate out the trays and roll the first tray in balls and place that tray in the freezer until frozen.  Then remove the second tray from the fridge and roll them and place that tray in freezer.  Once all are frozen, place the frozen balls in gallon Ziploc bags and get out as much air as possible before zipping closed and placing in freezer.  Freeze until ready to use.

When ready to bake, preheat the oven to 375 degrees Fahrenheit. Take out however many balls you are going to bake and place on parchment lined or Silpat lined cookie sheet.  Allow to soften slightly at room temperature to the point where you can use a fork to score the cookie dough (took mine about 20 minutes).  I like to dip them in red and green sugars for Christmas.  You can do that by either dipping the top half of the ball of cookie in the sugar or dipping a fork in the sugar and make criss-cross marks on the cookie.  Don't press too far down if you want a puffy cookie.  (I know a lot of people don't score the blossoms - just the plain PB cookies - but I like that instant recognition that comes with the scores..."hey, PB Cookies!")  If needed, wipe the fork between every 3 or 4 cookies... sometimes it gets gummed up with dough and doesn't make clear marks.

Bake the cookies for 8-10 minutes - just lightly browned so they will be soft and chewy.  As soon as they come out of the oven, place tray on a cooling rack and place an unwrapped Hershey Kiss in the center of the cookie, gently pushing down.

Or, of course, if you don't want the chocolate in the middle, just leave them as Peanut Butter Cookies!
After the cookies are cool enough to handle, use a spatula to move from cookie sheet to cooling rack to continue cooling all the way.  The chocolate will be soft, so don't squish them!  I like to eat them while the chocolate is still soft...and the cookie is warm.  My kids don't care - they'll take 'em however they can get them!

I'm happy to be checking off another item on my "to bake" list... I'm liking that I am getting ahead of the game this year.  Of course, I haven't decorated even a single surface of my home...but the baking prep is getting done! 
The tasting dozen!

Bon Appetit, Y'all!!!

Shared With:

StumbleUpon

Wednesday, November 28, 2012

Holiday Chocolate Chip Cookies

In October I first laid eyes on the Nestle's Toll House Limited Edition Holiday Chocolate Morsels...and I instantly grabbed two bags.  Like so many other products, the size was now 10 ounces instead of 12 ounces.  I've been thinking about what I wanted to do with these ever since.  My family does love the Toll House cookies....but we like LOTS of chips in those cookies...and they have to be chewy, not crisp.  So, I elected to stick close to the original Toll House recipe but to  make it 1 1/2 times the amount listed on the bag and use both bags of chips.  They are red, green, and semi-sweet chocolate.

You might remember my insanity last Spring in searching for pastel colored morsels...finally ending up making my own.  Whew, that was labor intensive.  My heart jumped when I saw these this year.  They certainly were not in the Wal-mart last year (at least that I saw), so I'm thinking they must have read my blog (ROFL!!!) wherein I wondered why the heck no one was marketing colored baking chips?   I've seen the swirled chips before, and the mint chips - but never this particular package.

Here's the recipe I came up with (including my frequent addition of cinnamon to things with chocolate).

Holiday Chocolate Chip Cookies
Adapted from Nestle's Toll House Cookie Recipe
(click here for printable recipe)

Ingredients:

3 1/2 cups unbleached AP flour
1 1/2 tsp. baking soda
1 tsp fine sea salt (I have found Kosher salt is not as good in these cookies - I end up with salty bites here and there)
1 tsp. ground cinnamon

3 sticks (1 1/2 cups) butter - softened
1 cup granulated white sugar
1 1/4 cup packed light brown sugar
2 tsp. pure vanilla extract
3 large eggs (room temperature)

2 ten-ounce packages Nestle's Holiday Morsels

Method:

In separate mixing bowl (or 5 cup measuring cup) combine the dry ingredients (flour, soda, salt, and cinnamon) - whisk to incorporate - set aside.

In bowl of a stand mixer, whip softened butter and both sugars until fluffy.  Add eggs, one at a time, mixing after each addition, and finally the vanilla extract.  Mix until combined thoroughly.  Scrape bowl.

Add the dry ingredients, mixer on low, about 1/3 of the amount per addition.  Scrape bowl between additions if needed.  Definitely scrape all the way to the bottom at the completion of this step.

Add the first package of morsels and mix a couple of rounds on low.  Remove the beater and hand mix the second package of morsels so they don't get broken up.  Use a very sturdy spoon to do this - I broke a large spatula with a plastic handle trying to mix this amount of dough.  Moved to an industrial size metal mixing spoon!  Now is the time to add pecans or walnuts if you like nuts in your cookies... we prefer nut-free except for my husband.  (I make him special ones from time to time)

I have scooped them all up with a medium-sized cookie scoop and have them freezing on a couple of trays.  I scooped out 63 cookie dough balls with this recipe.  Once they are frozen firmly, I will store them in Ziploc bags in the freezer for baking as Christmas time draws near.

I like to get ahead of the game, and when I do this, not a soul knows that I wasn't in the kitchen mixing up a batch of cookies that morning (well, except for you guys).  It really cuts down on the overwhelm that occurs that last week before December 25th!

When it is time to bake, preheat your oven to 350 degrees Fahrenheit, place cookies, directly from freezer bag, at least two inches apart on a parchment or Silpat covered baking sheet.  (no need for them to thaw - just pop them right in the oven)  Bake for 11 to 14 minutes and allow to cool on a rack before moving to serving tray. 

Obviously I had to bake off a few to ensure they were not poison.  I think they taste and look quite delicious!  This will be a colorful and tasty addition to your holiday platters of cookies!

I baked six and tasted one...yummy...and you-know-who will
be happy to be a taste tester as well... "ohhhh Ian...guess
what I have for youuuuu!"


Bon Appetit, Y'all!!!

Shared With:StumbleUpon