I was soooo excited to see Sweet Sugarbelle's recipe for Red Velvet Roll-outs. She posted it on her website in 2012, but re-posted this year on Facebook for those of us who missed it. I had been thinking about what flavors to do for Valentine's baking - I like to do at least two and, because my grandkids prefer them, I always include my Vanilla Bean Sugar Cookies in the mix. I am linking the recipe above because I didn't change one tiny iota of the recipe. It worked beautifully. I rolled between parchment paper, wore gloves in fear of red food color hands, used her tip of mixing cocoa powder with flour for dusting when sticky. Everything was smooth and beautiful. Best of all, they smelled awesome when baking - enough to draw the boy from his man cave. Best, BEST of all, they taste divine! No red teeth thanks to the use of Lor-Ann's Red Velvet Emulsion instead of an entire bottle of liquid red food color, no bumps in the baked dough...smooth and delicious. Ahhhhh.
So, as I moved on to thinking about decorating them, they were calling out to me, begging for a cream cheese icing. Red Velvet must have cream cheese frosting/icing. It's in the Southerner's Rules of Baking Book (if there is one, I'm sure it's in there). The tastes just marry perfectly and, while I wanted to make them "purty", I did not want to top them with royal icing if I could possibly avoid it. Let the science experiments begin!

I have previously used Karen's Cookies recipe for Meringue Powder Buttercream. Gave a lovely mouth feel to piped icing. However, it took three days to dry down in my humid May environment. I knew I was going to be decorating a lot of cookies for family and friends, I was worried I would not have time. My usual time frame takes five preparation days, including making the dough, baking, making the icing, and decorating in layers that require complete drying overnight between layers. If I experimented and it didn't dry, I was afraid my cookies wouldn't be done until AFTER Valentine's Day!

I cogitated about it a bit with a cup of coffee, sitting here cursing our weather, which is unusually cold this year (like the rest of the southern United States) and cut on the television to Food Network. Now, my husband would say you can't cut anything on...you can turn it on, but only cut it off. Yankee, what does he know? All of us down south know you absolutely can cut on lights, cut on the a/c, cut on the fan, cut on the t.v. - right? I digress. On that television was Alton Brown, discussing cakes. Red Velvet Cake in specific and the fact that the invention of cream cheese "saved the south" because it had a much higher melting point than butter so it became the standard in frosting in the very warm southern U.S. - light bulb goes off in my tiny little 'ole brain. Maybe I could use cream cheese instead of shortening in Karen's recipe for MP Buttercream. Instead of Almond extract, maybe I could use some of the Lor-Ann's Cream Cheese emulsion that I had in my cabinet. Lastly I remembered I had not used the extra MP last time, Karen recommended double for humid environments...I would do that too. Woo hoo, I was off to the races with my fingers crossed.
I got everything out, mixed it up, and shoulders slumped...it was too runny. I added another cup or so of confectioner's sugar (maybe even one and a half) and beat it some more. Now...that's what I'm talking about. Perfect flood consistency icing. So, I piped some on a naked cookie and halved the cookie with one of my food testers (Mr. Flip Flop) and we both agreed - yum! Next to ice some more hearts and see if they would crust. I put them under the fan and four hours later, the had a light crust, but my finger pressure broke the surface and it was still very "floody" underneath.
So, here's the recipe, based on Karen's recipe, with my tweaks. It's good, and if you have the time for them to dry, it's very, very tasty. Fortunately, the Red Velvet cookies were so moist they stood up to the time under the fan. Still soft to the tooth inside and incredibly delicious (I know because I just ate one to make sure ;-).

Cream Cheese MP Icing
Tested in a humid environment
Adapted from Karen's Cookies Recipe
Ingredients:
1/3 cup room temperature water
6 Tablespoons Meringue Powder (I use AmeriColor MP)
4 ounces regular cream cheese, room temperature
5 1/2 to 6 cups of sifted powdered sugar (sift first, then measure), divided
1 teaspoon pure vanilla extract
1/4 to 1/2 teaspoon Lor-Ann's Cream Cheese emulsion (shake before measuring)
Method:
Place three cups of the powdered sugar and the meringue powder in the bowl of a stand mixer with the whisk attachment engaged. Turn the machine on and whisk the two dry ingredients together until thoroughly mixed. With the mixer still on, slowly stream in the water. Mix until everything is incorporated, scrape down the sides if needed. Turn the mixer on high and whip until stiff peaks form. Add flavorings and mix well.
Change to paddle attachment at this point. Try to get as much off of your whisk attachment as possible. Use a rubber spatula to help with that.
Add remaining powdered sugar and the cream cheese. Whip for about 3 minutes - or until you get to flood icing thickness. Don't whip any less to prevent separation. I used this as my base. Store icing in the refrigerator with plastic wrap laying on the surface to prevent crusting (I'm guessing here - that's how I do anything that crusts).

To make piping icing for the leaves, I added powdered sugar and some base together with the green food color (AmeriColor gel leaf green) until it was the consistency I was seeking.
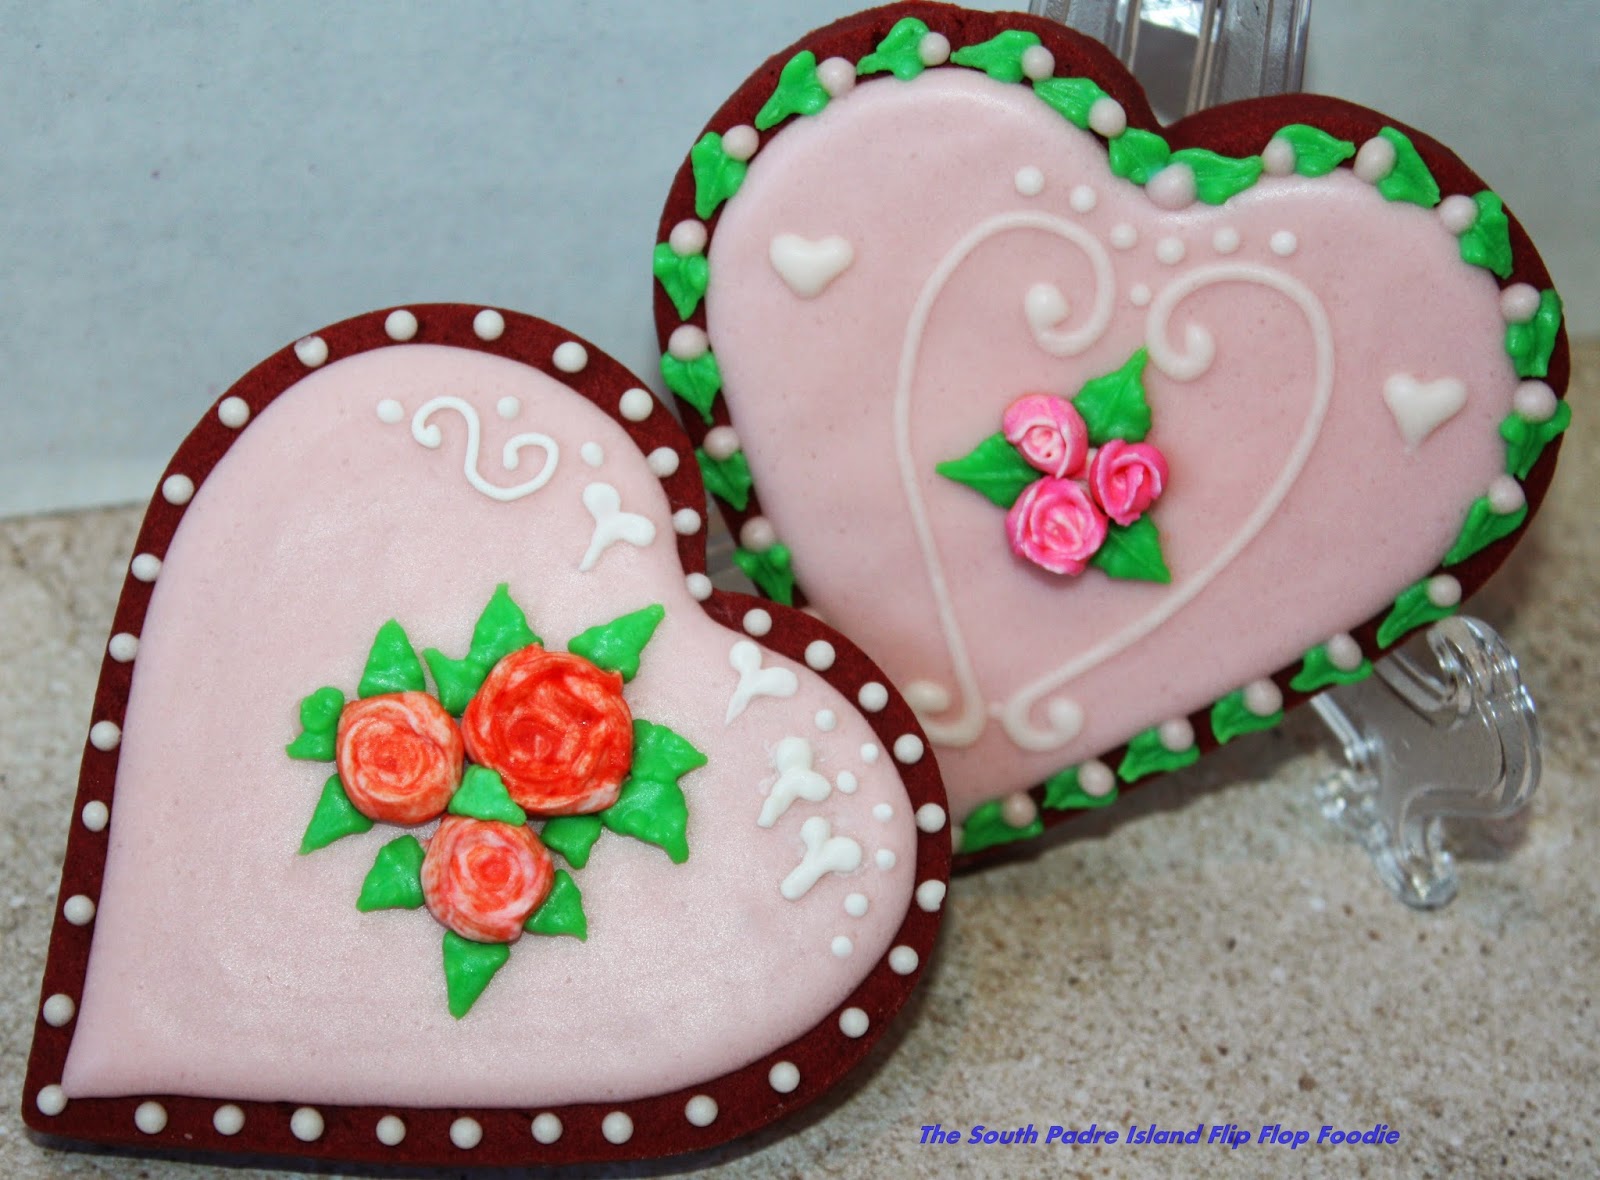
I think you can see from the photos, that it worked really well. It tastes delicious and worked...what more can you ask for? Well, you could have asked me to test it more than once to ensure consistent results...but I don't have time. I welcome any feedback if you try this. I haven't found anything in a Google search that provides a similar recipe, so I was on untried ground as far as I could tell.

I did find that it was easier for me to do writing with royal icing and the roses are all royal icing transfers I made on another cold day last week. They are great to have on hand and a good way to use up your unused royal icing. They last forever if kept in an airtight container!
Well, that's it for the experimentation phase of my Valentine's Day cookie decorating. I'm onward to the rest of the cookies, still hoping I will get finished in time!
Bon Appetit, Y'all!!!
No comments:
Post a Comment
Comments are moderated - you should see it within a few hours if approved! Spam or marketing comments are immediately deleted. Thank you!!!