The South Padre Island Flip Flop Foodie Brownsville restaurants

Search The South Padre Island Flip Flop Foodie Blog!

Showing posts with label decorated sugar cookies. Show all posts

Monday, September 4, 2017

Not Kicking High, but Still Kicking!

Just a quick update... it has been over 2 years since diagnosis, I had a successful Stem Cell Transplant, and am in good remission with maintenance chemo...which I will likely take for the rest of my life.

I can't do much cookie decorating because chemo and fatigue make my hands shake and I am developing some neuropathy...but still, life is good. My favorite saying is "it's better than being dead".  Must husband says I need a t-shirt and a mug with my mantra on it.  It keeps me going when I think side effects of chemo are horrible and I envision the future. It is definitely better than being dead!

Glad to see I am still getting views on my blog.  It gives me a little thrill whenever I see the numbers (I know they aren't big, but someone is out there looking!). I only check in on the blog every few months. Over 3000 views this month!  Woo hoo!  I get nothing financial, because I never advertised, but I got joy from blogging.

A friend recently asked for my Royal Icing recipe.  I realized I don't think I ever posted it.  I typed it up with a bunch of commentary. LOL - no surprise from me! The printable link is HERE. It says Print Page at the bottom of the page.  Let me know in comments if you have any issues.  My brain is foggy from chemo but I still have lots to offer from my cookie decorating experience and am happy to share.  If it is a bad day, you might not hear back from me as quickly...but I do love getting messages or comments from readers.

I'm not back to blogging... this is just a check-in to say - "HEY" and "I am alive".  My disease has recently been upgraded from a 2-5 year survival rate to 3-7 years...I fully intend to be the person that breaks survivability records.  #CancerSucks

Still wearing FLIP FLOPS!!!StumbleUpon

Friday, April 3, 2015

Paint-Your-Own Cookies

Ready to package!


This is really just a quick share!  If you want to learn how to make these cute cookies, there is a wonderful tutorial online via Montreal Confections' Patreon page.  It is a subscription - but for as little as $1 per month you can have access to many of her tutorials.  I enjoy learning from Marlyn and I bet you would too.  She was the original creator of the PYO (Paint-Your-Own) cookie - often copied in the cookie world!  She always says she's happy for people to learn and use her designs.  I do think, however, it is important for cookie artists to attribute the source of their design ideas in social media.  That's why you often see my posts including where I learn things.  I'm a little creative...but not THAT creative.  The link to her YouTube channel above shows samples of the types of PYO cookies you can learn to do on her Patreon Channel.  The actual tutorials are on Patreon at this point.

These were my first PYO cookies.  I made them for my grandkids and some friends of my oldest son...everyone seemed happy to get them!  They were also happy to see I had used my Vanilla Bean Sugar Cookie dough.  It's the family favorite.  These cookies were really large and sturdy.  They measured 6 1/2 inches tall and were rolled 3/8" thick.  I only used 1/4 tsp. of  baking powder to prevent spread (but I used a tiny bit so I would have some lift - it's a fine line)!

Simple designs or more intricate.
You can gear it more towards
the age of the child by piping
larger patterns, easier to paint
and stay in the lines...
although staying in the lines
is not at all necessary!

A little tag stapled to the top of the packaging gives
instructions on how to activate the colors.
I loved that this particular project used
food color air-brushed M&Ms for the color dot
instead of more royal icing..
Tasty addition to the PYO line-up!
 Thanks Marlyn, for sharing your creative genius with the world.  I have learned so much from Obi-wan Marlyn!!!

Happy Easter Everyone!!!  May you be blessed with spending the day with your family and/or friends!  Those who don't celebrate Easter - just have a marvelous Sunday!

UPDATE:
I just received a photo of one of the painted cookies.  Yay!  Thanks for sharing the art work :-)

Photo Courtesy of James Harris


StumbleUpon

Tuesday, March 31, 2015

Easter's on the Way!

A very light violet royal icing stenciled onto base-coated
cookies - these three were all using Designer Stencils
products.  The flowers were learned by taking  two
different classes on Craftsy - SweetAmbs Sweet Elegance
and Wilton Piped Flowers.

Cookie show and tell time.  I've been working on these Easter cookies for the last few days.  I needed to have them finished by today and I met the deadline.  This isn't everything but I did end up with three dozen that I'm happy with!  I've been taking a lot of "online classes"... Montreal Confections, McGooU, Craftsy, and a lot of quickie tutorials I see on Facebook and YouTube.  Most of these were planned based on something I've learned online.  So, here we are!

I love the baskets of flowers I made based on my class at McGooU.  The basket and handle were piped white with a PME 1.5 tip and then, when dry, painted with a mixture of copper AmeriMist color, some gold petal dust and even a little pink in the middle one - gave it an interesting depth of color.  I like that there is some bare cookie showing with visible flecks of vanilla bean seeds in my Vanilla Bean Sugar Cookies.  I worked on flowers every time I had extra stiff icing.  Stored in air-tight containers, piped royal icing flowers last for a really long time!  I keep several containers on hand for days like this.  Love the look!  My grandkids will love eating the "candy flowers".

Montreal Confections posted a video for this project this week on her Patreon channel.  Patreon is a wonderful way to support artists you admire.  I enjoy getting tutorials before others and sometimes they are available only to Patrons.  It's a worthy cause in my book.

I had already baked these little guys and was overjoyed to see her detailed visual on decorating them pop up.  I think they turned out cute and I used most of her technique but made a few slight changes.  I didn't cut out and use her template, but I did print it out to look at it while I piped.  I also did not want to drag out my airbrush so I used some dry orange petal dust to lightly highlight the edges of their cheeks and wings.  Love the depth it gave.  I also used dry luster dust on the cheeks...it was a deep pink with a little sparkle.  This cookie cutter is from Wilton and actually has a bow tie for the little chick.  I bake really thick 3/8" cookies and should have rolled the bow-ties thinner.  After I decorated them, they looked funky because the stuck up so high, so I opted not to use them.  I'm happy with how they turned out - very cute little chicks.

Next up, also learned from Montreal Confections, were these cute 3-D bunnies using a cutter from Chicago Metallics.  I had learned my lesson from the chicks and cut these guys at 1/4".  I would cut the hind legs even thinner if doing again. Pretty much followed Marlyn's tutorial except that I piped a dot of dark gray and lay in a pink 4mm sugar pearl for the eyes and then, using a needle tool, I dragged a bit of the dark gray into eyelashes...so these are girl bunnies :-)  Marlyn showed grass down by the bunny feet but I liked the idea of painting on some flowers.  I used a very fine paint brush (I finally found one I love) and just did little dot flowers. They remind me of the beautiful wildflowers currently being seen on Texas roadways and acreage.  Also loved this little project (especially that they stand up so easily).  The paint brush I found at Michael's or Hobby Lobby I'm sure.  It is a LaComeille 18/0 Liner #7350.  I love that it has a thicker handle with a tapered grip which allowed me to hold it in such a way that I had a bit more control.  I tend to get shaky hands :-)

I make chicks every year.  Nothing new here beyond some little wings I piped on.  I found this tiny little carrot cutter in my box of Easter cutters.  I used some leftover icing to pipe the carrot and then used orange food color to paint some stripey looking color - going for a more realistic carrot!


I don't know where I got this bunny cutter with a tail.  I saw lots of people using this cuter this year but using it face-forward.  I was working on trying out some stencils and decided to do the rear-facing bunny on the left and some bunnies stenciled onto an egg on the right.  Stepping away from the "expected" with these two.

These were all stenciled and painted with food color as well.  The bunny ears and eye lashes were painted, the flowers and grass on the left also painted.  The center bunny was stenciled, then dots piped for flower centers and leaves/stems painted two shades of green.  The bunny on the right utilized half of a stencil which I masked off using Press 'n' Seal so the eyes and ears didn't end up with a design on top of them.  These are some of my favorites.

A simple stenciled bunny.  She's pretty in purple.  Very light purple!


By the time I got to these last three cookies I was getting weary.  I used a glass etching stencil for the hummingbird over the flowers.  Trying to hold the stencil still while changing colors with my palette knife was challenging, but it turned out nicely.  The butterfly was stenciled in light blue and then I highlighted with painted accents using that new extra fine paint brush.  The flower spray on the right was the same stencil I used on the bunny above except I didn't paint it.  I was really tired by this point!

Thanks for checking out my cookies - I keep thinking I should start a second blog just for cookies but, darn it, I'm just too lazy!  My blog is kind of like my life - scattered with a variety of interests - I enjoy sharing whatever I find that I like!

Bon Appetit, Y'all!!!


StumbleUpon

Friday, February 13, 2015

The Valentine Cookie Parade 2015!


Well, it's time!  I finally finished all the cookies I'm gonna finish.  I always end up with unfinished cookies, because I run out of time...once again, that is the case!  Oh well.  I don't care, I just do what I can do.  I'm sure Mr. Flip Flop will eat the "nekkid" ones!

I have been cleaning piping tips, couplers, ties, and all the "stuff" I use...refiling stencils, replacing everything in my cookie armoire where it belongs.  The clutter overtakes my dining area for about 10 days while I bake and decorate in waves before a holiday.


Whew, glad to be done with it for a few days.

Next I start on the donation for the KOA Care Camp auction.  That gives me a week-end reprieve.  Then I'm back to mixing, rolling, cutting, baking, cooling, icing, drying, decorating, drying, and decorating some more!  I only do it because I love to do it.  It's my favorite hobby.  I still get asked "how can I order your cookies" and I have to keep saying "I don't sell my cookies".  I like the freedom to create what I want to create and not what people want me to create.  The few times I've done it, I was a stressed out mess.  Maybe some day - but I'd really rather teach someone to do it themselves than to take orders and pump out cookies looking the same, one after another.  Not my thing!

I had fun stretching my wings this Valentine's with some new cookie cutters.  I bought a few from Whisked Away Cutters (on Etsy) and used the tiny owl cutter to make an owl like Sweet Sugarbelle demonstrated on her web site.  They were one of my favorites this year.

Also had fun with the "wedding bouquet" cookie cutter using the tiny piped roses I learned from my SweetAmbs Craftsy Sweet Elegance class.  They turned out cute I thought.

My friend, Jessica, took the photo below of one of the bouquets - she's an awesome photographer and I really enjoyed her visiting a cookie decorating day at my condo.  All of the ones that I could not take or wouldn't have thought to take (me working on the owls, the piping bags on the table, etc.) were taken by Jessica and you can see them in the Food Photography gallery at Just Us Photography.
I also acquired this cuteeee tiny cupcake cutter which I know I will use repeatedly for upcoming birthdays and other celebratory events.  They are so sweet.

I used a lot of new and not-so-new stencils on a variety of cookies.  I enjoy stencil work quite a bit.  I am getting more tools to help steady things during the process (which you can read about here). The lips and the guitar necks were new to me and I liked their addition to this "musical set".  My granddaughter is in choir (upper left went to her), my middle son has given me a lot of Mary Chapin Carpenter music over the years, so he got the upper right (I'm sure he won't think that's too weird - he'll "get" the connection)  The Love Me Do nod to The Beatles went to my youngest Beatles fan...he texted me that it was "cheeky, Mom".  Fun to do, one and all. Love baking for my family above all others!


I have worked for over two years trying to free hand scroll work without a template or looking at a picture.  I finally just sat down and did this heart on the left below - and the light wasn't even on!  Maybe I just needed to forget the fear of messing up and just go for it.  Turned out pretty well - and I was happy about having one I didn't cringe from.  I love the look of scroll work on cookies - looks elegant.  Another skill learned from Amber Spiegel of SweetAmbs.  She makes it look effortless.

I'm giggling over my ASL "I Love You" cookies - they looked a little funky to me, but I've not figured out just the right way to make them look right.  I've done three sets of these in the past and none were worth photographing.  I'll keep working on it and WILL get it right eventually!

These last three photos were using the chocolate cookie dough from LilaLoa's recipe and a slightly altered recipe of my cream cheese meringue powder icing to top them.  Crusted much better and tasted pretty darn good.
Rolled and cut large hearts and cut out the center with a
smaller heart - which I simply iced below.
Photo by Jessica
I enjoyed quilting on this cookie on the right.
On the first one I didn't measure the lines.  Awful.
This one I used a ruler and an edible
marker and it was just right.
Another technique I worked on this year was making a
ruffled lace edge on some of the hearts using brush
embroidery.  More techniques learned from the
tutorials from Montreal Confections, McGooU, and
 many other cookie artists.  It sounds easy...but I had to
find just the right brush to make it work right.
Well, that's the end of the cookies I (or Jessica) photographed.  I baked 90, ate a couple, and decorated about 70 cookies.  I know my sons' and my granddaughters' cookies arrived at their destination unscathed.  I have a few local friends to deliver to and then I'm finished with the Valentine decorating extravaganza.  Mr. Flip Flop ended up on-call on the 14th, so we will be celebrating on Friday the 13th.  Hope it's a good luck day for us!

May every day be filled with love - whether it is love for your best friend, your beloved, your family, your pet, the beautiful outdoors, the beach, the mountains...whatever rings your chimes.  Let it fill your heart on the holiday of love.


Bon Appetit, Y'all!!!


StumbleUpon

Thursday, February 12, 2015

Dolphin Love


I adore the dolphin tribe residing in our bay.  I love seeing them feeding and playing.  I just love everything about them!  Except that I can't seem to get a clear photo of their precious faces.  Oh well, that's my problem, not theirs. I get so excited I take my eye away from the camera and just exist in the joy of the moment.


I adore their biggest advocate, Scarlet Colley, her husband George, their many animals, including the dolphin dogs and the dolphin pig (yes, you heard me, the dolphin pig).  I love that they pass down to the upcoming generations the need to love our environment and care for the sea life that depends on a safe and clean environment. I love the Sea Life Center they run in Port Isabel. (there's lots to love you can tell).

I also adore.... dolphin cookies!


Last month I found a cute new dolphin cookie cutter and matching stencil...which I immediately ordered from Piping Mad Prints.  Just too cute!  My friend, Jessica, was photographing some of my cookie decorating endeavors (see previous blog post) and she wondered why I was decorating dolphin cookies for Valentine's Day.  I explained.

Frequently when I'm sick or sad or sound like I need a boost on Facebook, sweet Scarlet, the Dolphin Whisper, sends me a "dolphin love" comment.  It magically makes me feel better.

My friend, Anna Rae, and I took a dolphin watch last October
 on Scarlet's boat with Capt. George

A little clip from a video shows that moment when my heart
goes pitter patter.  It's dolphin love!

So, when I decorated this tiny set of Vanilla Bean Sugar Cookies, I thought of Scarlet and her darling husband, George.  They bring joy to so many people .  I just love them for all they do.


Happy Valentine's Day to my friends who do so much for our environment!!! Everyone out on the water, show the dolphins some love by taking care not to run up on them, leave them alone when they are feeding, and be courteous and good stewards of our glorious Laguna Madre.  SWAK!!!

Bon Appetit, Y'all!


StumbleUpon

Wednesday, February 11, 2015

Using a Stencil Mask

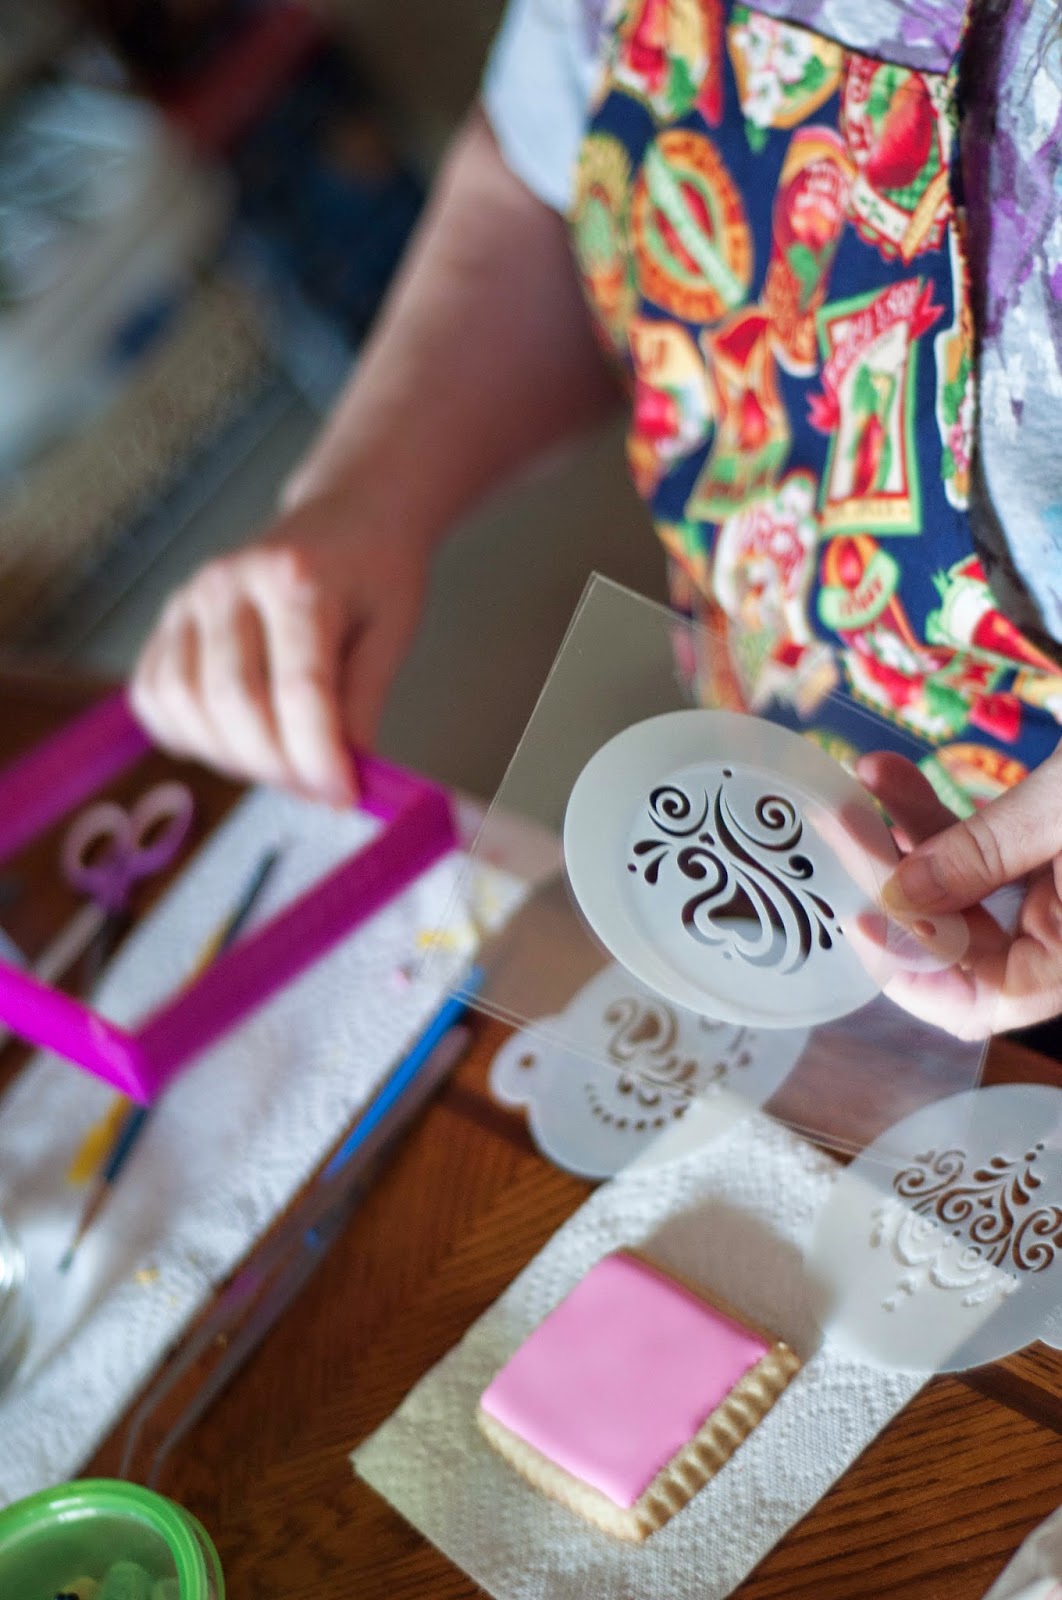
These three cookies were all stenciled utilizing a Stencil Genie.
The top right cookie utilized a 2Ts Stencil Mask
This past week-end I had a friend over to photograph some of the process of decorating cookies.  She and I played with icing for a while and then she began working with her camera while I continued decorating.  I asked her to help me photograph the process of stenciling because it was one of the things I could not photograph myself.  She sent me the photographs yesterday and I can't wait to finish writing this post to share her lovely photographs with you!  All of the rest of the photos in this post are courtesy of my friend Jessica of Just Us Photography. You can link to their web site and their gallery has a Food Photography link.

I met Jessica one Summer after we moved to the coast when she did some home visits for speech training with my youngest son who is deaf and wears cochlear implants.  I liked her immediately and have continued our acquaintance through the years.  The Sugar Skull cookies I made were for her wedding.  She and her husband are really good people and I'm thrilled she took her Saturday to come play "photograph my cookies" with me.  She's really quite good - speech therapy training, photography, entrepreneur... I love a multi-tasking woman!


I recently purchased some stencil masks from 2T's Stencils, to use with the Stencil Genie from Creative Cookier.  Both of these companies are Texas-based...which I love!  I have occasionally been challenged with feeling like I didn't have enough hands to get a good stencil on a less than perfectly flat iced cookie.  The Stencil Genie really helped me improve my stencil-ability but it didn't help with some of my favorite round stencils from Designer Stencils.  I love the sturdy products from Designer Stencils, but I regretted the inability to use them with the oh-so-cool Stencil Genie.  When I saw a video of Tammy's masks, I ordered them instantly.  Saturday, the day of these photos, was the first time I used one...so that tells you how easy and helpful they are!


The only issue I had was that my stencil slipped around a bit between the masks.  As I was not spraying the color, instead spreading thick royal icing, I was pushing and there was movement.  My solution was anchoring the center of the round stencil with a needle tool (as I usually do anyway) and working around it.  It allows me not to need any addition of Press 'n' Seal or trying to juggle everything (like when I really need two needle tools and an extra hand to hold one of them!).


I'm all about the "easy" way of doing things and this product definitely helped.  The only thing I was less than happy about was the slippery texture of the mask.  It all turned out well - and I'll continue to practice with the other shapes to see how it goes as I grow more comfortable with the product.  I do bake 3/8" thick cookies, and I like using the thinner side of the Stencil Genie so that it lays down on my cookie and sort of hugs it. That didn't work as well with the mask - so, like I said, will need to play with it some more to see what works best. .I simply seem incapable of icing perfectly flat cookies... this helps without a doubt!  I used my Vanilla Bean Sugar Cookie Dough for this cookie - and I will say this batch was a bit flatter than normal because I only added 1/2 tsp of leavening.  Now, if I can figure out how not to have dips in my icing - no matter what I do, I have slight dips... grrrrr.

Anchoring with a blob of icing and holding a needle tool
on the stencil helps avoid slippage.

Using a plastic scraper instead of a metal spatula
helped me avoid magnet grabbing...but that's
no longer a real problem when you use the
Stencil Genie.  I wish it came in a variety of sizes.
I bake some big cookies it doesn't fit over.

Ta Da! A good stencil...hooray for great tools!
Some simple dots around the edge and voila!  'Tis done!  Well, with a little action from the boo boo stick when  one of my dots became rebellious and didn't comply with my regulation dot size.  I know you guys can tell I am obsessed with dots.  I simply love their look on a cookie.  The great thing about the boo boo stick, which all cookiers know, is that you can take the flat edge and scrape the dot right off of the cookie and it's ready for take-two on the dottage.


I'll admit it is kind of weird to see myself in photos (I demanded no face shots - I had on no make up and I just wasn't going there).  I also find it weird to see my hair in photos of me decorating.  100% of the time it is up in a pony tail or a huge teeth clip.  I really don't want people to find a hair in my cookies!  Ewww (althoug my hair is very clean, it's just a yucky thing).  Jessica, however, kept saying she wanted to get my curls in the picture.  I laughed because even without seeing my face, friends can tell by the hair and freckles that this is me.

I love making Valentine Cookies - it is the epitome of the way I like to decorate - swirls, flourishes, flowers and more.  I have been taking Craftsy classes to learn more and more techniques.  I wonder if the new Culinary School coming to Port Isabel will have a baking and decorating curriculum.  I might need to go back to school if they do!  Secret I'll share - I have dreamed of teaching classes in cookie decorating.  I have to be good enough first...I'll probably be an arthritic old lady before I get to that point... we can always dream, yes?

More Valentine Cookies will be forthcoming - some will have Jessica's lovely photos as well.  I love the soft touch she gets and I can't wait to share the rest of them with you!

Bon Appetit, Y'all!

UPDATE OCTOBER 1, 2015
An email from Tammy with a trick to prevent slippage:

Debbi,  I just read your article from back in February and your stencils slipping.

I had that problem to.  Initially I found
made these to adapt to stencils of all shapes and sizes and sandwiching between 2 pieces.  But that does not secure the movement.  So recently I have been putting the stencil I want to closest to the cookie,   Piping a thin line of royal icing or piping jell around that stencil and then placing one piece of the adapter directly on top creating an airtight seal especially for airbrushing and eliminating under spray but it also holds the stencil in place with less movement for royal icing transfers too.

I hope you give this a try and find it an option and less movement. 

I loved your article!!!!

Tammy
2 T's Stencils

StumbleUpon

Friday, January 23, 2015

Is Blood Spatter Too Much? The CSI Cookie Project

I'm so excited to be participating in the 2015 version of Mystery Week at Paragraph's on South Padre Island.  This year they hosted book signings during the week and are culminating with a Meet the Mystery Authors discussion on Saturday from 1-4 p.m.

The grand finale of the day is a special event from 4-6:30.  We will be conducting an Investigation into Murder at the Crime Scene Investigators Convention... sort of a take-off on a mystery dinner.  Tickets have been on sale since the 14th and I imagine they are sold out...but you can call and check if you want to know.  Meeting our great mystery authors Pat McGrath Avery, Bob Doerr, Joyce Faulkner, and David Harry (Tannenbaum) is worth your time spent, whether you make it to the Murder Mystery or not.  They always make for an interesting discussion group!  I love it when they are all on the island together - something exciting always seems to happen!

I, of course, always need to bake cookies.  Griff and I talked and he suggested "CSI - type cookies".  Uh, OK, I can do that!

Admittedly, I had a load of fun stretching my wings a bit with this set of cookies.  I hand cut my own stencil so I could use their little "man with a magnifying glass" from the event flyer, I learned to make fingerprints on cookies, I used the white tissue paper transfer method I learned from various tutorials online, and I made blood splatter by flicking liquefied red petal dust off of a paintbrush onto base coated cookies (kind of creepy).

To begin with - the stencil making is not that easy by hand.  I bought stuff to do just that a couple of years ago and they just sat in my cookie supply closet staring at me.  It was so easy to order stencils on-line, once I found the vendors, that I really never had cause to consider such a thing as "DIY stencils" after that!  Self-healing cutting mat and a supply of sharp X-acto knives got me through the project.

All would have worked out better had I used my airbrush instead of being lazy and using canned spray.  I had a lot of under-spray as I couldn't "dial down" the pressure.  Lesson learned.


The fingerprints...I tried several different "ways" of doing it...the best results were yielded by coating my thumb/fore finger with corn syrup then dabbing it down to just a little stickiness.  Applied the finger in a rolling motion  (just like they used to do it at the DMV) to thoroughly dried royal icing and let it sit for a few minutes.  Using a dry paint brush and dry dark silver luster dust, I basically copied what you see on the CSI shows.  I lightly brushed the powder across the "prints". and viola!  Well, a bit shiny, but silver was all I had.  Not going on an expedition in search of black petal dust!

The DNA helix was easy, using white tissue paper over a printed picture.  I traced the outline with a food color pen and then placed it on the, again thoroughly dried royal icing, and re-traced with the food color pen.  It bled through, leaving lines for me to follow, and I just piped blue icing on top of the lines with a 1.5 PME tip.  Then, with a size 1 PME tip, I piped the little lines free-hand while looking a the picture.  I reallly liked how they turned out.

I had not used my food markers a great deal, but I must say I am very fond of the FooDoodler brand.  Good color and nice tips.  I used Wilton and AmeriColor brands as well...but, the FooDoodler reigned supreme.  Granted, I hear great things about the Rainbow Dust pens.  I ordered a black one to try out - but it is enroute from the U.K. so it will be a while before I get to try it out.

All in all, I had fun with this project.  Hopefully, the blood spatter, fingerprints, and EKG going flatline won't gross anyone out too badly.  (Mr. Flip Flop is a nurse and I made him explain how an EKG might look...although he said I didn't have enough room... I got the baseline, with Ps and Ts with the qRs in the middle, then V-tach, then flat line demonstrated.  More than I ever want to know - and still not likely all that accurate).

Hopefully, despite all the visual ick on top, the cookies will taste good.  I used my Vanilla Bean Sugar Cookie with minimal leavening so they'd be flat for the stencil and I used LilaLoa's Chocolate Cookie recipe.  I sampled one of each - they tasted quite delicious!

I really want to eat this one... kind of an all-in-one CSI cookie!

Black and White - mystery noir!

Bon Appetit, Y'all!!!


StumbleUpon