The South Padre Island Flip Flop Foodie Brownsville restaurants

Search The South Padre Island Flip Flop Foodie Blog!

Showing posts with label decorated cookies. Show all posts

Friday, September 27, 2013

King Bob's Birthday 2013


I was so happy to be invited to the 2nd Annual King Bob's Birthday party on the beach!  Bob's wife, Sally, puts on a great party...which included beach-front umbrellas and lounge chairs in front of Wanna-Wanna, ice chests filled with icy libations, yummy snack trays. Sand Castle Queen of the Island, Sandy Feet, her very entertaining "sand slaves", and a bunch of interesting people to talk to!  I really enjoy meeting new friends.  I also love talking to people who have moved to the area and find out where they come from.  There's always a story...I just love hearing the tales!
I enjoyed using some of my stencils on the minis!  These
came from Designer Stencils

My offering was a set of cookies made for King Bob (Bob's 71st birthday and his 1st anniversary of retirement makes him King of the Day!).  The cookie set included a large layered cake-shaped cookie, some crowns for the king, and a few minis to fill in the set.  He was kind enough to share the cookies and it seems the Acorn Squash Sugar Cookies were a success.  Even my trial with a new royal icing recipe seemed to work out okay (I didn't have time to taste a dry cookie before leaving for the beach so I wasn't sure how taste and texture would be after drying...risky on my part but...whew...it apparently worked).  Nothing makes me more happy than people enjoying my treats!
These were drying to the very last minute!
Photo by Sally Scaman
I was having a big hair humidity day...the
curls were blowing wildly as Sally snapped
a photo of me and Bob and the box of cookies

While a lot of the United States is enjoying Fall weather, folks on South Padre Island are enjoying one of our favorite times of year.  The beautiful days of September and October are PERFECT beach weather.  So, it being a perfect day on the beach, I'll just end the post with a slew of photos featuring Sandy Feet, Dennis,and Ken working hard (did you know, it's important to place your beer higher than the sandcastle...else you fill your can with sand???) Enjoy!

This stuff is hard work!
Things are shaping up as the creative genius kicks in!

Hot work when you are working on the side where there is no wind!

Sandy Feet carving the King's Sculpture
Dennis (L) and Ken (R) carving supporting castles on each side
of the King Bob sculpture 
(yep, they are a lot more than just sand slaves - 
they are talented sculptors themselves).  
This is the status when I had to leave.


Following Photos from Sally Scaman
The King and his Pampered Princess
The Sand Sculptors (behind)
Bob and Sally...beach royalty.  Great party and Fabulous Sand Sculpture!

Bon Appetit, Y'all...and May Your Day be Filled with Sunshine!!!StumbleUpon

Thursday, May 30, 2013

Stencil, Stencil, Toil, and Trouble...

This has been another week of experimentation, projects unfinished, and unexpected projects finished.  The Memorial Day cookies never got finished.  I got base coats on them and then I put an extra project on myself that needed to be finished by Monday night...so my husband got to eat the base-coated Memorial Day cookies.  I'm sure he was quite happy about that!

I completed two sets (6 dozen) graduation cookies for a friend and a family member.  Once they receive them, I'll post photos.  I made extra plaque cookies and ran out of decorating time...but I knew I would use them to practice with some of the cool stencils I have acquired as well as some new powdered food coloring I ordered from DesignerStencils.com.  The use of those plaque cookies are the subject of this post.

With anything new, you have trial and error.  I did watch a youtube video from Designer Stencils which described the many ways to decorate cookies using their stencils and other products...as well as pie crusts, cakes, and chocolates.  Unfortunately, I apparently have retention issues!  It wasn't until I was trying to figure out what I'd done wrong that I went back and re-watched the video...head smack...well, there it was...my glaring misconception!

So, I think the easiest thing is to post a picture and underneath, I'll describe what I was going for, and what I ended up with!  Some mistakes are here and some mistakes are in my husbands tummy.

A swirls and stars stencil with royal icing
This was take 3 on using this stencil.  I have used small stencils with royal icing a few times in the past.  I find I do better with the smaller adhesive stencils.  This particular stencil is quite large, so holding it in place while I "troweled" the icing caused me to break the first cookie, smudge the second cookie when the stencil moved, and 3rd time was the charm.  I embellished it with some dots and it actually ended up being part of the graduation cookie package because it was the proper school colors of one of the graduates!

A powdered food color, dabbed on dry royal icing
with a stencil daubing brush on a cookie using a Karen's Cookies Exclusive Cutter
This, too, will be found in the grad cookie packet.  I almost didn't send it because it was the first one I tried using dry food color (which I thought I remembered was okay to do).  I ended up liking the soft look, despite the few streaks caused by the barest stray bit of powder.  There's nothing to really make it adhere...but I think the coastal air was so humid that it allowed it to "set" somehow...and so, I embellished it for the grad with the year and her name and an outline and I liked it...so it's in the package.

Large Scalloped Cutter from Karen's Cookies base coated with RI
and dry powder stenciled with the same "technique" described above
This was the second cookie I stenciled using the powdered food color and a pounding brush.  I was trying to make this orange and yellow but in the end you can't really see the yellow in the photo...it's on the outer edges of the frills and a lot of the embellishment covered up the delicate color.  Also, there was so much excess powder (it was less humid the day I did this) that I ended up sort of "coating" the cookie with a pale orange using a big fluffy paint brush...one that almost looks like a make-up brush.  Again, I know it's not the proper technique...but I liked it anyway.

The same stencil used in picture #1 with a wet technique
using powdered food color made into a paste with vodka
(or you can use any alcohol based clear extract)
By the time I did this cookie, I had gone back and re-watched the videos on youtube and on DesignerStencils.com's web page.  I knew, by this point, that the dry powdered decorating was generally done straight on the dough and it was baked in (duh - that would be why the powder didn't stick well to an iced cookie) and I realized I should be making a paste or paint-like consistency if I was using the powdered colors.  I used, for this blue based cookie, a Crystal Colors brand powdered food color called Poinsettia.  The blue base really deepened the red.  I used a small flat stencil brush with fairly good results for a first attempt.  Again, the large stencil (and my attempts at not getting red food coloring on my fingers) made it difficult to hold the stencil in place...I see some smudges - but not bad for a first attempt.  I had leftover red in my palette so I decided to brush the edge of my cookie which was not iced.  Then, some outline and dots accented it nicely.  I was happy with it...for a first try.

Another of my new Karen's Cookies plaque cutters - stenciled with
Crystal Colors Charcoal and Lime.
This cookie was an attempt at using up some of the leftover green and black piping icing...so I stenciled two colors using an adhesive stencil.  I think it is a Martha Stewart stencil.  I used the powdered color with vodka and made the paste a little thinner this time. Better.  I wanted to make a Thank You cookie for someone...and this didn't exactly turn out the way I wanted but it was a pretty decent stencil job, so I am including it in the post.  If my green icing had matched the green stencil coloring, I'd have been pretty happy with this cookie!  Oh well.

My first ever attempt at painting a "scribble rose"
I had this rectangular scalloped edge cookie with a base coat of blue sitting in front of me waiting for inspiration.  In walks the teen, asking what I was going to do with that cookie.  I said I was thinking about trying to paint some scribble roses.  He, who never shows much interest in my cookie activities, perked up and moved in...suggesting white roses.  I told him I didn't know if I had white food color and, if I did, how it would look with the blue showing through.  I found a small bottle of AmeriColor bright white so added it to my palette.  The first scribbles resulted in a look of horror from my "helper".    I told him they were SCRIBBLE roses.  I did the 5 on the upper right side (just white - and added some vodka to thin it out and make it less startling white) and it just looked wrong.  I let it dry and went off to read some of my book and relax my head and my hands for a bit.  When I went back to it, I knew the white was not going to work for me so I got a bright pink color and used it both diluted and straight up for some shading.  My leaves were then painted with leaf green and lined with forest green, each with a drop of vodka to thin them out. All of this cookie used AmeriColor gel colors.  I used some of the bright pink color and painted a line around the base of the blue and then added my usual dots.  After they dried, I decided I needed a heart, so I used some leftover royal icing.  I also made a shaky attempt at some scrolls by the heart.  It is the bane of my existence that I can't do scroll work.  I need to just get some parchment paper and practice...so far too lazy.  Again, oh well. (When this was almost finished the teen walks in again and informs me that I did it wrong.  He instructed me in how he learned to paint roses...5 years ago as a Freshman in art class.  Now, this is the "child" in a man's body who can't remember to take out the trash, and other daily activities...but he can clearly articulate how to paint a dang rose.  Hmmmm.....)

Another Martha Stewart stencil with royal icing

I though this looked familiar when I pulled out the stencil...sure enough, when I was looking back at the graduation cookie pictures, there it was...I had used it on one of those cookies.  It works very well because it, again, is adhesive and doesn't have a lot of big space to smooth down.  Some dots around the edge and viola!

The last cookie of the day - Martha Stewart adhesive stencil with
black royal icing
As with anything, the more you practice the easier it gets.  By the time I got to this cookie, I had the stenciling down - the right pressure, the right amount of icing...but still, I see several spots where things went awry.  My husband tells me if I would quite pointing out the things that are wrong, most people will just go "oh, pretty cookie" and take a big bite out of it and there go any mistakes - not to be worried about ever again.  I know he's right, but, I also know that my cookie decorating friends are surely seeing the same things I see. My current mantra is a simple "it is what it is" as I try to accept that which I cannot change.  Some days it is harder to live by than others!!!

Thanks for reading along.  I hope you try stenciling your cookies.  You really don't even have to go to the effort of baking...you can turn over a store bought cookie, pipe and flood the flat bottom, and practice on that after it has dried.  For some reason, that would make me happier than practicing on parchment paper.  At least my family would get to eat my learning projects!

If you have any comments or constructive suggestions - I would love to hear them...I do moderate comments, so you won't see them immediately.  I try to reply to all comments!

Bon Appetit, Y'all!!!

SHARED WITH:

StumbleUpon

Thursday, May 9, 2013

The Cookie Decorating Experiment

My second attempt at painting a cookie
This week has been "experiment" week.  I have learned many lessons!  Good lessons and "eek" BAD lessons!

I tried using Karen's Cookies Meringue Powder Buttercream this week...I had printed her recipe - but it's been over a year since I watched the video...and I missed some key things this time around...now duly noted on my printed copy. 

1.  Need to measure loose powdered sugar, not packed (I was in a hurry and dug it right out of the bag).  Which follows rapidly with, don't make anything at midnight right before going to bed - the reason "I was in a hurry"!
2.  Those living in more humid areas were advised to use extra meringue powder.  I did not.  Two days of being under the fan and I still have a softness under the crust. (not me, silly, the COOKIES).
3.  Either #2 is in play, or you cannot use food color markers without breaking through Meringue Powder Buttercream. 
4.  Air brushing is different on MPB than on RI...I guess the buttercream aspect makes it slick and much harder to use a stencil.  I wrecked a couple of cookies trying to work that out.  I'll stick to Royal Icing for stenciling and air brushing in my immediate future!  Here's a photo of a couple of the fails (my friends tell me they want to see the fails too - so I am begrudgingly showing the ones that have not been eaten yet - the hubs gets the fails). 

Mr. Flip Flop said (as he was biting into the sister failure of this cookie)
that it looks like a tile - kind of an old tile...he thought I did it on purpose.
In reality, I used an adhesive back stencil (which never has damaged
a RI cookie) and it ripped the crust right off the cookie after
I airbrushed it.  Yikes.

I used a lot of "stuff " to cover up the defects
in this cookie.  The pearl sheen pink air brush color
on a vinyl stencil seemed gummy...and then I touched it...
after I mushed the not totally crusted white base.  This
cookie didn't have a chance.  So, I over-decorated it with
some dots and royal icing ribbon roses I had on hand.
It ended up being "okay" - but a wee bit too busy!


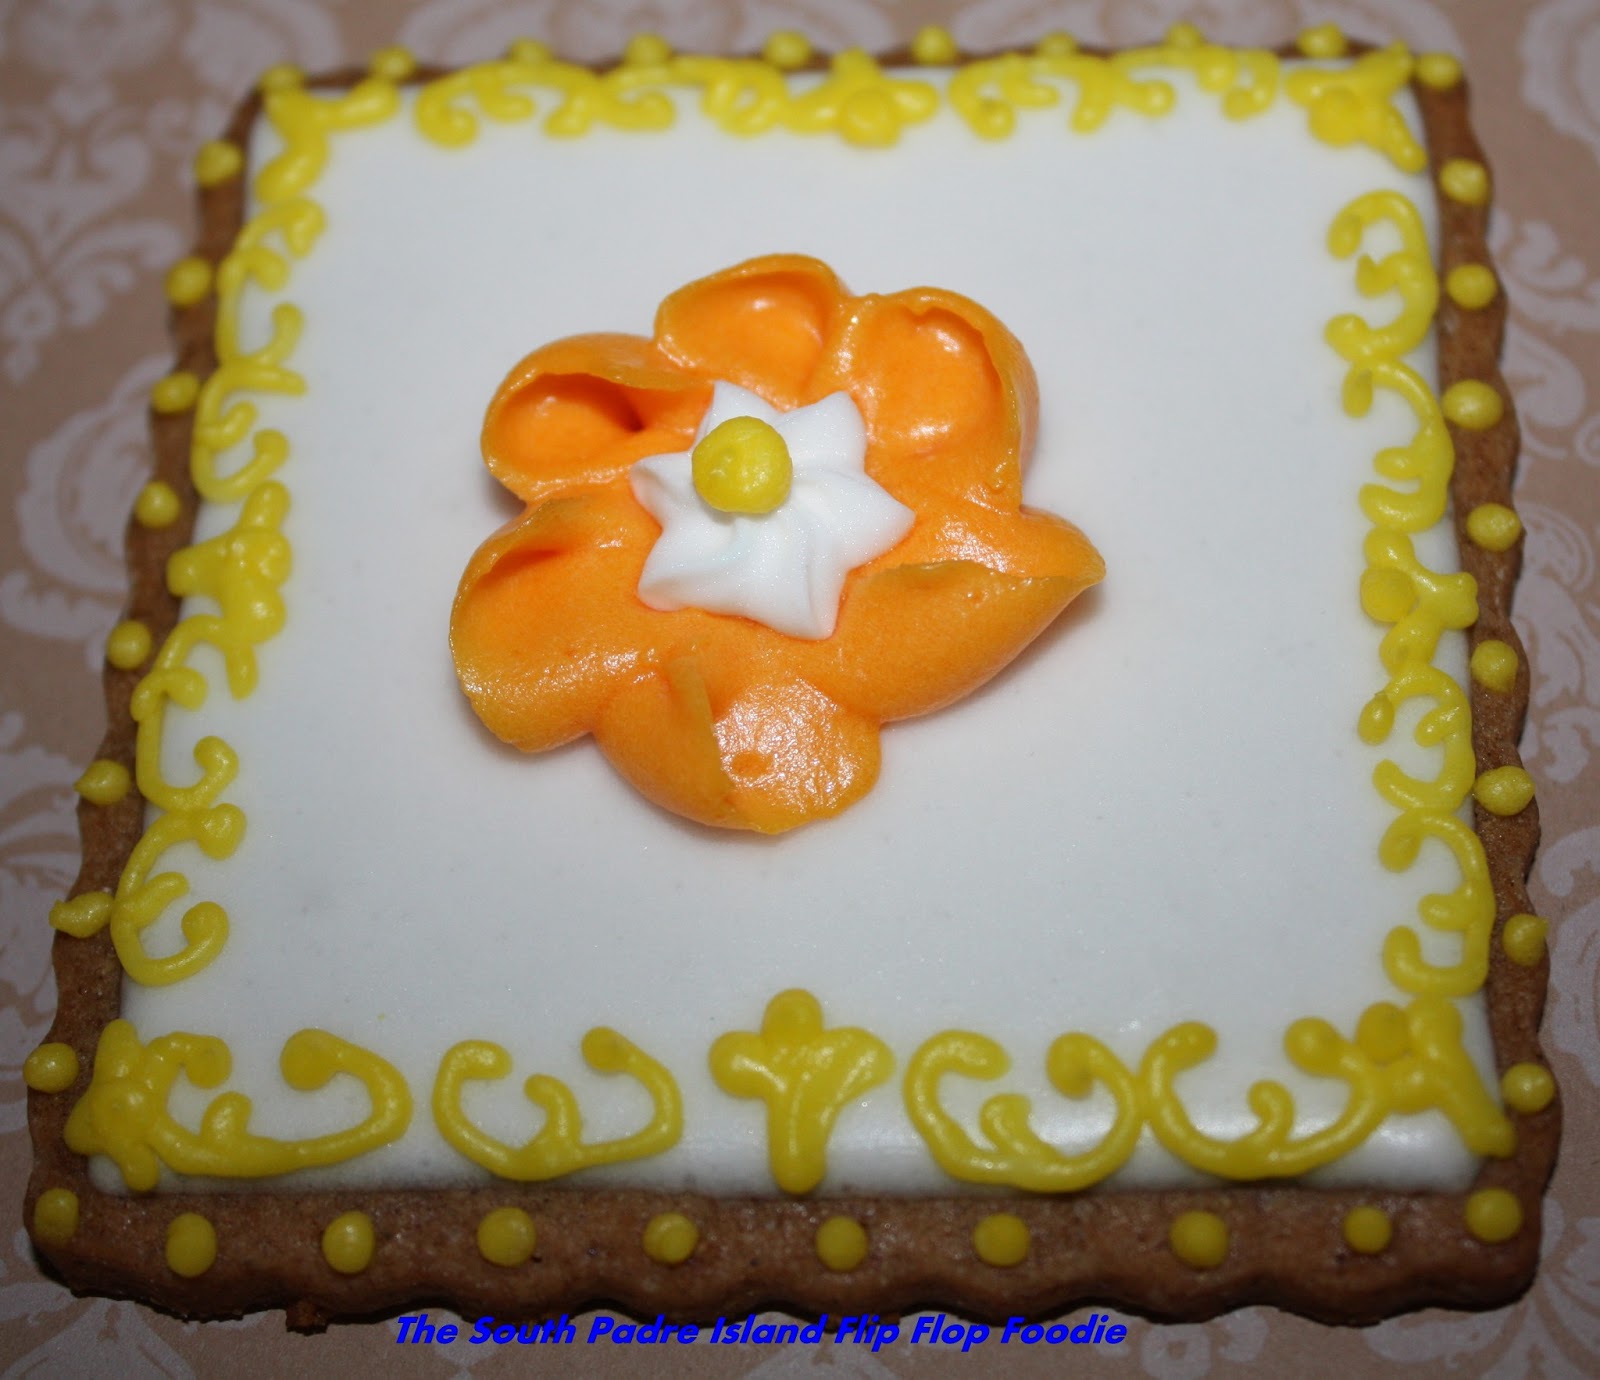
5.  MPB works beautifully for flowers - I have not had much luck with getting my royal icing to an appropriate consistency to hold up well, yet not cramp my hand while piping it.  The blue cookie flower was RI and the orange one below was MPB - you can really see the difference in how they stood up - same tip was used (#102 or #103 Wilton - can't recall which one I ended up with)

Royal Icing flower accented with a RI transfer I made last month

The Meringue Powder Buttercream really held
the shape better although it did not do so well with
the border piping...I used a PME 1.5 tip so I know
it was the icing that was the issue.

I wanted to make some Zinnia's to honor my late sister and they turned out pretty good.  They do, however, have a LOT of icing on them.  Who knows how long it will take for these to dry!!!  I also did some mini leaf cookies topped with royal icing that I had left over in the fridge.  I managed to use up the last of all I had saved via several of these cookies.
MPB Zinnia and RI leaves!


I also experimented with the airbrush (as noted above) and used the technique learned from Montreal Confections wherein one places a piece of lace over the cookie and then airbrushes over it.  I tried it on mini butterfly cookies - they turned out cute!  Was able to do 4 cookies at a time under one piece of lace.  The lace was light enough not to disturb the crust and it cleaned up beautifully after the experiment too.  I went ahead and embellished afterwards - not my best piping, but again, working late at night is not my best time for keeping an even hand.  Note to self...when spraying straight downwards, don't tip the air gun to the point food color runs out onto your cookies - not pretty.  Lots of blue splatter on one cookie...which was eaten before anyone saw the evidence.

Lace Airbrush Butterfly Minis

The larger butterflies were all airbrushed with pink sheen air brush by AmeriColor.  It took a long time to dry.  My completion of the butterflies was at a point where I just wanted to use up some of the colored icing I had on hand.  I actually like the pink,gray, and white theme I ended up with...maybe not so much the blue one - it was a bit "busy"...but...week of experiments, right?


I made some Sea Gulls with fairly basic feathering...couldn't seem to get the perspective right though.  I've seen different Sea Gull cookie cutters - I may have to get one so I'm not making this so hard on myself.

Last, but not least, I took the scary, heart-pounding leap and decorated two cookies by hand painting them.  I am so NOT an artist.  The first one is a better bird, with a kindergardenish sun in the background...the second one the bird's beak is way too big and his legs are too fat...and I messed up by painting yellow into blue...which magically became green (duh)!  I love looking at the blue herons wading in the shallow bay outside my window.  This was my homage to herons.  I need to take an art class - I need help with perspective and simple "how to draw things".  It does not come naturally to me at all!


Well - that's this week's enterprise.  I'll be seeing family this week-end so I hope they are willing to eat the experiments!

All cookies used this week were Apple Butter Sugar Cookies (recipe linked here).  It is a wonderful spicy cookie and is tender to the tooth.  I do bake the large ones a little longer so they don't break - better to be a little hard than too soft when decorating.  My icing was flavored with pure vanilla extract and 1/4 tsp cinnamon extract.  The combo goes beautifully with this cookie.

Thanks for sticking with me, I finally feel like I'm getting back into the swing of baking and decorating after several months of not being able to gather the energy... and that is a VERY good thing!

Bon Appetit, Y'all!!!


Shared With:

StumbleUpon

Friday, April 26, 2013

Cookie Memories

My regular readers may have noticed I have been very "off" lately.  I have experienced some losses that nearly wiped me out and baking and blogging on a regular basis have been more than I could handle.  I just worked on putting one foot in front of the other to make it through the last 7 months or so.  As Dory the fish so eloquently said it, I just had to "just keep swimming, just keep swimming".

For the past 3 days I have been baking cookies and decorating them for a Memorial Service for my big sister.  She loved the beach.  Everyone is encouraged to wear coastal attire to the service.  I have my new tropical shirt, my best flip flops, my dolphin necklace, and my mermaid earrings.  I'm almost ready.

In her honor I made cookies for after the service fellowship.  The entire endeavor was a cathartic walk down Memory Lane.  I began with sand dollar cookies - which brought back memories of our regular childhood camping trips to Mustang Island and Port Aransas.  We'd search for shells for hours and, in those days, the sand dollars were the primo find.  Now-a-days we rarely find more than the occasional broken sand dollar.  It's a sad commentary on the state of our oceans!

Sand Dollar cookies with a pearl sheen

I also made "my version" of conch shells.  Big sister loved The Keys.  She had one last chance to try to make it to her beloved Keys in December when I called her back home because our Mom died. She never was well enough again to make the journey...so, conch shell cookies are my offering.  I'm sure she is smiling.


My version of conch shell cookies - a little dry brushed pink
lustre dust gives the edge a little shimmer

She loved bright colors - yellows and oranges and aqua - the colors of the tropics.  So, my version of scallop shells with orange and yellow feathering.


Scallop Shell cookies with orange and yellow feathering.
After drying, embellished with some dots and lines.  I liked this set.

Palm tree cookies - she loved laying on a hammock hanging between two palms.  Reading a book or napping or just swaying to the gentle breeze off the Atlantic Ocean.  My first piping icing wasn't thick enough, so I had to get creative.  I think they turned out okay...but they sure do have a lot of royal icing on those palms!


The rustling sound of palms is one of my favorite sounds
These cookies have coconuts - our palms do not.
I liked the look though, so coconuts they are!


Dolphins - ahhhh, the dolphins.  We used to ride the ferry to Mustang Island and the dolphins danced around the ferry, smiling their happy smiles, delighting the souls of children and adults alike.  When I moved to the South Padre Island area I told her about our tribe.  She told me in January "I want to go see the dolphins with Scarlet...it's on my bucket list".  I knew that wouldn't happen because she would never have been able to make the 7 hour journey.  She entered at-home hospice care in January.  We met in Port Aransas instead, as one of her final wishes, and the dolphins were at the ferry waiting for her.  So, dolphin cookies were a must.  Dolphin Love - it's the best.

A happy pod of dolphin cookies

Flip Flops - we were two true flip flop devotees!  I know I have a LOT of flip flops - but she may have had more.  Flip flop cookies were mandatory!


Flip Flops - piled up like mine are.  I had fun making these.


The last batch of cookies are more about her beautiful grandchildren.  She had a lot of grand kids for a 62 year young woman!  She loved to tickle their tummies when they were little and say the belly button bug was getting them (a ladybug of course).  So, the final batch was my first attempt at lady bug cookies.  I hope they love them.  Unfortunately, I know they will turn their mouths black and red.  I did try the trick of adding cocoa powder to the icing to darken it before adding the black food coloring.  I definitely used less black gel color, but still...I'm anticipating some colorful mouths!  I used a tutorial from O So Sweet Cookies - and it was perfect.  I have had the lady bug cookie cutter for a while and never got to making them.  This was the perfect opportunity.


Lady Bugs - my first attempt...cute!

My cookie dough was in the freezer waiting for me (thank goodness) and I used both my long-time favorite Mather World's Best Sugar Cookie Dough and Lila Loa's Vanilla Variation.  I used Ali's Sweet Tooth's method of making royal icing and not a single bag separated!  Yay!!!

Now, after this I hope life will return to the more gentle pace I grew accustomed to when we moved to the coast.  I need the peace and tranquility of the waves lapping, the gulls calling, the pelicans soaring, and the sand between my toes.  I know, then, I will be able to feel the previous joy I felt for baking and blogging and sharing my meandering thoughts with my blog readers.  Thanks for hanging with me during this really icky time of my life.  I'm hoping this will be the final melancholy post you will have to endure from me!

Bon Appetit, Y'all!!! 


UPDATE: 4/29/2013:  At the reception in Fellowship Hall,
the tables were decorated with leis, coastal ornaments, and
my cookies!  Everyone seemed very appreciative.
It was a lovely ceremony, filled with spirituality and
love and caring.  Happy Trails my dear sister!


StumbleUpon

Thursday, February 21, 2013

Beach Cookies

The Beach Cookie created following
tutorial from Marlyn of Montreal Confections
I know it is February and many folks North of the equator are having a nippy week...but where I live, it's pretty nice weather!  I live on the Gulf Coast ...right on the water... and this week-end, I'm driving up the coast a few hours to spend time...at the coast.  Yep, weirdly enough, it's true.  My flip flops are happy to be in the sand, wherever the sand may be.

So, cookies were requested by the traveling companions ...apple butter cookies specifically.  Ask and ye shall receive!  I made 30 cookies and got them all decorated in one day via carefully scheduled fan drying of layers and starting early in the day.  I used a different method for making royal icing this time...from the wonderful Jaci at Ali's Sweet Tooth.  We both live in a land of great humidity.  Her method worked beautifully.  Not a bit of separation all day long...and a good thick base to work from with my handy dandy spray bottle. Yay!

My favorite cookies were a "beach" with waves I meticulously created using the YouTube tutorial from Marlyn at Montreal Confections.  I am slightly addicted to her tutorials...she is such a good teacher.  I saw it earlier last year and knew I would eventually get around to trying it out.  Today was the day!  Mine doesn't look as sharp as hers... but I'm pleased with the result for a first effort.  I didn't make fondant sea shells, I used some white and milk chocolate instead in a Wilton silicon mold I bought from Amazon.  I'm not fond of fondant...but I surely do love chocolate.  They came out sort of cute, so I'm glad I took that turn.
I didn't have the cool sanding sugar Marlyn used.
I used turbinado sugar instead.

I also used, for the first time, my air brush.  I carefully covered my table and used a 3-part science poster board to protect over spray as recommended by the talented Melissa at The Baked Equation .  I was so joyful to spray the shades of blue and then pearl the waves.  I am laughing myself silly now, though.  Guess what I didn't protect?  The inside of my nose!  I blew blue icky stuff this evening (OK - blue boogers - I'll just say it).  Good grief!  I'm thinking a mask may be in order next time.  Now that I see how cool the airbrush is, I know I'm going to try to find ways to add more depth to future cookies.

Since I didn't take photos during the process (and you can see Marlyn's online tutorial here) I'll just post these photos of the finished products.  Dolphins, sand dollars, star fish, and some scallop shells add to the beach theme.  The teen informed me "uh, those shells look a little different", in reference to the colors of the scallops.  Heck, I needed to use up some of the blue and peach icing from other cookies...so we have "different" scallop shells.  Leave it to the teen to point out the obvious!
Happy dolphins, funky scallops...it's all good when it gets in the belly!

The sand dollars are much better than my last attempt!  Still
a few issues to work out.  Still, better!


Slowly but surely, I'm trying to get back to enthusiasm for baking.  I have some more stencils I want to use as well as quite a few new cookie cutters.  I need to start sketching out some ideas.  I'll keep you posted!

Bon Appetit, Y'all!!!
I airbrushed pearl on the center starfish and used sugar pearls to accent.
The rest of the starfish were just piped dots and no pearl.
I think I like the pearl best...and I like the dots better than the sugar pearls.
Next time :-)

SHARED WITH:
StumbleUpon

Wednesday, February 6, 2013

"Love" Cookies

The beginning of the 2013 Valentine Cookie Season
I don't know that I'm saying "I'm back"... but I have scraped myself up and "put on my big girl panties" and BAKED.  Finally!  Rough family stuff (too much to share here) resulted in a nearly two-month hiatus from doing most anything creative.  My brain just wasn't on that page.  Hopefully, I can keep myself motivated now that I got started!

While cleaning out my freezer I found a double batch of Apple Butter Cookie Dough all nicely wrapped and ready.  I had completely forgotten that I'd made that before everything crashed around me.  Score!  While that was thawing, I felt motivated to make a batch of LilaLoa's "The Vanilla Variation"" of her Sugar Cookie Dough and between the two, that got me baking!  I ended up with 16 large hearts, 40 medium size "shapes" and 60 minis.  I still have some vanilla sugar cookie dough in the fridge.

My first efforts were just some circles, squares, and rectangles in hopes of getting my piping skills going.  I'm one of those "don't use it you lose it" people.  I felt vaguely cursed because NONE of my icing turned out the way I wanted.  Again, when you do it regularly, you do it right.  This time, well...not so much.  My piping icing was too thin to hold some of the shapes, my flood too thick to lay down straight, I got craters, my little heart transfers didn't "heal" properly, and I learned I can't make my nail flower go in a complete circle without having to reposition my fingers.  (oh, so clumsy) Add to that, my icing didn't hold it's shape for the ribbon roses either.  It was supposed to be the thick stuff! Man, I was screwed.  I kept telling myself the Dory-the-fish line "Just keep swimming.  Just keep swimming".

I decided I would indeed just keep going and finish the cookies I had... I was trying out new tools I got for Christmas and as part of my retail therapy shoppingin January.  I got a heat gun from my son and I bought myself some stencils and new cookie cutters and better tasting Red Tulip AmeriColor gel from Karen's Cookies (man, I love opening boxes from Karen and Mike!).  I read a post from Sweet Sugarbelle about why this red food color isn't as icky as some of the other reds we've all used.  I ordered a big bottle!  Between Valentine and Christmas and Patriotic cookies - red is a popular color!  I also broke out my new airbrush and practiced with water...that will be the next thing I attempt "for real"!

Anyway, I got to it and this is just a post with a few photos (with the good, the bad, and the not-so-ugly).  Why I would share some of these?  I don't know.  I think I just have to start somewhere.  This will help me move along so I prove to myself I can do better.  I won't point out all the booboos, but the cookiers will be able to see everything I'm talking about.  No need for anyone to point out the obvious (like when I was wiping my tip and accidentally sucked up a drop of water from my too damp cloth and then aimed right down at my cookie...oh mercy).
I am dot crazy apparently.  I just felt like
everything was looking better with dots!

I love having the virtual friendships that have allowed me to continue to talk about cookies and tips of the trades on Facebook.  I think I now officially converse with cookiers more than my "regular" friends (oh wait, none of my friends are regular...they are all unique).  I'm not sure that is a good thing...but for now, it's what I need.  Cookie Convo!  I am also completely dedicated to finding my way to Cookie Con 2014.  Fingers are crossed.
I'm no van Gogh...but this is MY blue period!

So, here they are.  They are packaged up and ready to give to people who don't care that I'm not perfect and know what I've been going through.  Now that I think about it, I'm really surrounded by lots of good souls.  I feel happier than I have in a good bit.  Hope it's a trend!

Bon Appetit, Y'all!!!

SHARED WITH:
">
StumbleUpon