The South Padre Island Flip Flop Foodie Brownsville restaurants

Search The South Padre Island Flip Flop Foodie Blog!

Showing posts with label holiday cookies. Show all posts

Thursday, December 18, 2014

Santa Redux - but Miniaturized!


Last year I had the most fun making the wonderful Santa from a nesting doll cookie cutter.  The awesome Marlyn from Montreal Confections made an easy to follow tutorial and I made the big cookie twice within my Christmas cookie-baking season in 2013.  I made them for Mr. Flip Flop's co-workers and then I made some more later because I had extra RI Transfers and, well heck, couldn't let those go unused, right?

I mused on what to make this year - I always try to make something new and sometimes I just make one of a specific cookie.  Unless it's a "project" I rarely make more than 2 or 3.  This year, though, I decided to have two projects.  Shockingly, neither are new - but both are different.  The Snow Globes for 2014 were for my husband's co-workers this year and they took an unbelievable amount of time (because I went a little overboard) so I needed to make a second "project" of a smaller, more simple cookie.  I decided to use the smallest cutter of the nesting set I had gotten from Truly Mad Plastics.  I messed with Marlyn's template until I got it sized down to the size of the cookie cutter I was using.  I then used that template to make the tiny little gloves, nose, and belt buckles.  This year, using acetate for my transfers, wasn't the smartest thing because they released so easily that when I added the "fur" to the gloves, they fell off.  I got the loose ones "glued" back to the acetate sheet and quickly dunked them all in a row.  Whew, it worked.

These are the perfect size to add to a simple box of drop cookies when delivering little gifts to friends.  They get a sweet decorated Santa, but I'm not made insane with trying to do too much decorating at the last minute (which I may still do, but I'll be doing it to myself on purpose if I do).  Anyway, that's my plan...we'll see how it goes.

I'm heading North to visit family for an early Christmas so my cookie baking is on hold until next week...and next week is Christmas.  I fear this is all I'll finish.  So, all of the great ideas I have researched and drawn and listed...will likely be held over for next year.  Sometimes it happens that way.  I was sick when I should have been starting and, not desiring to share germs, I just couldn't get it all done.  Jeez, that's beginning to sound like a recurring theme... "I just couldn't get it all done".  I'll just repeat my mantra "it is what it is"!


Enjoy the look-see at this cute rendition of Marlyn's great cookie - which is sure to be a classic for me and mine!  Merry Christmas, friends!

Bon Appetit, Y'all!!!


StumbleUpon

Wednesday, December 17, 2014

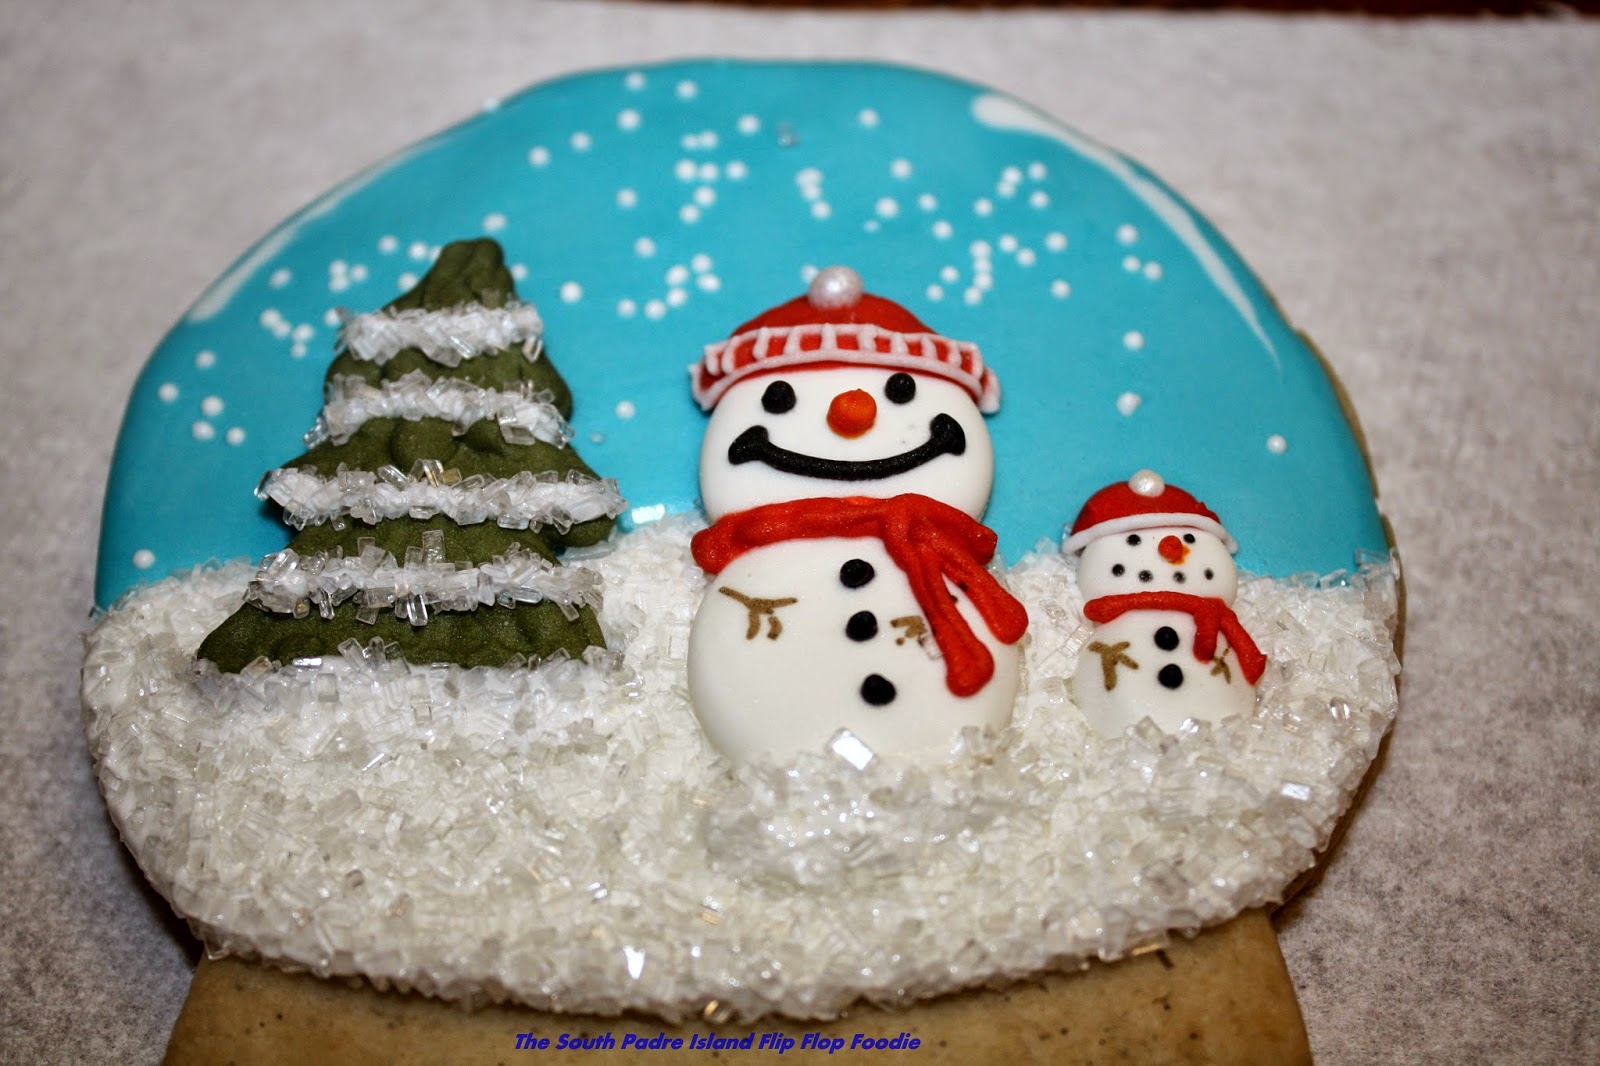
2014 Snow Globes

I am frequently asked "do you sell your cookies?" The answer has become a resounding no.  I did a few times, but found the stress involved more than I care to handle.  However, I do make cookies, from time to time, to give to friends, co-workers, and family.  It is a time-gobbling, labor of love, hobby!  I don't know how professional cookie decorators do it.  After about 10 days of this, my hands and shoulders ache.  I still have much more to do before Christmas arrives!

This year I have spent a long stretch of time creating the 2014 version of a Christmas Snow Globe.  The original tutorial for this lovely cookie was created by SweetAmbs and can be found on youtube.  Last year I made a few, but this year I made a dozen.  I was much more organized than last year.  I made my royal icing transfers a week before and it took 3 days to complete them.  I tried acetate for the first time instead of my normal parchment paper.  Wow!  Talk about sliding right off and zero breakage!  That is indeed the way to go if you have a lot to make!  I made a variety of snowmen and trees and the detail work was so time consuming.... I may make them in the Summer this next year.  I'm so far behind on my regular baking, I know this year is not going to be up to my expectations.

Royal icing, piped on  either acetate sheets, parchment
paper, or wax paper and allowed to dry until hard, are called
Royal Icing Transfers.  They keep forever in a sealed container.
A step above the "candy flowers on a sheet" you buy at
the grocery store.  I adored eating those as a child.
These are miles above the factory-made decorations!
After drying, store in a container with a good seal.
For delicate decorations like these, I temporarily
used a cupcake and deviled egg carrier.
Long term storage would be a plastic container
with bubble wrap between the layers for the
snowmen and the trees are sturdy enough
to just be in a container sans bubble wrap.

However, I like the snow globes a lot, so the effort has given me a sense of satisfaction, despite the physical aches and pains!  Once they get baked and cooled and the various icing colors and consistencies all mixed up/bagged and have the proper sprinkles on hand (white nonpareils were not to be found this year - I had to order online and pay for express shipping...then low and behold, they appeared on the HEB shelf the next day - ayi!), anyway, once all that is done, the actual decorating took three days.  I made one dozen.  They are large cookies so it took 1 1/2 batches of my Vanilla Bean Sugar Cookie Dough (that's a lot for one dozen cookies).  I hope the lucky recipients enjoy the effort that went into these.

I hope you will watch Amber's video and then see how you can use an available cookie cutter, different sprinkles, and different design details to make it your own, like I did.  It doesn't have to be perfect (mine sure aren't) and each of mine are different.  Here's a photo journal of making this fun cookie.  Enjoy!


After baking and allowing to cool, I piped on sky blue royal icing, 
then while wet, sprinkled on some white nonpareils.  
Then I piped a white royal icing "reflection" 
on the upper edges.  This technique is demonstrated in the 
video tutorial from SweetAmbs.
These must dry completely (over night) before you can continue.
I am using some "tipless" piping bags.  
I ordered them on E-bay and they are very popular 
in the cookie artist community.  
They are very thin, you can cut the tip, thus the
nickname "tipless bags".
(if you don't need any fancy tips)  

They are so cheap you can throw them away
without feeling like you should clean and reuse.  

A sharp pair of embroidery scissors helps 
you get the tiniest opening...or a slightly larger opening
for the flood consistency I was using here.  Cool new tool!
Base for the "snow" is ready for some sparkle 
to be added while still wet.
I use a bead tray for sprinkles.  
It's easy to pour the leftovers back into the jar
using the little tubes at the end of the tray.  

I chose to use sparkling sugar
crystals for the snow 
on the ground.  
I like the glistening appearance.
Once the sparkling sugar is on and you have neatened up the 
edges of the snow globe with something like the yellow 
boo-boo stick on the right, it is time to apply
the royal icing transfers by applying some of the 
same white RI to the back
and carefully placing it on the cookie.
You can see that after you press the RI transfers, the icing
is displaced and moved towards the edge.
You'll need to neaten the edges again.
Now I want to add some depth and further dimension.  
I pipe some royal icing
on the tree and at the base of the tree and snow people.
This time I lay the cookie in the tray face up and manually sprinkle 
sparkling sugar over the wet icing and then carefully 
move the cookie up so that the excess falls off.
I clean it up with a dry paint brush in case sugar is where 
I don't want it....and once more  fix the edges of the snow 
to be even with the blue sky while it is still wet.  
Allow to dry overnight
or with a fan blowing on it for several hours.
The base is a simple flood.  Use a needle tool or tooth pick
to pop any bubbles or smooth any bumps.
Allow to dry.  
Then pipe a red line on top of the outline of the base.
Allow to dry.
Top outline again to get height and dimension.  

And, again allow to dry.
A simple zigzag and dot  pattern  in green outline 

consistency icing  with a very small opening 
cut in the tipless bag (on top of the dry red) 
gives it a Christmasy look!
The last step is piping some white snowflakes in the blue sky 
in any blank spaces.  I usually add 3 or 4 of these.
Allow everything to dry at least 12 hours before bagging 

(I always dry under a fan for 24 hours 
because of our humidity and then bag)
Now that I'm finished with this project, I can move on to my small nesting doll Santas which are a take-off, or miniaturization, of the large ones I did last year.  Got to get busy...Christmas is coming fast!


Bon Appetit, Y'all!!!


StumbleUpon

Wednesday, November 19, 2014

Thanksgiving Cookies 2014

We are having our Thanksgiving on the Saturday before Thanksgiving... because nurses rarely get time off around the holidays...and my husband is a nurse.  Hospitals are 24/7 and you are all glad they are when you need them.  Like other service providers - police, fire, EMS, hospital, military - and any others I left out, well, the families learn to be flexible.  We learn it isn't the specific day we celebrate, it's celebrating the season in whatever special way we make it.  I'm kind of used to it now...still don't like it, but I'm used to it.  We are driving to spend time with some of our Austin family and to make our presence known with the Indiana family, I sent cookies (what else).


I've been working on these for days - and they are bagged, sealed, bubble-wrapped, and boxed with a prayer that they make it through the US Mail system to the Indiana crew.  If there are broken cookies, well, look at the photos and enjoy the taste.  I'm always wanting my cookies to taste better than they look.  A cookie is to be enjoyed both visually and by taste...but really, primarily taste, right?

I got my leaf inspiration and my cute turkey inspiration from enrolling in the online version of McGoo U.  That Arty McGoo has put together a first class cookie instruction/entertainment/share fest and I'm so thrilled to be a subscriber.  I have watched all of the October and November videos and the dotted and painted (with food coloring) leaf project was part of the long class for November.  Then, the precious seated turkey, looking somewhat alarmed and bug eyed (with those cuteeee feet) was the project from visiting Professor Georganne Bell aka LilaLoa, in the segment "Expert Lab" in November's sessions.

I doubt I really did either cookie artist/instructor justice, because I had to adjust each for my "tastes"...but I admit to feeling somewhat proud of my watercolor leaves!  It gave me the courage to try it different ways, despite not having a good color palette of Wilton gel colors to use.  I stopped buying Wilton several years ago and have been a devotee to AmeriColor with a few sidesteps to ChefMaster from time to time.  I will absolutely admit though, Arty McGoo is right on.  I had left some AmeriColor gel colors on the palette from maybe 6 months ago, in a plastic baggie.  The darn things were still sticky to the touch!  I set up a palette with the Wilton and they are dry and not sticky at all.  I'm going to re-stock my Wilton colors, just for painting!  My leaves look a bit psychedelic because I really didn't have the recommended colors.  Nonetheless, I like them...I am embracing my inner kindergartner who enjoys playing with water colors.

Let me just say... CHECK OUT McGOO U ONLINE!!!  If you want to step up your cookie decorating game, this is a great way to do it.  Internationally renown cookie artist, Arty McGoo, shows you step by step how to make some really cool cookie sets.  You can try it out on a monthly basis or there is a reduced price for annual subscriptions.  I'm changing my monthly to annual as soon as I finish paying for Christmas!!!  My gift to myself. (Although I may sound like it, I am not a paid endorser, nor stalker of these people...LOL!!!)

I haven't stenciled in a while, so I tried a few different plaques and stencils and sprays and thick RI...I learned, once again, that my cookies are not flat - but I still liked the overall look of these cookies.  My favorite is the large leaf with a pearlized spray over a Designer Stencils paisley stencil I picked up at CookieCon.  It looks simple, yet elegant.


I also really like the Cookie Countess subway art and leaf stencils.  They turned out nothing like I expected, but absolutely love they way they look in the end (the gold tint is from an epic fail on my part by over-saturating spray which I quickly wiped off - to result in a gold overtone to the light green cookie - then I sprayed darker green on top of gold green...turned out kind of cool.


Simple leaf was stenciled with thick royal icing, just blobbed
on in layers, then scraped upwards to make the
color changing Autumn leaf!

The stencil for this plaque cookie is from Designer Stencils obtained last year.  The berries along the edge were also sort of learned in McGoo U - I had never thought about dropping another color inside a berry.  That was from the October tutorial with visiting professor, Maryann Rollins, aka The Cookie Artisan.  I also used foodcolor from my palette and a fine tip brush to paint some copper/brown leaf veins and acorn tops.  I need to get over being afraid of painting things - especially when icing just won't do.  I'm gonna be stretchin' my wings, y'all!


I got this tall pumpkin cutter earlier this Fall and I must say I am in love with it.  The ivory pumpkins turned out just the way I envisioned them in my head.  I got it, and a stencil genie, from Creative Cookier.  Unfortunately, my big plaques were too large for the genie...but the paisley stencil on the leaf worked beautiful...Literally hands-free stenciling!  So excited to use it on some of the Christmas cookies I am planning.  Wheeee!!!  I'm getting wound up just thinking about it :-)

Thanks for stopping by and checking out my playtime with cookies.  I baked and decorated 80 cookies (I ate two - one red velvet and one vanilla bean sugar - just to ensure quality control!).  I can't wait to share the goodies with my family members, both near and far.

Good thing we are empty nesters and don't eat at our
kitchen table...because where the heck would I spread out
my cookies while decorating?
I cropped out as much of the surrounding area as
 possible - you just cannot imagine the mess I make
when decorating.  It's an embarrassment!


Happy Thanksgiving everyone!!!

Bon Appetit, Y'all!!! 


StumbleUpon

Wednesday, December 18, 2013

Mint Chocolate Delights

Last night I made some cookies using the recipe from the back of the Nestlé's Toll House Winter Dark Chocolate & Mint Morsels bag.  They were easy to make and are quite delicious!  I baked off a dozen and froze scoops of dough with the remaining dough to bake off next week so they will be fresh and wonderful.

Mint Chocolate Delights
Original Recipe from Nestlé's Toll House
 
 
Ingredients:
 
2 cups unbleached all-purpose flour
2/3 cup Baking Cocoa (I used Ghirardelli unsweetened cocoa)
1 tsp. baking soda
1/2 tsp. fine sea salt
1 cup (2 sticks) butter, softened
2/3 cup granulated sugar
2/3 cup packed brown sugar
1 tsp. pure vanilla extract
2 large eggs
1 2/3 cups (10 oz.) Nestle Toll House Dark Chocolate
    & Mint Morsels (may substitute Ande's Crème de Menthe
    baking chips in the non-holiday season)
 
Method:
 
Preheat oven to 325 degrees Fahrenheit
Combine flour, cocoa, baking soda, and salt in 4 cup measuring cup or small mixing bowl and gently whisk until evenly blended.  Set aside.
 
In the bowl of a stand mixer with paddle attachment, add butter, granulated sugar, brown sugar, and vanilla extract.  Beat until creamy.
 
Add eggs one at a time, beating well after each addition.
 
Gradually beat in flour mixture on low speed.  Scrape bowl as needed.
Remove paddle attachment and mix in morsels or baking chips with a very sturdy spoon.
Drop by well-rounded tablespoon (I used a medium size cookie scoop) onto ungreased baking sheet or a baking sheet lined with parchment paper or a baking mat (that's what I used).
 
Bake for 11 to 13 minutes or until cookies are puffed and centers are set.  My cookies were slightly larger from using the medium cookie scoop and took 14 to 15 minutes.  You can make them mini cookies using a smaller scoop and bake for 9 to 10 minutes.
 
Remove from oven when puffed and set, and leave on baking sheet on top of cooling rack for 5 minutes (or they will fall apart if you try to transfer too soon).  Remove to wire rack to cool completely before handling.
 
With the medium scoop, this recipe made 36 cookies.
 
The bottom of the cookie is where you find the
visible chips :-)  The top of the cookie is puffed
and tends to hide the morsels!
 
This morning I was trying to avoid eating the remaining cookies and further exacerbating my butt's holiday growth spurt.  Sometimes if I focus on dressing up the cookies, I don't feel inclined to eat them.  I'll wait for my husband to come home and admire them.  :-)

So, I had some candy melts and molds sitting out on the table, and I knew I would be using them at some point in my holiday baking.  I grabbed the never-before-tried Candy Cane melts from Wilton, along with a bag of red candy melts (also Wilton).  I got both at Michael's but you could likely find them at Wal-Mart just as easily.

For this little project, I needed:
Candy Melts
A microwave safe glass
Two disposable piping bags, scissors
A couple of twist ties
Paper towels
A toothpick or two
A small offset spatula.
Christmas sprinkles or molded chocolate shapes 

Simple clear plastic molds - I think I got these on Amazon
several years ago.  I'm sure they are available at Hobby Lobby
or Michael's as well.


You don't have to have the candy molds - I already had these on hand.  I rarely use them but, I had them out so I shrugged and decided to go for it!  I had some Wilton Snowflake Sprinkles, so I made a few cookies with those so you can see they look really cute too!

This is easy and really dresses up the basic little drop cookie!

First, if you are molding the peppermint chocolate, set that up. 
Place 1/2 the mint chocolate discs in a disposable piping bag, place it tip side down in a microwave-safe glass, and put it in the microwave following the packaging instructions.  Melt until they are quite smooth and you feel no lumps when you massage the bag. (you can use the same bag again to make more molds with the same kind of chocolate)
Remove from microwave, squeeze the chocolate down into the tip of the bag and put a twist tie slightly above the fill line of the chocolate.
Snip the bottom of the bag (less is better until you judge the flow!) and fill you molds.
Take the offset spatula and scrape the side across the back of the mold ensuring complete coverage.  Re-distribute as needed and scrape until you have a smooth back on the candy and the edges are as clean as you can get them (don't stress on that, you can clean them up after they harden).  Wipe the edge of the spatula on clean paper towels in between swipes once you get the candy evenly distributed among the molds.

When filled and smooth, place in freezer while you prepare the "striping" chocolate.  Clean the offset spatula to use again.
If you have extra melted chocolate, push the chocolate out of the tip of the bag and twist it off with a small rubber band or a twist tie.  You can rewarm in the same bag (without the twist tie of course).  Just double the tip part over and return to glass for reheating.  After warmed/reheated, replace twist tie on the top, lay glass on it's side, and carefully turn the bag tip part up so it doesn't go out onto your floor or counter!

Place the red  (or whatever color you like) discs in the second piping bag (I used about 1/4 bag for 10 cookies) and repeat the process for melting until smooth and get the twist tie on.  Wrap the bag in a cloth to keep it warm and quickly get the molded chocolate from the freezer. 

Run the edge of the offset spatula firmly over the back of the mold to get as much of the stray, now hardened, chocolate released as possible.  I found this more challenging for the little snowflakes than the big shapes.  Pop the molded chocolate out (you may have to bang the mold on the counter) and release onto a paper towel.  Clean up the edge of the chocolate by scraping your spatula edge along the edge of the chocolate...gently.  It comes right off without much effort on the larger pieces.  I gave up on the little pieces and so they have a small edge.
These are very tasty and would be great by themselves as a
Christmas candy treat!

If you aren't molding chocolate, grab some sprinkles (I used the white snowflakes from the bottle) and have them ready to go.

Re-knead the melted red chocolate bag to ensure it is still warm and loose, and snip the tip of the bag. Squeezing from the top, make a back and forth pattern across the chocolate mint cookie (cookies must be totally cooled - best to decorate these the day after baking or at least a few hours later).  Quickly decorate with chocolate shapes or with sprinkles - push into chocolate pattern on cookie to hold them in place.  If you use a big piece of molded chocolate, squeeze some excess chocolate on the cookie to act as glue.

They set up rapidly and are ready to eat within a brief period of time - maybe 15 minutes or so.
It's homemade, it's easy, and perfect for a beginner if you just use the sprinkle snowflakes.  Your family will think you are so talented!  I just tried one and they taste fabulous to boot!

Cute little dish from Ship Shape on South Padre Island!

Bon Appetit, Y'all!!!


StumbleUpon