The South Padre Island Flip Flop Foodie Brownsville restaurants

Search The South Padre Island Flip Flop Foodie Blog!

Showing posts with label Red Velvet cookies. Show all posts

Wednesday, November 19, 2014

Thanksgiving Cookies 2014

We are having our Thanksgiving on the Saturday before Thanksgiving... because nurses rarely get time off around the holidays...and my husband is a nurse.  Hospitals are 24/7 and you are all glad they are when you need them.  Like other service providers - police, fire, EMS, hospital, military - and any others I left out, well, the families learn to be flexible.  We learn it isn't the specific day we celebrate, it's celebrating the season in whatever special way we make it.  I'm kind of used to it now...still don't like it, but I'm used to it.  We are driving to spend time with some of our Austin family and to make our presence known with the Indiana family, I sent cookies (what else).


I've been working on these for days - and they are bagged, sealed, bubble-wrapped, and boxed with a prayer that they make it through the US Mail system to the Indiana crew.  If there are broken cookies, well, look at the photos and enjoy the taste.  I'm always wanting my cookies to taste better than they look.  A cookie is to be enjoyed both visually and by taste...but really, primarily taste, right?

I got my leaf inspiration and my cute turkey inspiration from enrolling in the online version of McGoo U.  That Arty McGoo has put together a first class cookie instruction/entertainment/share fest and I'm so thrilled to be a subscriber.  I have watched all of the October and November videos and the dotted and painted (with food coloring) leaf project was part of the long class for November.  Then, the precious seated turkey, looking somewhat alarmed and bug eyed (with those cuteeee feet) was the project from visiting Professor Georganne Bell aka LilaLoa, in the segment "Expert Lab" in November's sessions.

I doubt I really did either cookie artist/instructor justice, because I had to adjust each for my "tastes"...but I admit to feeling somewhat proud of my watercolor leaves!  It gave me the courage to try it different ways, despite not having a good color palette of Wilton gel colors to use.  I stopped buying Wilton several years ago and have been a devotee to AmeriColor with a few sidesteps to ChefMaster from time to time.  I will absolutely admit though, Arty McGoo is right on.  I had left some AmeriColor gel colors on the palette from maybe 6 months ago, in a plastic baggie.  The darn things were still sticky to the touch!  I set up a palette with the Wilton and they are dry and not sticky at all.  I'm going to re-stock my Wilton colors, just for painting!  My leaves look a bit psychedelic because I really didn't have the recommended colors.  Nonetheless, I like them...I am embracing my inner kindergartner who enjoys playing with water colors.

Let me just say... CHECK OUT McGOO U ONLINE!!!  If you want to step up your cookie decorating game, this is a great way to do it.  Internationally renown cookie artist, Arty McGoo, shows you step by step how to make some really cool cookie sets.  You can try it out on a monthly basis or there is a reduced price for annual subscriptions.  I'm changing my monthly to annual as soon as I finish paying for Christmas!!!  My gift to myself. (Although I may sound like it, I am not a paid endorser, nor stalker of these people...LOL!!!)

I haven't stenciled in a while, so I tried a few different plaques and stencils and sprays and thick RI...I learned, once again, that my cookies are not flat - but I still liked the overall look of these cookies.  My favorite is the large leaf with a pearlized spray over a Designer Stencils paisley stencil I picked up at CookieCon.  It looks simple, yet elegant.


I also really like the Cookie Countess subway art and leaf stencils.  They turned out nothing like I expected, but absolutely love they way they look in the end (the gold tint is from an epic fail on my part by over-saturating spray which I quickly wiped off - to result in a gold overtone to the light green cookie - then I sprayed darker green on top of gold green...turned out kind of cool.


Simple leaf was stenciled with thick royal icing, just blobbed
on in layers, then scraped upwards to make the
color changing Autumn leaf!

The stencil for this plaque cookie is from Designer Stencils obtained last year.  The berries along the edge were also sort of learned in McGoo U - I had never thought about dropping another color inside a berry.  That was from the October tutorial with visiting professor, Maryann Rollins, aka The Cookie Artisan.  I also used foodcolor from my palette and a fine tip brush to paint some copper/brown leaf veins and acorn tops.  I need to get over being afraid of painting things - especially when icing just won't do.  I'm gonna be stretchin' my wings, y'all!


I got this tall pumpkin cutter earlier this Fall and I must say I am in love with it.  The ivory pumpkins turned out just the way I envisioned them in my head.  I got it, and a stencil genie, from Creative Cookier.  Unfortunately, my big plaques were too large for the genie...but the paisley stencil on the leaf worked beautiful...Literally hands-free stenciling!  So excited to use it on some of the Christmas cookies I am planning.  Wheeee!!!  I'm getting wound up just thinking about it :-)

Thanks for stopping by and checking out my playtime with cookies.  I baked and decorated 80 cookies (I ate two - one red velvet and one vanilla bean sugar - just to ensure quality control!).  I can't wait to share the goodies with my family members, both near and far.

Good thing we are empty nesters and don't eat at our
kitchen table...because where the heck would I spread out
my cookies while decorating?
I cropped out as much of the surrounding area as
 possible - you just cannot imagine the mess I make
when decorating.  It's an embarrassment!


Happy Thanksgiving everyone!!!

Bon Appetit, Y'all!!! 


StumbleUpon

Wednesday, February 12, 2014

Red Velvet Valentine Cookies


I was soooo excited to see Sweet Sugarbelle's recipe for Red Velvet Roll-outs.  She posted it on her website in 2012, but re-posted this year on Facebook for those of us who missed it.  I had been thinking about what flavors to do for Valentine's baking - I like to do at least two and, because my grandkids prefer them, I always include my Vanilla Bean Sugar Cookies in the mix.  I am linking the recipe above because I didn't change one tiny iota of the recipe.  It worked beautifully.  I rolled between parchment paper, wore gloves in fear of red food color hands, used her tip of mixing cocoa powder with flour for dusting when sticky.  Everything was smooth and beautiful.  Best of all, they smelled awesome when baking - enough to draw the boy from his man cave.  Best, BEST of all, they taste divine!  No red teeth thanks to the use of Lor-Ann's Red Velvet Emulsion instead of an entire bottle of liquid red food color, no bumps in the baked dough...smooth and delicious.  Ahhhhh.

So, as I moved on to thinking about decorating them, they were calling out to me, begging for a cream cheese icing.  Red Velvet must have cream cheese frosting/icing.  It's in the Southerner's Rules of Baking Book (if there is one, I'm sure it's in there).  The tastes just marry perfectly and, while I wanted to make them "purty", I did not want to top them with royal icing if I could possibly avoid it.  Let the science experiments begin!

I have previously used Karen's Cookies recipe for Meringue Powder Buttercream.  Gave a lovely mouth feel to piped icing.  However, it took three days to dry down in my humid May environment.  I knew I was going to be decorating a lot of cookies for family and friends, I was worried I would not have time.  My usual time frame takes five preparation days, including making the dough, baking, making the icing, and decorating in layers that require complete drying overnight between layers.  If I experimented and it didn't dry, I was afraid my cookies wouldn't be done until AFTER Valentine's Day! 

I cogitated about it a bit with a cup of coffee, sitting here cursing our weather, which is unusually cold this year (like the rest of the southern United States) and cut on the television to Food Network.  Now, my husband would say you can't cut anything on...you can turn it on, but only cut it off.  Yankee, what does he know?  All of us down south know you absolutely can cut on lights, cut on the a/c, cut on the fan, cut on the t.v. - right?  I digress.  On that television was Alton Brown, discussing cakes.  Red Velvet Cake in specific and the fact that the invention of cream cheese "saved the south" because it had a much higher melting point than butter so it became the standard in frosting in the very warm southern U.S. - light bulb goes off in my tiny little 'ole brain.  Maybe I could use cream cheese instead of shortening in Karen's recipe for MP Buttercream.  Instead of Almond extract, maybe I could use some of the Lor-Ann's Cream Cheese emulsion that I had in my cabinet.  Lastly I remembered I had not used the extra MP last time, Karen recommended double for humid environments...I would do that too.  Woo hoo, I was off to the races with my fingers crossed.

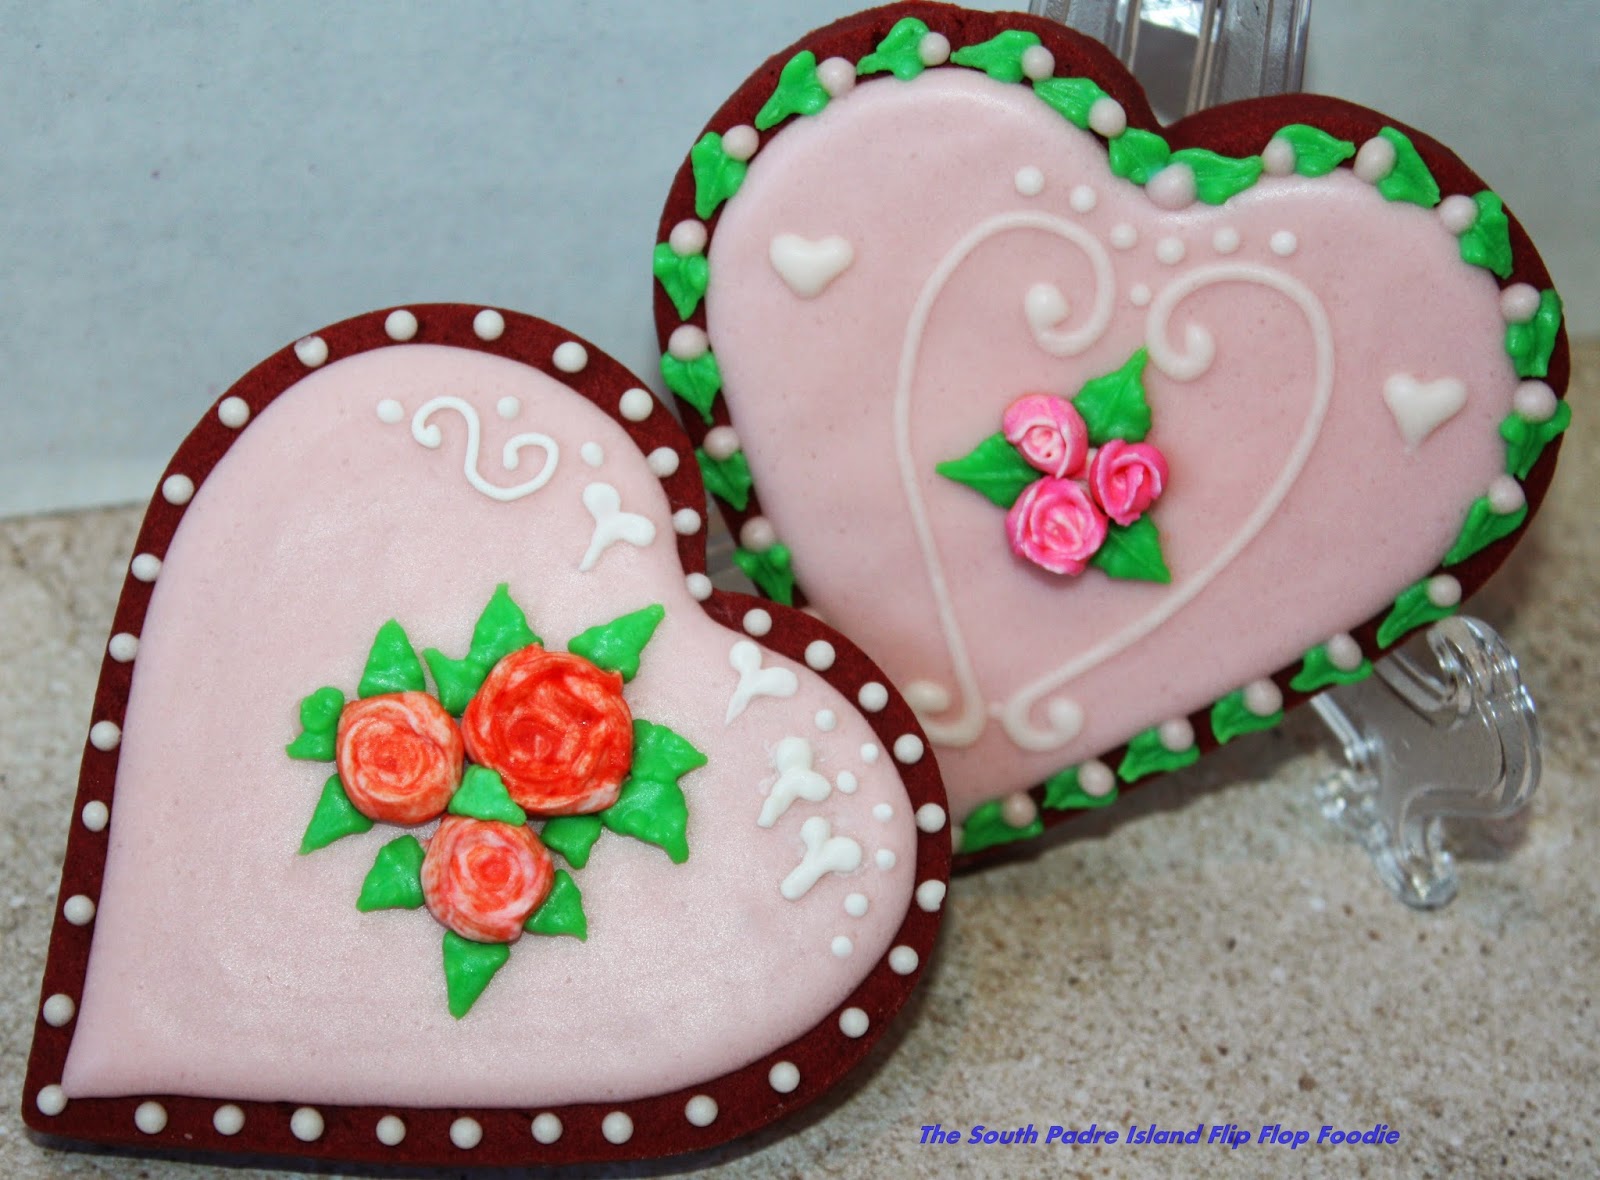
I got everything out, mixed it up, and shoulders slumped...it was too runny.  I added another cup or so of confectioner's sugar (maybe even one and a half) and beat it some more.  Now...that's what I'm talking about.  Perfect flood consistency icing.  So, I piped some on a naked cookie and halved the cookie with one of my food testers (Mr. Flip Flop) and we both agreed - yum!  Next to ice some more hearts and see if they would crust.  I put them under the fan and four hours later, the had a light crust, but my finger pressure broke the surface and it was still very "floody" underneath.    I left them untouched under the fan and the next morning I tried again.  They felt smooth for the most part, but still could be crushed.  I could work on them if I was careful and hope they'd continue to set up.  One of the things I noticed is the cookies closest to the fan had "waves" in them.  These were sacrificed to the taster and I allowed most of those wavy ones to continue to dry so I could check on drying status with ones I wasn't going to decorate...but then, I decorated a few to see if the wavy could be hidden by decor.  Actually, that worked pretty well!  Bottom line...the Cream Cheese MP Icing worked great.  Like the MP Buttercream, though, it did take 3 days to get dry all the way through to the point where I could package and stack them.  However, I could marble, I could make dot borders, and I could pipe some "designs" - although I did have a bit of running-together with that.  Anything that is bright white or a rose is royal icing.  The softer colors (and the green piped leaves) are all CC MP Icing!

So, here's the recipe, based on Karen's recipe, with my tweaks.  It's good, and if you have the time for them to dry, it's very, very tasty.  Fortunately, the Red Velvet cookies were so moist they stood up to the time under the fan.  Still soft to the tooth inside and incredibly delicious (I know because I just ate one to make sure ;-).


Cream Cheese MP Icing
Tested in a humid environment
Adapted from Karen's Cookies Recipe


Ingredients:

1/3 cup room temperature water
6 Tablespoons Meringue Powder (I use AmeriColor MP)
4 ounces regular cream cheese, room temperature
5 1/2 to 6 cups of sifted powdered sugar (sift first, then measure), divided
1 teaspoon pure vanilla extract
1/4 to 1/2 teaspoon Lor-Ann's Cream Cheese emulsion (shake before measuring)


Method:

Place three cups of the powdered sugar and the meringue powder in the bowl of a stand mixer with the whisk attachment engaged.  Turn the machine on and whisk the two dry ingredients together until thoroughly mixed.  With the mixer still on, slowly stream in the water.  Mix until everything is incorporated, scrape down the sides if needed.  Turn the mixer on high and whip until stiff peaks form.  Add flavorings and mix well.

Change to paddle attachment at this point.  Try to get as much off of your whisk attachment as possible.  Use a rubber spatula to help with that.

Add remaining powdered sugar and the cream cheese.  Whip for about 3 minutes - or until you get to flood icing thickness.  Don't whip any less to prevent separation.  I used this as my base.  Store icing in the refrigerator with plastic wrap laying on the surface to prevent crusting (I'm guessing here - that's how I do anything that crusts).

To make piping icing for the leaves, I added powdered sugar and some base together with the green food color (AmeriColor gel leaf green) until it was the consistency I was seeking.

I think you can see from the photos, that it worked really well.  It tastes delicious and worked...what more can you ask for?  Well, you could have asked me to test it more than once to ensure consistent results...but I don't have time.  I welcome any feedback if you try this.  I haven't found anything in a Google search that provides a similar recipe, so I was on untried ground as far as I could tell.

I did find that it was easier for me to do writing with royal icing and the roses are all royal icing transfers I made on another cold day last week.  They are great to have on hand and a good way to use up your unused royal icing.  They last forever if kept in an airtight container!

Well, that's it for the experimentation phase of my Valentine's Day cookie decorating.  I'm onward to the rest of the cookies, still hoping I will get finished in time!


Bon Appetit, Y'all!!!

StumbleUpon