The South Padre Island Flip Flop Foodie Brownsville restaurants

Search The South Padre Island Flip Flop Foodie Blog!

Saturday, January 22, 2011

Dirty Al's at Pelican Station

I've written about Dirty Al's before - I love their shrimp - but I didn't realize that my husband has never been to the mainland location, located at Pelican Station.  It is a really nice place...and filled with history as well as good food.  I first went to the spot when it was the restaurant, "Pelican Station" and I found some history about the location on their old web site.  It's interesting history about our area...so I'm quoting from that old web site below and copying one of their photos as well.

Rio Grande Rail Road Company 1870 - 1911

Pelican Station is located on the exact site where the Rio Grande Rail Road ran in the late 1800's. RGRR began in 1870 as the only railroad in Texas and one of the few in the United States. It was a 42" gauge railroad. RGRR ran a twenty-six mile route between Point Isabel and Brownsville and consisted of three locomotives and fifty-six cars.
RGRR was owned and operated by several Brownsville businessmen. It was created in an attempt to break the transportation monopoly held by riverboat owners Richard King and Mifflin Kennedy, who later became owners of large ranches in the area.

RGRR had a loading / unloading pier 1000 feet long, built over the shallow waters of the Laguna Madre. Lighter boats would offload cargo from ships offshore of Point Isabel and deliver it to the pier to be offloaded once again. This process was reversed for cargo shipped from Port Isabel. This pier was rebuilt in 1928, by the US Corps of Engineers, and used to deliver the granite rock used to construct the Jetties.

There is a railroad car in the parking lot...and my son tends to respond "the historical railroad place?" when I ask if he wants to go to Dirty Al's. 

Photo Source:  http://www.pelicanstation.net/tour.htm

My hubby and I wanted to go out to lunch on the mainland side today because we had errands to run in Port Isabel...I suggested Mexiquito's, Dirty Al's, or Pirate's Landing.  He jumped at Dirty Al's - so off we went!

We were seated quickly at a table with a wonderful view of the causeway and South Padre Island...and some pelicans perched on pilings.  It was a sunny day, but in the upper 40's...unusually cold for us!  We enjoyed watching the birds and the bay and chatting while we waited for our order.  Our drink orders were taken rapidly and served equally efficiently.  My husband ordered the shrimp and oyster platter and I ordered the medium shrimp platter with onion rings instead of fries.  My hubby quickly changed to onion rings as well when he heard me doing so.

Our food was not too long in coming, so we were happily ready to dig in when I bring everything to a halt saying I needed a photo..."of course you do" he responds dryly,  "but you took your camera out of your purse before we left the house".  I do have my cell phone, however, so it had to do!

Medium Shrimp Platter with Onion Rings Substituted for fries - an Add'l $2.50

Medium Shrimp and Oyster Platter with Onion Rings Substituted for frues
 I absolutely love the Dirty Al's shrimp...the onion rings are not worth, in my humble opinion, an additional $2.50 for the substitution.  They tasted slightly overly-greasy - which I confirmed with my husband as his opinion as well.  If we'd realized there were so many (we left about 8 or 9 on the plate between us), only one of us would have paid for the up charge and shared the onion rings.  That would have been better.  With drinks and tip our lunch was $35.00 and that's a bit pricey for a week-day lunch.

The shrimp are so fresh tasting, though, I'd rather get them here than most anywhere else at this point.  I've tried them in a LOT of places...these folks know how to fry some shrimp.  They split them, and lightly bread them, and they don't taste greasy at all. 

Some of the best, if not THE best, fried shrimp in the area!!!
They bring 3 sauces with your platter...cocktail sauce, tartar sauce, and ranch dressing...and they serve a squeeze bottle of Dirty Al's secret sauce...and, catsup of course.  My sons love the Dirty Al's sauce - and if you read my previous posts, you know I've not had luck in getting any to take with us.  Today I asked about it and the waitress said, yes the did sell it, but it wasn't bottled, it was in a Styrofoam container with lid and it cost $6 or $8 - she wasn't sure.  That didn't sound like it would transport well - so I skipped it.  They'll just have to come see me and buy it themselves!  I love it when my kids visit (hint, hint if you are reading this boys!).

My husband and I walked to the car laughing, saying "if only Pier 19 and Dirty Al's could get together...we'd have the perfect shrimp platter with onion rings".  We both love Pier 19's onion rings and Dirty Al's shrimp is our current "favorite" vote in the fried category.  Oh well - isn't it always that way?  Keeps you searching for the perfect plate!

We both walked away with a full tummy and a satisfactory feeling - so good lunch in my book!

SPI FLIP FLOP FOODIE RATING:

4 – Lip smackin’ - good quality – flip flops will definitely be parked under their table again!

Dirty Al's at Pelican Station on UrbanspoonStumbleUpon

Friday, January 21, 2011

Almond Joy Bars

Do you love the Almond Joy candy bar?  I do...they are the only food item with coconut I would eat as a child.  Don't know that this is a good thing!  My hubby's previous supervisor made these cookies for a cookie contest at work and I've been making them almost every Christmas since then.  I didn't make them this year...I got too overwhelmed with sweet treats to finish my list.

Hence, I don't have a photo of my version of these great bar cookies...Almond Joy Bars...but I did find an image that looks very much like the finished product....

Photo Source:  Google Image courtesy of Anniebakes.com
Oddly enough, this recipe doesn't have almonds in it...but it's quite easy to sprinkle some toasted almonds underneath the chocolate...for a really great addition to this bar cookie.  If you love chocolaty, coconuty, sweets...you'll like this treat!

ALMOND JOY BARS
by Debbie Taul

2 cups crushed graham crackers
1/4 cup sugar
1/2 cup butter

Mix the above and press into 9x13 pan.  Bake at 350 degrees for 10 minutes.

2 cups shredded sweetened coconut
1 can sweetened condensed milk

Mix together and spread over graham cracker crust
Bake at 350 degrees for 10 minutes

1/2 cup sliced toasted almonds (optional)
10-12 oz of milk chocolate Hershey's bars (1 8-oz bar and 2 of the regular size you buy on the candy aisle)
1 Tbsp creamy peanut butter

Sprinkle toasted almonds over coconut mix (optional)
Break apart and melt chocolate bars in microwave with the peanut butter...melt in 30 second intervals, stirring until smooth.
Pour over coconut mixture and smooth with spatula

Allow to set up and slice into whatever size bars you enjoy...just remember they are really rich.

Bon Appetit, Y'all!StumbleUpon

Thursday, January 20, 2011

Flash In The Pan


Do you have trouble baking an apple pie?  I do.  Pies are not my forte...no matter how I try, regardless of homemade crust or even store bought...it's either soggy or burned on the bottom or shrinks or the edges burn.  I am just not a pie baker!  I simply don't have "the touch".

I'm working on that this year...maybe.

The one thing I do have luck with, is the more rustic style.  The ones that taste marvelous...but don't look traditionally "pie like" :-)

I made this "upside down pie", or tart, for the first time in the early 1990's.  Almost no one can mess THIS up (thank goodness).  It was either in a magazine or the newspaper...I can't really tell.  It's so old it is brown...so I'm thinking newspaper!  Oddly, the recipe did not include spices...so I've added my spices to it...way better.  It also calls for laying your apples out in a circular pattern...um, I just kind of dump them in.  Also, I put some of the lemon juice on my apple slices if they have to "wait for me" to get to them after I peel them.

Save this if you need an easy, yet delicious, apple tart recipe...upside down.

FLASH IN THE PAN APPLE TART

Ingredients:

1/4 cup butter (use real butter - it matters)
1/3 cup dark brown sugar
1/2 teaspoon ground cinnamon
1/8 teaspoon freshly grated nutmeg
1/8 teaspoon ground cardamom
1/8 teaspoon ground allspice
1 tablespoon light corn syrup
1 tablespoon lemon juice
2 cored and peeled Granny Smith apples, cut into slices (I had 2 large Gala apples - I used them - they were great)
1 rolled 1/4" thick round pie dough (refrigerated is fine - box is fine - scratch is fine - I made one from scratch this time)


Ready to go in the oven...see rustic is good!

Method:
Preheat oven to 400 degrees.  Place 1/4 cup butter in a 9-inch glass pie plate.  Place pie plate in oven until butter is melted.  Remove from oven; stir in brown sugar, light corn syrup, spices, and lemon juice.  Arrange apple slices over brown sugar mixture in circular pattern.  Drape rolled pie dough over apples, tucking sides in around apples.  Bake tart for 30-35 minutes (place on a baking sheet covered in foil in case of bubble overs...really makes clean-up easier in that event), until crust is golden brown.  Remove from oven, cool 5 minutes.  Invert tart onto serving plate with a lip.  Serve with ice cream, if desired.  Makes 6 servings.


Just out of the oven - be sure to let it sit for 5 minutes before flipping

Make sure you flip it onto a rimmed plate - the juice will run out of the tart.
Place the plate on top of the pie pan and "flip"
The pie crust I used is one I found because I needed one that didn't require shortening.  I only had butter...so I found a Land O'Lakes recipe that worked just great!  I also used the food processor to make the dough...so pretty darn easy.  I didn't roll it out very pretty...but since it was a "drape and tuck" it really didn't matter! 

BUTTER PIE CRUST
from Land O'Lakes

Ingredients:
2 cups all-purpose flour
1/4 teaspoon salt
2/3 cups cold butter
4-5 tablespoons ice cold water

Method: (the one I used)
Cut butter into small pieces and place in freezer to get very cold.
Place flour and salt in bowl of food processor and pulse to combine.
Add butter to flour and pulse until you can't see the big butter pieces...you want little bits throughout.
Through the shoot add ice water 1 tablespoon at a time, pulsing until the dough just begins to come together.
Check the readiness by pinching together a small bit..if it holds shape, it's ready...if not add a bit more water.  Much will depend on the humidity of the day and the flour.  Mine took a full 5 tablespoons and about 1 extra teaspoon.

Turn the dough out onto a clean surface - push together with your hands - divide in half.
Pat dough into a disk and wrap each half in plastic wrap.  Place in refrigerator to rest at least 2 hours.

When ready to roll it, put some bench flour out on a smooth surface (granite counter works great) and roll to something resembling a circle :-)  That's as good as it gets with me!  Rustic...yeah, that's the ticket.

I didn't have any ice cream today...so I whipped up some cream with vanilla and confectioner's sugar...yum...it was a delicious dessert.  Easy and delicious...who could ask for anything more?

Bon Appetit, Y'all!!!StumbleUpon

Wednesday, January 19, 2011

My name is the SPI Flip Flop Foodie....

...and I am addicted to PadreRitaVille Nachos. 

I think about the chips when I've gone too long without them...
I think about the beans and the chicken and the beef....
I think about the guacamole and sour cream.

Today, I gave in to my obsession...again.  I can't seem to help myself.
I'm paying for it though.
I ate almost the entire container of jalapenos (served on the side)
I ate a handful of diced red onion sprinkled on the nachos
I ate almost all of the delicious salsa
I picked all of the globs of melted cheese off the plate...

I have indegestion

I have taken Ranitidine

I have chewed Tums when the Ranitidine didn't work sufficiently to douse the burn in my belly...

I even tried to coat my stomach with... chocolate (it seemed smart at the time)

Is it wrong, nay even SICK of me, that I will make it through this horrible discomfort,
and think of returning to
those evil geniuses at PadreRitaVille?

There is something terribly, terribly wrong with me.

Can you blame me?
PadreRitaVille Nachos

PadreRitaVille on UrbanspoonStumbleUpon

Roasted Balsamic Onions


The final recipe from Melssa d'Arabian's Today Show meal purported to be under $10...Roasted Balsamic Onions.  I love roasted onions and I love balsamic vinegar...I was hoping this dish would be a winner.

Her recipe calls for white onions - I bought yellow onions because they were significantly less expensive than the white onions.  I also only prepared 1 1/2 onions (the yellow ones were larger than the white ones)...the teen won't eat these (I knew that going in...but I always encourage a taste)...so I figured a half recipe would be more than sufficient. 
Here's the recipe...

ROASTED BALSAMIC ONIONS
by Melissa d'Arabian

Ingredients:

3 large white onions, peeled and quartered
3 tablespoons olive oil
Kosher salt and freshly ground black pepper
1/4 cup balsamic vinegar
1/2 teaspoon sugar

Method:

Preheat oven to 350 degrees F.

In a large bowl, toss the onion quarters with the olive oil, balsamic vinegar, sugar, and season with salt and pepper.

Tossing in sauce before roasting
Place in an ovenproof, large, nonstick skillet, spreading them out in an even layer.  Cover the skillet with aluminum foil.  Roast for 20 to 25 minutes, and then remove the foil.  Toss the onions well to coat with the reduced balsamic glaze and put back in the oven to roast another 20 to 25 minutes.  Serve warm.

She didn't say to put the foil back on for the last 20-25 minutes, so I didn't.  I figured this would be necessary to reduce the liquid to a syrupy state.

If you are serving this with the braised pork - and the polenta, plan out the timing....
Start the ribs first, get the polenta going next, both of those take slightly over 2 hours total cooking time.
These onions take just under an hour, so obviously, start them 1 hour into the process. 
If the wind is blowing your way, your meal should be complete all at the same time.

My thought is that I used too small of a pan - these would have been better if they were cooked a little more...the small pan I used (since I only did 1/2 recipe) didn't allow them to be in a single layer.  Also, the sauce did not get syrupy as indicated.  With more surface area for roasting, that would have likely happened as well.

The flavor was good - but a little too much crunch for me - I would have liked these a LOT had they been more roasted!  A point in their favor...the polenta and braised pork ribs were so rich that the tartness of the balsamic onions cleansed the palate a bit - it was a good choice for balancing out the dishes being served.

Want to find out what we had for dessert?  Stop by tomorrow...a simple and delicious upside down apple tart...called Flash In A Pan!!!


Bon Appetit, Y'all!!!StumbleUpon

Creamy Polenta

Following along from my last post on the braised country pork ribs, it calls for a bed of creamy polenta when serving.  I've never had much luck making polenta.  I either make it too dry, or it has no flavor...I've only tried it a couple of times...and gave up.

I have high hopes for this recipe because Melissa d'Arabian said a chef told her to finish the polenta in a slow cooker for a no-fail method, using a 1:7 corn meal to liquid ratio.  Her recipe also calls for half-and-half, butter, and Parmesan cheese...part of my own personal holy trinity!  High hopes people!

The cornmeal I finally selected
The first challenge was finding the proper corn meal...my stop at the Port Isabel HEB garnered pre-made polenta on the "Italian foods" aisle (nope - that won't do) and had me moving on to the cornbread fixin's aisle, aka the baking aisle, where I found no coarse ground corn meal.  I didn't even find corn meal that had a recipe for polenta on the packaging.  I flip flopped on over to the breakfast cereal aisle and looked at the "grits"selections...no yellow grits.  So, I moseyed my way back to the "baking" aisle and looked at what I determined to be my best options.  One was a medium grind corn meal from Corsicana, Texas.  Probably would have been my first pick, except it expired in about 6 weeks...and I knew I was only using a small amount...and it was likely to go bad, resulting in my throwing it away.  So, I took the slightly more expensive but longer shelf-lifed option of a Stone Ground 100% whole grain cornmeal - medium grind.

It looked like the stuff I used to buy in Austin - the packaging was clear so I could see what I was buying.  Expiration date in mid-2012...with freezer storage and the assistance of my Food Saver seal for the bag after opening, this should be a winner and last long enough that I can use it multiple times.  I reckon I was wayyyy over-thinking the whole process...but I wanted to have the correct product!

So, onward towards the recipe....

CREAMY POLENTA
by Melissa d'Arabian

Ingredients:

Vegetable cooking spray
1 cup milk
1 1/3 cups half-and-half, divided
2 tablespoons butter, divided
1/3 cup coarse polenta, or corn grits
Kosher salt and freshly ground black pepper
1/2 cup grated Parmesan
Special equipment:  Slow cooker

Method:

Spray the insert of a slow cooker with cooking spray (for easier cleanup) and preheat on high. (Note - if I had any brains I would have used a slow cooker liner - this looks like some hard-to-clean stuff...see the photo below at the 45 minute mark)

In a medium sauce pan, add the milk, 1 cup of the half-and-half, 1 tablespoon butter, and polenta. 

Polenta into the cold liquid
Season with salt and bring to a boil over medium-high heat, whisking constantly to keep the mixture lump-free.  Boil for 2 to 3 minutes.  Pour the mixture into the slow cooker and cook on high for 2 hours, stirring once or twice per hour. 

At the 45 minute mark in the slow cooker -
I'm thinking I'll try it on low heat for the remaining time!
Once you are ready to serve, open the slow cooker and whisk in the remaining 1 tablespoon butter, remaining 1/3 cup half-and-half and the Parmesan cheese....um, okay...I confess, the last 1/3 cup was not half-and-half...it was whipping cream :-)  My own personal touch.  I think it made it extraordinary.

Also, my slow cooker is old...and high was too high for 2 hours.  I turned it down to low for the last hour and turned it off for the last 15 minutes of cooking time.  That was perfect for my slow cooker.  I was worried there was not going to be enough...but I was wrong.  It was the perfect amount for the base of my serving platter!  Verrry cheesy and rich.

I put this out on a serving platter and placed the ribs down on top of the polenta and ladled the reduced braising sauce over the ribs.  Really, really good stuff.


Braised Country Pork Ribs over Creamy Polenta -
the steamy heat makes for blurry photos...sorry!

I served this dish with Melissa's Roasted Balsamic Onions.  Another post coming your way for that one...

Bon Appetit, Y'all!StumbleUpon

Tuesday, January 18, 2011

Braised Country Style Pork Ribs

Ready to Serve
I caught the tail-end of a Today Show segment where Melissa d'Arabian, of "Ten Dollar Dinners" on Food Network, was preparing Braised Country Style Pork Ribs over some polenta.  She was apparently going too slow for the hosts who were hurrying her along but were delaying her by asking repeatedly "are you SURE you can make this for $10?  Where are you getting this meat?  Is it black market meat?  Stuff like that.  I admit I thought the same thing, because those were some meaty looking country pork ribs!  The dish also looked mouth watering delicious.  I'm all for an inexpensive recipe...and she was preparing the creamy polenta via her slow cooker - interesting technique...so I thought I'd search down the recipes...for "consideration".

I looked on Food Network and didn't find them there, so I went to TODAY on msnbc and did find them there.  The recipes also included a side dish of Roasted Balsamic Onions which didn't appear on the part of the segment I saw.  When I re-watched it on the linked video player, I saw the onions sitting in front of the slow cooker.  It sounds good...and simple...so I'm going to make the whole shebang for dinner!

I found some beautiful meaty country pork ribs at Sam's Club in Brownsville...for $1.88/pound!!!  So, I guess she is serious...you probably CAN make this meal for under $10 (well, right at $10...maybe).  I'm not going to cost out 1 stalk of celery, 1 carrot... and all the bits and pieces.  Whatever!  Meat that is $1.88/pound is a cheap dinner!  (of course it is only worth the price if it actually tastes good)

Country Pork Ribs - Salt and Peppered - Ready to Brown
Since I know that country style pork ribs are a cut from the pork loin - the blade end of this section - they are meaty, yet fatty; bone-in or boneless are usually available at the store...I felt certain they would be tasty.  Braising them would ensure fall-apart tenderness.  The package I got at Sam's Club were bone in (mostly - altho there were a couple of boneless)...Melissa's recipe called for 3 pounds to feed 4 people.  I'm cutting back to 4 ribs - which were about 2 1/2 pounds total.  I'll leave all the rest of the ingredients the same since they are for the braising liquid - won't mess with a proven recipe since I've not made it before.

So, let's get rolling on the prep work.

Knocked out the prep work for the ribs...taking a break now :-)

BRAISED COUNTRY STYLE PORK RIBS
by Melissa d'Arabian

Ingredients:

3 pounds bone-in country style pork ribs (I used 4 ribs totalling 2 1/2 pounds)
Kosher salt and freshly ground black pepper
3 tablespoons vegetable oil, divided
1 onion, chopped
1 carrot, chopped
1 stalk celery, chopped
4 cloves garlic, minced
2 tablespoons tomato paste
1/4 cup apple cider vinegar
1 teaspoon crushed red pepper flakes
2 bay leaves
2 1/2 cups chicken stock
2 tablespoons chopped fresh parsley, for garnish (I skipped this)

Method:

Preheat the oven to 350 degrees F.
Pat the ribs dry and season with salt and pepper.
Browned and removed from pan
Heat 2 tablespoons of the oil in a Dutch oven over medium-high heat and brown the ribs on all sides, working in batches if needed.
Remove the ribs and set aside.
Add the remaining 1 tablespoon oil to the Dutch oven and reduce the heat to medium.
Add the onion, carrots, celery, salt and pepper and cook until soft, about 5 minutes.

Mirepoix in the pan


Add the garlic and cook until fragrant, about 1 minute.
Add the tomato paste and cook, stirring, to remove the raw flavor, about 3 minutes.
Deglaze the pan with the cider vinegar, and then add the red pepper flakes and bay leaves.

Add the ribs back to the pan and add enough stock to reach halfway up the sides of the ribs.  Bring the pan to simmer, cover, and place in the oven.
Ready to add browned ribs back to pan

Braise until the meat is tender, about 1 1/2 hours.
During the last 1/2 hour, uncover to allow the liquid to reduce and the pork to brown.

Serve the ribs with creamy polenta, spooning the sauce on top, and garnishing with parsley.

So, here are a few of my thoughts...

  • This is not a 30 minute meal - obviously. 
  • This is a Sunday Dinner...even if it is an inexpensive meat, it tastes fabulous. 
  • The pork, braised in the tomato paste, puts off a lot of red looking grease.  I drained a LOT of it before serving...but it really showed up around the polenta.  It actually tasted pretty good mixed into the polenta, 'cause we know "pork fat rules!" (thanks for that Emeril)
  • I cooked the dish almost 2 hours...the last 30 minutes uncovered.  Mostly because I forgot to bring it up to simmer after I put the pork ribs back into the veg mix...so I wanted to make sure it got the full cook time.
  • From start to finish, including prep and cooking time, this took me almost 4 hours.  I have to say, I think it was worth it!
The picky teen got one tiny spoonful "to try"...and he ended up eating two large helpings.  He gave it an 8.3 out of a 1-10 system.  My husband gave it a 8.9 so I think everyone was pretty happy with the labor of love.

The best part was the polenta.  See tomorrow's post for that recipe!

Bon Appetit, Y'all!!!StumbleUpon

Monday, January 17, 2011

Jalapeno Cheddar Cornbread Muffins

Photo Source:  Google Images (because my people
would not let me put jalapenos in ours)
There's a little restaurant in Austin (no, not South Padre this time), called Eastside Cafe.  It is in an old house East of IH 35, converted to a most excellent restaurant, where I have eaten some mighty fine meals during the years when I lived in Austin.  I received a little cookbook, as a gift, that gave me the secrets to some of their delicious dishes a few years back.  The other morning, I was flipping through it...talking to the family about what to have for dinner.  I tried to push them to accept my suggestion of the Jalapeno Cheddar Cornbread Muffins I have enjoyed at every single meal at this restaurant.  Both "men" shook their heads...they don't like jalapenos in their cornbread. <sigh>

However, I bet there are plenty of folks in the Rio Grande Valley who would like this recipe and embrace the jalapenos (perhaps adding more than is called for)!  I liked them, particularly, because they were not overwhelming in the heat department...just a small nip on the tongue, if even that :-)  The key is in getting the jalapenos minced very small - there are only 2 tablespoons in 24 muffins - how hot could they be???

I'm going to share the recipe with you - and I did make it for the guys without the jalapenos...but I just don't think they are as delicious as the ones that prompt my memories of lovely lunches under the blooming pomegranate tree, walks in their beautiful organic gardens, and the memories of the friends I enjoyed those lunches and walks with! (although my cornbread muffins were damn good, even without the jalapeno!)

My cheddar cornbread muffins - hot,
with butter - simply delicious!
Make these - they are really delicious...a moist crumb, big on flavor.  Make sure you have lots of softened butter to slather on as soon as they come out of the oven.  Delicious. (yep, I'm being redundant...but it's true.)

Eastside Cafe's Jalapeno Cheddar
Cornbread Muffins
From: Eastside's Inside Secrets

Ingredients:

2 1/4 cups yellow cornmeal
1 1/4 cups all-purpose flour
2 tablespoons baking powder
1/2 teaspoon salt
1/2 teaspoon baking soda
5 tablespoons sugar
2 eggs
1 1/2 cups buttermilk
6 tablespoons canola oil
1 1/2 cups cheddar cheese
2 tablespoons canned/jar jalapenos, minced
4 tablespoons butter, melted

Method:

Preheat oven to 375 degrees.  Place cornmeal, flour, baking powder, salt, baking soda, and sugar in a mixing bowl.  Set aside.  In another large mixing bowl, combine eggs, buttermilk, canola oil, cheddar cheese, and jalapenos and whisk together.  Add dry ingredients to wet ingredients and whisk to combine.  Add melted butter and mix well. 

To bake:  Spray 3-inch muffin pan with cooking spray.  Fill muffin pans half full (about 1/4 cup per muffin).  Bake for 25 minutes until golden brown.  Yield 24 muffins.

Now, I halved the recipe today - 12 muffins - and it turned out fine...not always the case when baking halved recipes...but feel confident that you CAN halve this recipe with no problem whatsoever.  I even went so far as to make 6 without cheese (the picky teen didn't understand why I had to mess with a "perfectly good cornbread muffin by adding cheese" <sigh...again>).  Everyone was happy.  The teen was so happy he ate ALL SIX of them.  His dad ate FOUR.  Holy smokes!  We served them with chili...and it was a most excellent dinner!  (Did I say most excellent more than once?  I must be channeling Bill and Ted's Excellent Adventure... I don't know why.)

The muffins are ready!

Bon Appetit, Y'all!!!

Eastside Cafe Gardens, Austin, Texas
http://www.eastsidecafeaustin.com/garden/garden.html
StumbleUpon

Sunday, January 16, 2011

Texas Chili

My Facebook friend was having a discussion last week about making some good Texas chili...and there were a lot of suggestions and ideas...including the discussion regarding beans or no beans.  I told her a great beginner chili was to use Wick Fowler's 2-Alarm Chili mix...it is really quite good. 

I don't have anything against beans...just not in my homemade chili.  If I was going to put beans in - I would make some pinto beans from scratch and add to the chili about 30 minutes from finish time...but really?  No beans needed.  My in-laws make chili (well, they call it chili) with SPAGHETTI in it...What the heck is that about???  But, at least they don't have beans in their "chili"!!!
:-)

My hubby is home sick with a cold and asked me to make something spicy for him.  I asked "how about some chili?" and he responded "that would be great".  We both believe spicy food helps naturally relieve some of the symptoms of the common head cold (not cure the cold, just relieve some of the symptoms).  Chili peppers are thought to loosen phlegm and reduce the pain of a sore throat.  Chicken soup is the answer for some people..for us it's a bowl of chili!

So, I had a pot on the stove for about 3 hours today...and I'll tell you how I make it.  I usually don't measure, when I make chili, but I tried to do so today!  If there is a larger crowd, you can certainly multiply this up to make a huge pot of chili...and you will learn by smell and appearance (over time) when it is "just right" for your taste.

What I offer today is "just right" for us!  I frequently make it less spicy...but not on a day we are trying to relieve the misery caused by a crappy old cold!

DEBBI'S TEXAS CHILI

Ingredients:

1 1/2 pounds chili meat (or ground chuck if chili meat not available)
1 small (or 1/2 large) yellow onion - chopped
8 oz tomato sauce
2 cans water (rinsing the tomato sauce)
1 small 8 oz. jar Picante Sauce (medium hotness)
1 jar of water (rinsing the salsa from the jar)
4 Tbsp Chili Powder
1/2 teaspoon Cayenne Pepper (1/2 this much for a mild and none if you can't take the heat)
1 Tbsp Onion Powder
1 Tbsp Cominos (ground cumin)
1/2 Tbsp Garlic Powder
1 teaspoon kosher salt
1/2 teaspoon ground black pepper

3 Tbsp Masa Harina
1/2 cup tepid water

Method:

Place ground meat and chopped onion in a Dutch oven and cook until onions softened and beef is crumbly and browned.  Add the tomato sauce and picante sauce and associated water, and stir.  Add all the seasoning and stir well. 

Do not add the Masa / tepid water yet!

Bring to boil, lower heat and cook, uncovered, on a very low simmer for about 2 hours.  If it reduces too much, just add a bit more water.  It will be intensely brownish red, but not very thick...soupy still.  The masa does the thickening part!  About 30 minutes before serving, whisk the Masa Harina in the tepid water until smooth.  Bring the chili to a little bit more than a simmer (but not a big boil) and pour in the masa water, stir thoroughly.  The masa lightens the color just a bit.  Simmer until it is the right thickness for you, stirring frequently to make sure it doesn't stick to the bottom of the pan.  I think the masa "makes it" - gives it that special Texas chili taste.  If you skip that part, it just doesn't taste right to me.
Chili after Masa Harina added - ready to serve


Offer grated Cheddar Cheese when serving.  My Mom would want some chopped onions as a topper.  Some people add sour cream.  I just go for the cheese.

We serve it with corn muffins or with tostado chips.  We just finished a big bowl a few minutes ago...I felt a singe on the back of my throat from the cayenne...oh my goodness, it was delicious!!!


Yum yum
Look for the Jalapeno Cheddar Corn Muffin recipe I'll be posting tomorrow.  I made them tonight, without jalapenos...and made only a 1/2 recipe (the full recipe makes 24 muffins)...the teen didn't want cheese in his...he asked why I had to mess with a perfectly good cornbread muffin.  So, I did half without cheese and half with.  I think the cheese makes it over-the-top delicious...so keep an eye out!!!

Bon Appetit Y'all!!!


StumbleUpon

Saturday, January 15, 2011

Clean Kitchens - Yay! Dirty Kitchens - Boo!

ValleyCentral.com reports the following cleanest restaurants this week in Port Isabel (I assume "of those inspected")...

Domino’s 1702 Hwy 100
Lost Galleon 202 Queen Isabella St - Update Nov. 2012 - closed for Business
Fisherman’s Café 416 W Highway 100

We've had Domino's pizza, of course, and eaten multiple times at Lost Galleon...so Yay!  Lost Galleon has several all-you-can-eat options and a pretty good chicken-fried chicken platter.  Served diner style (all the food is served on one plate sort of thing) - with a piece of toast - it's a good place to stop in when they aren't crowded.  It's a smallish restaurant - so if the parking lot is full - so is the restaurant.  I haven't been in a few months - I'll have to stop in again soon.

The all-you-can-eat deal is plated as well - when you want more of something, you just ask for it.  It's not buffet style where you go get what you want....and it isn't served in big bowls and put on the table.  I'm not sure if they would do that differently if everyone at the table had the same all-you-can-eat order.  We never all order the same thing.  :-p

I've never tried Fisherman's Cafe...I think it has about 4 parking spaces...and when they are open (which doesn't seem to be consistent) they are usually full...probably a good sign that I should stop in!

(UPDATE MAY 2011 - Costa del Mar permanently closed)
They also report that Costa del Mar was shut down for SIX DAYS due to 37 demerits...including insect infestation, no thermometers to check food temps, cross contamination of chicken and fish....OH MY!
They are now re-opened, and had a perfect inspection to get the opportunity to re-open.  I've never been there - it just looked a little too "iffy" to me, from the outside.  I'm thinkin' I'll probably stick to that decision at this point.

And that's the news...here in Port Isabel, Texas!

Bon Appetit, Y'all (gosh, hope I didn't ruin your appetite!)StumbleUpon

Birding on South Padre II


A revised (shorter) version from earlier this month - minus most of the shaky video!!StumbleUpon

Lemon Ricotta Cookies with Lemon Glaze

In the Fall of 2009 I found one of the best cookies to ever pass my lips.  I saw them being made by Giada on Food Network and I thought they sounded really good...and I printed off the recipe.  I made them when my family came down for a visit...they loved them...I made them for coffee with my friends, more raves!  They don't last long in my household!  Lemon Ricotta Cookies with a fresh lemony glaze are a cakey cookie - just refreshingly delicious.  One of those "you can't eat just one" kind of cookies.  I LOVE lemons - I love lemon drops - and these taste like a cookie version of a lemon drop.  Intensely tartly lemon and yet sweet... all in one bite.  Yum.

So, here we are in January and I'm encountering some gorgeous lemons and limes...and I've started pulling out recipes using them.  I decided to start with one I knew...and then I'll be trying a new one this week-end...using some of the big juicy limes I bought this week.

I had one Valley Lemon (a Meyer) and 2 "regular" lemons in the fridge.  The Valley Lemon is much more thin skinned, so I used the "regular" lemons for the zest...but the Valley Lemon is juicy to the extreme...and easily gave twice as much juice as one of the smaller lemons on hand.

Here's the recipe...make sure you have access to a zester (not the long strips - but a grating kind of zester...I use a micro plane) and a good reamer or juicer to get the juice out.  I used a 2 Tbsp cookie scoop for portioning the cookies (the recipe makes a little over 2 dozen).  Other than that, some bowls, measuring utensils, and a mixer were all that was needed.

LEMON RICOTTA COOKIES
WITH LEMON GLAZE
Recipe from Giada De Laurentiis via www.foodnetwork.com

Ingredients:

Cookies:
2 1/2 cups all-purpose flour
1 teaspoon baking powder
1 teaspoon salt
1 stick unsalted butter, softened
2 cups granulated sugar
2 large eggs, room temperature
1 (15-oz) container whole milk ricotta cheese
3 tablespoons lemon juice
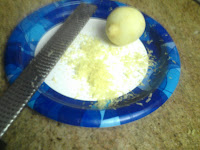
1 lemon, zested (note - zest the lemons first - and then cut and squeeze for the juice - be careful not to zest the white pith - just the bright yellow intensely lemony zest)
the zest of one lemon and the naked lemon ready to cut and squeeze
Glaze:
1 1/2 cups powdered sugar
3 tablespoons lemon juice
1 lemon, zested

Directions:

Preheat the oven to 375 degrees F.

Cookies:
In a medium bowl, combine the flour, baking powder, and salt. (I whisked them together to remove any lumps and ensure well-blended) Set aside.

In large mixing bowl (I used the stand mixer bowl), combine the butter and the sugar.  Using an electric mixer beat the butter and sugar until light and fluffy, about 3 minutes.  Add the eggs, 1 at a time, beating until incorporated.  Add the ricotta cheese, lemon juice, and lemon zest.  Beat to combine.  Stir in the dry ingredients (I just added to mixer bowl and continued mixing).

Line 2 baking sheets with parchment paper (I used Silicone Baking Mats).  Spoon the dough (about 2 tablespoons for each cookie - I used a cookie scoop) onto the baking sheets.  Bake for 15 minutes until slightly golden at the edges.  Remove from the oven and let the cookies rest on the baking sheet for 20 minutes. (My batch of dough made 28 cookies - and I used 3 baking sheets - as I remember they spread significantly - see photos).


scooped dough - ready for the oven

baked cookies - just barely brown around the bottom edge
Glaze:

Combine the powdered sugar, lemon juice, and lemon zest in a small bowl and stir until smooth (I pre-whisked the powdered sugar to ensure no lumps and then used the whisk to incorporate the juice and zest - makes for a smooth glaze).  Spoon about 1/2 teaspoon onto each cookie and use the back of the spoon to gently spread.  Let the glaze harden for about 2 hours.  (Note - I wish I had put the cookies on a rack before glazing so the glaze didn't pool around the cookie.  I looked on foodnetwork's link above and the picture shows them being glazed on a rack...duh...my recipe was printed out last year - and it didn't have that picture then.  Someone must have re-tested and realized :-)

Pack the cookies in a decorative container. (yeah, that's not gonna happen...they'll be lucky to be here past dinner time in my house!!!)

So, I've finished glazing them - and sampled one for QC (Quality Control)...and I must say - that is one damn fine cookie!  I need another one - see ya later!

Bon Appetit, Y'all!!!StumbleUpon

Friday, January 14, 2011

Three Cheese Risotto

This is an incredibly rich risotto - and worth every minute of the 20 minutes you have to stand there stirring.  Really good stuff.  Put this in a pasta bowl, spoon some Osso Buco over it...OMG it is to die for.  Actually, I could make a meal of this with not much else...but I always make it when I make Osso Buco.  It's a perfect complement.  Be sure you only try this with arborio rice...the longer grains just don't work!


Found this recipe online in 2003...it says it came from a website called Culinary Cafe.  "Thanks" to them, because it is an awesome recipe!


THREE CHEESE RISOTTO

Ingredients:

1 tablespoon olive oil
1 cup chopped onions
Salt and white pepper
6 cups chicken stock (have made with beef stock - even more rich)
2 teaspoons chopped garlic
1 pound Arborio rice
1 tablespoon butter
1/4 cup heavy cream
1/4 cup grated Parmigiano-Reggiano cheese
1/4 cup grated Romano cheese
1/4 cup grated Asiago cheese
2 tablespoons chopped chives

Method:

In a large sauce pan, over medium heat, add the olive oil.  When the oil is hot, add the onion and season with salt and pepper.  Saute for 3 minutes, or until the onions are slightly soft.  Add the stock and garlic.  Bring the liquid to a boil and reduce to a simmer.  Cook for 6 minutes.  Add the rice and simmer for 18 minutes, stirring constantly, or until the mixture is creamy and bubbly. (check for doneness with a small bite of the rice).  Add the butter, cream, cheeses, and chives.  Re-season to taste with salt and pepper.  Simmer for 2 minutes and serve immediately.

Serves 8-10 (I don't know who's house she is from, but it wouldn't serve 10 of my people!)

Now, you'll notice, she doesn't use the traditional risotto method....where you heat the broth in a separate pan, saute the rice in with the olive oil and onions, add the stock by ladle-full, stirring until it is incorporated, more broth, stir, more broth, stir...yada yada yada.  I've done it both ways.  Something inside me makes me need to do it the traditional way.  Frankly, though, I don't see a huge difference...and it's one more pan to wash.  So, the last couple of times, I've just done it her way...and it's been great! (uh, I don't know why I assume it's a "her"...)

I hope you enjoy the risotto as much as I, and my family, does.  I've served this to guests as well...always heard accolades.  It is really delicious!

Bon Appetit, Y'all!StumbleUpon

Thursday, January 13, 2011

My Osso Buco

I learned to make Osso Buco about 8 or 9 years ago.  It's a rare treat these days, because finding veal shanks in a retail environment in the lower Rio Grande Valley is not easy.  I've checked HEB, Wal-mart, Mata's, Blue Marlin...no veal shanks on any of the days I visited. <huge sigh>

So, when I get to Austin, I buy the precious goods and save them, carefully vacuum sealed and frozen, for the perfect day, when it is chilly and my husband is home, to prepare Osso Buco (veal is expensive and only he makes it worth the effort and expense of this dish!).

I know you could make this with beef shanks...but I haven't tried it yet.  Everything I've read, says it just isn't as good with beef shank.  So, if you know a LOCAL source for veal...please, please, please share with me (I know I can order it online).

This recipe is based on a couple of different recipes I mixed and mashed to make my own.  It is f**king delicious.  That's all I'll say.  And, with that, here it is.

MY OSSO BUCO

Ingredients:

Olive Oil - enough to cover bottom of Dutch Oven
Flour - for dredging the shanks
Sea Salt - fine grind for this, not kosher
Fresh ground pepper
4 veal shanks - the meatiest you can find - cut 4 to 5 inches thick
Butcher's twine
4 carrots - cut into bite-sized chunks
2 large cloves of garlic, finely minced
1 large sweet onion - chopped
1 28-oz can good quality whole peeled tomatoes - remove from juice - chop - return to juice
1 1/2 quarts beef stock - I prefer the cartons - Organic if I can get it
1 cup Pinot Grigio (any good crisp white wine - one you would serve with dinner)
2-3 plum tomatoes, diced
3 or 4 basil leaves, cut in chiffonade plus more for sprinkling over the dish when served
Salt and pepper to taste

Method:

Prepare the shanks by tying them around the outside with butcher's string.
Season flour with fine sea salt and ground pepper.
Heat olive oil in a large Dutch oven (oil should just cover the bottom of the pan)
Dredge veal shanks in flour, add shanks to Dutch oven and brown, turning frequently to get a good light brown crust...takes between 6-8 minutes.
Reduce heat to medium, add carrots, onion, garlic, canned tomatoes, and 1 quart of beef stock.  Cover and let simmer about 45-50 minutes.  Add the wine, the diced fresh tomatoes, the basil, and the remaining 1/2 quart stock to the pan.  Place in 375 degree oven for about 1 hour... or until tender.  Salt and pepper to taste.  Snip the butcher's twine and remove from pot before serving.  The meat should be falling off the bone and melt in your mouth tender. 

If you are a fan, I hear the marrow is awesome - I always serve the bone.  I just can't go there personally...I love what it adds to the dish - but I can't spoon the marrow out of the bone...just can't!  I plan for 1 shank per person being served.  I sprinkle chopped basil over the dish when I plate it (or bowl it - I usually serve in a low pasta bowl).  I have always served this ladled over risotto - I have an awesome recipe for risotto that I'll post tomorrow.  Some crusty bread on the side...this dish has never let me down!

Bon Appetit, Y'all!!!StumbleUpon

Wednesday, January 12, 2011

Another Kitchen Gadget

My last kitchen "gadget of the day" from my stop at Cactus Flower, was a Spiral Slicer for garnishing vegetables - $2.95.  I'm not much on fancy garnishing of vegetables...it is not all that easy in my limited experience...I can do a few things - green onion curls, radishes that look like flowers...but nothing fancy.  I had seen an interesting sort-of accordion sliced potato on an Ina Garten special, Barefoot in London, and I thought this tool might help make the potatoes.  Unfortunately, I can't seem to find the recipe yet...so you may have to stay tuned for an update on that recipe.  But, I did use the spiral slicer on a potato, just to see if it worked "as advertised".  In retrospect - I'm thinking the Barefoot Contessa recipe is likely fan slicing the potato...but I'll wait for the recipe to come out.

Onward to kitchen play time.  The weather is nasty outside (unusual for the coast - but happens a bit in the Winter months) so a perfect day for experimenting in the kitchen.

So, I opened the little gadget and read the instructions on the back.  They say:
1.  Use a knife or a corrugated garnishing tool to cut the vegetable into a cylinder shape.
2.  Insert the screw of the spiral slicer into the center of the top of the vegetable.
3.  Place your finger into the hole and turn the tool clockwise.
4.  Attach the ends of the spiral together with a toothpick.

The Potato spiral can be fried.

Potato Chips:
Potato chips, home fries, or cottage fries can be made from the spiral potato by cutting with a paring knife down the screw hole and making a single cut outward. 

I saw Google search results, while searching for Ina's recipe, that somewhere in the northeast part of the US, spiral potatoes on a skewer are a boardwalk favorite.  I didn't linger long enough to find out how that was done, but it kept cropping up when searching, so it must be true. Ha ha!


Anyway, I cut a rather large russet potato in half, leaving the skin on and cut the small end so it would be flat.  I pushed the screw in and then wound it in pushing with my thumb (being careful not to cut myself on the gadget - one edge is quite sharp).  Then I started turning the tool clockwise as directed.  Easy.  Ha!  I like easy :-)

Knocked out that half potato in nothing flat!  Don't know what I'd do with that twirly piece of potato, but the gadget does work as advertised! 

Next, I peeled the other half of potato to see if it made any difference.  Got the screw in, potato starting to get slippery as the starchy liquid starts releasing.  I start twirling, easy to do until I got about half way down then it was so slippery I had to stop, I couldn't hold the potato and the screw was to the end, and would gouge my cutting board if I continued. 

OK - plan to waste about 1 1/2 inches of veg at the end if it is a slippery one....like a peeled cucumber or something.  I think you would have trouble using this on a carrot or other hard veggies too.  If I had a carrot, I'd try...but none available today.


Onwards...what do you do with these???  I don't want to throw them away, and I don't want to fry anything - soooo.... I cut the peeled potato spiral down the center as instructed for potato chips above...and I baked them on a sheet pan after spraying with butter-flavored cooking spray and sprinkling with a combo of season salt, garlic powder and onion powder....at 400 degrees...until "they looked like" they needed to be flipped.  Then finished them off until cooked through. 
Cooled on paper towel...not crispy...but very tasty!  The ring was treated the same way and cooked longer, flipping it was not as easy. 
I think, after seeing it, maybe an interesting alternative to baked potato or steak fries if you were in the mood to serve something unusual as a side potato.  You can see that they sort of collapsed though. The flavor was actually better on these - the skin had a bit of a crunch - but you'd need to cut them with a knife and fork ... I don't know...could be worth the effort if you have the need for your food to look fancy :-)  I really don't. 

I also tried this on a Gala apple - thinking this might be a great alternative to slicing apples for a tart or pie.  No go...the screw doesn't hold.  Maybe a firmer apple might work, but the ripe Gala did not.
I guess the final words on the spiral slicer are...it did what it was advertised to do.  It was fairly easy.  The firmness of the flesh, and having something for the screw to grip are prime in the effectiveness of the tool.  Give it a try if you like to play in the kitchen.  It's just $2.95!

See ya later gators - I've spent 3 hours messing with this, eating baked potato chips and apple remnants...I gotta go get a life :-)
StumbleUpon