The South Padre Island Flip Flop Foodie Brownsville restaurants

Search The South Padre Island Flip Flop Foodie Blog!

Showing posts with label savory. Show all posts

Thursday, January 8, 2015

Sticky Asian Chicken Drummies


I bought chicken drummies to make New Year's Day...and didn't end up making anything snackish after all.  What to do, what to do with 4 pounds of winglets in my freezer?

I started searching online for recipes.  I didn't want to fry them (we, along with millions of other people are making the New Year attempt at eating healthier after the gluttony of the past two months).  I wanted it easy.  I needed to have all the ingredients on hand...is that too much to ask?

I couldn't get everything I asked for, but I did run across an interesting recipe called Slow Cooker Sticky Chicken Wings from a blog called Damn Delicious... and that sounded quite delicious to me!

I stuck close to the recipe at the link above, but due to my lack of Sriracha and the bottom bits of honey in the cabinet (most used up during our coughing extravaganza last two to three months between me and Mr. Flip Flop) I was forced to make a few adaptations.  I substituted Vietnamese Chili Garlic Sauce for the Sriracha (it sure gave it a nice kick) and I reduced the honey to about 3 Tbsp instead of 1/4 cup.  I also used dark brown sugar (which has more molasses in it so I figured the sweetness would be balanced despite the smaller amount of honey - and it was).  The blogger, Chungah, has the recipe on her site so I'll invite you to click on the link in the paragraph above for a printable recipe.  I didn't make enough changes to really call it my own at all!

It turned out delicious indeed.  I did, inadvertently, over-cook them, which resulted in some of them literally falling off the bone.  That was a bit of a bummer; but the flavor was truly wonderful!  Follow her times - her drummies looked better than my drummies!


I had no intention of blogging this post, but once I got it plated I thought I'd take a couple of photos.  It was not very bright in the kitchen so they aren't wonderful.  Nonetheless, it's a recipe worth sharing!  Just stick to the original recipe's cook time and you'll do better than me.  My flavor substitutions worked out fine.  I had the leftovers for lunch yesterday and it was great re-warmed ... just wished I'd saved a bit more of the sauce.  The rice sucked it all up on the leftovers.

I scooped up some of the sauce for dipping.  There is brown rice under
the drummies and steamed brocolli on the side.  A rather anemic
looking watermelon for dessert (it tasted good, but the color was too light).
A very satisfying meal!!!

It's cold right now and this seemed like a tasty treat for a cold day.  I'm sure you could use regular chicken drumsticks, whole wings, or even thighs.  I might have to try that.  The flavor was really outstanding!

If you try it, please leave a comment and let me know how it turned out for you.  Inquiring minds want to know!

Bon Appetit, Y'all!!!


StumbleUpon

Monday, December 23, 2013

Parmesan Roasted Cauliflower


I have never been overly fond of cauliflower...until recently. 

I didn't know what to do with it.  My primary experiences with cauliflower were my Mom baking it whole in the oven and then spooning cheese sauce over the entire thing...or having it as part of a "steamed vegetable mix" alongside broccoli and carrots in a restaurant.  It was always just "meh".

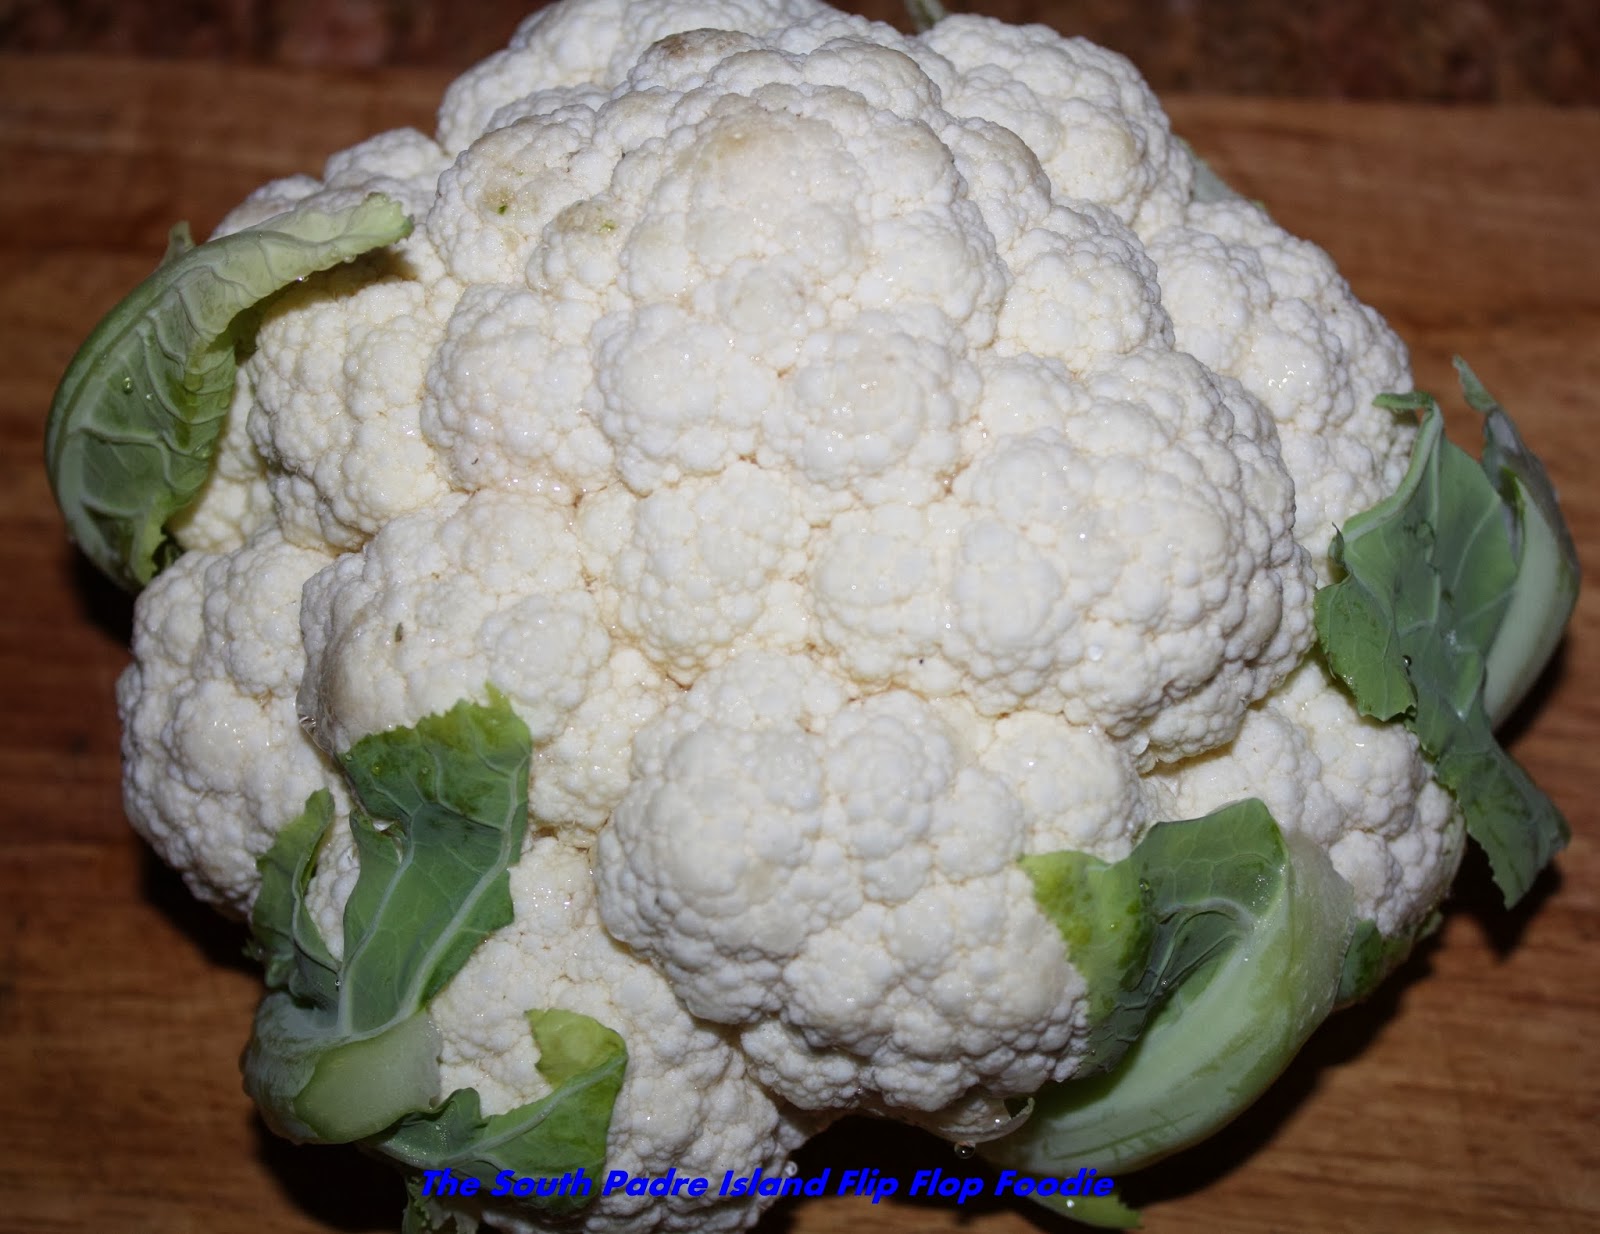
However, we are really trying to decrease our processed carbs and boost up our veggies so I brought home a big (and I do mean huge) head of cauliflower a couple of weeks ago and went on an internet search for a good sounding recipe.  I landed on this Parmesan Roasted Cauliflower from Bon Appetit magazine's web site.  I gave it whirl and it was really outstanding!  After we polished off the entire HUGE head of cauliflower, I realized "hey, I should have posted that".  Hindsight...it's my routine level of vision some days.

So, today, we were having some steaks and I thought this would be a great side dish...and I wanted to post it before Christmas because I think it would be an awesome addition to a Christmas dinner if you are in search of another item to add to the table.  Mr. Flip Flop and I ran to the grocery store to get out of the house...I'd been decorating cookies since 7:30 in the morning and we both needed some fresh air.  I added the ingredients for this dish to my grocery cart...and I announced that I would be taking photos so everyone needed to be patient!

Here's the recipe - pretty much straight from Bon Appetit - the only change I made was using dried thyme instead of fresh - no luck in finding fresh thyme on our brief outing.

Parmesan Roasted Cauliflower
Source:  Bon Appetit

Ingredients:

One head cauliflower
One medium onion (I used a yellow onion)
4 thyme sprigs (I used about 1/2 tsp of dry thyme)
4 UNPEELED garlic cloves
3 Tbsp olive oil
Kosher Salt and Ground Pepper to taste
1/2 cup grated Parmesan cheese (not the powder stuff)

Method:

Preheat oven to 425 degrees Fahrenheit.
Cut the head of cauliflower into florets. I sliced most of the really large florets into 3 pieces.
If you've never dealt with cauliflower before
it might feel intimidating - but it really
isn't!


First wash, then remove the outer
leaves and discard.  Then, core the cauliflower
and separate the florets

Slice the onion and slice off just the bottom end of the garlic pieces - leave them unpeeled.

I had a really large onion - so used half.
Cutting the end makes for easier
squeezing after roasting


Toss all ingredients, except parmesan cheese, together on a large rimmed baking sheet.

Toss to coat all ingredients with
the olive oil - I find hands work best!

Roast, tossing occasionally, until almost tender, 35-40 minutes.

Toss every ten minutes or so, or the onions will burn - I waited 15 minutes and they were already blackening. 
At the 15 minute mark - you can see the sides I tossed
were already browning nicely. Unfortunately, the onions
were already on the dark side of the moon.

It looks like a lot on the baking sheet in the beginning - but it does shrink during roasting.

Sprinkle with 1/2 cup grated Parmesan, toss to combine, and continue roasting until cauliflower is tender, 10-12 minutes longer.
30 minute mark - this batch was ready for the cheese!

Parm on the goodies and ready to melt.

Note - the huge head worked perfectly with these times.  The smaller head I got today was finished in 30 minutes and ready for the Parm, and then only needed another 5 minutes after that.

After removing baking sheet from the oven, find the pieces of garlic, squeeze them out of the peelings and moosh it in with the mixture (moosh is a technical culinary term I am certain).  The lucky people who get the roasted garlic bits are blessed with goodness!

So, dinner was delish - Choice steak, roasted cauliflower, and fresh green beans.  Outstanding!

Bon Appetit, Y'all!!!


StumbleUpon

Tuesday, December 10, 2013

Green Chili Corn Casserole with Turkey


It's been a busy period after Thanksgiving, thus absent from the blogosphere.  We had a post-Thanksgiving trip to Austin to see my lovely family for a wonderful Mexican dinner at Baby Acapulco's on Stonelake.  Awesome food, drinks, and service from Alice.  We were a group of 20 and she took care of us with seamless fluidity.  I suspect the Mexican Martinis I drank had something to do with the sense of well-being (besides being with the family of course).  I rarely, RARELY drink these days...so they hit me with a blast of happy (until the next day...ugh).  Anyway, we also had granddaughter Audrey's birthday party, and several doctor appointments before returning to the coast to finals for the young man (the previous teen) followed by lots of catch up work and then Ian having all four of his wisdom teeth removed on Monday.  Like I said, a busy period of time.

Add to that, a severe cold snap of two weeks (unheard of at the coast in November and early December), some cookie baking and decorating...well, let's just say my hands have been full.  Keep an eye out for the Santa cookies I've been working on.  They are a 3-day endeavor of decorating, not including the two days required for prepping the dough and baking/cooling the cookies.  There will be a blog post on that in a day or two.  I have one more day of decorating to go.

That brings you up to date and to the point of my afternoon's thought "what can I make with those turkey leftovers in the freezer"?  I packaged up the leftovers in two Food Saver packets to ensure freshness so I grabbed out one of the packets and put it to soak in a sink of cold water to thaw.  I ran out to the store since Ian is feeling better today and not all drugged up with anesthesia and pain meds and, therefore, could be left unattended (I'm sure he was grateful).

I ended up deciding on a take-off of one of my sister's recipes - her Shoepeg Corn Casserole.  I had everything except the cheeses and corn already on hand.  Grabbed those ingredients at the store!  Here's the recipe and how I did it.

Green Chili Corn Casserole with Turkey
by Debbi Hook

Ingredients:

Two cups cooked turkey (Thanksgiving leftovers are perfect) - cubed
1 16 ounce bag of frozen yellow and shoepeg (white) corn
7 ounce can mild diced green chiles
8 ounces cream cheese - cubed
1/2 diced yellow onion (medium sized onion)
1 stick (1/2 cup) salted butter (that's what I had available)
2 cups grated Mexican Blend cheese (or Monterrey Jack)
Salt and Pepper to taste

Method:

Add the butter and yellow onion to a medium-sized sauce pan and cook on medium low until onions are beginning to be translucent.  Add the green chiles and cream cheese to pan and stir until melted together.

Spray a small Pyrex casserole dish (11x7x2) with vegetable oil spray and add the frozen corn and cubed turkey and toss together. 

Add in the saucepan contents and carefully stir to coat. 


Smooth the contents, sprinkle with salt and pepper, and top with the grated cheese.

Place in preheated 350 degree oven for 30 minutes (cheese melted and bubbly on the sides).  Remove from oven and allow to rest for 5-10 minutes.  Spoon out helpings.

This turned out very tasty!  I ate it with some tortilla chips.  The only thing I would possibly change, would be using just shoepeg corn.  Unfortunately, our local H.E.B. grocery store, down here in the boonies, didn't have canned shoepeg corn...so I had to use the mix I found in the freezer section.  I also think I might have preferred the spicier canned green chili.  The cream cheese would have muffled the spiciness.

Mr. Flip Flop is working on his second helping of casserole - so I guess it was pretty good just the way it was.  Give it a try - quick - before the Thanksgiving turkey gets frost bite!!!

Bon Appetit, Y'all!!!
StumbleUpon

Saturday, October 26, 2013

Dump-in Beef Vegetable Soup

We were so hungry we didn't take photos...although my husband deemed this soup worthy of a wait for photographs.  Unfortunately, I didn't feel like setting it all up.  When I make it again, I'll add some photos.  It was absolutely delicious.  Give it a try!


Ingredients:

2 tbsp. olive oil
1 pound quality stew meat chunks or chunks of thick sirloin steak
1/2 large yellow onion, diced
1 15oz can crushed tomatoes
3 tbsp. tomato paste
3 stalks celery, diced
3 carrots, halved and sliced
1 tsp dried basil
3 cloves of garlic, pressed
1 tsp of garlic powder
1/3 head of green cabbage, large dice
1 cup sugar snap peas, cut into bite-sized pieces
1 can cut green beans
1 can black-eyed peas
1 quart low-sodium beef broth
2 cups chicken stock
4 cups water
kosher salt - to taste
fresh ground pepper - to taste

Method:

Heat olive oil in a Dutch Oven.  Season beef with salt and pepper and add to pan, tossing to brown.  Add onions and garlic with a pinch of salt, stir around for about a minute.  Add tomato paste and stir in and cook for a minute or two.  Add the celery and carrots, stir for a minute or so.  Add can of crushed tomatoes and all of the other ingredients except the canned green beans and black-eyed peas.  Stir well and bring to a boil then reduce to simmer.  Leave on a good simmer (not too high, not too low) until meat is tender, stirring every so often to ensure nothing sticks to the bottom of the pan.  In last 30 minutes before serving, add green beans and black-eyed peas (do not drain) and re-season to taste. 

I let mine simmer for several hours.

A hearty and delicious vegetable beef soup - perfect on a chilly night!

Bon Appetit, Y'all!!!StumbleUpon

Wednesday, July 31, 2013

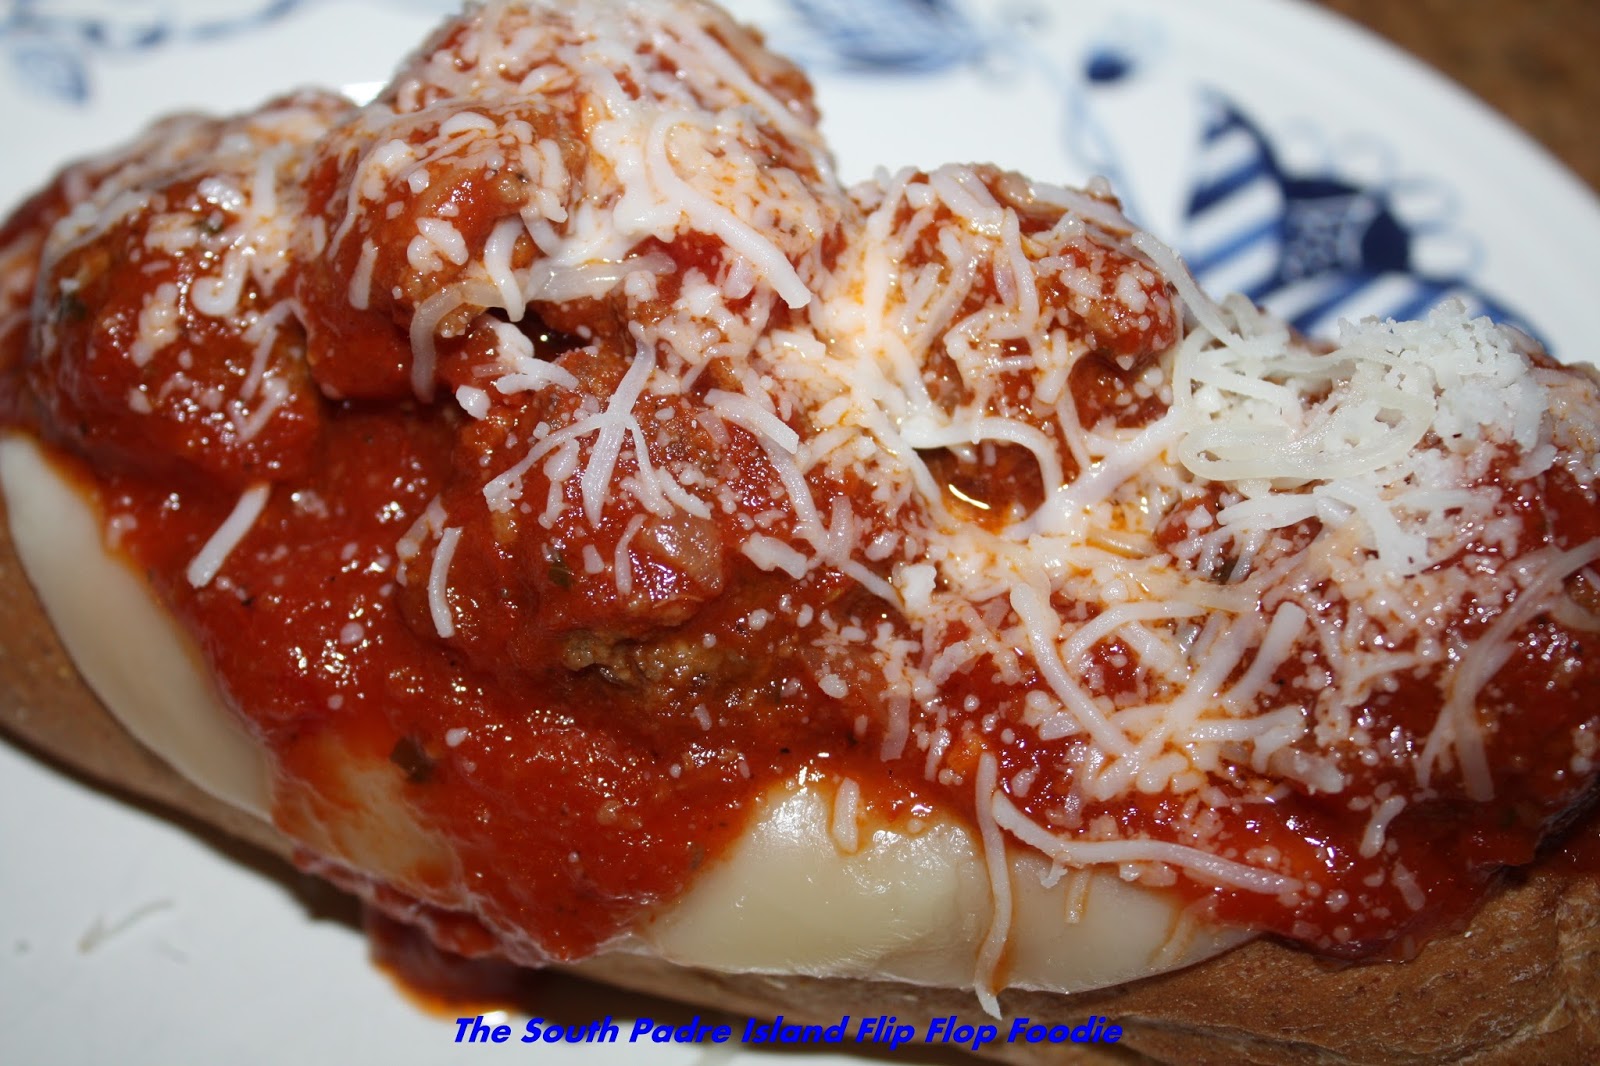
Meatball Subs

I love watching Pioneer Woman on Food Network.  Ree is so down to earth and "real"... I can make AND enjoy eating her recipes.  She is "every woman" in the food world.  This past week-end I was catching up on some of my DVR'd episodes of Pioneer Woman and was laughing with her as she was scurrying to make "fast" recipes.  Her mini meatball sandwiches looked so tasty, I decided to use her basic recipe and bump it up a bit in size... thus my latest version of a Meatball Sub was born.

Since I don't have a big bunch of kids to feed, I scaled down the quantity and boosted the size of the meatballs.  Here's what I ended up with.

Meatball Subs
Based on Ree Drummond's Recipe

Ingredients:

1 pound ground sirloin
1/4 cup Italian breadcrumbs
1/4 cup milk
1 garlic clove, peeled and finely diced
1/8 yellow onion, very finely diced
Salt and Pepper
2 Tbsp olive oil
1/8 yellow onion, larger dice
Sliced Provolone
Grated Italian Blend cheese (mozzarella, etc.)
Jar of Marina Sauce (I used Barilla Spicy Marinara)
Wheat Submarine Rolls (I used Cobblestone Mills)

Method:

In mixing bowl, combine ground sirloin, breadcrumbs, milk, diced garlic, finely diced onion, salt and pepper.  Mix with your hands until everything is well-incorporated.  Using a medium-size cookie scoop, measure level scoops of meat mixture and place on plastic wrap on counter.

In large skillet, heat olive oil and add larger dice onions.  Cook over medium heat until lightly browned.  While onions are cooking, roll the scoops of meat mixture into meatballs and place in pan with onions.  Raise heat slightly and cook meatballs until browned on all sides.  Add jar of Marinara Sauce and gently toss the meatballs to cover with sauce.  Put a lid on the pan and reduce temperature to low to continue heating through.


Cut center tops of the sub rolls at an angle to remove a triangle of the center of the roll (making a boat for the sauce and meatballs). 

Line the cut section of the sub rolls with sliced provolone cheese and melt under broiler.

Place sub on plate and spoon 4 to 5 meatballs into center of roll with extra sauce.  Sprinkle with grated cheese and serve with a fork!

My family loved these.  We ended up with about 22 meatballs...the men scrounged the last few and gobbled them down.  This was a great, and quick, week-night meal which I would have happily served to guests!  Very tasty!!!

Bon Appetit, Y'all!!!

StumbleUpon

Saturday, July 6, 2013

What's Up Pup?

It's been a busy few weeks here at the coast.  Balancing regular work, working out, working on cookies, husband's new work schedule, and working on household chores ...results in lots of work going on!  The good news is that my husband is working a regular day shift for the first time in 20 years (woo hoo!).  He's been traveling a LOT for the past 5 years and he was soooo ready to get a job close to home with no 350 mile journeys to get home for a week-end.  That DID happen in March...but he wasn't all that happy...and he still had drive 130 miles every day.  He was very fortunate to get a job even closer to home within the same company and started two weeks ago.  It's been quite an adjustment...a good adjustment, but it is a change!  I'm back to cooking regular dinners, having more laundry, and needing to be "with the family" in the evenings instead of working on my many projects.  When you then add Zumba back into my life with an additional topping of working out in the gym 5 days per week... my free time has gotten more challenging to find! 

Blogging seems to be slipping between the cracks.  My family doesn't like to wait for photos and stuff before eating...that wore thin fairly quickly the first year or so of blogging!  Now, however, I'm starting to gently push the issue again! 

On the 4th of July we stayed at home and avoided the high volume tourist traffic heading to the island.  We love the island in the Fall and the Spring...we do NOT frequent the island much during the Summer!  Holidays and week-ends are particularly unappealing now that we live here and can enjoy a traffic-and-crowd-free season by waiting for September.

Our grill died a rusty death (a side effect of living on the Laguna Madre) and Mr. Flip Flop had bought some beautiful Choice boneless Rib-eyes at Sam's Club.  I picked up some fresh jumbo Gulf Shrimp at Quik Stop in Port Isabel and thus we had the makings for Surf and Turf...even if I had to do them in a stove-top grill pan.  They were outstanding!  We are particularly fond of baked yams so I picked up a few at the grocery store as well as some really nice fresh green beans.  I had intended to make some of Ann Smith's Sour Cream Crescent Rolls but time got away from me and we ended up with Pillsbury's Crescent Rolls instead.  We were so full from all of the good food, we could have done without the bread completely!  Everyone else had already done a nose dive into their steaks and shrimps when I realized I had only eaten one shrimp and still had a "photo op" with my plate...so here it is.  My steak was half the size of the boys' but their plates were no longer "attractive", so the smallest shows here!  It was really quite an easy dinner to throw together.  I seasoned the steaks with Weber Chicago Style Seasoning (one of our favorites after dining at the Weber Restaurant in Chicago) and while the steaks were resting, I quickly pan-grilled the peeled and de-veined shrimp.  I snapped the beans while watching one of my DVR'd shows and boiled them in simple salt, pepper, and onion powder.  Delish.  Yams went in the microwave and were perfectly tender and moist.  Yummy to the X-treme!  I only ate 3 shrimps and half of my steak...but I ate two servings of green beans and all of my yam.  We all sat around in a food-induced daze after dinner!!!

Dessert was quickly-decorated miniature star sugar cookies (eaten later that evening).  I started them late Wednesday night and finished them off on Thursday morning.  They were all gone by Friday.  Not my best work, but I was at a tired spot in the day and my hands were not cooperating with piping straight lines and my red icing was not "just right" in the consistency department.  Still, they were very patriotic looking and the family was appreciative.  They are liking the slightly revised recipe I've been using (Vanilla Bean Sugar Cookies) and that I'm rolling at 3/8" thickness instead of 1/4".  It makes for a slightly softer, more buttery textured cookie.  Mr. Flip Flop and I went to Lowe's last week-end and bought me some 3/8" untreated trim board to use as rolling guides.  They are fabulous!  Easy to roll out consistent thickness cookies.  Plus, they are much sturdier and less inclined to break when I shake them or bang them on the table to get a smooth surface.  Thicker is better I think!


On Friday I started a big 150-cookie project and spent the past afternoon, evening, and this morning busily base-coating 13 dozen cookies.  The decorating of those cookies will take several days and involve a new technique (or two) for me...so keep your eyes out for a blog post on that before long!

Hope everyone had a great 4th...we sure enjoyed relaxing at home.  Sometimes that is just the best thing in the world!

Bon Appetit, Y'all!!!

StumbleUpon

Saturday, May 25, 2013

7-Up Biscuits

7-Up Biscuits hot from the oven

I saved the 7 Up Biscuits recipe one of my friends posted - it had been repeatedly shared on Facebook. I shared it to my wall (or whatever the heck it's called now) so I could access it easily because they sounded so simple and yummy.  I am not a good biscuit baker.  I don't know why, but I just have issues with biscuits.  They don't rise, they aren't flaky or soft, they are too dense...all kinds of problems likely caused by over-use of egg wash and over working the dough.  I have not, however, tried biscuits from scratch for a couple of years.  Saved this recipe in case I wanted to change my mind. (I know Bisquick base is not baking from scratch - sue me, I don't care - if it doesn't come out of a can I reserve the right to call it baking from scratch)

I've been working on cookies for 4 days now.  Two days of baking, icing preparation, base coats, and the beginning of some of the detail work.  (I still have a lot to go)  When my thin piped lines started consistently breaking this morning I decided I needed a break.  It's Saturday morning (well, okay, it's really "barely" Saturday afternoon...but my husband and son didn't get up until after 11:00...so it's still morning for them - I've been up since 7:30ish).  I decided to make the 7-Up Biscuits in hopes that something that appears quite simple really is!

I'd bought a bottle of 7-Up (because the teen drinks Sprite and I was hesitant to substitute...so 7-Up it was!) and some sour cream...knew I had Bisquick and butter...and that's all there is to it.

My two comments regarding this recipe are:
1.  Sounds easy - makes a freaking mess!
2.  Possibly the best biscuits I've ever eaten - worth the mess!
This was AFTER I had washed my hands
once...and was now patting the remnants
for cutting...you end up with doughy monster hands!

The Facebook post/picture said it was a difficult-to-find recipe.  I'd heard of 7-Up cakes, but never 7-Up biscuits.  I'll share my experience...with some additional steps I found helpful, not mentioned in the original post.


7-Up Biscuits
From Tonja Busch Facebook Post

Ingredients:

4 cups Bisquick Baking Mix
1 cup sour cream (I used regular - not reduced fat)
1 cup 7-Up
1/2 cup melted butter (real butter - it was delicious)

Extra Bisquick for countertop

Method:

Preheat oven to 425 degrees.

I used a 9x13 glass (Pyrex) baking dish (I've always been told not to bake above 375 in a glass dish but the picture in the post showed them made in a glass dish so I hoped my old-school info was wrong and that I wouldn't end up with an explosion of glass in the oven...which, of course, I did not have).

I placed the stick of butter into the glass dish and microwaved it for two 30-second intervals sitting on the rack, turning dish before second interval.  Remove and let it be ready for you when you get the dough prepped.  It needs to be right next to the dough - it is not a sturdy dough.

Mix Bisquick, sour cream and 7-Up in mixing bowl until the ingredients are a sticky mess. (my words).  Do not over-mix. (NOTE ADDED 5/27/2013...another blogger recommends cutting the sour cream into Bisquick and THEN adding the 7-Up.  If anyone has any suggestions on this method, please comment)
Sticky, sticky dough - in retrospect I might have let
the sour cream come to room temperature.
It was quite hard to mix in evenly

Sprinkle extra Bisquick onto counter top and gently knead and fold dough until coated with baking mix.  Don't over-work.  It's a sticky mess.  Just get to the part where you can gently pat dough into your desired shape (I used a square cutter so I patted into a rectangle).  I tried to dip my cutter into Bisquick to help release it for transfer.  I don't think there's enough Bisquick in the world to make them release easily.  I found it easiest to let the pieces stick to the cutter, pull away the excess, and move the pieces individually to the pan.  You just place them on top of the melted butter.  I ended up with enough remnants to re-pat and cut a total of 13 biscuits (the end two were "half size").  A baker's dozen - nice.
Ready to go into oven - they look a mess - but all turns out well!

As you can see - gunky cutter.
I really appreciate a granite counter top
and a bench scraper when I make this
kind of mess!


Bake for 12-15 minutes or until brown at 425 degrees.  I baked 17 minutes.  I set the timer for 12 minutes - at the 10 minute mark I knew they would need more than that so I added 3 minutes.  Then, they didn't look very brown, at 15 minutes, so I added 2 more minutes...as Goldilocks says, they were "just right" at 17 minutes in my oven, in a glass dish.  Much of the cook time depends on the type of pan you use.  The original post said to use a cookie sheet pan or 9x13 casserole dish.  Baking times for the two of those are really different.  Keep an eye on your biscuits!

The house smelled awesome while they were baking - I could smell the richness of the sourcream and butter and the 7-Up did its' thing by making the biscuits light and fluffy.
You can see the bubbly butter when the biscuits come out of the oven.

I let them sit in the pan on the cool cook top while I fried up some sausage pieces and prepped some fruit for the men.  They came out of the pan very easily with a silicone pancake turner.
All that butter makes for easy release from pan!

Mr. Flip Flop gave the highest compliment..."these taste almost as good as my Mom's".  For Ms. Makes-a-Bad-Biscuit, that was high praise indeed!!!  I literally clapped my hands in glee.

The teen, who doesn't like to try new things, declined biscuits and sausage.  He was leery of the entire "experiment"...who the heck puts soda water in biscuits?  Well, from now on, guess we do!  I brought him a "bite" and encourage him to try it and he, hesitantly and with "a look" did so.  He smiled.  He said "I'll take some!"  Duh...of course he will.

Mr. Flip Flop had his with a berry-blend jam, sausage, and a bowl of watermelon.  He polished off two and went back for two more.  The teen went "no jelly or jam" and had sausage and a bowl of sliced apples (got to get something healthy inside him).  I went for just biscuits and apple butter.  DELISH!  You don't need to butter these biscuits - they have absorbed the entire 1/2 cup of butter in the baking process (and it bubbled up around them, getting the sides as well).  The sour cream also adds enough of that awesome mouth feel to negate further addition of butter.

These are company-good biscuits.  I will be keeping some 7-Up on hand whenever we have visitors or I plan a special breakfast.  These will definitely be part of it from now on!

Bon Appetit, Y'all!!!


StumbleUpon

Wednesday, February 27, 2013

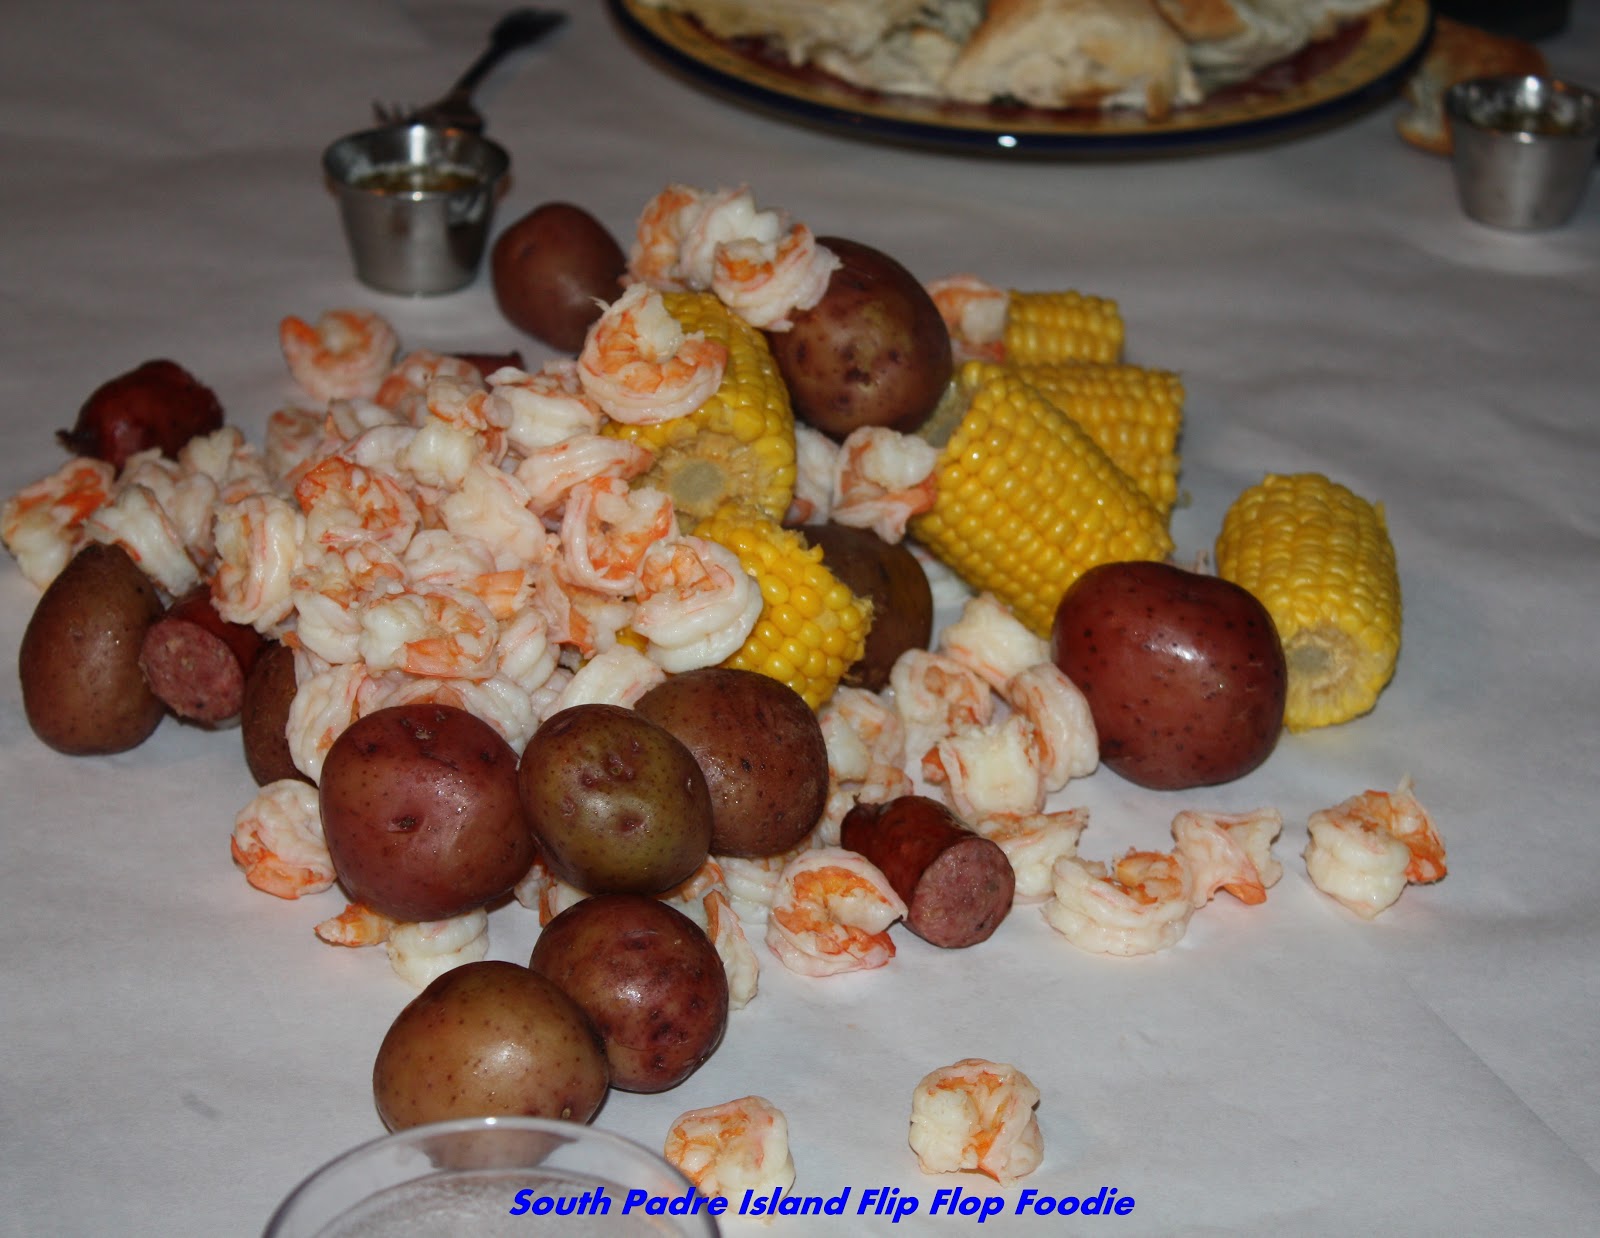
Shrimp Boil

I've had a lot of shrimp boils in my day...but this may have been one of the best ones and easy to throw together!

Twelve people, a six-month old who had had enough fun for the day, an ocean-front condo with seating for 5...hmmmm.  No biggie - we could make it work!  We dragged in the balcony table and chairs, covered both tables with wax-backed butcher paper (double layer) and threw all of the food on the table.  Literally!

We used a big "turkey fryer" pot filled 2/3 with water and two packages of Zatarain's Crab and Shrimp Boil.  Started it to boil and first put in a bag of clean new potatoes and let it go for 15 minutes or so...next went the frozen corn (24 pieces) and then, 5 minutes later, three pounds of sausage chunks.  I prepped the 4 pounds of fresh shrimp purchased near the docks at Port Aransas by peeling, butterflying, and deveining (because my sister doesn't like to peel them and see the vein...so, like a good sister, I cleaned them for her).  Once the shrimp were added, they were finished cooking in 3 minutes or less and everything smelled so incredibly delicious!

We melted 3 sticks of butter and placed in little ramekins around the table; my sister-in-law, Lana, mixed up 2 bowls of cocktail sauce and toasted two loaves of French bread.  We put out a container of my homemade pasta salad and dinner was ready!

We carefully transported the extremely heavy boiling pot to the floor on top of towels, lifted the strainer basket up over the sink and let it drain.  With a towel underneath, my oldest son transported it to the table and we tossed it down the middle of the two tables.  One table got more potatoes and corn and the other table got the majority of shrimp (which, of course, we re-distributed!)...and everyone dug in. 

People took turns holding the baby and eating and laughing...what a great time was had....the laughter, the jokes, the sounds of happy eating!  Friends, family, and lots of joy all around the table. Anyone having room for dessert could nibble one of the "Beach Cookies" I made for the trip.

We finished the evening with the poker people (most of the people) playing a fun, albeit quite competitive, game of Texas Hold'em...which was, of course, a win for my sister-in-law Lana.  She's just a little competitive!

A fun time was had by all - good times, good times.

Sister-in-law Lana, big sister Cynthia, and their beautiful
granddaughter Sarah Jewel.


Bon Appetit, Y'all!StumbleUpon

Saturday, July 14, 2012

Trout with Whole Wheat Couscous

This is just a very fast post - home from a week in Austin going to doctor appointments (not the most fun of trips).  First meal I've cooked in about 10 days!!!

I sauteed some of the bay trout Ian and Jay caught in June.  Quick prep in EVOO, butter, and a couple of garlic cloves pushed through a garlic press...and juice from one half of a lemon.  Salt and pepper after flipped.  Perfect and fast.  Literally took 6 minutes.

For the couscous - I bought a box of Near East Whole Wheat Couscous when I restocked my kitchen this afternoon.  I put 1/2 of a large diced yellow onion and 2 garlic cloves (also pressed) into a sauce pan with 1/2 stick butter and 1/4 cup EVOO over medium high heat.  I salt and peppered lightly.  Once the onions were soft but not fully translucent, I added 1 1/2 cups water and brought to a boil.  Added box of couscous, stirred,  covered and removed from heat.  Five minutes later (while I cooked the fish and steamed some broccoli for a side vegetable), I removed the lid, fluffed the couscous with a fork and added a small amount of chiffonade of basil and some thinly sliced green onion (whites and green parts).

I poured all of the seasoned couscous on a platter and laid out the fish, pouring all of the cooking liquid from the fish pan over the fish.  Sprinkled with a bit more of the fresh basil from the lovely plants on my deck and more sliced green onion.  Lemons served on the side for squeezing.
Fresh basil from plants purchased at Veranda's in Port Isabel!

Bread of the day was two pieces of whole wheat Naan, gently sprinkled with olive oil and placed directly on the oven racks in a pre-heated 400 degree oven for 3 minutes.
Store-bought Naan - it was incredibly delicious!  Soft and chewy.
Ian wrapped his couscous and fish up and ate like a tribal teen-ager.
He loved the couscous AND the naan!  Yay for new things!!!

The entire dinner was ready in under 30 minutes including prep time and everyone walked away stuffed to the gills!  Minimal photos because I was on a roll - we were late eating and I needed to get dinner on the table PDQ!  Best "fast food" we've had in weeks :-)

Bon Appetit, Y'all!!!

Shared With:
Addicted to Recipes Button, Page button

StumbleUpon

Saturday, June 16, 2012

Poached Chicken Summer Salad

Poached Chicken Summer Salad
Much to the dismay of the teen, Pizza Friday has morphed to Salad Friday!  He is not a fan.  I am fine with his making pizza for himself if he desires - but he has to clean up - and pizza from scratch is a messy endeavor for him.  He generally takes a different path :-)

This Friday night I had some cubed boneless skinless chicken breast leftover from a mid-week batch of home-made chicken nuggets. The plan was to saute them and use them as my salad toppers.  However, I'd been reading a bit about poaching and it prompted me, at the last minute, to try poaching these chunks.  I read that the trick was allowing the chicken to cool in the cooking liquid, allowing it to maintain its juices until service.  I often have a complaint that poached meats end up dry...which seems odd, but it is what I experience.

This is how I prepared the chicken ...and I didn't measure so these are all approximate...sorry.  I also am very aware this is not traditional poaching - purists please don't ding me.  We are rarely pure in my kitchen.

Poached Chicken Chunks

2 tablespoons extra virgin olive oil
1/2 teaspoon chili and garlic paste
3/8 teaspoon roasted sesame oil
About 1 cup of chicken broth
1 large boneless, skinless breast,
        cut into medium to large chunks

Heat oil, chili and garlic paste, and sesame oil in pan, stirring to evenly distribute the paste.  Add chicken chunks, turn to coat.  At this point, I was going to saute and then the light bulb went off to add liquid and poach...so I added the chicken broth.

I brought the pot to a low boil and immediately reduced heat to simmer.  I put a lid on because my pan was shallow and I didn't want to lose all my liquid before the chicken was cooked through.  When it appeared "done", I removed from heat, removed the lid, and allowed to cool.

I tasted a piece and was pleasantly surprised at the tender moistness of the chicken chunks and the mild flavor with just a hit of heat at the end.  Perfect for a salad topper where I don't want to have the taste of the chicken overpower the fresh taste of the salad ingredients.

My husband's salad is the one with halved cherry tomatoes.  I laid down a bed of lightly chopped baby spinach mixed with chopped iceberg lettuce.  I circled his with the cherry tomatoes.  Tomatoes are always so colorful and pretty - but I can't stand fresh tomatoes (childhood trauma).  I know, by smell and appearance though, when they are good.  These looked delicious.

I peeled, quartered, and diced 1/2 English Cucumber and divided it between the two salads, I cleaned and sliced 3 green onions, tops and whites, and sprinkled half on each salad.  I had already boiled 3 eggs and had them peeled and cooled.  I quartered them...and since hubs got more of the chicken and tomatoes, I got the extra egg (only seemed fair).  My avocado was partially brown, so I diced what was good and split between the two salads.  I topped each salad with chicken chunks (I ended up cutting each piece in half because they were a bit large for bite size) and topped with reduced fat Feta Cheese crumbles (one of the few cheeses where I cannot tell the difference between the traditional product and the reduced fat product).
My salad - extra eggs and no tomatoes - yum to me!

We both ate every bite of our salads - if I can say so myself, it was really dynamite!  The slight heat of the chili and garlic paste was delicate and flavorful and allowed all the Summer Salad flavors to shine through.
In this photo you can see flecks of the garlic and chili paste...yum!

Another excellent Summer Salad!

Bon Appetit, Y'all!!!StumbleUpon