The South Padre Island Flip Flop Foodie Brownsville restaurants

Search The South Padre Island Flip Flop Foodie Blog!

Showing posts with label holiday baking. Show all posts

Saturday, July 6, 2013

What's Up Pup?

It's been a busy few weeks here at the coast.  Balancing regular work, working out, working on cookies, husband's new work schedule, and working on household chores ...results in lots of work going on!  The good news is that my husband is working a regular day shift for the first time in 20 years (woo hoo!).  He's been traveling a LOT for the past 5 years and he was soooo ready to get a job close to home with no 350 mile journeys to get home for a week-end.  That DID happen in March...but he wasn't all that happy...and he still had drive 130 miles every day.  He was very fortunate to get a job even closer to home within the same company and started two weeks ago.  It's been quite an adjustment...a good adjustment, but it is a change!  I'm back to cooking regular dinners, having more laundry, and needing to be "with the family" in the evenings instead of working on my many projects.  When you then add Zumba back into my life with an additional topping of working out in the gym 5 days per week... my free time has gotten more challenging to find! 

Blogging seems to be slipping between the cracks.  My family doesn't like to wait for photos and stuff before eating...that wore thin fairly quickly the first year or so of blogging!  Now, however, I'm starting to gently push the issue again! 

On the 4th of July we stayed at home and avoided the high volume tourist traffic heading to the island.  We love the island in the Fall and the Spring...we do NOT frequent the island much during the Summer!  Holidays and week-ends are particularly unappealing now that we live here and can enjoy a traffic-and-crowd-free season by waiting for September.

Our grill died a rusty death (a side effect of living on the Laguna Madre) and Mr. Flip Flop had bought some beautiful Choice boneless Rib-eyes at Sam's Club.  I picked up some fresh jumbo Gulf Shrimp at Quik Stop in Port Isabel and thus we had the makings for Surf and Turf...even if I had to do them in a stove-top grill pan.  They were outstanding!  We are particularly fond of baked yams so I picked up a few at the grocery store as well as some really nice fresh green beans.  I had intended to make some of Ann Smith's Sour Cream Crescent Rolls but time got away from me and we ended up with Pillsbury's Crescent Rolls instead.  We were so full from all of the good food, we could have done without the bread completely!  Everyone else had already done a nose dive into their steaks and shrimps when I realized I had only eaten one shrimp and still had a "photo op" with my plate...so here it is.  My steak was half the size of the boys' but their plates were no longer "attractive", so the smallest shows here!  It was really quite an easy dinner to throw together.  I seasoned the steaks with Weber Chicago Style Seasoning (one of our favorites after dining at the Weber Restaurant in Chicago) and while the steaks were resting, I quickly pan-grilled the peeled and de-veined shrimp.  I snapped the beans while watching one of my DVR'd shows and boiled them in simple salt, pepper, and onion powder.  Delish.  Yams went in the microwave and were perfectly tender and moist.  Yummy to the X-treme!  I only ate 3 shrimps and half of my steak...but I ate two servings of green beans and all of my yam.  We all sat around in a food-induced daze after dinner!!!

Dessert was quickly-decorated miniature star sugar cookies (eaten later that evening).  I started them late Wednesday night and finished them off on Thursday morning.  They were all gone by Friday.  Not my best work, but I was at a tired spot in the day and my hands were not cooperating with piping straight lines and my red icing was not "just right" in the consistency department.  Still, they were very patriotic looking and the family was appreciative.  They are liking the slightly revised recipe I've been using (Vanilla Bean Sugar Cookies) and that I'm rolling at 3/8" thickness instead of 1/4".  It makes for a slightly softer, more buttery textured cookie.  Mr. Flip Flop and I went to Lowe's last week-end and bought me some 3/8" untreated trim board to use as rolling guides.  They are fabulous!  Easy to roll out consistent thickness cookies.  Plus, they are much sturdier and less inclined to break when I shake them or bang them on the table to get a smooth surface.  Thicker is better I think!


On Friday I started a big 150-cookie project and spent the past afternoon, evening, and this morning busily base-coating 13 dozen cookies.  The decorating of those cookies will take several days and involve a new technique (or two) for me...so keep your eyes out for a blog post on that before long!

Hope everyone had a great 4th...we sure enjoyed relaxing at home.  Sometimes that is just the best thing in the world!

Bon Appetit, Y'all!!!

StumbleUpon

Thursday, December 6, 2012

Christmas Cookies... I've gone to the Dark Side!

Pearlized Snowflake Chocolate Espresso Chocolate Chip Cookies


I started prepping dough for holiday baking a few weeks ago, tucking it safely and well-wrapped in my freezer.  This week, I thawed, baked, and decorated my first batch of Christmas cookies using the new  chocolate sugar cookie recipe I found on AnnClark.com.  After rolling, cutting, and baking... I gave one a try and they were rich and dark and marvelous.

The only down side is that, even with sharp metal cookie cutters, the mini chocolate chips wreaked havoc with smooth edges.  They were also "not smooth" straight out of the oven - no problem there.  I was able to use my fondant smoother and "iron out" the dips.  Nothing to be done about the edges though.  You can see from the photos that some of the edges show the problem.  However, the flavor is so exceptionally good for a roll-and-cut cookie dough, that I think I'm not going to care.  They are "rustic"...yeah, that's the ticket.

Here's the recipe with a small tweak or two that I made...plus I renamed it.  The Espresso Powder gives it the depth of flavor...I wanted that to be in the title.
Christmas Lights
accented with Wilton Silver Color Mist Shimmering
Food Color Spray over white piped icing for the bulb's base

Chocolate Espresso Chocolate Chip Cookies
Adapted from Ann Clark

Click Here for Printable Recipe

 
Ingredients:

1 cup butter, softened
1/2 cup brown sugar
1/2 cup granulated white sugar
1 large egg (room temperature)
1 teaspoon instant espresso powder
1 1/2 teaspoon pure vanilla extract

2 1/2 cups unbleached all purpose flour
1/2 cup cocoa
1/2 teaspoon salt
1/4 teaspoon baking powder

3/4 cup mini chocolate chips (I used Nestle's -
must use mini chips - you can't roll it with regular
size chips)

Method:

In the bowl of a stand mixer, beat butter and both sugars until creamy.  Add egg, espresso powder and vanilla extract.  Beat until incorporated.

In a separate bowl (or large measuring cup), whisk together flour, cocoa, salt, and baking powder.

Add dry ingredients to wet ingredients and mix just until completely incorporated.  I did this 1/2 at a time to reduce the "fly up" of dry goods.

Hand mix the mini chocolate chips into the dough.

Wrap the dough, in four portions, in plastic wrap and chill until firm (I froze them and then brought them down to the refrigerator for a day before using).  I wrap in small sections to make it easier to roll.  If you have too much, it is more prone to being uneven, cracking, and getting too warm before everything is cut out and moved over.

Preheat the oven to 350 degrees Fahrenheit   Roll the well-chilled dough out on a lightly floured surface.  Ensure your rolling pin is well-floured as well.  This dough can be sticky if not well-chilled.  Using metal cookie cutters (you need the sharpness to cut through the chips) cut the dough and transfer cookies onto baking sheets lined with parchment or a Silpat.  If they stick to the counter at all, use an offset spatula dipped in flour, sliding underneath the cutout, to help you make the transfer.  Because I have a warm kitchen, I almost always pop the trays into the freezer after the cut-outs are ready, for 5 to 15 minutes, to re-chill the butter (helps prevent spreading).

Bake cookies for 8 to 10 minutes (mine took about 9 minutes, except the large snowflakes, which took the full 10 minutes). The surface of the cookies look dry and set when they are ready.  Remove from oven and place baking trays on cooling racks for 10 minutes or so, then transfer cookies to a wire rack to cool completely.

I did re-roll my scraps - and they seemed to work just fine.  I actually used the last bit of dough left to form a free-style cookie as a tasting cookie.  Since it was a new recipe, I wanted to make sure they tasted good before I spent hours decorating them!  Delicious they were!!! (Did I just sound like Yoda?)
Christmas Reindeer
Oops I forgot to pipe their black hooves!
I'll do that before I package them.

I iced all of these cookies using my regular royal icing.  I have become a huge fan of the AmeriColor Meringue Powder.  It seems to taste better than the Wilton brand...but Wilton is absolutely fine too, I have both in my cabinet.  I flavored this batch with a mix of almond extract and pure vanilla extract.  I wasn't worrying about a pure white color so I didn't use the clear vanilla (actually, I rarely do - I like the real deal).
Mittens
The little lines for the cuff were
harder to pipe than I thought...and already
a couple of lines crumbled a bit.
Live and learn...I learn something from every project!

I did break one snowflake when piping and flooding.  In retrospect, I probably should have used a medium sized cutter for all cookies with this dough.  It is not as "hard" as regular sugar cookies.  These are not cookies I would feel free to bang on the table to help them smooth themselves out.  These are hold-and-shake cookies....of course, that's how I broke the snowflake, so I'll leave it to you to figure out how to smooth things along.
Snowflakes
I outlined and flooded these with a slate blue icing.
Then I pearlized them by spraying with Wilton's Pearl Color Mist.
Piped on the detail with white 20 second+ icing and
accented with blue sugar pearls.  I am quite happy with them!

This recipe will now be a stock recipe for cookie decorating.  I feel it is so important that pretty cookies really taste good.  Otherwise, what's the point???

OK - now that I've photographed the cookies, time to package them up and put them in the freezer.  What?  You didn't know you could freeze decorated sugar cookies?  Oh yes you can...and they taste just as good as the day I put them in (I don't leave them more than a few weeks).  It would be impossible to bake and decorate without stress if I didn't have a freezing option!  I follow the instructions found at Bake at 350's blog.  Believe me, it was a game changer for me!  The only problem is that I need a bigger freezer now!  Oh well, details...just details!
Christmas Ornaments
My hands were really tired, as evidenced by
some shaky lines and slanting sections
that were intended to be straight!


Bon Appetit, Y'all!!!

Shared With:

Creations by Kara


Inside BruCrew Life

Chef In Training
Our Delightful Home

Carole's Chatter:  Food on Friday Christmas Favourites

StumbleUpon

Friday, November 25, 2011

SOUR CREAM CRESCENT ROLLS


My friend, Ann Smith, promptly replied to my shout out for a yeast roll recipe where the dough might travel well.  She suggested a recipe she found in a 1989 Bon Appetit magazine and said she had traveled with it without problems - because you chilled it overnight and you could just load the chilled dough into an ice chest for travel.  That sounded good to me.

It's always quite daring (or maybe ill-advised) to try a new recipe for a huge family occasion...so I planned to make a batch prior to travel.  However, I got overwhelmed with all I needed to do and it just did not happen.  I decided to just trust that Ann was a good cook, knew what she was talking about, and I just traveled with the ingredients and made the double batch of dough when I arrived at my sister's house Wednesday late afternoon. 

The dough was soft and tender and yeasty so I felt very positive when I went to bed that night.  My only concern was that I'd never made anything with a refrigerated dough (overnight rising) and I am not a good roller.  I didn't need to worry - upon checking the next morning, it had doubled in size and was ready to be punched down and prepared for rising. This recipe (doubled) required rolling out 8 ten-inch circles and cutting each one into 12 triangles.  What I learned is that I had just cause to be concerned with all that rolling and my apparent inability to make 12 even triangles.  Who knew THAT would be so hard!


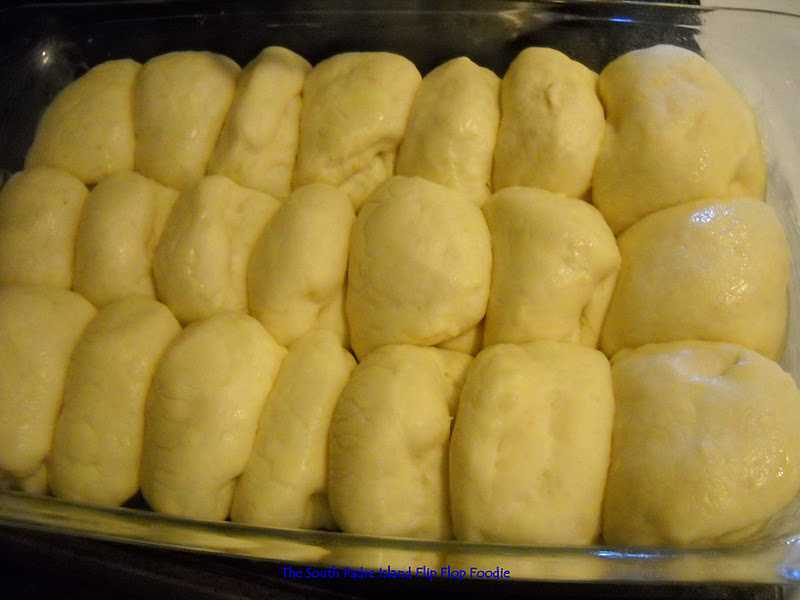
I ended up with a tray of small crescents and two trays of large crescents...and at some point I just got tired of crescents (after the third full tray) and decided to make a pan of rolls that I could roll into a ball and plunk into the pan!  Totalled about 85 rolls with my larger pan rolls taking more dough than the crescents.

Except for the one crisis of burning the bottom of one tray of rolls (dang that pissed me off) because I was unfamiliar with my sister's oven and its idiosyncrasies, they turned out beautiful and, most importantly, delicious.  They were rich tasting, light and airy, browned beautifully, and everyone ate at least two.  Even the tray that had burned bottoms had people pulling the over-browned (not really black burned - just too dark) bottoms off and eating the perfectly done tops.

Here's the recipe.  I do think it will be our family's new holiday tradition for rolls.  They were that good!

SOUR CREAM CRESCENT ROLLS
From Bon Apetit Magazine, 1989 (per Ann Smith)


Ingredients:

 3/4 cup butter, divided

 1 (8-oz.) container sour cream (bring to room temperature - my note)

 1/2 cup sugar

 2 (1/4-oz.) envelopes active dry yeast

 1/2 cup warm water (100 degrees F to 110 degrees F)

 4 cups all-purpose flour

 1 teaspoon salt

 2 large eggs, beaten

 Directions:

 1. Melt 1/2 cup butter in a small saucepan over medium heat. Remove from heat; stir in sour cream and sugar. Pour mixture into a large mixing bowl; cool to 100 degrees F to 110 degrees F.

 2. Combine yeast and warm water (100 degrees F to 110 degrees F) in a 1-cup glass measuring cup; let stand 5 minutes.

 3. Whisk together flour and salt in a bowl. Whisk eggs into sour cream mixture. Stir yeast mixture into sour cream mixture. Gradually add flour mixture, stirring well. Cover and chill at least 8 hours.

 4. Punch dough down, and divide into 4 equal portions. Roll each portion into a 10-inch circle on a floured surface. Microwave remaining 1/4 cup butter at HIGH 1 minute or until melted. Brush dough with melted butter. Cut each circle into 12 wedges; roll up each wedge, beginning at wide end. Place on greased baking sheets, point sides down.

 5. Cover and let rise in a warm place (85 degrees F), free from drafts, 45 minutes or until almost doubled in bulk.

 6. Preheat oven to 375 degrees F. Bake rolls at 375 degrees F for 10 to 12 minutes or until golden brown.

Note:

Dough for Sour Cream Crescent Rolls may be baked in other shapes such as cloverleaf and pan rolls.

Makes 4 dozen rolls
I didn't take photos of the mixing process... I was so tired from the 6 hour drive taking 7 1/2 hours due to intense holiday traffic that I was lucky to get the dough made.  Plus, when you are working in someone else's kitchen, it's just not as easy as being at home in a familiar environment.  I didn't even think about photos until the next day when I was making rolls!

It was a gloriously beautiful day in Central Texas.  We ate casually, on paper plates, out on my sister's beautiful back patio and the temperature was pleasant, the food abundant, the thanks for all we were blessed with perfectly evident in the smiling faces of our children and their parents and grandparents.  It was all a Thanksgiving should be. 

We've had fancy Thanksgiving dinners with fine china, the good silver, and crystal glasses on linen cloths...but outdoors, buffet style, long tables everyone could see down, drinking our sodas out of a can from the ice chest...it was a good ol' family dinner - I will likely remember it more fondly than the 50+ Thanksgivings I have experienced.  There were a few cooking crisis, easily handled.  Slight delays, a few skinned knees and a bleeding elbow...but what was missing were angry words, drama, irritation, and upset.  I will remember the Thanksgiving where everyone really seemed to be thankful that we were able to gather and we were filled with love for our family.

The buffet table with my Mom - the family matriarch
The kids segregated themselves - they want to talk to their cousins!
My big sister, Cynthia.  I think she had a good day :-)
There were so many people I could not capture them all! 
28 for dinner - 6 more came later for football and snacks!


Bon Appetit, Y'all!

SHARED WITH:

StumbleUpon

Monday, February 14, 2011

VALENTINE COOKIES - INTERNATIONAL!!!

Rachel Chaikof is an amazing young woman I met "virtually", because we have the commonality that she hears with cochlear implants like my youngest son.  Her mom and I became acquainted YEARS ago via a listserv support group for parents of children with cochlear implants.  I have "watched" Rachel grow up, graduate from high school, be an international exchange student, graduate from college, and now doing post-graduate studies in England.  She is an highly successful young woman...who happens to be deaf.  I like that her deafness does not define her.  She speaks fluent English, French, and some Spanish (she did an immersion exchange in Peru without knowing Spanish...that would have scared me to death).  She seems to have no fear in going boldly into the world, travelling, learning, blogging, creating web sites, educating others, and taking amazing photographs of her travels and experiences.  I invited Rachel to be a guest blogger this week.  She's been posting some photos on Facebook regarding her culinary escapades in London.  I've enjoyed them thoroughly.  This week she and a friend made sugar cookies for Valentine's Day.  I asked her to write about her experiences, and she graciously did just that.  Enjoy!

GUEST BLOGGER:  Rachel Chaikof

I am honored to do a guest blog post for Debbi's blog. While I am from the US, I have been studying in London since September for a masters. Being an international student is quite an experience because I learn so many cultural differences from my classmates. Because ovens don't exist in almost all homes in China, a classmate of mine who is from China, Sophia, has been fascinated with utilizing the oven to bake many kinds of food that do not exist in her home country, since arriving in London and discovering an oven in her flat. She has been wanting to learn how to make "Western World" cuisine, in particular desserts that require the use of an oven. Every other weekend, she comes to my flat to learn how to make a dinner dish and a dessert from my home country. Then on the other every other weekends, I go over to her place to learn how to make REAL Chinese food. I should note that Fortune cookies do not exist in China!

Because this past weekend was shortly before Valentine's Day, I wanted to choose a traditional Valentine's Day dessert to celebrate it and to teach Sophia about the holiday. I explained to her that making sugar cookies in heart shapes and writing notes and names on the cookies by using icing in pink, red, and white is one way to express our love for other people. She asked me why red, white, and pink are Valentine's Day colors. I explained to her that red signifies the traditional red roses and roses are traditionally given by husbands to wives or by boyfriends to girlfriends. I told her that pink means love and also red too. Pink also represents combining white and red. I told her that white has a similar meaning to what we use in weddings, which is spirituality and purity.

Sophia and Rachel busily decorating cookies!
I used the recipe that Debbi posted, Laurie Mather's World's Best Sugar Cookies. While I have made sugar cookies from scratch in the past, I found that the ones I've made are not as good as the cookie dough that I can just buy from a food store. Because Sophia is not going to find cookie dough in her home country, it was very important for me to find the BEST recipe so that Sophia can make the cookies when she goes back home and purchases an oven. After I saw her posting pictures of her Valentine's Day sugar cookies on Facebook, I knew that Debbi would have a GOOD recipe, as she has far more experience in baking than I do!

This sugar cookie recipe was the first one that I really enjoyed! It had a rich taste that other recipes that I used did not have. I also loved the fact that these cookies didn't expand as they cooked, and they stayed in their perfect heart shapes.


For frosting, I just used a very basic recipe using confectioners sugar, butter and milk and mixing them together. Of course, I put in some red food coloring to jazz up the cookies!


Sophia absolutely loved the cookies when she tasted them! In honor of her family and friends who can't be with Sophia to celebrate Valentine's Day, she wrote "Mom", "Dad", her husband's name and her best friend's name from China in Chinese on the cookies. Of course we took pictures so that Sophia can e-mail them to her family to show her new discovery - Valentine's Day sugar cookies! ...And to show that she has been thinking about her family while living thousands of miles away from them.


StumbleUpon