The South Padre Island Flip Flop Foodie Brownsville restaurants

Search The South Padre Island Flip Flop Foodie Blog!

Showing posts with label Italian. Show all posts

Wednesday, July 31, 2013

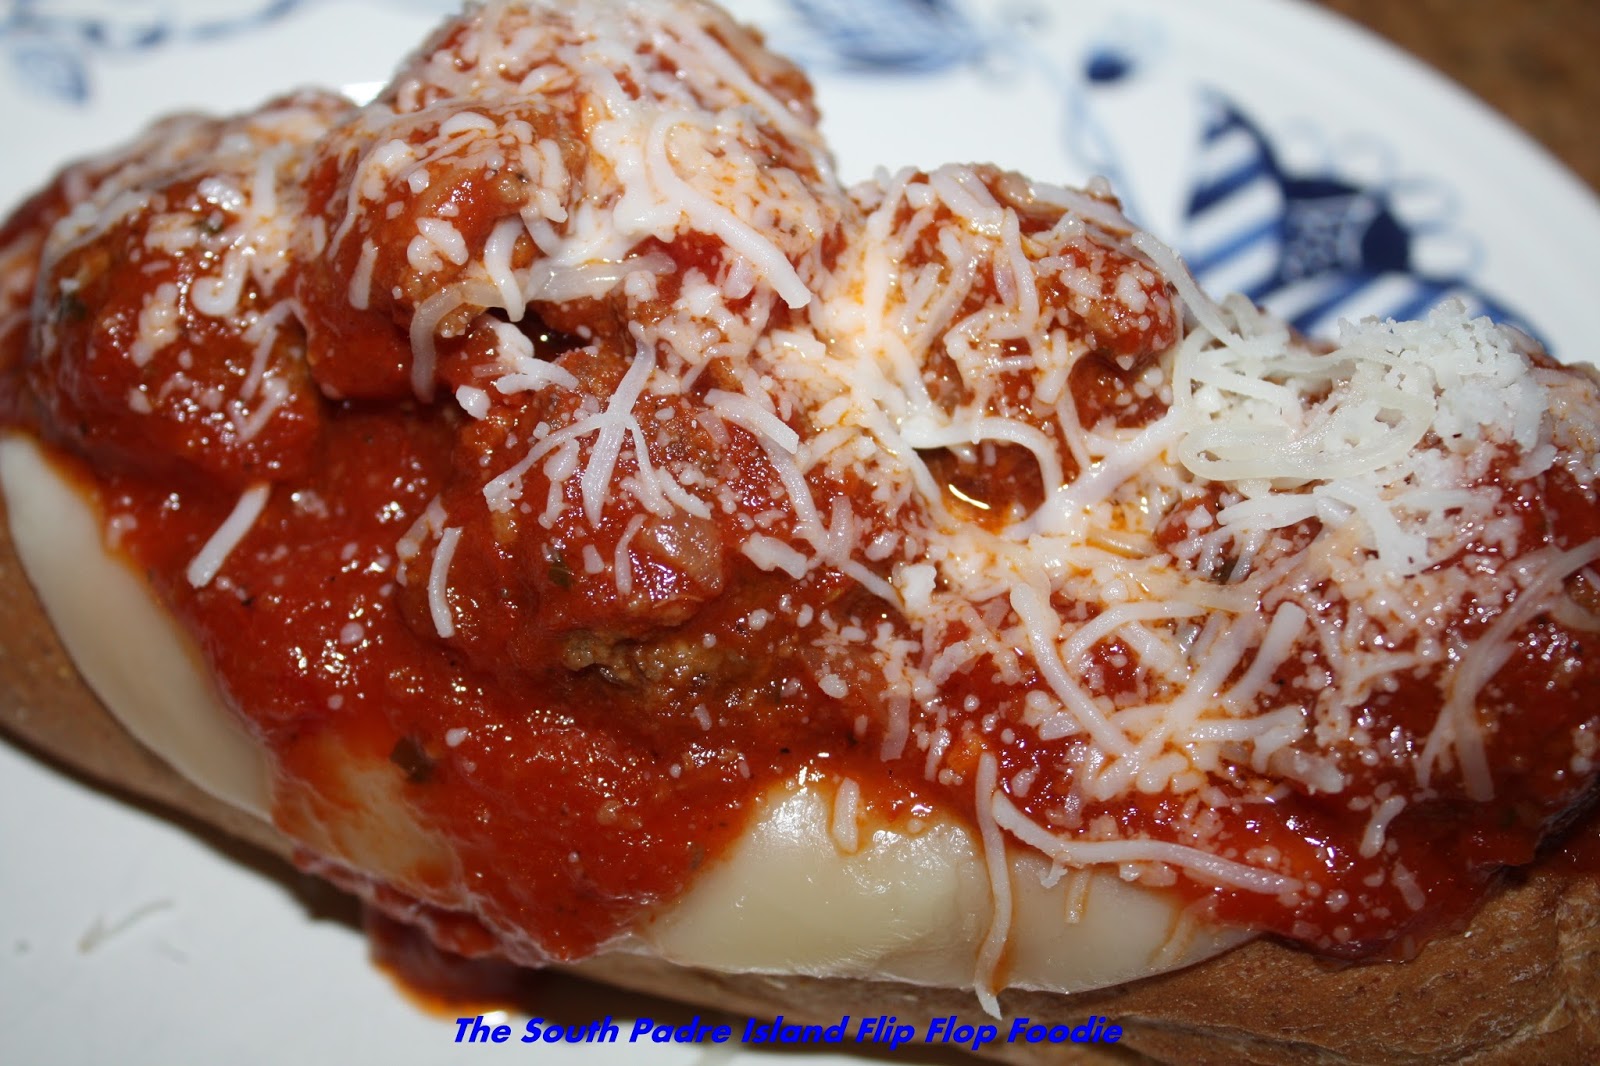
Meatball Subs

I love watching Pioneer Woman on Food Network.  Ree is so down to earth and "real"... I can make AND enjoy eating her recipes.  She is "every woman" in the food world.  This past week-end I was catching up on some of my DVR'd episodes of Pioneer Woman and was laughing with her as she was scurrying to make "fast" recipes.  Her mini meatball sandwiches looked so tasty, I decided to use her basic recipe and bump it up a bit in size... thus my latest version of a Meatball Sub was born.

Since I don't have a big bunch of kids to feed, I scaled down the quantity and boosted the size of the meatballs.  Here's what I ended up with.

Meatball Subs
Based on Ree Drummond's Recipe

Ingredients:

1 pound ground sirloin
1/4 cup Italian breadcrumbs
1/4 cup milk
1 garlic clove, peeled and finely diced
1/8 yellow onion, very finely diced
Salt and Pepper
2 Tbsp olive oil
1/8 yellow onion, larger dice
Sliced Provolone
Grated Italian Blend cheese (mozzarella, etc.)
Jar of Marina Sauce (I used Barilla Spicy Marinara)
Wheat Submarine Rolls (I used Cobblestone Mills)

Method:

In mixing bowl, combine ground sirloin, breadcrumbs, milk, diced garlic, finely diced onion, salt and pepper.  Mix with your hands until everything is well-incorporated.  Using a medium-size cookie scoop, measure level scoops of meat mixture and place on plastic wrap on counter.

In large skillet, heat olive oil and add larger dice onions.  Cook over medium heat until lightly browned.  While onions are cooking, roll the scoops of meat mixture into meatballs and place in pan with onions.  Raise heat slightly and cook meatballs until browned on all sides.  Add jar of Marinara Sauce and gently toss the meatballs to cover with sauce.  Put a lid on the pan and reduce temperature to low to continue heating through.


Cut center tops of the sub rolls at an angle to remove a triangle of the center of the roll (making a boat for the sauce and meatballs). 

Line the cut section of the sub rolls with sliced provolone cheese and melt under broiler.

Place sub on plate and spoon 4 to 5 meatballs into center of roll with extra sauce.  Sprinkle with grated cheese and serve with a fork!

My family loved these.  We ended up with about 22 meatballs...the men scrounged the last few and gobbled them down.  This was a great, and quick, week-night meal which I would have happily served to guests!  Very tasty!!!

Bon Appetit, Y'all!!!

StumbleUpon

Wednesday, August 8, 2012

Gabriella's - a Family Favorite


The teen chose Gabriella's for his birthday dinner and Mom and Dad were very glad!  We realized we had not eaten there since last Fall!  The last couple of times we went, it was soooo crowded, we just couldn't handle the wait.  Shocking to us all when we realized how really long it had been!

I have heard, during the Spring, that the family owning Gabriella's has, or is, phasing out of day-to-day operations (or maybe sold?).  I don't really know since it was hearsay.  I do know the menu was the same, the quality of the food was the same, and the service, while slow in the beginning, picked up to a level not usually experienced (Gabriella's is known for being slow because they make everything upon ordering).  We've never minded because the quality was so worth it.  After a few missteps in the first 15 or so minutes... attempting to seat us in a booth that was so tight my chest would have been sitting on the table, getting a table finally, waiting while others seated after us were served their drinks...after all of that...the rest of the visit worked like a well-oiled machine.  Once our waiter, Hector, arrived...smooth sailing!

Ian asked to start with Calamari with their spicy Marinara Sauce.  I swear it is the best on the island.  What pushes it into the #1 position is the awesome sauce and the perfect breading.  Yummmm.

Next up was the family serving of salad with a small antipasto plate of cheese, pepperocini, and olives. 

Then delicious crisp garlic bread to dip into their SUPERB balsamic and toasted garlic and herb dipping sauce.  Holy smokes I could drink it ... it is that good. 

As soon as we were finished, out came our main dishes.  Perfect timing.  Drink refills, extra bread...ready to dig in. (I get euphoric when I have good service)

My husband ordered a Classic Calzone.  Served on a pizza platter (it is so huge) with a ginormous pile of french fries.  There was so much food he ended up opening the calzone and eating all of the good stuff out of the middle and left about half of the crust.  I tried the calzone crust and dag nab it, it was better than mine.  It was really delicious.

Ian had the ravioli platter with marinara sauce.  Choices were Marinara, Alfredo, or toasted ravioli.  He likes the marinara with a bunch of cheese on top.  He ate every bite (and he didn't wait for the photo before he dug in).  Possibly for the first time ever he said he was too full for more bread and didn't want dessert.  Wow!

I had the Carbonara (the photo didn't turn out - darn cell phone) with bacon and chicken and a opulent asiago sauce...OMG - to die for.  I am the only one who needed a to-go box.  I filled up on Calamari and salad and couldn't even eat half of my main dish - and there was enough for two or three people really.  I enjoyed having it for lunch the next day though!

Except for the missteps to start...it was a wonderful birthday dinner for the boy.  We got stuck on the bridge ... endlessly it seemed... on the way home, but the sun was starting to set and it was beautiful...lots of boats fishing.  I just didn't give a hoot...could have sat looking out at the Laguna Madre for 30 more minutes if needed!

Thanks Gabriella's, for another incredible evening!

Bon Appetit, Y'all!!!

Gabriella's Italian Grill and Pizzeria on UrbanspoonStumbleUpon

Saturday, May 5, 2012

Healthier Friday Night Pizza - Home Run Hit!

If you are a regular reader, you know we almost always have Friday night pizza at the Flip Flop household.  Usually the teen makes the dough, but this Friday night, I wanted to make a healthier crust than his usual AP flour crust (which is absolutely delicious of course).  So I hit the kitchen while he was vegging in teen-age wasteland...aka his man cave.

Mr. Flip Flop is home and has been hitting the gym for a few months.  After this two-week absence I really noticed a difference!  Wow...I think Mr. Flip Flop lost weight and gained muscle.  Woo hoo baby!  So, in recognition of his efforts, yet his desire for the comfort of homemade pizza, I went for a slightly more healthy version.  Slightly.  Very slightly!  Normally, the teen wouldn't eat this kind of crust...but I guess the thought of having to make his own and wait another hour for rising prompted him to think that maybe specks of flax seed weren't such a bad thing!

So, here it is, the healthier version of our Friday Night Pizza.

Flax Seed Crust Pizza
By Debbi Hook

Ingredients:

5 teaspoons Instant Yeast (or you can use Active Dry - 2 packets)
2 tablespoons granulated sugar
1 1/2 cups very warm tap water
       (you can dip your finger in without screaming ouch)
4 cups White Whole Wheat Flour plus extra bench flour
1/4 cup ground flax seed meal
4-5 tablespoons olive oil plus more for rising bowl

Jar of pizza sauce (I used Ragu Homestyle)

Toppings of your choice - today I used:
Sliced Crimini mushrooms
Sliced green onions
Chiffonade of fresh basil
1 slice of lean deli ham, large diced
A few slices of Pepperoni
Kalamata Olives sliced in half
Green Olives with Pimento sliced in half

Grated Mozzarella, Romano, Asiago, Parmesan Cheeses

Corn Meal for Baking Pan

Method:

In the bowl of a stand mixer with dough hook attachment, add the yeast, sugar, and warm water.
Although instant yeast does not have to be hydrated, I find it doesn't have to rise as long if I hydrate it with sugar in the blend.  I also keep the little packets of Active Dry Yeast around - but we bake so much pizza and bread, that the 1 pound package is soooo much cheaper!

A great and dependable product.

For this dense crust, I wanted to move things along...hence the hydration.
After 3 or 4 minutes it will have a foam of bubbles on the top of the yeast - that means it is ready to add the flour.

I love King Arthur products - I find the White Whole Wheat
Flour to be a nice alternative to the heavier and darker
Whole Wheat Flour.  Wonderful product!

Add the flour and flax seed meal and turn on the mixer (low speed) and allow it to begin incorporating.
I love adding this - a little goes a long way!

Add the olive oil while it is working.  I started with 4 tablespoons and added another tablespoon when I realized the KitchenAid was struggling.  The dough came together quickly and I moved it up to medium speed for a total of 5 minutes of kneading. 
A beautiful speckled dough!

During the time it is kneading, turn your oven on for 60 seconds at 300 degrees, then turn it off.  Really, no longer, as you are just getting the chill off the oven.  My kitchen is too cool for things to rise rapidly, so I always de-chill the oven and use it for rising.

Oil a good sized mixing bowl with extra olive oil (don't let it puddle at the bottom - use  just enough to ensure the dough doesn't stick to the bowl).  With your oiled hands, remove the dough from the dough hook (it's a heavy dough so most of it will plop into the mixer bowl when you raise the head).  Form it into a ball with your lightly oiled hands and smooth the top with just enough oil that it has a slight sheen...the oil on your hands is likely plenty to achieve that).  Place it in the lightly oiled bowl, cover tightly with plastic wrap and place bowl in the de-chilled-turned-off oven for about 50 minutes.  It will double, up to triple, in size.

I usually spend the last 15 minutes or so of rising time prepping my toppings and setting up the rolling area.

Pull the bowl of dough and preheat the oven to 450 degrees Fahrenheit.
Prepare a baking sheet or pizza pan with a dusting of corn meal.

Now, I don't "press out" pizza dough like you are supposed to.  I roll it - no matter how hard I try, I suck at the press out method.  So, I put down some bench flour and took 2/3 of the risen dough (leaving 1/3 for the teen to make his own pizza) and shaped it into a rectangle because I was using a baking sheet today. I gently rolled it to the shape of my baking sheet with a lightly floured rolling pin.  Like all doughs, move it around to ensure it doesn't stick.  Sprinkle more flour if needed (I used the white whole wheat flour for this as well).

Roll the dough on the rolling pin, sprinkling extra flour if needed so it doesn't stick to itself and transfer it to the prepared baking sheet or pizza pan.

Pinch up the sides of the dough so the sauce stays on the pizza during baking. 
See that little dip in the front right bottom side - yep, the sauce
snuck out of there onto the pan during baking..  

Add pizza sauce (I used a jar, but you could make your own if you wanted - you could also use any thickish pasta sauce).  Spread sauce with a spatula or back of a spoon to evenly distribute.  I used about 1/3 of a small jar of pizza sauce.

Next I laid down a layer of sliced provolone cheese from the deli.  I like the bottom layer of cheese - makes for a really cheesy pizza :-)

Next come the toppings.  I sprinkled green onions all over, evenly placed sliced Crimini mushrooms around, placed a few pieces of pepperoni (just a few - trying to keep it slightly more healthy - of course, the cheese...oh well), the bits of ham, and topped with all of the olives.  It looked like a really good pizza.
This was 3 largish Crimini mushrooms and 3 green onions.
The basil was just about 4 or 5 leaves rolled and sliced
thinly.  I used 2/3 and left 1/3 for the teen!
The balance of the toppings - we love olives :-)
Mr. Flip Flop would have liked some bell pepper
and I would have liked some pepperocini...but I
didn't think of it until it was too late!


Next came the grated cheeses - first a light layer of grated Romano, then Asiago, then Mozzarella, and finally Parmesan.  I finished with the chiffonade of basil.
Ready to bake!

Place in preheated oven for 15 minutes and pizza is ready!

The dough took me about 10 minutes to prepare...15 at the most.  I prepped the toppings in under 15 minutes and the baking time was 15 minutes...this is an easy Friday night dinner.  My friend, Linda, said she had been inspired to make homemade pizza after reading my blog.  Her hubs asked her why they ever ordered pizza when they could have this?  Exactly!  Even if you don't want to make the crust - you can buy a pre-made crust or buy some pizza dough from a local pizzeria.  Let the kids do their own toppings.  But, really, if you have a stand mixer, why bother buying dough.  This is EASY!
If you don't want to make the whole grain, healthier crust, there's always the standard AP flour crust - here's the one the teen uses most of the time.  I realize I have gotten to the point where I don't use salt in the crust.  We don't miss it and there's probably enough sodium in the sauce to make up for it!

I use an offset spatula to run underneath to ensure
there are no stuck parts and it slides easily
onto a big wooden cutting board.
Slice and eat...delicious!

I could only eat two pieces - this is a dense crust.  The teen ate his entire "smaller" pizza, and Mr. Flip Flop packaged up the remaining slices from our pizza and I guarantee that's what he'll want for breakfast whenever he wanders out of the bedroom (he sleeps late).  He'll eat it cold...right out of the fridge.  Ick.  He just tells me "I'm a guy, cold pizza is fine".  Okay, whatever!

Bon Appetit, Y'all!

SHARED WITH:


Addicted to Recipes Button, Page button


Our Delightful Home


StumbleUpon

Monday, February 13, 2012

Pork Medallions Milanese

Our Valentine's Dinner


I really didn't know what to call this dish.  It was served on top of cheesy polenta...and it was topped with a Cheesy Tomato Sauce with Onions and Mushrooms and Basil.  The pork tenderloin medallions were "sort of" in the Milanese style.  They were pounded with a mallet and coated in Italian style bread crumbs...but not dipped in egg - and fried.  So I don't know if it qualifies.  I don't really care either. I suspect I'm mixing regions... I just know it was really, really good!  I'm calling it Pork Medallions Milanese and that's that.

It came together so quickly I had no time to take preparation photos.  All I have are a couple of photos of the finished product ready to take to the table...and there was so much it was almost overflowing the platter.  It was attacked with gusto by the family as we had not had lunch...just the Sunday morning breakfast tacos and we were all starved.  We had a simple side of steamed asparagus...and a lovely brownie cake waiting for dessert.  (More on that tomorrow)

This was our Valentine's Day celebratory meal.  There was no patience for photos at this table...no nicely set up plated meal...hell no.  They were on it like dogs on a plate of rib bones.  I didn't know whether to laugh or pull my hands back for safety.

The sounds of enjoyment were my rewards.  After a few bites, there were the appropriate ooohs and ahhhs and "honey this is good" which always warms my heart. 

Here's how I pulled it together.

1.  . Before starting the pork, clean and slice 1/2 pound of mushrooms and dice 1/2 small or 1/4 large sweet onion. Saute in 2 tablespoons olive oil. Add large pinch of salt once they are in the oil as well as 1/2 teaspoon dried basil. Once onions are translucent, add your favorite marinara or pasta sauce. I used Bertolli 5-Cheese Sauce. Stir and leave on low to use on top of the medallions. (if you haven't already prepped your side(s) - do that now.  Once the tenderloin and polenta get going, it goes fast.

2.  Trim a pork tenderloin of all silver skin and white stuff (that's a technical term).  Slice into about 1 inch medallions, placing each piece between pieces of plastic wrap, and pounding thin with a mallet.

3.  Place pounded medallions into a bed of seasoned bread crumbs, flipping back and forth to coat.  I used Progresso Italian Bread Crumbs.

4.  In a small amount of oil in a wide bottomed fry pan, over a medium high heat, begin browning the pieces of pork.  They go fairly quickly.  Remove browned pieces to a paper towel coated rack and lightly salt.  Put in another batch.  I had about 6 batches all together.

5.  Prepare your favorite polenta - I used Colavita fast cooking polenta for the first time - holy smokes, they weren't kidding that it only took 5 minutes - I had to hustle to stir with one hand and flip medallions with the other.  I must say, here, you really need to whisk from the start.  The directions say "stir" but whisk if you don't want any lumps.  And, when they say slowly pour in the polenta, they mean slowly...if you don't want lumps.  My addtion:  Add 1/2 cup cream, 1/2 cup grated Mozzarella and 1/4 cup grated Parmesan to the thickened polenta right before serving.  Stir until melted.

6.  Pour the polenta into a large serving platter, top with fried pork tenderloin medallions, and ladle the mushroom and onion tomato sauce over the top...and serve!

Okay, here's the other picture...looks pretty much like the other picture.  That's it!


Bon Appetit, Y'all!

SHARED WITH:


Addicted to Recipes Button, Page button
Our Delightful Home
StumbleUpon

Saturday, November 5, 2011

Gabriella's Two-in-a-Row!


My sisters were in town near my birthday and we joined up at Gabriella's for dinner out.  One sister was visiting the island for the first time and we were telling her, now that we live here, Gabriella's is our favorite restaurant for consistent quality meals.  You can guarantee (almost) that there will be a long wait...and you can pretty much guarantee it will be worth that wait! Flavor-wise, they have not failed me yet!

Sorry about the cell phone photos...but it is what it is!

I got the Pasta Carbonara - full of creamy garlicky bacony goodness :-)


Baby Sister got the luscious and dependably delicious Lasagna.


Middle Beloved Sister got the spicy and sausage-filled baked rigatoni.


With a piece of Raspberry Cheesecake and 3 forks for dessert - dinner was memorable.

Then, the very next week, my husband was lamenting that I always went to Gabriella's when he wasn't in town.  So, I planned date night for the night of the Port Isabel High School Homecoming Dance.  The teen was dropped off and we rolled on to the island and Gabriella's.  Despite a 45 minute wait, my husband's plastic chair cracking and dropping him to the floor and barely missing hitting his head as we waited outside, it was still an awesome night.  The wait staff were celebrating Halloween dressed up in some amazing costumes, the temperature was in the cool 60's while we waited and enjoyed a view of the bridge and the bay, and our service from Green Man, our waiter, was impeccable.  I didn't spoil our ambiance by whipping out the cell phone for pictures.  My poor husband had already been traumatized by the cheap chair crackage...so no photos.  However, he had Linguine with Clams and declared it very very good.  I had Roast Beef Papparadelle (this picture is from a previous visit) which really rocks. 

Mostly we enjoyed a night out together in the midst of happy people, good food, and outstanding service.  (It didn't hurt that we didn't have to fight for the bread and outstanding dipping sauce with the teen...he tends to hog it!)

Gabriella's is a place you definitely want to visit when on the island.  Don't be hurried...because they are on a Mama's Italian kitchen schedule...cooked to order and everyone wants it... so you WILL have to wait!

Bon Appetit, Y'all!!!


Gabriella's Italian Grill and Pizzeria on UrbanspoonStumbleUpon

Sunday, February 6, 2011

OSSO BUCO FOR TWO!

So tender you can cut it with a spoon
As Valentine's Day approaches, we start thinking about a special meal for our special someone.  My hubby is in town this week-end so I decided to do an early Valentine's dinner at home.  He may be home next week-end, and if so, we will likely eat out somewhere special...because we soon celebrate our anniversary.  February is a busy month for us! 

When I was last at Central Market I picked up two hugely awesome veal shanks.  The teen doesn't care for Osso Buco so I knew it would just be me and the husband :-)  Good thing...two big veal shanks set me back $35!  I thought this was supposed to be a poor man's stew.  No poor man can afford veal in the U.S.... unless they grow it themselves!  This was a labor of love - and the house smells delicious as it is cooking.  Here's how I tweaked my full-size recipe to be a perfect dinner for two!

OSSO BUCO FOR TWO

Ingredients:

Olive Oil - enough to cover bottom of Dutch Oven
Flour - for dredging the shanks
Sea Salt - fine grind for this, not kosher
Fresh ground pepper
2 veal shanks - the meatiest you can find - cut 4 to 5 inches thick
Butcher's twine
3 carrots - diced
3 celery stalks - diced
2 large cloves of garlic, finely minced
1 small to medium yellow onion - diced
15 oz can good quality whole peeled tomatoes - remove from juice - chop or squeeze into pan
1 small can (15oz) crushed tomatoes
1quart beef stock - I prefer the cartons - Organic if I can get it
1 cup Pinot Grigio (any good crisp white wine - one you would serve with dinner)
2 plum tomatoes, diced (or whatever looks freshest and smells freshest at the market - this time I used a largish tomato from Mexico - it smelled so "tomatoey" and the plums looked a bit anemic...go with what's best!)
6 basil leaves, cut in chiffonade plus more for sprinkling over the dish when served  (I used more this time because my husband brought some beautiful organic basil to me - he knows the way to my heart!)
Salt and pepper to taste

Method:

Prepare the shanks by tying them around the outside with butcher's string.


Two beautiful pieces veal shank
 Season flour with fine sea salt and ground pepper.
Heat olive oil in a large Dutch oven (oil should just cover the bottom of the pan)
Dredge veal shanks in flour, add shanks to Dutch oven and brown, turning frequently to get a good light brown crust...takes between 6-8 minutes. 


Browning the veal before removing
to saute the mirepoix and garlic

Remove shanks from pan to a plate and let rest while you saute the vegetable base.

Mis en place - mirepoix and garlic

Reduce heat to medium, add carrots, celery, onion, and garlic.  Saute to soften. 


Saute the veg in the oil left in the pan
after browning the veal...good stuff in that pan!


Add canned tomatoes, and 1/2 quart of beef stock. Return the veal shanks to the pan, nestling them down into the vegetables and broth - the liquid should reach about halfway up the shank. Cover and let simmer about 45-50 minutes. 


Ready to simmer covered on stove top
Add the wine, the diced fresh tomatoes, the basil, and the remaining 1/2 quart stock to the pan.

Place uncovered in 375 degree oven for about 1 to 1 1/2 hours ... or until very tender.

Just out of the oven
Removing the shanks from the broth
 (Shanks are a leg muscle cut and tighten up in the earlier stages...then relax as they braise...the full length of cooking time is necessary to get to the very tender state you are looking for) Salt and pepper to taste.  Remove from pot and snip the butcher's twine before serving.  The meat should be falling off the bone and melt in your mouth tender. 

Place prepared risotto (I used an easier version of the previously posted  3-Cheese Risotto) in two pasta bowls.  Place one veal shank in each bowl.  Ladle the broth/tomato sauce over the top.  Sprinkle with finely chopped basil.  A crusty loaf of bread.  A glass of good wine...some berries or other fresh fruit for dessert.  Mangia bene!  A very romantic and filling meal ... just for two!

You will likely have leftover "sauce" - save it and serve it over pasta for a second meal.... it is absolutely delicious tasting and will be even better the next day!  Leftovers say "lunch" to me!

Bon Appetit, Y'all!!!StumbleUpon

Thursday, January 13, 2011

My Osso Buco

I learned to make Osso Buco about 8 or 9 years ago.  It's a rare treat these days, because finding veal shanks in a retail environment in the lower Rio Grande Valley is not easy.  I've checked HEB, Wal-mart, Mata's, Blue Marlin...no veal shanks on any of the days I visited. <huge sigh>

So, when I get to Austin, I buy the precious goods and save them, carefully vacuum sealed and frozen, for the perfect day, when it is chilly and my husband is home, to prepare Osso Buco (veal is expensive and only he makes it worth the effort and expense of this dish!).

I know you could make this with beef shanks...but I haven't tried it yet.  Everything I've read, says it just isn't as good with beef shank.  So, if you know a LOCAL source for veal...please, please, please share with me (I know I can order it online).

This recipe is based on a couple of different recipes I mixed and mashed to make my own.  It is f**king delicious.  That's all I'll say.  And, with that, here it is.

MY OSSO BUCO

Ingredients:

Olive Oil - enough to cover bottom of Dutch Oven
Flour - for dredging the shanks
Sea Salt - fine grind for this, not kosher
Fresh ground pepper
4 veal shanks - the meatiest you can find - cut 4 to 5 inches thick
Butcher's twine
4 carrots - cut into bite-sized chunks
2 large cloves of garlic, finely minced
1 large sweet onion - chopped
1 28-oz can good quality whole peeled tomatoes - remove from juice - chop - return to juice
1 1/2 quarts beef stock - I prefer the cartons - Organic if I can get it
1 cup Pinot Grigio (any good crisp white wine - one you would serve with dinner)
2-3 plum tomatoes, diced
3 or 4 basil leaves, cut in chiffonade plus more for sprinkling over the dish when served
Salt and pepper to taste

Method:

Prepare the shanks by tying them around the outside with butcher's string.
Season flour with fine sea salt and ground pepper.
Heat olive oil in a large Dutch oven (oil should just cover the bottom of the pan)
Dredge veal shanks in flour, add shanks to Dutch oven and brown, turning frequently to get a good light brown crust...takes between 6-8 minutes.
Reduce heat to medium, add carrots, onion, garlic, canned tomatoes, and 1 quart of beef stock.  Cover and let simmer about 45-50 minutes.  Add the wine, the diced fresh tomatoes, the basil, and the remaining 1/2 quart stock to the pan.  Place in 375 degree oven for about 1 hour... or until tender.  Salt and pepper to taste.  Snip the butcher's twine and remove from pot before serving.  The meat should be falling off the bone and melt in your mouth tender. 

If you are a fan, I hear the marrow is awesome - I always serve the bone.  I just can't go there personally...I love what it adds to the dish - but I can't spoon the marrow out of the bone...just can't!  I plan for 1 shank per person being served.  I sprinkle chopped basil over the dish when I plate it (or bowl it - I usually serve in a low pasta bowl).  I have always served this ladled over risotto - I have an awesome recipe for risotto that I'll post tomorrow.  Some crusty bread on the side...this dish has never let me down!

Bon Appetit, Y'all!!!StumbleUpon

Thursday, September 16, 2010

Marcello's Italian Restaurant

Source: Google Images
After enjoying the small-town big event of the Port Isabel Homecoming Parade, we decided to avoid the immense traffic jam (people wandering the street, talking, no hurry to get out of the way) by eating dinner out before heading to the big bonfire.  Marcello's Italian Restaurant is on the corner of Hwy 100 and Tarnava on the Lighthouse Square and we were parked close by...win-win situation!  I've been to Marcello's several times and have always enjoyed it so we headed in for dinner and air-conditioning. 

It is an iconic family-owned restaurant and, at this time of year, filled with locals enjoying an evening out.  I like the atmosphere, which includes background music, subdued lighting, oil lamps on the table, white linens, and cloth napkins...kind of old European in atmosphere - nothing like the chain ambiance of the Olive Garden type of Italian restaurant.  Soothingly relaxing after the blaring horns of every police car and fire engine in the area leading the parade!  We were seated at my favorite table in the restaurant - square in front of the window looking out at the lighthouse.  Perfect!

Today, being the first day out to eat all week, I enjoyed the slight delay the apparently unexpected post-parade rush caused for the waitstaff.  Our waiter was great and handled the influx with friendly aplomb, expressing appreciation for our patience.  Our food actually came out quite promptly.  We started off with the included salad (mine with a wonderfully tangy tomato vinaigrette) and a generous basket of lightly toasted Italian bread with a dipping bowl of Marinara sauce.  I was in the mood for something fairly basic so ordered whole wheat spaghetti with meatballs and Marinara.  The teen ordered their seafood lasagna.  I was afraid he would not be hungry after plowing through most of the bread basket.  (We generally eat fairly early on school nights and it was 7:40 when we got to the restaurant - he was starved.)  I tried some of his seafood lasagna and boy was it good!  It was in a white sauce and completely covered with stringy delicious cheese.  I could identify crab and some shrimp in my one bite - the teen wasn't able to identify anything else, but did declare it was very good.  It was such a generous serving that he couldn't eat it all (especially having filled up on bread and Marinara!). 

My meal was all that I could ask for in a plate of spaghetti and meatballs.  Meatballs so big I could only eat one (I think there were two on the plate - under all that delicious Marinara) and a literal bowl of pasta sufficient for multiple servings.  We could have easily shared either dish.

In the past I've enjoyed their cheese ravioli in shrimp and lobster sauce - rich and decadent.  Last year when my family was here, we dined at Marcello's, and everyone loved their meal.  Good stuff - reasonably priced.  Our dinner tonight was $36 with non-alcoholic drinks and a tip.  For a nice dinner, that's a good price in my opinion.

I'm tired and pleasantly full (thankfully I only ate half the dish) and ready for bed.  The evening was so pleasant, we completely forgot about the bonfire!  We swung by on the way home and at least saw it, despite missing the actual activities...not sure what you do at a bonfire...but we were so stuffed and ready to fall into the post-pasta-induced slumbers, that we both said "okay - saw it - let's go home"...and we did.

Marcello's is a place we will go again and again...when we need a nice night out and want to stay on the Port Isabel side of the bridge.  It's definitely mangia bene!

SPI FLIP FLOP FOODIE RATING:
4 – Lip smackin’ - good quality – flip flops will definitely be parked under their table again!
Marcello's Italian Restaurant on UrbanspoonStumbleUpon