The South Padre Island Flip Flop Foodie Brownsville restaurants

Search The South Padre Island Flip Flop Foodie Blog!

Thursday, August 22, 2013

BurgerFi South Padre Island - a review


I have heard good, bad, and mediocre to describe the fairly new BurgerFi on South Padre Island.  I have not gone over the Summer months because, frankly, I try to avoid most all eating establishments on the island in the high season.  It is not the optimal time for locals to go out to eat!  You vie with hoards of tourists in large groups with crying children.  Not my idea of a good time.  I laugh, because we, at one time, were a part of those hoards and never thought a thing of waiting in long lines with harried waiters taking forever to get anything.  We smiled and toasted our wonderful vacation.  From an economic standpoint, I'm thrilled to see the madness continue.  However, I no longer choose to play the game.

Sooooo, it is now the last week of Summer on the island...school starts Monday...there will be a bit of a bump (ok, maybe a big bump) of visitors for Labor Day week-end.  However, for the most part, the hoards are waning.  You will hear a tremendous sigh of relief from those of us who, while grateful for the economy of Summer, dream of the days of September and October...when the beaches are less crowded, the weather begins a slight (oh so slight) cooling of the morning air, and everything is wonderful once again.  That is, of course, barring some vicious H*rr***ne (a bad word, I can't type it, bad luck).

Today, my granddaughter waited very patiently for me to get my pedicure at Venus Spa so I told her we could go out for lunch after I was finished.  I had BurgerFi in the back of my mind to hit up when the crowds dissipated and it seemed to me that the island was much less crowded today.  Seemed possible today could be the day, so I asked the girls at Venus if they had tried it and what they thought.  Jennie had - and said she and her husband liked it a lot.  There was talk about their recent inspection getting flying colors from Ryan Wolf.  So, I decided to give it a try if it wasn't a full parking lot.

Upon arrival, we found most of the side parking lot available and so we hurried in.  It was nearly 1:00 and I expected the main lunch push was wrapping up.  We still had a line reaching back about 1/3 of the main dining area.  It seemed doable so we stepped into our place in line.  The line was one long one which split to two cashiers.  That seemed confusing to several people who came in after us who tried to step up to one or the other of the cashiers.  I guess they figured it out because they backed up to the proper end of the line.  The line moved fairly quickly.  The grandchild wanted a cheeseburger with pickles and ketchup only and some fries.  I decided on a single patty with fairly simple standard ingredients...mustard and ketchup and mayo (yep, I like all three) lettuce, onion, and pickle - no cheese.  I saw the combo order of onion rings and fries and the little miss and I decided to split that (with me taking the onion rings).  Two sodas and a tally right under $20.  That was a little pricier than I would hope for, since there was not any visible "kids menu", but if it was delicious, I was game.

BurgerFi has some high-tech soda machines.  They were pretty cool - you could mix sodas (yeah, like that's gonna happen) if desired and it was all touch screen.  I was able to figure it out fairly easily since the buttons flashed so you could realize "hey, push here dummy".  The grandkid thought the whole business was pretty cool...until her tiny fingers hit the Sprite Zero button accidentally and she couldn't figure out how to get back to the screen for regular Sprite.  The dude behind us had to walk us through the endeavor...and we were holding up the line...which is right in the midst of the waiting line.  Not an optimal set-up.  That is, of course, what a lot of the complaining was on Facebook when they first opened.  The traffic flow is poor when crowded.  Nonetheless, we got our sodas, lids, and straws and since the grandchild decided to sit outdoors, we headed that way.  Joy of joys...sliding doors...no need to balance drinks and push heavy doors.  I had to go back for condiments and again was thankful for not having to open doors with my hands balancing 4 containers of ketchup! 

We had a beeper for order pick-up and it seemed a bit of a long time for our order to be ready.  I can't imagine what it might be like with a huge crowd.  I had time to look around and observe things while I waited.  I saw big orders of fries passing by, mostly families, a few workers, and lots of happy faces.  That's always a good sign.  I noticed a worker was deep cleaning/scrubbing vacant tables.  A manager came out and reviewed his work and asked if he was cleaning under the table.  He got instruction on scrubbing under the table as well as on top.  Gotta say I liked that!  A few weeks with my grandkid has reminded me what germ mongers kids are! 

Finally, our beeper vibrated and lit up so lunch was ready!  My first thought when I retrieved our tray was "gee, these are pretty tiny burgers for nearly $6" and "damnnnn, that's a lot of fries, we'll never eat all of these".  In the long run, the burgers were actually just the right size for me and...we did not even put a dent in the fries.

I got back to the table and unloaded.  Eating outdoors on perpetually breezy SPI is always a challenge for a child.  Flyaway napkins, flyaway hamburger wrapper...I had to keep on top of where things were at all times.  I snapped a couple of photos.  Miss A. declared them to be really, really good hamburgers (she's a harsh hamburger critic and generally prefers chicken nuggets so that's a big kudo).  My burger was outstanding flavor-wise, albeit a bit dry.  However, since I love a chargrilled burger, I really like that it was well-done.  Many, however, will think it is over-cooked.  I know my younger son would.  The 1-patty burger is a very thin patty...and thin dries out when grilled, it's just a fact. The veg was fresh, the pickle particularly delicious, and the buns have the entertaining feature of being branded (literally) with the BurgerFi name.  That really thrilled my granddaughter!  "How did they DO that Grandma?" was asked repeatedly.  Finding the 7-year-old words to describe branding resulted in several different ways of describing how they might have branded the hamburger bun.  In the end, I finally admitted I just didn't know exactly HOW they did it!  I also tried to discuss with her the benefits of an "all natural" burger patty.  I gave up...just too over her head :-)

I finally got to eat my three HUGE AND DELICIOUS onion rings.  I was full at that point.  I love onion rings.  The fries are "hand cut" and have the skin on them (which was a negative for the grandchild) and were quite limp after a few minutes of being on the table....but, still, surprisingly tasty and had a light dusting of sea salt.  Grandchild only ate 3 of them...so, if you have kids looking for McD's crisp - you won't find it here. (After I typed those words, I Googled their website.  Apparently, there is a "secret menu" where you can ask for extra crisp fries.  Well duh, now I know!)

Over all, I enjoyed the meal.  Another manager stopped by the table to see if everything was fine with our meal.  We said it was very good.  Having a manager walk through...that's a good thing. 

So, in summary...the onion rings were exceptional, fries really nothing to write home about and burgers quite good, but over-priced IMHO.  I managed to keep myself away from the custard/shakes section.  I have heard amazing things about a Red Velvet Cake Shake.    I really want to try that...but it's better that I don't!

We'll stop in again when the season is low and the family is hungry.  I expect, however, my spouse will find that he doesn't want to spend that much money to grab a burger...since we aren't on perpetual vacation (as he frequently likes to remind me).  Say what???  I beg to differ!

This photo has nothing to do with BurgerFi... but everything
to do with being on perpetual vacation :-)


SPI FLIP FLOP FOODIE RATING:

3 – Pretty Yummy - I feel my flip flops wanting to head back from time to time!


Burgerfi on UrbanspoonStumbleUpon

Monday, August 5, 2013

CAPTAIN DONUT!

If you were on the island a bit before noon today and saw a crazy woman making a U-turn on Padre Blvd...I admit, it was me.  I had been to CVS to pick up some prescriptions after finishing up Zumba and a work-out at Olympian Fitness Gym of Port Isabel.  I was icky sweaty and my hair was poking out all over the place and I had no intention of stopping between leaving CVS and taking a peak at the ocean (as I do every time my wheels drive onto the island) by driving down to a beach access on Gulf Blvd.  Beautiful day for the beach I'll say...so my thoughts were happy as I turned onto Padre off of Amberjack.  That's when I did a double-take and impetuous U-turn.  I saw the new doughnut shop!!!  I had heard good things so, despite most certainly returning every bit of calories I had just burned off right back onto my butt, I decided to walk into this new potential den of iniquity...the first doughnut shop on the island since we've lived in the area. 

One of the things I missed about Austin when moving here was the absence of local doughnuts (that I know of); not even Krispy Kreme or Dunkin' Donuts...nada, zip, nothin'!  I do NOT count Wal-Mart doughnuts AT ALL.  They suck and are a total waste of calories.  HEB will do in an absolute craving pinch, but really, nothing to write home about.  I'm a lemon filled doughnut NUT and very rarely HEB has them so I cave.  I also really like a good yeasty glazed doughnut.  HEB's just don't do it for me.

So, I carefully stepped out of my car and surreptitiously looked around to see if anyone was watching me....I darted into the brand new Captain Donut!  It does not look like much from the outside - pretty mundane - but then you walk in...and inhale the dizzying delicious scent...and see the shining Pandora's case is in front of you...and smiling sirens are welcoming you.  OMG...what HAVE I done?  It would have been better not to know!
(not really)

I truly didn't expect much in the way of selection or extreme freshness considering it was nearly lunch time.  Boy was I in for a surprise!  Clean, new, lots of choices, nothing industrial looking in the case.  Yee Haw!!!  Donut nirvana!

After chatting with a couple of people in the shop, and the lovely Ms. Madie who created the S'mores Donut, I decided on a couple of donuts to go.  I got one of the basic glazed donuts and one of the aforementioned S'mores Donut.  I snapped some cell phone photos, and took my carefully packaged bag of donuts and left.  I fully had every intention of waiting to get home before I touched the bag.
The sirens of Captain Donuts.  Madie apparently spends her
time thinking up awesome donut concoctions.  Isn't that the cutest
apron and hat???

Then, imagine, the yeasty smell of fresh donut molecules sensuously winding their way to my nose, saying silently "come on Debbi, open the bag...just try a bite...just a bite".  Well, let me tell you, that glazed donut was out of the bag and in my belly before I hit the bridge.  I am so ashamed. (not really)

FRESH yeast donut with a delicate, not sloppy, sugar glaze.  Oh my.  Never would I have had the ability to eat just a bite.  It was a damn good donut.  I closed the bag and placed it out of my reach when I stopped at the light before the bridge.  Whew...close call, I could have inhaled the second one too had I had more immediate access.  I have no donut will power when the donut is as good as that glazed donut! (note I am officially changing my spelling from doughnut to donut because it is Captain Donut after all)

I made it home, fixed a cup of coffee from the last in the pot (love thermal coffee carafes - fresh coffee at noon, brewed at 6am), took a picture of the remaining donut and sat down to savor it. 

Imagine my surprise when I noticed it was gone...before even half my coffee was gone.    I am such a pig.  I had really not expected to love the S'mores donut because I'm not a huge fan of the usual chocolate glaze on donuts.  However, this was thin and tasty and added to the taste of the donut instead of overwhelming the donut.  These dudes (and dudettes) are awesome donut makers!  I hope and pray they make it.  Winter Texans...prepare to have coffee and donuts all Winter long down here.  We must keep this place in business for those times of utter and abject weakness when I turn into Homer Simpson and walk/drive in my sleep to get the donuts!!!

Next time I'm going earlier... I want to see every single option they have...including the Kolaches!!!
Until then, Bon Appetit, Y'all!!!

JULY 5, 2014

My son needed donuts after his haircut so we nipped across the street to visit The Captain!  Happy to find lemon-filled (delicious) and our regular faves glazed and chocolate frosted.  My gaze lingered longingly on the giant cinnamon rolls...and my bright idea was to buy two of them "for my husband"...yeah, that's the ticket.  Here are couple of photos - they were all gone lickety split...with fingers licked as well!  Still havented tried the Kolache...but I will!

Delicious 1/2 dozen from Captain Donut...yum!

Cinnamon rolls so big 2 barely fit in the box!
(I was happy they didn't have raisins...that would have been a no-go for me)


Captain Donut on Urbanspoon StumbleUpon

Saturday, August 3, 2013

Graduation Cookies Take Two!

A couple of fondant accents, drop flower and mini rose RI transfers,
as well as an outlined and accented stamp were some of the
ways I decorated mini cookies for a grad platter. 
A friend asked me to make some grad cookies for her daughter's college graduation party.  I loved the color palette and thoroughly enjoyed playing around with this project.  Orange, blue, and white are the Sam Houston State University Bearkat colors and the following are what I came up with.  They are based on a vanilla bean sugar cookie and used a variety of techniques when decorating - basic piping, rubber stamping, stacked "3-D" plaque cookies, and some royal icing transfers (a variety of flowers).  Lots of fun - a few mistakes (mostly eaten) and off they went to celebrate this week-end.  Enjoy the photos!

Three plaque cookies from 5-6 inches in size. 
Nice centerpieces for a cookie platter.
The white dots were all piped with a PME 1.5 tip,
the orange with a PME 2 tip,
and the blue shell border with a Wilton tip #13.
I found these rubber stamps
(Class of, Congrats, and the Grad Cap)
at Hobby Lobby.  I think they were just $3.99 each.
 I have to tell the story of the '13 plaque cookie.  It was supposed to be the Congratulations plaque cookie.  I let it dry 18 hours under a fan, but apparently it wasn't dry enough.  When I pressed the stamp on the surface and gave it a slight push - the whole thing cracked and caved in.  I was going to give it to my husband to eat and left it under a fan all day so he would not end up with black lips!  However, after it dried, I thought "hmmm, could I re-coat it?"  So I tried it and it didn't dry very smooth and I could see a vague bit of black under the orange.  Then, when I was outlining and flooding the numbers 2013...I broke the number two.  I didn't have a back-up cookie.  So, I thought "hmmmm...could I make a 3-d cookie and cover up a whole mess of woes and still come out sunny?"  Having nothing to lose (and a back-up plaque or two) I gave it a try. To get the apostrophe, I used a mini leaf cutter and cut it out of a spare cookie from the batch...not a very smooth edge, but I carefully pressed it into shape and quickly iced it and didn't touch it any more!  It turned our fairly well I thought.  I gave all 3 plaques to my friend - she could choose whether to use one or all in her cookie platter.

There were quite a few stars - this is a sampling.  The center bottom
star is stenciled and highlighted with blue dots...
 the rest are free-hand.  My friend asked for
three-dozen minis.  It was fun getting creative with the minis.
Large 3 1/2 to 4 inch cookies included grad caps, scrolls, and
shooting stars (not shown)  A bit of gold lustre dust dissolved in
a drop of vodka added a nice accent to the tassels.


These are various drop flowers, piped roses, and piped ribbon roses.
The little hearts on the bottom left cookie were a simple dot
piped wet-on-wet and dragged with a needle tool to form a circle of hearts.
The transfers were all prepared on parchment paper, allowed to dry
overnight, and then glued to the base-coated cookie with royal icing. 
Mini leaves piped with a PME ST50 tip.  One of my new favorites!

This bunch of minis had a couple of wet-on-wet techniques.
I marbled the bottom one with white and orange after
base coating the cookie blue.  I like the way it looks.  I used
a technique for wet-on-wet flowers I've seen done by Buttercup Cookies.
Mine is not as good as hers...but I like the concept.


I've enjoyed sharing this project with you - I've made more graduation cookies this year than I've ever made before...EVER!  Since I'm just a hobby baker at this point, making large sets for friends is helping me stretch my wings!  If she sends me photos of the party, I'll update the blog post!!!  Congratulations, Elizabeth, on your graduation...hope you and your friends and family enjoy the cookies!
 
 
Bon Appetit, Y'all!!!


StumbleUpon

Wednesday, July 31, 2013

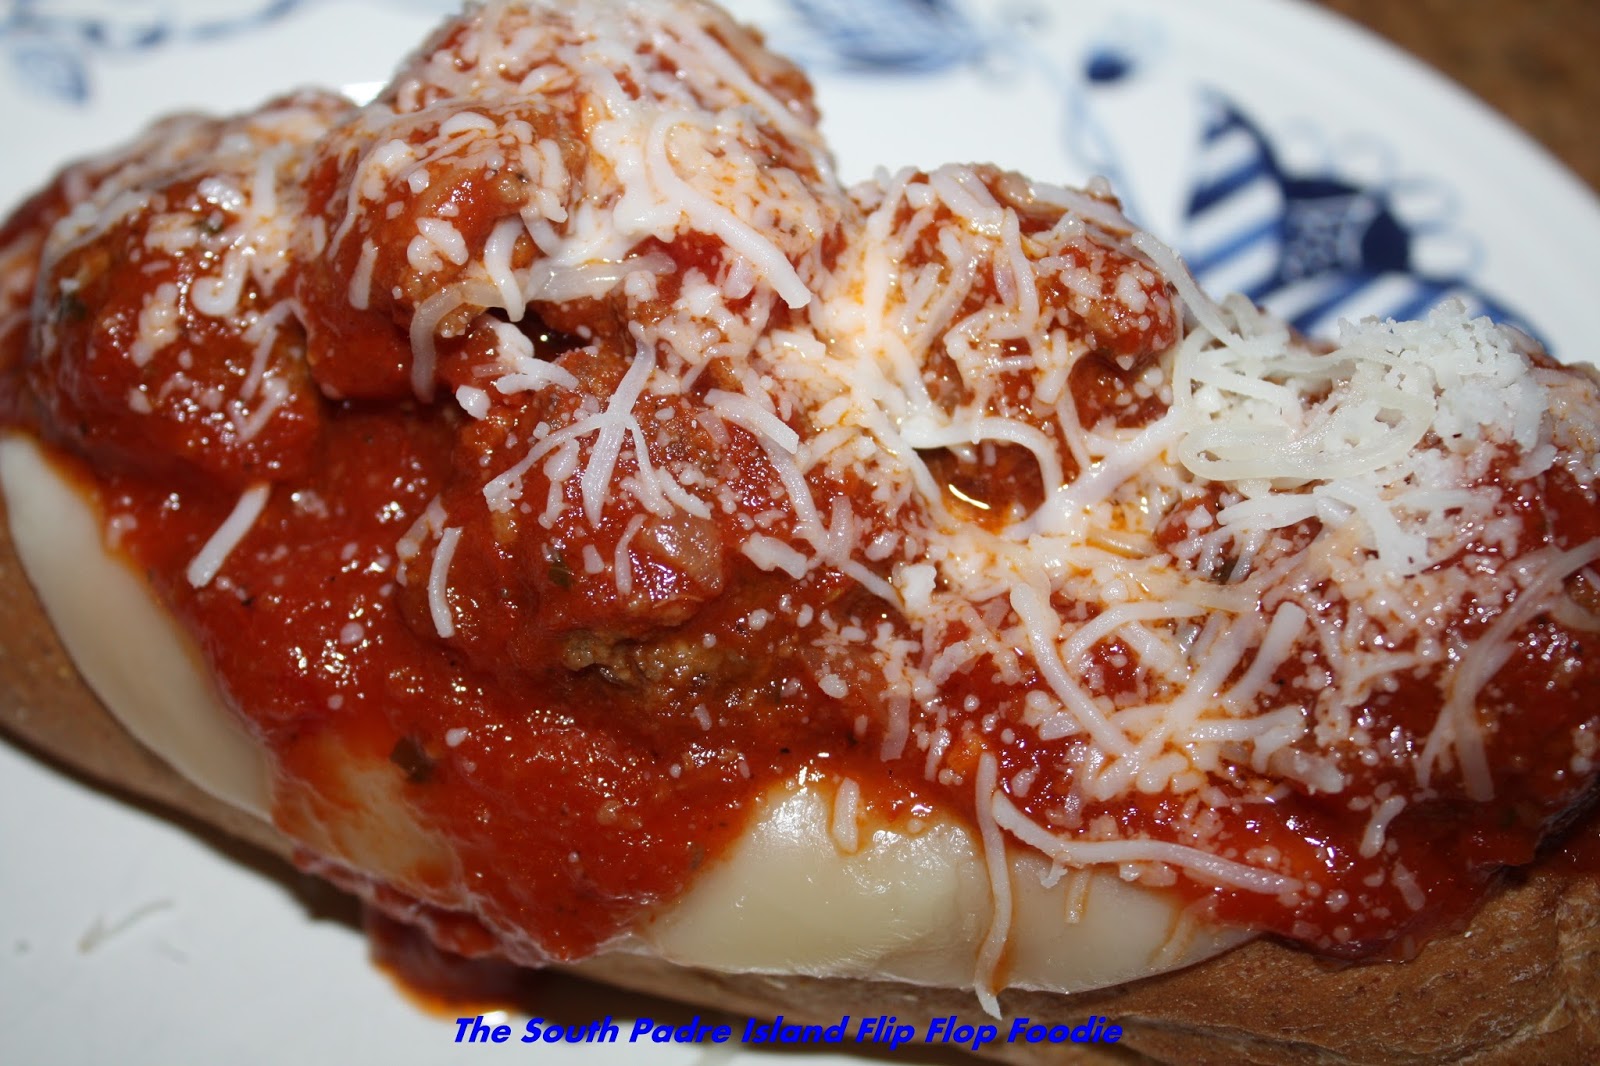
Meatball Subs

I love watching Pioneer Woman on Food Network.  Ree is so down to earth and "real"... I can make AND enjoy eating her recipes.  She is "every woman" in the food world.  This past week-end I was catching up on some of my DVR'd episodes of Pioneer Woman and was laughing with her as she was scurrying to make "fast" recipes.  Her mini meatball sandwiches looked so tasty, I decided to use her basic recipe and bump it up a bit in size... thus my latest version of a Meatball Sub was born.

Since I don't have a big bunch of kids to feed, I scaled down the quantity and boosted the size of the meatballs.  Here's what I ended up with.

Meatball Subs
Based on Ree Drummond's Recipe

Ingredients:

1 pound ground sirloin
1/4 cup Italian breadcrumbs
1/4 cup milk
1 garlic clove, peeled and finely diced
1/8 yellow onion, very finely diced
Salt and Pepper
2 Tbsp olive oil
1/8 yellow onion, larger dice
Sliced Provolone
Grated Italian Blend cheese (mozzarella, etc.)
Jar of Marina Sauce (I used Barilla Spicy Marinara)
Wheat Submarine Rolls (I used Cobblestone Mills)

Method:

In mixing bowl, combine ground sirloin, breadcrumbs, milk, diced garlic, finely diced onion, salt and pepper.  Mix with your hands until everything is well-incorporated.  Using a medium-size cookie scoop, measure level scoops of meat mixture and place on plastic wrap on counter.

In large skillet, heat olive oil and add larger dice onions.  Cook over medium heat until lightly browned.  While onions are cooking, roll the scoops of meat mixture into meatballs and place in pan with onions.  Raise heat slightly and cook meatballs until browned on all sides.  Add jar of Marinara Sauce and gently toss the meatballs to cover with sauce.  Put a lid on the pan and reduce temperature to low to continue heating through.


Cut center tops of the sub rolls at an angle to remove a triangle of the center of the roll (making a boat for the sauce and meatballs). 

Line the cut section of the sub rolls with sliced provolone cheese and melt under broiler.

Place sub on plate and spoon 4 to 5 meatballs into center of roll with extra sauce.  Sprinkle with grated cheese and serve with a fork!

My family loved these.  We ended up with about 22 meatballs...the men scrounged the last few and gobbled them down.  This was a great, and quick, week-night meal which I would have happily served to guests!  Very tasty!!!

Bon Appetit, Y'all!!!

StumbleUpon

Tuesday, July 30, 2013

How to Survive When You've Had Enough Sun!!!

As I've mentioned before, we used to vacation on South Padre Island for at least 15 years before we moved to the area nearly 5 years ago.  One of the problems I always encountered (being the freckled, white skinned girl that I am) was what to do when I couldn't take any more sun and everyone else was still going and going like the Energizer Bunny!

Over the years I have found a few activities that those "less than sporty" and "shade loving" individuals can use to occupy time in the area!  This is not the place to look for all those fun-in-the-sun activities.  Check out the links on South Padre Live for loads of THAT kind of information.

1.  Visit Paragraphs on Padre Blvd.  - Our wonderful independent book store is at 5505 Padre Blvd. in a lovely turreted building on the West side of the main street.  Booksellers Joni and Griff will welcome you warmly and offer you a comfy chair and cool a/c to while away some time browsing books, playing a game of chess, checkers, or scrabble... or just having a nice chat.  They often host book signings, poetry readings, book discussions, and writer's workshops.  See what's on their schedule while you are in town!  One of my favorites.

2.  Get up early or go at sunset to the bird walk, butterfly garden, and water feature by the convention center.  We were so delighted the first time we went to stand and watch the birds at sunset as they flew in by the droves to bathe and forage and prepare for night.  The sunset is glorious out over the bay.  Take a camera...you won't be sorry.  It's free! (Don't forget to check out Wyland's Whaling Wall #53 on the convention center)


3.  Sea Turtle, Inc. - I can listen to their informative lectures time and again.  Hearing the history of the facility, visiting all of the turtles living there or in rehabilitation, actually going to a hatchling release during the summer...the possibilities are endless...and shady for the most part!  Please make a donation so their excellent work may continue.  Buy an eco-friendly turtle souvenir in their shop!

4.  The Dolphin Research and Sea Life Center in Port Isabel (next to Pirates Landing) is an educational opportunity for the whole family and always worth a walk-through visit for a nominal donation.  Touch Tank, aquariums, rescued animals...you never know what you might encounter.  Take time to view the video and the posters about "Dolphin Whisper" Scarlet Colley's work identifying and loving the local tribe of bottlenose dolphins.  I've taken an excursion with Scarlet and the joy of a dolphin sighting is up there in my "best life experiences".  She always seems to know where to go to make sure there's some dolphin love to be had.  Schedule an excursion by contacting Scarlet at the number listed on their website.

5.  The South Padre Island Birding and Nature Center provides an additional opportunity for viewing flora and fauna of the area.  I've enjoyed cool morning walks (and hot afternoon walks) and had the opportunity to experience a wonderful variety of birds.  Small fee for this one - not too much shade either - so pick your time wisely.  We've gone at different times of day, different times of year...always walk away amazed and happy.

6.  Sabal Palm Sanctuary is an exceptional place to visit - no place else quite like it in the United States!  It's located in Brownsville, right on the Rio Grande.  I can't say I've ever visited in the summer, but Winter visitors will find this a cool and refreshing nature walk easy for all, even those not so fit :-)  Wear sturdy shoes.  I accidentally wore Crocs...it limited my exploration!  Take a camera.  There is a donation fee - well worth it!

7.  Rent an umbrella and lounge chairs!  It was a necessity, not a luxury, when we used to vacation...it allows those prone to sunburn to enjoy the coastal breezes in the shade.  Cool off in the waves then scurry back to your lounge chair and let the breezes blow across your moist skin.  Heavenly!  Check with your rental company or condo to find out who the authorized vendor is for your area of the beach. 

8.  If you are used to going to waterparks and having to stand in long, sun-searing lines on asphalt paths....visit Schlitterbahn at the Beach.  The lines are primarily in the water.  With a hat, a long sleeved shirt, and lots of sunscreen, I could usually make it through the day.  My kids always wanted to be there when the gates opened and not leave until they closed.  I could handle that by finding and staking claim to a table and chairs under a shady palapa seating area.  You can take your own food and drinks (no glass containers - your ice chest will be checked!) into the waterpark but be careful not to leave food out (even chips in packages).  The gulls and grackles WILL peck open a bag of chips and eat them in your absence.  I've seen it every time I've been to Schlitterbahn!  People are always so shocked when they return to see their big bag of Lays ripped to shreds.  Secure your belongings, and that includes food!  I'm no longer enthusiastic about riding the inner tubes and sliding...but I enjoy getting wet swimming in portions of the lazy river or the wave pool, then returning to whichever side of the big Sand Castle is shady and sitting with my feet in the water...then I return to the palapa and read a book.  It manages to be a fairly enjoyable visit, every time I go to Schlitterbahn.  It doesn't hurt that they have cocktails and beer available too!

9.  Schedule a morning or late afternoon Sand Castle Building Lesson with Sandy Feet.  She is the best and has the patience of Job.  Check out her website... we've taken her classes over and over.  We own the book, the tools, the DVD...Incomparable!

10.  Check out classes at South Padre Island ArtSpace...or just stop in and shop!  Located at 1817 Padre Blvd., a unique and lovely group of local artisans sharing their skills and selling their creations.  It's wonderful!

11.  SHOP - there are a plethora of souvenir shops if that is your thing...but if you'd like a slightly different shopping experience, head to places like Ship Shape, Desert Cactus, or Isla.  You'll see the difference when you walk in the door.  The staff are all friendly and courteous...the inventories are very nice.

12.  Schedule some personal spa services at my favorite, Venus Nails & Spa.  The team is friendly and attentive.  Appointments or walk-in.  Located at the intersection of Padre Blvd and East Amberjack.  Excellent service in a relaxing atmosphere.

13.  Do the Lighthouse Square shopping round while in Port Isabel.  ArtSea, The Rusty Pelican, and Coastal Winds are some of my favorite shops in PI...but there are many more around the square well worth investigating.  If you have the energy to climb to the top of the lighthouse (not cool, but it is shady!) you will find the view beyond compare.

14.  Head off the island and enjoy the wonderful zoo in Brownsville.  Gladys Porter Zoo is an outstanding zoo full of a surprising wealth of information and exhibits.  It was more than I had expected and a jewel in our little area of the country.

15.  If you are in town on a Friday or Saturday evening during the Summer - find yourself a spot to watch Friday Night Fireworks on the bay or ocean or Saturday Night Fireworks on the ocean.  Our preferred place for Friday night on the bay is a table at Louie's Backyard, stuffed full of their buffet meal and margaritas OR Laguna BOB's with a bowl of ceviche and a beer.  Grab a place early and eat slow...slightly after 9:00 p.m., you'll see a wonderful fireworks display from a barge in the bay. For ocean fireworks viewing Friday and Saturday nights, find a spot on the enormous deck at Clayton's.  Either bay or ocean...both provide a perfect beginning or end to a wonderful summer vacation!

Timing is everything.  Hit the beach early, come in for lunch and a nap, do an activity from the list above, head back to the beach in the late afternoon... I like to time afternoon on the beach when the condos throw shade onto the beach (OK - let's say early evening).  Then, when the sun is dropping low, shower off and head out to eat, then back "home" to sleep like a baby...get up and do it all over again the next day!

Have fun and Bon Appetit Y'all!!!


StumbleUpon

Sunday, July 21, 2013

Run to Hear 2013 Cookies!


I've written in the past about Run to Hear... a charity near and dear to my heart.  It's a wonderful charity focused on raising funds to help support deaf and hard of hearing children who want to hear and speak.  A group of children, calling themselves The Deaf Club since they were pre-teens, are now all entering their late teens and early 20's.  They wanted a way to "pay it forward" because they know how very fortunate they are.  All of them, through the years, have become cochlear implant users and they are very aware of how incredibly expensive their gift of hearing has been for their parents.  They came up with having a benefit 5K to raise funds...and this was their 3rd event.  In past years, most of the work was done by the parents, with the kids in training.  This year... a huge amount of the work was done by the young adults.  Before long, I expect it to be totally in their hands.  We are all very proud parents.

This month's incredibly busy schedule included learning a new cookie decorating technique (actually TWO techniques) and using said techniques in the preparation of 150 cookies for the Run to Hear families and for some excellent volunteer workers!

Technique #1 - Using edible wafer paper, printed with the Run to Hear logo, as the centerpiece of each cookie.

Technique #2 - Finally getting the correct royal icing consistency so that I could learn to pipe a shell border. 

I started by working with our tech support guy and photographer extraordinaire, Alex Labry, on the Run to Hear team.  He provided me with a .jpg of the color logo.  I then sent the logo to an Etsy seller, CookiePixie.  She worked with me to custom design the wafer paper order to make the most cookies possible at the lowest cost.  I received many compliments on the vivid colors...she was great to work with.

Next, once I received the wafer papers (30 to a sheet), I began making cookie dough and baking off the cookies - I elected to go with small scalloped edge squares.  It took 4 batches of Vanilla Bean Sugar Cookie Dough rolled 3/8" thick.  Next, I prepped enough white royal icing to outline and flood 160 cookies (extras in case I screwed up).  I needed to make sure it was smooth, so it was a bit looser than usual and they turned out really nice.  One thing I will do if I ever attempt a huge project like this again, is to make a template and draw, with food color markers, an outline on the cookie of what I want to pipe.  My base coat sizes were not consistent.  Anyway, after I got them all flooded, I set them under the fans (I had to buy an extra fan to keep them all going...humidity was HIGH).  I knew I shouldn't be particularly concerned with bubbles because I knew the wafer paper would cover most everything.  However, my need to have things neat made me compulsively try to make each cookie bubble free!  I let them dry thoroughly under the fans for 24 hours.  Applying the wafer paper requires a completely dry base coat.

The next step was to cut the square logo prints.  I had read on the Cookie Pixie blog that she sometimes snipped off her corners to get good adhesion.  I did some without...and most with curved corners.  The ones with straight corners tended to be the most difficult to get to lay down flat.  Since I'd never done this before, I messed up a few.  I tried techniques I had read about on The Cookie Connection web site...and I ended up finding the most success painting the back of the rounded corner squares with corn syrup. 

 
I wiped my hands with a moist dish towel and dried them between every single application.  The deal with wafer paper...water melts them immediately.  The deal with painting with corn syrup...very sticky endeavor.  Impossible to get the edges without getting it on your hands.  I soon got into a rhythm.  Because my cookie surfaces were not consistent I learned quickly to just cut all of the squares and put them in a bowl.  Then, I'd sit three cookies in front of me and my bowl of light corn syrup and artist's paint brush.  I had a pair of tiny, very sharp scissors at my right hand and a cleaning station to my left.  I trimmed each square to fit each cookie and allowed the trim bits to fall into a ramekin.  Flipped the paper, painted the back and carefully turned it onto the cookie, gently smoothing all the way to the edges.  Move the cookie to the rack in front of the fan.  Complete the 3 cookies, re-smooth the edges...repeat 160 times.  Dry another 24 hours.

The next day, I made more royal icing and added just a spritz of water to the thick "concrete" to make the stiff icing to pipe the shell borders.  I had never been successful with making a shell border - either the icing was too loose or I didn't "get" what the motion was supposed to be like.  Then I watched Julia Usher demonstrate it on her Ultimate Cookies DVD.  I had some wax paper to the side and used it, as she instructed, to practice and make sure my tip and icing consistency were just right.  After watching her a few times, it just clicked!  I used a #13 Wilton star tip and I went to town!  I did mess up a few and let my husband eat the mistakes. 

I also wanted to eat one myself to make sure the wafer papers tasted okay.  Truth was, they didn't taste like anything.  They didn't melt as fast as I expected and I could tell there was "something" on the icing...but it tasted just fine!  150 cookies later, under the fans to dry again.  The piped border neatly covered all of the wafer paper edges.  I had every intention of piping colorful dots around the outer edge of the scallops...but I gave up.

OK - I admit by this point, I was T*I*R*E*D of cookies!  I gave myself a break and then got started on bagging each one.  I decided not to tie with little ribbons this time, but did seal each with a happy face stickers.

I boxed them up and prayed they would make it unscathed on the 390 mile journey to my destination.
The prayers were answered and the run, and cookies, were a success.  Whew! 
Deaf Club Members and the young ladies who came up with the idea of
paying it forward with a charity event...
Claire Labry, Bridget Black, and Karlie Franke!
Photograph courtesy of Alex Labry Photographer
Bon Appetit, Y'all!StumbleUpon

Saturday, July 6, 2013

What's Up Pup?

It's been a busy few weeks here at the coast.  Balancing regular work, working out, working on cookies, husband's new work schedule, and working on household chores ...results in lots of work going on!  The good news is that my husband is working a regular day shift for the first time in 20 years (woo hoo!).  He's been traveling a LOT for the past 5 years and he was soooo ready to get a job close to home with no 350 mile journeys to get home for a week-end.  That DID happen in March...but he wasn't all that happy...and he still had drive 130 miles every day.  He was very fortunate to get a job even closer to home within the same company and started two weeks ago.  It's been quite an adjustment...a good adjustment, but it is a change!  I'm back to cooking regular dinners, having more laundry, and needing to be "with the family" in the evenings instead of working on my many projects.  When you then add Zumba back into my life with an additional topping of working out in the gym 5 days per week... my free time has gotten more challenging to find! 

Blogging seems to be slipping between the cracks.  My family doesn't like to wait for photos and stuff before eating...that wore thin fairly quickly the first year or so of blogging!  Now, however, I'm starting to gently push the issue again! 

On the 4th of July we stayed at home and avoided the high volume tourist traffic heading to the island.  We love the island in the Fall and the Spring...we do NOT frequent the island much during the Summer!  Holidays and week-ends are particularly unappealing now that we live here and can enjoy a traffic-and-crowd-free season by waiting for September.

Our grill died a rusty death (a side effect of living on the Laguna Madre) and Mr. Flip Flop had bought some beautiful Choice boneless Rib-eyes at Sam's Club.  I picked up some fresh jumbo Gulf Shrimp at Quik Stop in Port Isabel and thus we had the makings for Surf and Turf...even if I had to do them in a stove-top grill pan.  They were outstanding!  We are particularly fond of baked yams so I picked up a few at the grocery store as well as some really nice fresh green beans.  I had intended to make some of Ann Smith's Sour Cream Crescent Rolls but time got away from me and we ended up with Pillsbury's Crescent Rolls instead.  We were so full from all of the good food, we could have done without the bread completely!  Everyone else had already done a nose dive into their steaks and shrimps when I realized I had only eaten one shrimp and still had a "photo op" with my plate...so here it is.  My steak was half the size of the boys' but their plates were no longer "attractive", so the smallest shows here!  It was really quite an easy dinner to throw together.  I seasoned the steaks with Weber Chicago Style Seasoning (one of our favorites after dining at the Weber Restaurant in Chicago) and while the steaks were resting, I quickly pan-grilled the peeled and de-veined shrimp.  I snapped the beans while watching one of my DVR'd shows and boiled them in simple salt, pepper, and onion powder.  Delish.  Yams went in the microwave and were perfectly tender and moist.  Yummy to the X-treme!  I only ate 3 shrimps and half of my steak...but I ate two servings of green beans and all of my yam.  We all sat around in a food-induced daze after dinner!!!

Dessert was quickly-decorated miniature star sugar cookies (eaten later that evening).  I started them late Wednesday night and finished them off on Thursday morning.  They were all gone by Friday.  Not my best work, but I was at a tired spot in the day and my hands were not cooperating with piping straight lines and my red icing was not "just right" in the consistency department.  Still, they were very patriotic looking and the family was appreciative.  They are liking the slightly revised recipe I've been using (Vanilla Bean Sugar Cookies) and that I'm rolling at 3/8" thickness instead of 1/4".  It makes for a slightly softer, more buttery textured cookie.  Mr. Flip Flop and I went to Lowe's last week-end and bought me some 3/8" untreated trim board to use as rolling guides.  They are fabulous!  Easy to roll out consistent thickness cookies.  Plus, they are much sturdier and less inclined to break when I shake them or bang them on the table to get a smooth surface.  Thicker is better I think!


On Friday I started a big 150-cookie project and spent the past afternoon, evening, and this morning busily base-coating 13 dozen cookies.  The decorating of those cookies will take several days and involve a new technique (or two) for me...so keep your eyes out for a blog post on that before long!

Hope everyone had a great 4th...we sure enjoyed relaxing at home.  Sometimes that is just the best thing in the world!

Bon Appetit, Y'all!!!

StumbleUpon

Tuesday, June 18, 2013

Red Velvet Coconut Bars

UPDATE - After Book Club:
I would now substitute a basic chocolate cake mix instead of Red Velvet.  The red from the cake mix got all over fingers, teeth, and tongues.  Since bars are meant to be handled with your fingers, and I saw how intense the red was, I did take forks and plates and lots of napkins.  It was a bit embarrassing to see how overly intense the red was.  Oh well, lesson learned.  It was really tasty though!  Try it with just a chocolate cake mix and it will do fine...although, at Christmas, it might be pretty!
------------------------------------------------------------------------
I am going to my first Book Club meeting Tuesday morning at Paragraph's on Padre and wanted to take a treat to have with coffee.  I found a recipe on Inside BruCrew Life's blog and I wanted to give it a try, but as so often happens, I didn't have all of the ingredients.  Since I'd rather be nibbled to death by ducks than go to the grocery store today, I scanned my pantry shelves.  I went crazy... I just flew by the seat of my pants and hoped it would turn out better than okay...but if it was at least okay, I'd have something to take.  I am a huge fan of Jocelyn at Inside BruCrew Life - she has a plethora of yummy desserts and I have tried several of them... not a bad one in the bunch.  I was very hopeful that my fly-by of one of her desserts would be something she might appreciate.

Here's what I ended up with:
Red Velvet Coconut Bars


Red Velvet Coconut Bars
Inspired by Inside BruCrew Life

Ingredients:

1 Red Velvet cake mix (used Duncan Hines)
6 Tbsp salted butter, melted
1/3 cup Half and Half
1 14oz can Sweetened Condensed Milk (not evaporated milk)
8 ounces Cream Cheese, softened to room temperature
7 ounce bag of Bakers Angel Flake Coconut (sweetened)
6 ounces Ghirardelli Semi-Sweet Chocolate Chips
1 tsp. brewed coffee
1/2 cup heavy cream

Method:

WEAR GLOVES
Preheat oven to 350 degrees Fahrenheit.
Prepare a 9x13 pan with cooking spray (I used a glass pan because I wanted to see what the layers looked like) .
Combine the cake mix, melted butter, and half and half until crumbly and wet.

Press one half of the dough evenly into the bottom of the pan.  Set the remaining dough to the side. (If you failed to heed my warning to wear gloves - well, you now have red hands)


In the bowl of a stand mixer, beat the softened cream cheese and sweetened condensed milk until mostly smooth.  Add the coconut and mix on low.
Pour the cream cheese mixture over the dough in the pan and smooth out evenly with a spatula.

Pull and drop bits of the rest of the cake dough over the top of the cream cheese mixture.  The dough is very "doughy" so try to pull small pieces and get them evenly over the top...it will not provide full coverage.  That's okay.

Bake at 350 degrees 28-30 minutes.  There was still a bit of jiggle in the middle when it came out.  That's okay too. It firms up when cooled.  The edges are lightly browned.  Place pan on rack and allow to cool completely.

Place chocolate chips in a heat resistant mixing bowl and add one teaspoon of brewed coffee.  In a small saucepan, bring the whipping cream just to a slight boil, stirring the entire time.  Remove immediately from the heat as it reaches a boil and pour the hot cream over the chocolate chips.  Stir until mixture is creamy and richly chocolate!  You have ganache....yum.


Spread thinly over the top of the bars.  Let set completely before cutting into squares.

The "red" part of the Red Velvet is quite messy and impossible
to cut without getting color on the white portion.
Regardless, they are delicious!
 

Bon Appetit, Y'all!!!

StumbleUpon