The South Padre Island Flip Flop Foodie Brownsville restaurants

Search The South Padre Island Flip Flop Foodie Blog!

Showing posts with label topping. Show all posts

Thursday, June 9, 2011

PINEAPPLE MANGO SALSA

About 20 people gathered for a beachfront fajita dinner on Tuesday night...long term friends vacationing on South Padre Island has been one of my reasons for being away from the blog.  Maybe some day I'll learn to blog from my cell phone...but for now, I've been enjoying sea, sand, food, and friends.  The teen and I have been coming home each evening exhausted beyond belief.  I'll catch up with the blogging eventually!

This is a quick and easy post - so while I wait for the teen to wake up so we can head back to the beach again, I thought I'd try to get this post finished!

My assignment Tuesday night was to bring homemade salsa and grated cheese for the fajita dinner.  Cheese was easy....and you've possibly seen my homemade salsa recipe I posted a few months ago.  However, I wanted something to hit the "tropical notes" of my friends' vacation...so I decided to try to create a tasty Pineapple Mango Salsa...it turned out delicious!!!  I made a big batch of my original recipe homemade salsa and a smaller batch of this new trial recipe...I loved it so here's the recipe:

DEBBI'S PINEAPPLE MANGO SALSA

Ingredients:

1 15-ounce can of peeled stewed whole tomatoes -
drain juice 
1/4 large sweet yellow onion - peeled and rough chopped
1 medium ripe mango, peeled, flesh removed from the seed - you don't want the mango overly ripe as it gets too fibrous...so just gently "giving" when squeezed up near the stem.  The color should be more green than yellow for this recipe.
1/2 fresh golden pineapple - peeled, cored, and "eyes" removed (reserve 1/4 of the whole pineapple)
1 medium to large jalapeno seeded and deveined (reserve 1/2 - hold to the side)
1/2 tsp kosher salt
1/2 tsp onion powder

1/2 tsp chili powder1 pinch sugar
Juice of 1 large or 2 small limes
1/4 cup fresh cilantro leaves (pick from stems)


The Extras:

2 plum tomatoes - diced - held to the side
2 thinly sliced green onions - held to the side
1/4 cup fresh cilantro leaves roughly chopped and held to the side
1/2 jalapeno - reserved from above - small diced - held to the side

1/4 pineapple - reserved from above - diced - held to the side

METHOD:

In bowl of food processor, add all of the ingredients except those listed in "The Extras".

Pulse just until everything chopped evenly.
Pour into mixing bowl.

Add "The Extras" and stir.


Allow to sit, covered, for at least one to two hours so the flavors can incorporate.

Serve with tortilla chips, as a salad dressing, as a fajita topping, over fish or chicken or with shrimp!  I can picture this being an elegant addition to a recipe or popped into a bowl with some chips on the side for a casual and deliciously different snack.

Freshly spicy, yet sweet.  Awesome combination of flavors.

Bon Appetit, Y'all!!!


SHARED WITH:
StumbleUpon

Saturday, May 14, 2011

MOSCATO TRIFLE DELIGHT


I tried a bottle of flipflop Moscato recently and it was like ambrosia of the Gods. I love to sip Moscato but as usual, these days all things in my brain seem to head towards "hmmmm, wonder what else can I do with this?" when I try something new...imagine that!

I remembered a concoction I used to eat years and years ago (like 30 years ago) with angel food cake and a cream pie filling and coconut sprinkled over it all - it was quite heavenly....and then my brain segued to all the beautiful blackberries in the stores…available for a really reasonable price.  I was a hop skip and a jump away from a new recipe with an old favorite recipe mixed up with blackberries so loved by my family and this incredibly smooth and sweet Moscato.  I really think it’s the best Moscato I’ve ever imbibed!

I started this blog post over a two weeks ago and kept tweaking it and imagining the flavors together...then I finally decided I was making it. I bought a package of luscious blackberries and got a new bottle of Moscato...so here goes!

flipflop Moscato adds a touch of mature elegance to a simple trifle


MOSCATO TRIFLE DELIGHT
Created by Debbi Hook

Ingredients:

1 package fresh blackberries

1 teaspoon orange zest
3/4 cup granulated sugar
1 cinnamon stick
3/4 cup flipflop Moscato wine

1 small box of instant French Vanilla pudding - prepared per box directions and chilled

2 cups Whipping Cream
2 tsp pure vanilla bean paste
1/3 cup powdered sugar

1 small Angel Food Cake torn into pieces (store bought is fine - I bought a loaf of angel food cake)

Trifle Dish or Individual Wine Glasses

METHOD:

In small saucepan bring the wine, 3/4 cup sugar, cinnamon stick, and orange zest to a low boil and immediately reduce to simmer - simmer until reduced by half. (about 3/4 cup of liquid - takes about 30 minutes). Remove from heat and pour into a small pitcher (I use a measuring cup with a spout) and place pitcher in bowl surrounded by ice to chill for about 30 minutes. (if you don't like to eat zest, you can strain before chilling). Remove cinnamon stick.
Simple syrup ingredients

The syrup is chilling after reduction


Whip cream, powdered sugar, and vanilla paste just until stiff.

Adding Moscato Syrup and Sweetened Vanilla Whipped Cream to the Pudding

Lighten pudding by mixing 1/2 of whipped cream into prepared chilled pudding.
Reserve 2nd half of whipped cream for later
Stir in 1/4 cup of chilled syrup into pudding - reserve rest of syrup for later.

The pudding lightened up and ready for layering

Cover bottom of trifle dish with 1/3 of pudding mix
Press in 1/2 of torn cake pieces
Sprinkle cake with 1/2 the blackberries and drizzle with 1/2 of the remaining syrup
Cover berries with second third of pudding mix
Press in last 1/2 of torn cake pieces
Sprinkle cake with second half of the berries, reserving a few for later.
Drizzle with the remaining syrup
Cover fruit with final amount of pudding and smooth over top.
Spread rest of whipped cream over top of pudding and decorate with the reserved blackberries mounded in the center of the whipped cream.

If you decide to create individual desserts in a wine glass - apportion accordingly. That's what I decided to do.

A Moscato syrup added to the custard and drizzled over the cake - yummilicious!

What a simple yet elegant dessert with the hint of wine in the background.  I would happily serve this at a dinner party or take it to a barbecue in a simple trifle dish.  The vanilla bean paste imparts a nice look to both the lightened pudding and the whipped cream topping.  The syrup is absolutely decadent tasting…just the hint of cinnamon and orange are a perfect complement to the sweet Moscato reduction.  I didn’t think anything could top the flipflop Riesling syrup I made…but this almost blows it away. 

I could picture making a cordial out of this syrup with some unflavored gelatin and some whipped cream on top…wouldn’t that be a kicked up adult kind of Jello?!?  I might have to try that!

I am really enjoying using the flipflop wines in recipes...I can't ask for a better addition to my flippity floppin’ world!  AND at such a reasonable price…if you can find it, you should lay in a supply.  You are going to want this on your summer table!

Bon Appetit, Y'all!

SHARED WITH:


StumbleUpon

Thursday, May 12, 2011

FRESH PINEAPPLE UPSIDE DOWN CAKE

I love fresh pineapple and the Gold ones especially.  Not a huge fan of maraschino cherries but I do have fond memories of my mom baking pineapple upside down cakes when I was a child.  They were always made with canned pineapple rings with a maraschino in the middle of each ring....fresh pineapple was pretty much a luxury in those days.  I remember shipping pineapple back from Hawaii when I went there in 1976 and eating so many while I was there I got sores in my mouth from the acid.  It was the start of a lovely relationship with pineapple of the fresh sort.  This week they are less than $2.50 at the grocery stores down here so I grabbed one and decided today I would make an upside down cake.

Cutting a pineapple is easy once you know how.  You start by cutting off the top and the bottom so you have a nice stable cutting surface. 
Even bottom surface makes for easier cutting

Starting from the top, cut down the sides, removing the rough outer skin - making sure to get all the "eyes" and any visible black seeds. 
Cut straight down the sides, turning as you go, with a very sharp chef's knife
Easy to get a nice big peeled pineapple!

Since I don't have a pineapple corer, I generally cut the sides off, leaving the core intact...if it is a juicy pineapple I suck the juice off the core - the cook's treat, and discard it. 
Cut straight down the outer edge of the core - I end up with 4 pieces

For the cake, I'll make about 1/2 inch slices from the largest piece to put in the bottom of the pan and fill in with smaller pieces.  Obviously, they will end up on top.
Half-moon slices for the bottom of the cake pan


So, here's the recipe I decided to use.  It's a basic yellow cake mix with a buttery brown sugar mixture to go in the bottom of the pan with the pineapple slices.  When you turn it out, it's a luscious sweet glaze.  I haven't eat one in several years so I'm ready to get started!

PINEAPPLE UPSIDE DOWN CAKE
Adapted from JoyofBaking.com and MarthaStewart.com Recipes

TOPPING:

Ingredients

1/2 cup butter, cut into chunks
1 cup tightly packed light brown sugar

Slices of fresh pineapple or rings of canned pineapple

Method:

Preheat oven to 350 degrees Fahrenheit and place rack in middle position.
Prepare 9 inch round cake pan by spraying with non-stick baking spray.  I use Baker's Joy.  (or you can lightly butter and flour cake pan instead)  This time I used an 8-inch cake pan and regretted it.  It came up over the edge when it rose and I had to cut a little lip off the cake's top (which became the bottom).  No biggie..it didn't overflow, but it needed another inch.

Place the butter and brown sugar in a small sauce pan over medium heat and stir until butter and sugar are melted together. 

Stop stirring and allow to cook just until bubbles start to form around the edge of the pan - you can swirl, but don't stir.  Remove from heat when you see bubbles forming around edge.


Pour topping into pan and shake until evenly distributed.
Pat pineapple dry and place evenly on top of the butter/sugar mixture.
Topping for the cake, the butter and brown sugar sauce topped with pineapple


YELLOW BUTTER CAKE:

Ingredients:

3/4  cup unbleached all purpose flour
3/4 cup cake flour (not self-rising)
2 teaspoons baking powder
1/2 teaspoon kosher salt
1/2 cup butter - softened to room temperature
1 cup granulated white sugar
2 large eggs - room temperature
1 1/2 teaspoons pure vanilla extract
2/3 cup milk - room temperature

Method:

In a separate bowl, whisk together both flours, baking powder, and salt. Set aside.
Whisked dry ingredients


In bowl of stand mixer, cream butter and sugar until fluffy (takes about 3 or 4 minutes).
Add eggs 1 at a time until each is incorporated.
Add vanilla extract and mix until incorporated.

With stand mixer on low, add 1/3 of the dry ingredients and allow to incorporate.
Add 1/2 of the milk and mix to incorporate.
Add 1/2 of the remaining dry ingredients - mix to incorporate
Add the remaining milk and mix to incorporate.
Add the last of the flour and mix to incorporate.
Batter is ready to be spooned on top of pineapple slices in cake pan

Spoon batter over pineapple and smooth with an offset spatula.
Bake 45-55 minutes (when tester comes out clean - be sure not to stick it into the pineapple stuff at the bottom).

Allow cake to cool on wire rack for about 10 minutes.  Run a sharp knife around the outside edges to ensure a good release.  Turn cake onto serving platter.  If any pineapple pieces get stuck, carefully release them with a spoon and place them back into their "spots".  Be careful of the hot topping.

I like it best served warm with a big scoop of Vanilla Ice Cream...or a dollop of sweet whipped cream. All by itself is just dandy as well!  It is just as good the next day.

This is a great old-fashioned cake and I can pretty much guarantee it will be breakfast with a cup of hot coffee!

Bon Appetit, Y'all!!!

Shared with:


StumbleUpon

Wednesday, May 11, 2011

PICKLED RED ONIONS

I've been making pickled onions and cucumbers for years just with a sweet and tart vinaigrette and a few hours-to-overnight in the fridge.  Then I began seeing a lot of recipes, especially for tacos, with specifically "pickled red onions"...recipes where they cook the brine and they last for a long time.  I dug the mandolin out of the storage unit and brought it up to the condo and bought a red onion.  I decided to give it a try.  I absolutely adore pickled things (well, not pickled pigs feet nor pickled boiled eggs...but most pickled things).

I found a David Lebovitz recipe (he attributes it elsewhere also) and it was so simple I thought it would be a great first effort.  We're having soft tacos this week at some point so these should be ready for me on that evening!

PICKLED RED ONIONS
Adapted from David Lebovitz recipe

Ingredients:

3/4 cup white vinegar
1/4 cup granulated white sugar
Pinch of kosher salt
1 Bay Leaf (I didn't have one so I had to skip it)
5 Allspice Berries
5 Whole Cloves
1/8 teaspoon dried red pepper flakes
5 cracked black peppercorns (pop them with the bottom of a heavy pan to crack open)
1 large red onion, peeled and sliced into very thin rings - I mostly got half rings when I used the thin slice setting.  My mandolin is kind of "different".

Using the guard on the mandolin as it is unbelievably sharp!

Extremely thin onion slices - not many whole rings - but they will work!

Method:

In a non-reactive pan, bring all ingredients except onion to a boil until sugar dissolves.
The seasonings going into the vinegar and sugar mixture -
guard from inhaling - vinegar fumes are strong!

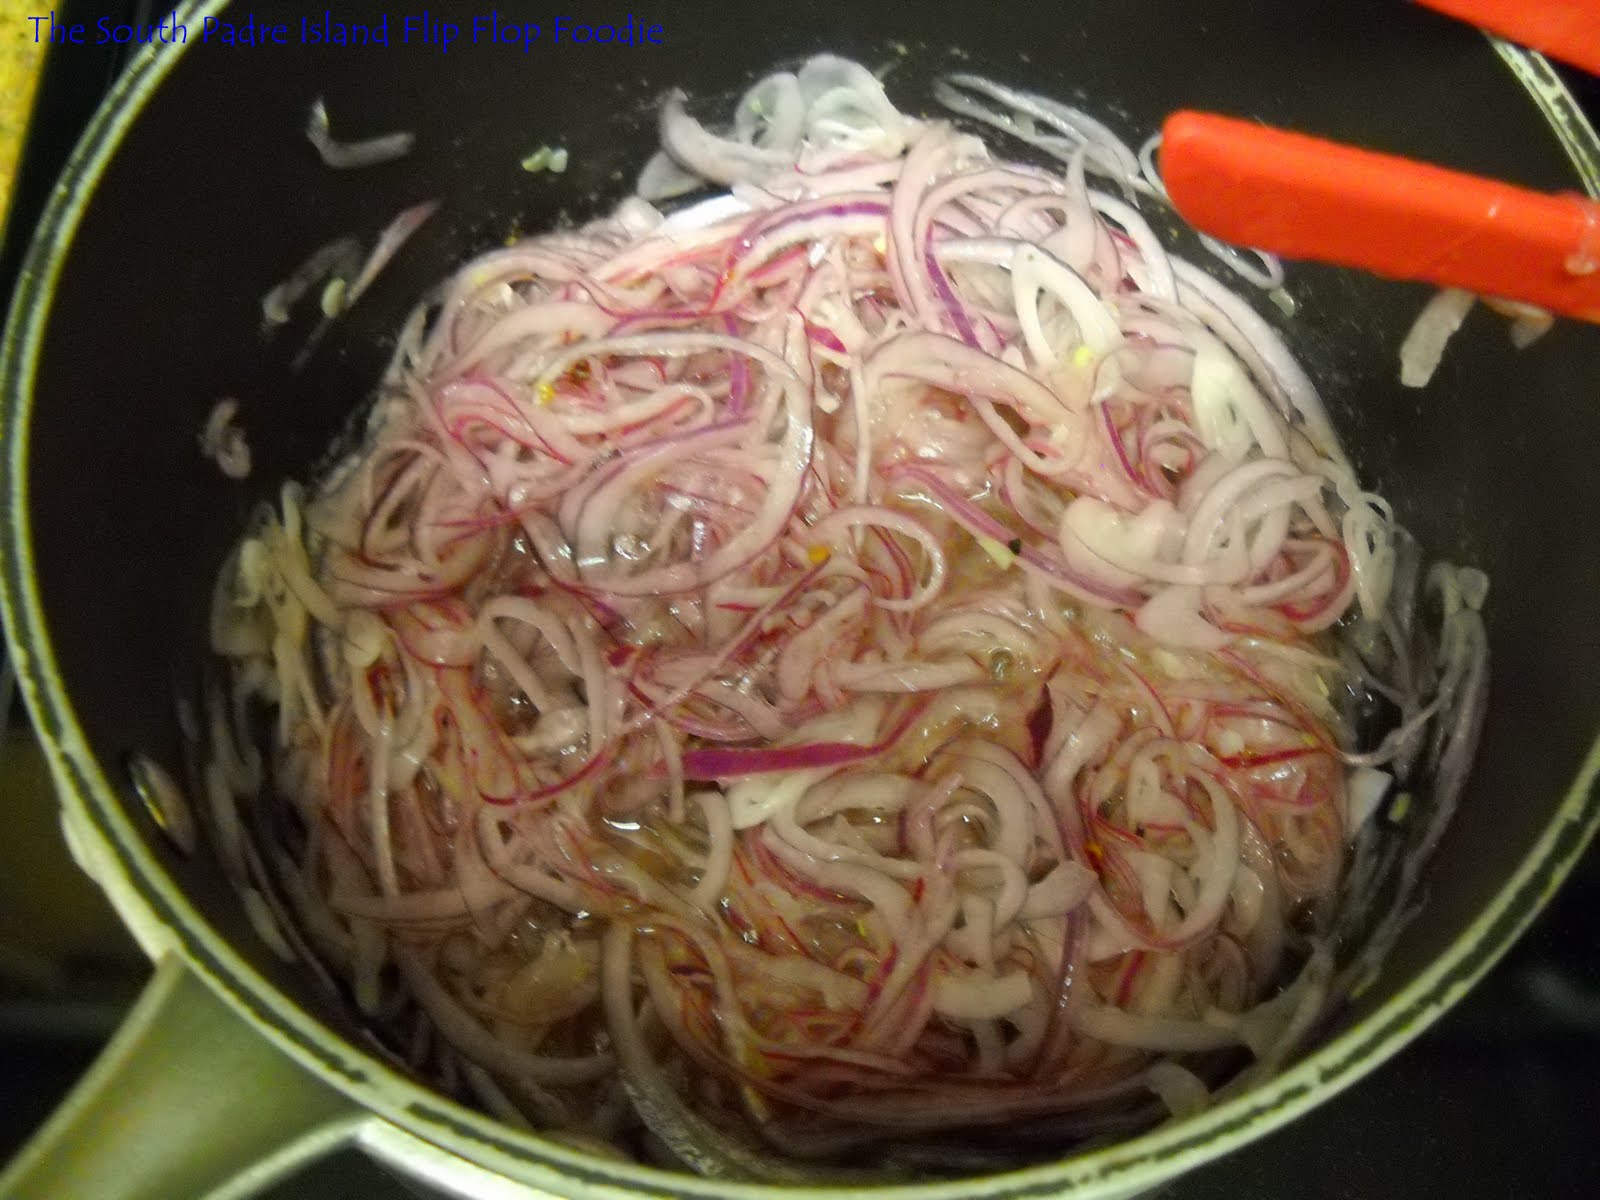
Add onion slices, reduce heat to a simmer, and gently simmer just for 30 seconds.
Instantly the color brightens to pinkish purple in the hot brine

Remove from heat and allow to sit until cooled completely to room temperature.
As they cool they turn more and more pink

Transfer onions and juice to a clean jar and refrigerate until use.
Pretty in Pink :-)

These are reported to be able to last for several months but are best eaten within a week.
I can't imagine they will last that long in my house :-)  I could probably sit down and eat the entire batch in one sitting.  Yum!

Bon Appetit, Y'all!!!StumbleUpon

Sunday, May 8, 2011

A LOVELY MOTHER'S DAY WEEK-END

My husband surprised me by arriving in the middle of Friday night instead of Saturday afternoon as expected.  It's wonderful when he pops in unexpectedly - and the more time we have together, the better.  It threw off my baking plans for Saturday morning though (which is quite alright with me) so I picked up a pre-made angel food cake to go with some fruit I had on hand and pulled out some freezer items so I didn't spend the day cooking and we could spend the day enjoying ourselves together instead.

Saturday night's dinner was the other half of the Swedish Meatballs I had made and frozen in a vacuum sealed bag with the rest of the bag of Amish Noodles I had (of which my husband is particularly fond), a deliciously fresh chopped salad with crisp iceberg lettuce, chunks of cucumber and green onions, black olives and feta cheese with a Champagne Vinaigrette, some garlic toast, and dessert of angel food cake topped with sugar macerated fresh strawberries and seriously delicious fresh blackberries further topped with a rather huge dollop of Sweet Vanilla Bean Whipped Cream.  Both my husband and son raved about the whipped cream of all things.  They enjoyed the visual appeal of the vanilla bean seeds in the cream and the glistening pieces of fruit slathered over the angel food cake slices.  Pretty good for a throw-together meal.

I didn't take any photos this time but here's how I made the whipped cream:

SWEET VANILLA BEAN WHIPPED CREAM

1 1/2 cups heavy cream
1/2 tablespoon Vanilla Bean Paste
3/8 cup granulated sugar

Add all ingredients to bowl of stand mixer with whip attachment and start off slow to get the sugar dissolving into the cream.  Increase the speed to medium high and beat until peaks form.  Be careful not to go too far or you'll make butter.  I can see when the cream starts "staying in place" that it is about ready.  I take the whip attachment off the stand and stir everything with it manually to ensure it is all the way ready.  Deliciously vanilla tasting and sweet.

For the fruit, I just rinsed and quartered the strawberries and rinsed the blackberries and tossed them in a bowl with 1/4 cup of granulated sugar and let them sit on the counter for about an hour before serving.  They made their own little sauce which the cake absorbed.  The fruit is tastiest at room temperature - very summery tasting dessert.

The FoodSaver is really a wonderful product - the meatballs and sauce were as tasty as the day I made them.  I did add a little half and half to thin out the sauce a bit because I knew the noodles were going to suck up what sauce there was.  I cooked the noodles, drained them, and added the thawed meatballs and sauce into the pasta pan and dumped the noodles on top, stirred gently, saw they needed a little thinning and added about 1/4 to 1/3 cup of half and half.  I didn't measure but I think that's about right.  It turned out pretty perfect!

We all left the table with full tummies and I found my husband rustling through the fridge looking for the leftover noodles for a before-bedtime-snack.  I think there were only one or two meatballs left but the sauce with the noodles is what I knew he'd go searching for...and I was right.

We decided to skip brunch Sunday morning and go out to dinner Sunday evening instead.  For lunch I whipped up a recipe of Chicken Salad Spread and served it on hamburger buns.  Quite delicious.

I'll write about our dinner later.  For now, I'm carrying on with the R&R associated with Mother's Day...  I've talked to my Mom, both of my older boys, one granddaughter, and texted my sisters.  All-in-all it's working out to be a great day!

Bon Appetit, Y'all!StumbleUpon

Sunday, March 20, 2011

Strawberries with my Angel Food Cake

I didn't have time to do anything today besides sit in traffic for an hour to get to Wal-mart, watch some DVR'd television with my husband (the scary stuff - Criminal Minds - I don't watch it without him here), fix some fabulous Shrimp Alfredo for dinner...and throw together our dessert.

No time for extra recipes (I've already done this Alfredo recipe) or baking or writing for that matter.

So, here's a quick photo and summary of how I put together our dessert.

A thick slab of the Angel Food Cake I baked yesterday, some lightly macerated sliced strawberries prepped with extra fine sugar 2 or 3 hours before serving, and some freshly whipped vanilla-sugar cream.  (I used sugar that had vanilla beans in it - beautifully vanilla scented sugar)

I'd never had a piece of homemade angel food cake before.  This is so hands and shoulders above the stuff we usually get in the plastic container at the grocery store...there is no comparison.  Light, sweet, flavorful, delicate...downright heavenly!

Yum...and it may be Tuesday before I get anything further posted.  I'm going to enjoy my time with my husband being home!

Bon Appetit, Y'all!
Yes - it tastes as good as it looks!  Simple and delicious....
StumbleUpon

Wednesday, March 9, 2011

FETA CHEESE DRESSING

After weeks of baking cupcakes and cookies...I felt the need for salad.  A wedge salad specifically.  I love iceberg lettuce.  I don't care what anyone says about the lack of nutrition...I love it.  The crisp cool taste is my favorite lettuce.  The only problem with most restaurant wedge salads is 9 times out of 10, their dressing of choice is Bleu Cheese.  Now, it is okay.  But I LOVE the same basic dressing, made with Feta Cheese instead.  There's still a tart bite...but not quite as sharp.  My hubby and my mom will both order Bleu Cheese if the restaurant has it, but not me.  I either go for a Vinaigrette/Italian, Ranch, or Catalina.  At home, I mix up a little container of balsamic vinaigrette and have it on hand just for me.  No one else likes it. 

Anyway, I was flipping through the Dining With Diane book I mentioned last month and saw a Feta Cheese Dressing from the old Basil's Restaurant in Austin.  I mixed up a batch and it tastes wonderful!

Spooned over a wedge of iceberg lettuce with some crumbled crispy Applewood Smoked Bacon I brought home from Central Market, some thinly sliced green onion, a sprinkling of avocado, and a generous handful of diced cucumber.  Pretty much my idea of a perfect salad.  I decided to make just a half batch actually...so I'll detail the exact amounts I used today below the original recipe.


Try this salad dressing - it's lip smacking deeelicious!

FETA CHEESE DRESSING
Recipe by Bruce Silverman, Basil's Restaurant
Dining with Diane - The Austin Restaurant Cookbook
by Diane Payton Gomez

1/2 pound feta cheese, crumbled
1/2 cup mayonnaise
1/4 cup buttermilk
1/4 cup sour cream
2 tablespoons chopped onion
1 large clove garlic, pressed
1 tablespoon white vinegar or lemon juice
dash Tabasco sauce
1/2 teaspoon Worcestershire sauce

Stir mayonnaise, buttermilk and sour cream together until smooth.  Add remaining ingredients including feta cheese.  This recipe will make enough for 2 or 3 large salads and will stay fresh in the refrigerator for 10 days.

HALF RECIPE

1/4 pound feta cheese, crumbled (I actually used more like 3 oz.....half of a 6 oz. container of Athenos traditional crumbled feta)
1/4 cup mayonnaise (I used Hellman's)
2 Tablespoons buttermilk (I used the buttermilk from the homemade butter)
2 Tablespoons cup sour cream
1 tablespoon chopped onion (I used very finely diced yellow onion)
1 small clove garlic, pressed
1/2 tablespoon white vinegar or lemon juice (I used lemon juice)
3 or 4 drops of Tabasco sauce
1/4 teaspoon Worcestershire sauce

Man, this is some good stuff!  This photo shows how much a half recipe makes... let it sit for about an hour before serving...lets the onion and the garlic get all snuggly with the creamy stuff...yum yum YUM!


Bon Appetit, Y'all!!!StumbleUpon

Monday, February 7, 2011

Cherry Breakfast Bites

My friend, Dana, posted this tantalizing note on Facebook last week....

"Made easy breakfast this morning... dipped biscuits in butter, then cinnamon/sugar, then made a thumbprint in middle, and filled it with a tsp of cherry pie filling... Iced with powdered sugar and milk mixed together... Awesome!"

...and then she posted this photo

Photo Source:  Dana Alexander
I told her that sounded like a future Flip Flop Foodie blog post!  Now, it is Monday morning, I have no time to write a long blog, bake, or be creative.... a million things to do...so I'll leave you with this fun little addition to the "quick breakfast" recipe list.  Thanks, again, Dana for sharing some great recipes!

A Quick Add-on Note:

These would be great with apple pie filling or any other favorite canned pie filling.

I think I am going to make them rolled in sugar - without cinnamon - and use a bit of lemon curd in the center...and add some lemon zest to the glaze...it's a mini danish...I can never find a good lemon danish down here...so I'm thinking this will be breakfast one morning this week!!!

Bon Appetit, Y'all!StumbleUpon

Saturday, February 5, 2011

THE ACCIDENTAL CHOCOLATE CHEESECAKE

The Accidental Chocolate Cheesecake
Accidental (adj.) Occurring unexpectedly, unintentionally, or by chance.

Yep, that's the ticket...occurring unexpectedly by chance.

I was idly flipping through cookbooks, feeling like I wanted something, but I didn't know what.  I was sort of looking for something that was a bit different - something new - and something I had the ingredients to produce.  I was NOT going to the store!  The day had warmed up considerably after the past few days of unseasonable untropical icy weather and I felt all cozy sitting in front of the window warmed by the sunshine.  I believe the word is indolent....I really didn't want to overly exert myself by leaving the house.  My mom would probably call that lazy :-)  Whatever!

I stood in front of the open cabinets for a while; just taking in what was there.   I stood in front of the open refrigerator like a teen-ager "looking for something to eat".  I had 4 bricks of mistakenly purchased fat free cream cheese just staring at me... I really didn't mean to buy them, I was in a hurry, and I really don't like fat free cream cheese.  <sigh>  BUT, I thought to myself, maybe I could mix one with 1/2 brick of cream cheese that is fully fatted and make a cheese cake?  Hmmm...no graham crackers. <another sigh> So, I go flop back on the couch and flip through another cookbook. (you are getting the picture I'm sure...)

My mom got me a Southern Living Christmas Cookbook for Christmas...and I had stuck it on the shelf after flipping through it thinking I'd review it again when it got closer to the next Christmas.  Today I started thumbing through...thinking dips...cream cheese...more savory stuff.  Then I flipped to a page with a photo of  Hot Fudge Cheesecake.  Now, I didn't have a lot of the ingredients (including the size pan called for) so I decided I was going to take the ingredients I did have, the pan I did have, and change things up.  What drew me to this recipe besides the nice photo, was the first ingredient in the crust...crackers.  Huh?  Saltine crackers and walnuts (also which I did not have).  But, I had whole grain crackers...and pecans...and soy nuts...

So, my recipe-creating mind started thinking (my husband would say he could smell the wood burning).  Worst thing that could happen is I would use up some stuff that I didn't normally use.  The best thing that could happen is it would be a new recipe with a twist...and it would be good :-)

So, tossing lethargy aside, I got busy.

THE ACCIDENTAL CHOCOLATE CHEESECAKE

Ingredients:

1/4 cup roasted salted soy nuts
1/4 cup pecan halves (or use all pecans and skip the soy nuts)
1 cup crushed multi-grain saltine crackers (I used Nabisco Premium)
1/4 cup granulated sugar
7 tablespoons unsalted butter, melted

6 ounces semi-sweet backing chocolate (I used Baker's)
3/4 cup butter

8 ounces Fat Free Cream Cheese
4 ounces regular Cream Cheese
3/4 cup sugar
3 large eggs

Method:

In small bowl of food processor, process soy nuts and pecans then add crackers and pulse until finely chopped.  The soy nuts never got "fine" - so they added the "crunch" to the crust.  Add 1/4 cup sugar and pulse until combined.

Pour crumb mixture into mixing bowl and add melted butter, mixing until fully coated.

Preheat oven to 350 degrees.  Wrap aluminum foil around the outside of an 8-inch spring form pan. (I do this with all cheesecakes that have a buttery crust because I have had butter in the bottom of my oven on more than one occasion)  Lightly spray inside of pan with cooking spray.  Press crumb mixture into bottom of pan and press just slightly up the edge.  Place pan on top of baking sheet and place in oven.  Bake for 8 minutes.  Remove to a wire rack, let cool.  Reduce oven temperature to 300 degrees.
baked crust cooling

Combine chocolate squares and 3/4 cup butter in a heavy saucepan.  Cook over medium-low heat until mixture is melted and smooth, stirring often with whisk.  Remove from heat, and let cool.  Pour into measuring cup with pourable spout to finish cooling.
butter and chocolate - nice and smooth

Place both cream cheeses in the larger bowl of your food processor and pulse until smooth.  Add 3/4 cup of sugar and pulse until incorporated - scrape down sides if necessary.  Add eggs, one at a time, through shoot, with processor running.  Stop and scrape down bowl.  Pour cooled chocolate through shoot, with processor running.  Stop and scrape down bowl and pulse a few more times.

Prepared batter


Pour batter into cooled, prepared crust.

Bake at 300 degrees for 50 to 60 minutes, or until almost set.
Turn oven off.
Let cheesecake cool in oven for 20 minutes.
Remove to wire rack, let cool to room temperature.

Remove sides by carefully running a thin sharp knife, dipped in warm water, around the edge of the pan.  Release spring and carefully remove side.  Serve cheesecake at room temperature or cold from the refrigerator. (we ate it at room temperature, unlike most cheesecakes that are chilled)

The original recipe called for a Hot Fudge Sauce.  But I started thinking about an Ebony and Ivory look (the song was playing in my head) and decided on a White Chocolate sauce for the top since I happened to have some white chocolate bark from dipping cake balls and some heavy cream...viola, a white chocolate sauce.  Hopefully won't harden like a cake ball coating with the added butter and cream...but will actually be thick on the top to cover a couple of unsightly bubbles that rose on my cheese cake...oops, who knows why that happened?

WHITE CHOCOLATE SAUCE

Ingredients:

6 ounces white chocolate bark
1/2 cup heavy cream
1 tablespoon butter
1/4 teaspoon vanilla extract

Method:

Place heavy cream in a small heavy saucepan over low medium heat.  Rough chop the white chocolate bark and add to warming heavy cream.  Whisk over medium low heat until white chocolate melts and mixture is smooth.  Don't leave it, white chocolate burns easily.  This went really fast.  Remove from heat and whisk in vanilla and butter.  Pour over top of cheesecake... or pour over individual slices, whichever you prefer.

Sooooo, how was it?  My family says...."hmmm, not bad - has a smooth texture!" and that person (the teen) is not easily convinced to try a new item with unusual ingredients.  He is now on his second serving.  The hubby gave it a "7".... I think he liked it better before I told him it had crackers in the crust.  His first response was "that's good!".  The teen is a tough judge...he gave it a 7.5 and his dad gave it a 7.  I don't know what it takes to get a high score at this house!  I'll keep trying though.  I give it an 8.5...really good texture - surprisingly so, considering the use of fat free cream cheese.  It really improved the entire depth of flavor to have the white chocolate sauce over the top.  In retrospect, I would not have poured the sauce all over the entire cheesecake...I would have served it drizzled over the individual slices.  But, I didn't so it is all pooled around the bottom of the cheesecake.  I like the texture of the crust...the crunch...it's different... and that's what I was looking for with this creation...so I'm happy with the end game.  A good chocolate cheesecake that was a little "different".


Bon Appetit, Y'all!!!StumbleUpon