The South Padre Island Flip Flop Foodie Brownsville restaurants

Search The South Padre Island Flip Flop Foodie Blog!

Showing posts with label apple butter cookies. Show all posts

Friday, May 31, 2013

Graduation Cookies

I made a little over 6 dozen graduation cookies this past week.  The entire endeavor took about 6 days...a day of baking, another day of baking and making royal icing, a half day of preparing 12 bags of royal icing in various consistencies and colors (at the time I was thinking I'd be decorating Memorial Day cookies too...but those only got base coated and I gave up on them to finish the cookies that needed to be shipped).  The rest of the days were spent decorating, drying, balancing family time, putting on another layer, more drying... and it was very humid.  I had 3 fans going almost the entire time.
It was a labor of love!

Shipping cookies has not been successful for me in the past.  My poor kids and grandkids have received cracked and crumbled cookies when I have tried sending via US Postal Service.  This time, I bubble -wrapped the heck out of them and put them in a larger box.  Mission fairly accomplished. I have heard from both of the moms now.  One batch had only 1 cookie broken...the skinny #1 in the number series 2013.  The other mom reports 4 cookies broke...a tassel on one of the caps, one of the diplomas, and 2 stars...not bad I guess...but not 100%)...here's a picture my niece sent of the survivors.  I'm hoping for a picture from the other mom too :-)


The survivors for Addison - Lago Vista High School grad 2013 - yay!
Photo by Melanie Wiesman


I made several  large cookies to go on a platter, if desired, and a lot of medium-sized cookies and about a dozen or more minis.  I'm not the best at writing on cookies, but I made the attempt anyway.  The more I did it, the better I got at spacing.  That's my downfall...spacing.  I don't have a KopyKake projector, so it is always free-hand for me.  It's another of those things I need to practice on more!

So, to Addison (my nephew) and Karlie (our dear friend) - congratulations on your graduation from High School, I hope you both have wonderful graduation parties, and I hope you know that our family is there with you in spirit.  Hope the cookies are yummy and you enjoy eating them and sharing them with your guests.

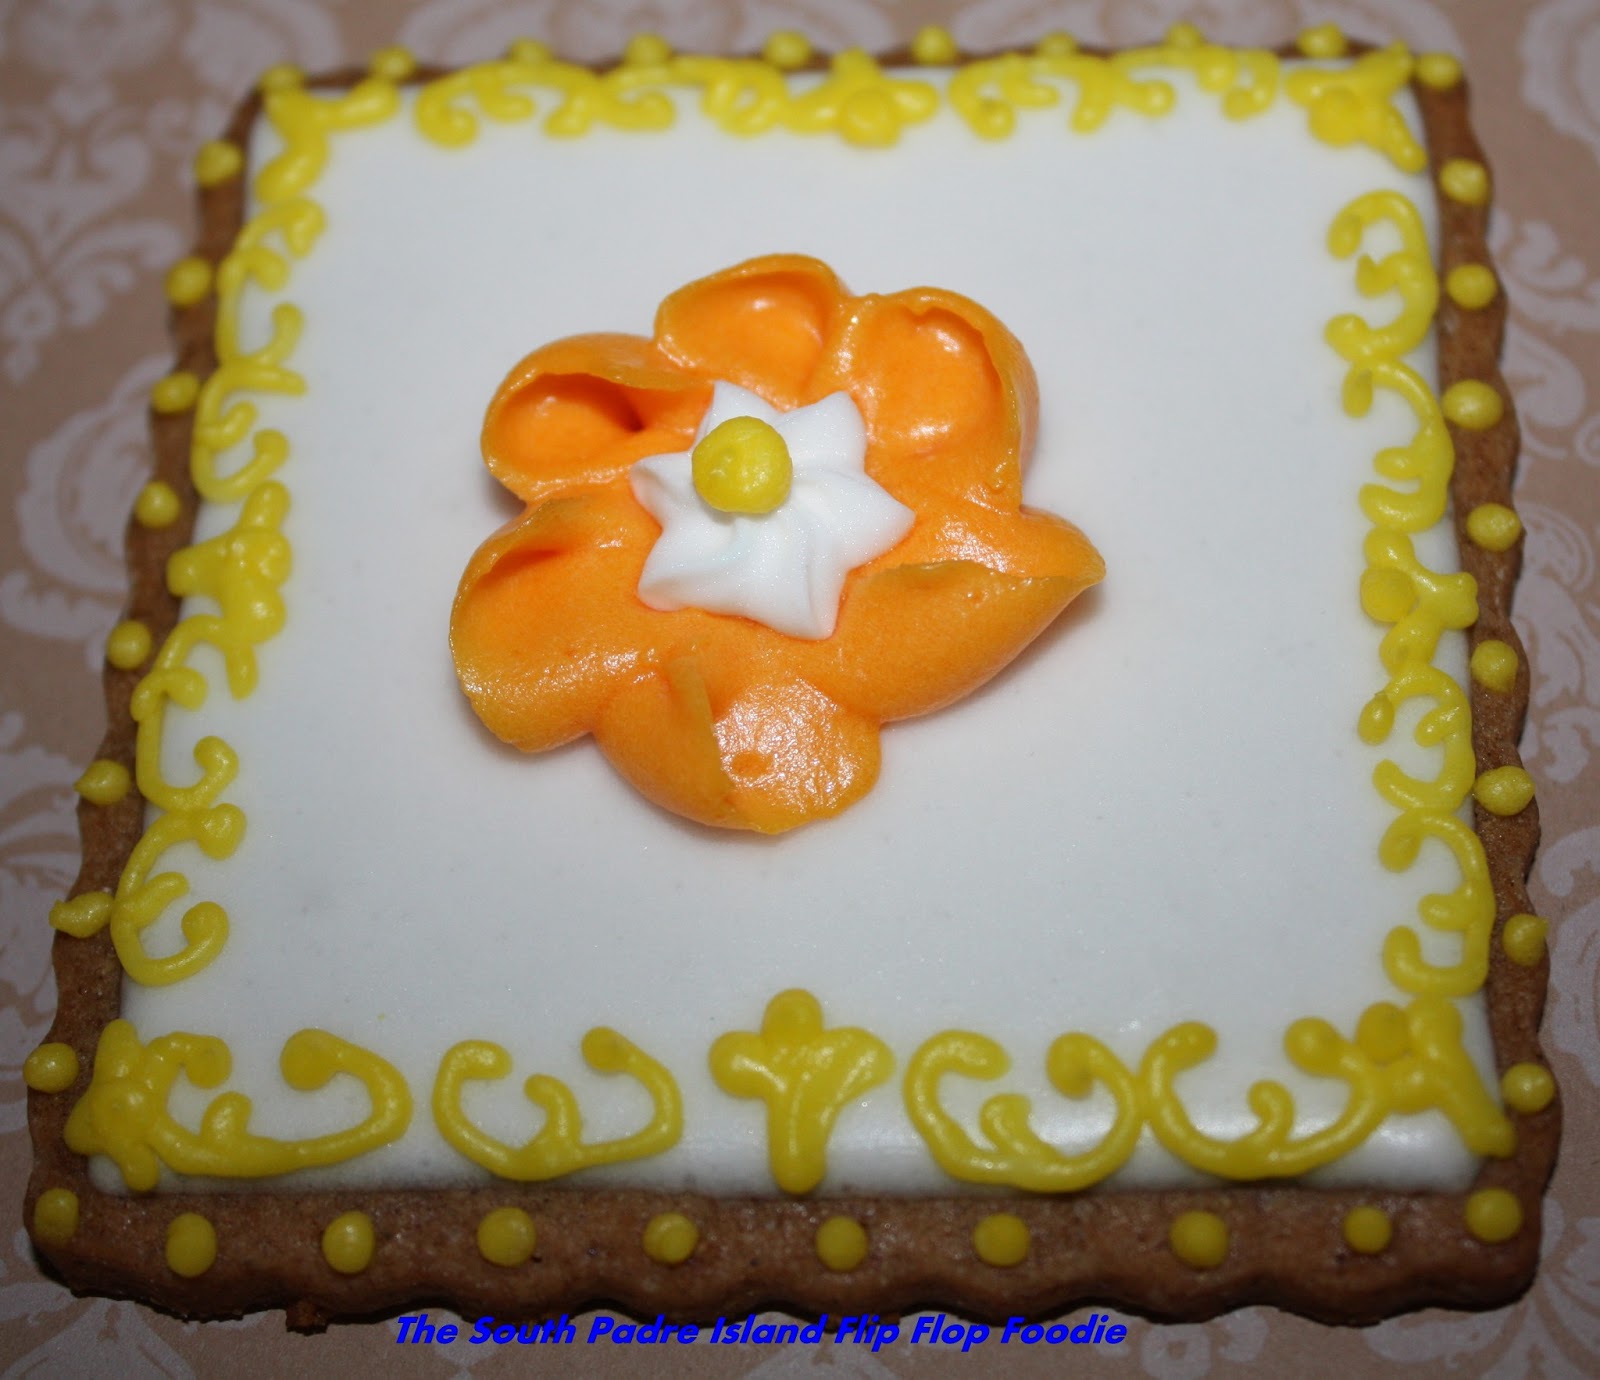
The dark brown ones are Apple Butter Sugar Cookies.  I've linked to a post with the recipe.  The light cookies are Vanilla Bean Sugar Cookies - you can see the black vanilla bean seeds in the dough - I like them a lot.  They are also a bit more sturdy for decorating and packing.  The Apple Butter are softer (but also tastier and I like the mouth feel better than the crisp sugar cookie).  The recipe for the Vanilla Bean cookie is below:

Vanilla Bean Sugar Cookies
Adapted from Recipe for World's Best Sugar Cookies
by Laurie Mather

Ingredients:
1 cup salted butter - softened
1 cup granulated white sugar
2 Tbsp Vanilla Bean Paste
1/2 tsp. pure vanilla extract
2 Tbsp Cream
1 Egg - room temperature
3 cups flour
1 1/2 tsp. baking powder

Method:

In the bowl of a stand mixer, cream the softened butter and sugar until fluffy.  Add the egg and blend until incorporated.  Add the cream, vanilla extract, and vanilla bean paste and beat until fully incorporated.

Whisk the flour and baking powder together and add about 1/3 of it at a time to the wet mixture, mixing just until incorporated, scraping down to the bottom of the bowl before the next addition.  The last cup can be mixed in by hand but I usually add it and give it a little pulse or two then turn it out on my counter to insure complete mixing by hand - being careful not to overwork the dough - a couple of kneading mixes is all that's needed.

This cookie dough may be rolled and baked immediately, but I find my edges are much crisper if I divide the dough into two or three portions and wrap in plastic, gently patting flat to prepare for easy rolling.  I put in the fridge for at least 2 hours and more-frequently overnight.  This dough also freezes well when wrapped in plastic wrap and then placed in a freezer bag.  I actually try to keep some in the freezer at all times.

When ready to roll out the dough, let sit on the counter for 5 minutes or so.  Prepare your rolling surface with a light dusting of flour on the counter/surface and the rolling pin.  I bake on a silicone baking mat.  Have your prepared pans at hand.  I roll my cookies to 1/4" thickness and work in small batches to ensure the dough stays cool and firm enough to transfer to the cookie sheet without getting messed up.  If anything sticks to the counter, I slide a floured offset spatula gently underneath to release.  I will re-roll twice with flour and then if I have a lot of bits left (which is almost always), I will roll them between parchment paper and put the parchment paper covered and rolled dough on a cookie sheet and place it in the freezer to firm up.  This keeps the dough in perfect cutting condition.  If you keep re-rolling in flour the cookies get tough and dry.  I freeze my cut outs on the cookie sheet while I'm rolling out the next pan and another pan is baking.  This firms up the butter and the cookies don't spread much at all!  I keep alternating into freezer, into oven, onto rack, cool, remove to rack to continue cooling, roll, cut, freeze, etc... it's a process!

Preheat your oven to 350 degrees Fahrenheit.  Bake cookies for 8 to 10 minutes...if a really large cookie, sometimes it takes 11 minutes to get the light brown color at the base of the cookie.  That's what I'm looking for - no color on top, light brown on bottom edges.  That's perfect.  Once they come out of the oven, I take the pan and sit it on a cooling rack.  I immediately take a fondant smoother and gently "iron" the cookies flat.  This ensures a smooth decorating surface.  I allow them to cool on the pan until cool to the touch.  I use a sharp-edged Wilton cookie spatula to remove them to another cooling rack to finish cooling completely, gently cleaning the edges of any crumbs.

My usual process is make the dough(s) on one day.  Refrigerate overnight.  Bake the cookies the next day and allow to cool all day then put in containers with wax paper between each cookie.  Make the basic extremely thick royal icing batch and let it sit, covered with plastic wrap on the surface, to release air bubbles.  While I'm waiting on that, I write out my plan for each cookie, drawing my idea, identifying the consistencies and colors I need then I go mix and color my icing and place them in piping bags.  I used to only use squeeze bottles...I've gotten away from that and am back to piping bags.  The next thing is to lay down the base coats and leave them to dry overnight under a fan.  Depending on the number of layers, decorating can take 3 days total.  Then, I individually bag all of my cookies.  They stay fresh longer.  It's quite the endeavor.

Unfortunately, I had already bagged up a LOT of the graduation cookies by the time I realized I had no photographs!  I was quite tired and it was Monday night.  I grabbed a few photographs and finished individually wrapping all 6 dozen cookies then wrapped them in bubble wrap and boxed them for delivery to the post office.  Here are the few I photographed!  I think I got a sample of each type of cookie I made...graduation caps, rolled diplomas, some shooting stars, some plaque cookies, a lot of mini and mid size stars, a bunch of scallop-edged rounds and each set had number 2013 cookies in their package...all done in their school colors (or as close as I could get to their school colors).

A basic sampling of the items included in each packet (obviously multiples
of each cookie...except the number set).


I stenciled a few of the cookies (with varying degrees of success).
It was helpful that the two grads had similar school colors!
I talk about this stencil in my post on stenciling
trials and tribulations.  You can click here to
check out that post.

Another cookie featured on my stencil post.  Hopefully,
my fighting Viking, Addison, didn't think it was too girlie looking.
That boy can put away the cookies...I doubt he cares what is on top!!!
I wonder if he will share???  Of course he will...he's an awesome person.

Well, that's all the photos I took.  I can't believe I didn't do more...but I was NOT unpackaging a ton of cookies!  Photos of cello-bag wrapped cookies are never good - too reflective.  I hope the kids love the cookies and, again, Congrats Grads!!!

Bon Appetit, Y'all!!!StumbleUpon

Thursday, May 9, 2013

The Cookie Decorating Experiment

My second attempt at painting a cookie
This week has been "experiment" week.  I have learned many lessons!  Good lessons and "eek" BAD lessons!

I tried using Karen's Cookies Meringue Powder Buttercream this week...I had printed her recipe - but it's been over a year since I watched the video...and I missed some key things this time around...now duly noted on my printed copy. 

1.  Need to measure loose powdered sugar, not packed (I was in a hurry and dug it right out of the bag).  Which follows rapidly with, don't make anything at midnight right before going to bed - the reason "I was in a hurry"!
2.  Those living in more humid areas were advised to use extra meringue powder.  I did not.  Two days of being under the fan and I still have a softness under the crust. (not me, silly, the COOKIES).
3.  Either #2 is in play, or you cannot use food color markers without breaking through Meringue Powder Buttercream. 
4.  Air brushing is different on MPB than on RI...I guess the buttercream aspect makes it slick and much harder to use a stencil.  I wrecked a couple of cookies trying to work that out.  I'll stick to Royal Icing for stenciling and air brushing in my immediate future!  Here's a photo of a couple of the fails (my friends tell me they want to see the fails too - so I am begrudgingly showing the ones that have not been eaten yet - the hubs gets the fails). 

Mr. Flip Flop said (as he was biting into the sister failure of this cookie)
that it looks like a tile - kind of an old tile...he thought I did it on purpose.
In reality, I used an adhesive back stencil (which never has damaged
a RI cookie) and it ripped the crust right off the cookie after
I airbrushed it.  Yikes.

I used a lot of "stuff " to cover up the defects
in this cookie.  The pearl sheen pink air brush color
on a vinyl stencil seemed gummy...and then I touched it...
after I mushed the not totally crusted white base.  This
cookie didn't have a chance.  So, I over-decorated it with
some dots and royal icing ribbon roses I had on hand.
It ended up being "okay" - but a wee bit too busy!


5.  MPB works beautifully for flowers - I have not had much luck with getting my royal icing to an appropriate consistency to hold up well, yet not cramp my hand while piping it.  The blue cookie flower was RI and the orange one below was MPB - you can really see the difference in how they stood up - same tip was used (#102 or #103 Wilton - can't recall which one I ended up with)

Royal Icing flower accented with a RI transfer I made last month

The Meringue Powder Buttercream really held
the shape better although it did not do so well with
the border piping...I used a PME 1.5 tip so I know
it was the icing that was the issue.

I wanted to make some Zinnia's to honor my late sister and they turned out pretty good.  They do, however, have a LOT of icing on them.  Who knows how long it will take for these to dry!!!  I also did some mini leaf cookies topped with royal icing that I had left over in the fridge.  I managed to use up the last of all I had saved via several of these cookies.
MPB Zinnia and RI leaves!


I also experimented with the airbrush (as noted above) and used the technique learned from Montreal Confections wherein one places a piece of lace over the cookie and then airbrushes over it.  I tried it on mini butterfly cookies - they turned out cute!  Was able to do 4 cookies at a time under one piece of lace.  The lace was light enough not to disturb the crust and it cleaned up beautifully after the experiment too.  I went ahead and embellished afterwards - not my best piping, but again, working late at night is not my best time for keeping an even hand.  Note to self...when spraying straight downwards, don't tip the air gun to the point food color runs out onto your cookies - not pretty.  Lots of blue splatter on one cookie...which was eaten before anyone saw the evidence.

Lace Airbrush Butterfly Minis

The larger butterflies were all airbrushed with pink sheen air brush by AmeriColor.  It took a long time to dry.  My completion of the butterflies was at a point where I just wanted to use up some of the colored icing I had on hand.  I actually like the pink,gray, and white theme I ended up with...maybe not so much the blue one - it was a bit "busy"...but...week of experiments, right?


I made some Sea Gulls with fairly basic feathering...couldn't seem to get the perspective right though.  I've seen different Sea Gull cookie cutters - I may have to get one so I'm not making this so hard on myself.

Last, but not least, I took the scary, heart-pounding leap and decorated two cookies by hand painting them.  I am so NOT an artist.  The first one is a better bird, with a kindergardenish sun in the background...the second one the bird's beak is way too big and his legs are too fat...and I messed up by painting yellow into blue...which magically became green (duh)!  I love looking at the blue herons wading in the shallow bay outside my window.  This was my homage to herons.  I need to take an art class - I need help with perspective and simple "how to draw things".  It does not come naturally to me at all!


Well - that's this week's enterprise.  I'll be seeing family this week-end so I hope they are willing to eat the experiments!

All cookies used this week were Apple Butter Sugar Cookies (recipe linked here).  It is a wonderful spicy cookie and is tender to the tooth.  I do bake the large ones a little longer so they don't break - better to be a little hard than too soft when decorating.  My icing was flavored with pure vanilla extract and 1/4 tsp cinnamon extract.  The combo goes beautifully with this cookie.

Thanks for sticking with me, I finally feel like I'm getting back into the swing of baking and decorating after several months of not being able to gather the energy... and that is a VERY good thing!

Bon Appetit, Y'all!!!


Shared With:

StumbleUpon

Thursday, February 21, 2013

Beach Cookies

The Beach Cookie created following
tutorial from Marlyn of Montreal Confections
I know it is February and many folks North of the equator are having a nippy week...but where I live, it's pretty nice weather!  I live on the Gulf Coast ...right on the water... and this week-end, I'm driving up the coast a few hours to spend time...at the coast.  Yep, weirdly enough, it's true.  My flip flops are happy to be in the sand, wherever the sand may be.

So, cookies were requested by the traveling companions ...apple butter cookies specifically.  Ask and ye shall receive!  I made 30 cookies and got them all decorated in one day via carefully scheduled fan drying of layers and starting early in the day.  I used a different method for making royal icing this time...from the wonderful Jaci at Ali's Sweet Tooth.  We both live in a land of great humidity.  Her method worked beautifully.  Not a bit of separation all day long...and a good thick base to work from with my handy dandy spray bottle. Yay!

My favorite cookies were a "beach" with waves I meticulously created using the YouTube tutorial from Marlyn at Montreal Confections.  I am slightly addicted to her tutorials...she is such a good teacher.  I saw it earlier last year and knew I would eventually get around to trying it out.  Today was the day!  Mine doesn't look as sharp as hers... but I'm pleased with the result for a first effort.  I didn't make fondant sea shells, I used some white and milk chocolate instead in a Wilton silicon mold I bought from Amazon.  I'm not fond of fondant...but I surely do love chocolate.  They came out sort of cute, so I'm glad I took that turn.
I didn't have the cool sanding sugar Marlyn used.
I used turbinado sugar instead.

I also used, for the first time, my air brush.  I carefully covered my table and used a 3-part science poster board to protect over spray as recommended by the talented Melissa at The Baked Equation .  I was so joyful to spray the shades of blue and then pearl the waves.  I am laughing myself silly now, though.  Guess what I didn't protect?  The inside of my nose!  I blew blue icky stuff this evening (OK - blue boogers - I'll just say it).  Good grief!  I'm thinking a mask may be in order next time.  Now that I see how cool the airbrush is, I know I'm going to try to find ways to add more depth to future cookies.

Since I didn't take photos during the process (and you can see Marlyn's online tutorial here) I'll just post these photos of the finished products.  Dolphins, sand dollars, star fish, and some scallop shells add to the beach theme.  The teen informed me "uh, those shells look a little different", in reference to the colors of the scallops.  Heck, I needed to use up some of the blue and peach icing from other cookies...so we have "different" scallop shells.  Leave it to the teen to point out the obvious!
Happy dolphins, funky scallops...it's all good when it gets in the belly!

The sand dollars are much better than my last attempt!  Still
a few issues to work out.  Still, better!


Slowly but surely, I'm trying to get back to enthusiasm for baking.  I have some more stencils I want to use as well as quite a few new cookie cutters.  I need to start sketching out some ideas.  I'll keep you posted!

Bon Appetit, Y'all!!!
I airbrushed pearl on the center starfish and used sugar pearls to accent.
The rest of the starfish were just piped dots and no pearl.
I think I like the pearl best...and I like the dots better than the sugar pearls.
Next time :-)

SHARED WITH:
StumbleUpon

Wednesday, February 6, 2013

"Love" Cookies

The beginning of the 2013 Valentine Cookie Season
I don't know that I'm saying "I'm back"... but I have scraped myself up and "put on my big girl panties" and BAKED.  Finally!  Rough family stuff (too much to share here) resulted in a nearly two-month hiatus from doing most anything creative.  My brain just wasn't on that page.  Hopefully, I can keep myself motivated now that I got started!

While cleaning out my freezer I found a double batch of Apple Butter Cookie Dough all nicely wrapped and ready.  I had completely forgotten that I'd made that before everything crashed around me.  Score!  While that was thawing, I felt motivated to make a batch of LilaLoa's "The Vanilla Variation"" of her Sugar Cookie Dough and between the two, that got me baking!  I ended up with 16 large hearts, 40 medium size "shapes" and 60 minis.  I still have some vanilla sugar cookie dough in the fridge.

My first efforts were just some circles, squares, and rectangles in hopes of getting my piping skills going.  I'm one of those "don't use it you lose it" people.  I felt vaguely cursed because NONE of my icing turned out the way I wanted.  Again, when you do it regularly, you do it right.  This time, well...not so much.  My piping icing was too thin to hold some of the shapes, my flood too thick to lay down straight, I got craters, my little heart transfers didn't "heal" properly, and I learned I can't make my nail flower go in a complete circle without having to reposition my fingers.  (oh, so clumsy) Add to that, my icing didn't hold it's shape for the ribbon roses either.  It was supposed to be the thick stuff! Man, I was screwed.  I kept telling myself the Dory-the-fish line "Just keep swimming.  Just keep swimming".

I decided I would indeed just keep going and finish the cookies I had... I was trying out new tools I got for Christmas and as part of my retail therapy shoppingin January.  I got a heat gun from my son and I bought myself some stencils and new cookie cutters and better tasting Red Tulip AmeriColor gel from Karen's Cookies (man, I love opening boxes from Karen and Mike!).  I read a post from Sweet Sugarbelle about why this red food color isn't as icky as some of the other reds we've all used.  I ordered a big bottle!  Between Valentine and Christmas and Patriotic cookies - red is a popular color!  I also broke out my new airbrush and practiced with water...that will be the next thing I attempt "for real"!

Anyway, I got to it and this is just a post with a few photos (with the good, the bad, and the not-so-ugly).  Why I would share some of these?  I don't know.  I think I just have to start somewhere.  This will help me move along so I prove to myself I can do better.  I won't point out all the booboos, but the cookiers will be able to see everything I'm talking about.  No need for anyone to point out the obvious (like when I was wiping my tip and accidentally sucked up a drop of water from my too damp cloth and then aimed right down at my cookie...oh mercy).
I am dot crazy apparently.  I just felt like
everything was looking better with dots!

I love having the virtual friendships that have allowed me to continue to talk about cookies and tips of the trades on Facebook.  I think I now officially converse with cookiers more than my "regular" friends (oh wait, none of my friends are regular...they are all unique).  I'm not sure that is a good thing...but for now, it's what I need.  Cookie Convo!  I am also completely dedicated to finding my way to Cookie Con 2014.  Fingers are crossed.
I'm no van Gogh...but this is MY blue period!

So, here they are.  They are packaged up and ready to give to people who don't care that I'm not perfect and know what I've been going through.  Now that I think about it, I'm really surrounded by lots of good souls.  I feel happier than I have in a good bit.  Hope it's a trend!

Bon Appetit, Y'all!!!

SHARED WITH:
">
StumbleUpon