Pages

Monday, February 28, 2011

New Kitchen Gadget Part One

My Mom gave me a Macy's gift card for Christmas and it has been burning a virtual hole in my pocket since I got home after the holidays...I have shopped online, looked at mostly kitchen tools, put stuff in my shopping cart, emptied the shopping cart, put different stuff back in the shopping car.  I just couldn't decide! I finally elected to save on shipping and just go to Macy's next time I was in Austin.  I didn't have time on my last trip in January but this week-end, despite it being a VERY short trip, my husband was exceedingly cooperative about shopping with me.  It was our anniversary and I made a 350 mile drive Saturday morning to spend Saturday afternoon and night with him and then drove the same 350 mile drive back on Sunday afternoon.  Killer but worth it...especially since he was being so cooperative about shopping with me all day long. <grin>

We actually quite enjoy shopping together - always have.  I feel lucky to have a man who enjoys shopping...although he finally hit the wall after we had gone to Hobby Lobby, one end of Lakeline Mall to the other, Ulta, Best Buy, World Market, and then finally when we walked into Bed, Bath, and Beyond...he just stopped in the middle of the aisle and said "I can't do this any more...I need a nap."  He turned around and disappeared.  I, totally UN-alarmed, continued shopping.  I found him out in the car with his eyes closed and the car running with the a/c on.  I thought it best to give him those moments alone for a brief recovery.  :-) 

Off we went to dinner...his choice, bless his heart for sticking with the shopping all day.  He REALLY wanted to go to a 3-D movie...and I just dug my heels in.  3-D makes me nauseated and I was not doing it.  Twinges of guilt over dragging him shopping and being uncooperative about the movie...but sore feet do not compare to nausea and headache IMHO.  Anyway, I have digressed tremendously.  Hah, I'm sure you are surprised...NOT!

Today, I'm writing about one of my Macy's items.  Guess?  Yep, a Martha Stewart product.  I found two really cool items - neither of which I saw online (doesn't mean they aren't online...just means I didn't notice them ... I have since found them - see upcoming link).  The first thing I picked up were a set of Magnetic Spoons...measuring spoons - double ended. 


Double ended spoons - it's like two sets in one!

I realize as I bake more and more...you just can't make it with just one or even two sets of measuring spoons.  If you measure something wet, you have to wash and dry before measuring a dry ingredient.  I don't want to dip the spoon I used to measure cinnamon into the baking powder...I need several measuring spoons.  The other issue I have is the dangling, connected set.  I can't tell you how many times I was measuring a liquid, and as I moved it to the mixing bowl, one of the swinging remainder spoons knocked against my hand, causing a spill - requiring re-measuring the liquid.  Ugh!

Flat bottoms allow you to rest a filled measure on the counter!
Soooo, when I saw this product, and realized that this measuring spoon set had numerous favorable features...I grabbed them...despite being $16.99.  Now, that's not a lot, really...but I tend towards the $1.99 plastic set...or maybe even a $7.99 stainless set - but not usually gonna buy a $17 set of measuring spoons.  Last time I succumbed to such a thing, I bought some cute measuring spoons with palm trees on them for $19.99...I used them twice, they were so flimsy they bent when I used them.  I was so mad at myself.  But, this time I rationalized it was okay...VERY sturdy set of spoons...AND every spoon in this set has two measuring ends...a double ended spoon for each measurement.  It's like getting TWO sets of measuring spoons!  One end of the spoon is round, for liquid measurement, and the other end is narrow to easily fit into spice jars.  AND, they have a flat bottom - which prevents spilling if you need to set it down filled with whatever you are measuring.  Isn't that cool?

Now, I've got a set of measuring spoons that slide off a ringed holder...which helps with the knocking and spilling business...but, when they get separated in the drawer...it's 4 or 5 things to search for (my drawers are NOT Martha-tidy).  The thing that keeps these measuring spoons together is a magnet on each spoon handle!  The magnets keep the set together for storage (or you can stick them on your stove or refrigerator even (if you don't have stainless)...for me, they'll just happily nestle together in my messy drawer...easily found...all together!

the magnets are quite strong!  I tried to "shake" them loose...they stuck!

Last but not least - Dishwasher safe.  I wouldn't have bought them if not!

So, I'm just tickled pink with my new measuring spoons.  More things to make my life easy when I bake.  As Martha would say "it's a good thing".

Next...another Martha gadget.  Gotta try it out before I write about it.  I hope it works as-advertised because, if so...another happy gadget report!  Keep an eye out :-)

Bon Appetit, Y'all!!!

Sunday, February 27, 2011

Musings

I'm in Austin enjoying my anniversary with my hubby this week-end.  Haven't stepped foot in a kitchen except to pour coffee at my sister's house.  I wonder...how come there are no barbeque places in South Padre Island and Port Isabel?  Am I missing something?  I grew up with Texas barbeque and I miss it terribly.  There's a Rudy's in Brownsville and that's the closest I've come to finding good barbeque.  We tried a place in Los Fresnos, Wild Blue...while the meat was good, the sauce was awful (IMHO and my family's opinion too) so we didn't go back.  Good barbeque...it's something I miss a lot.  My family laughs at me when I come to Austin... they know I want good Tex-Mex and I want good Barbeque...every time!

My oldest son was good enough to invite his brother over for movies and burgers so we could get away without the teen for a bit.  We enjoyed a neighborhood Chinese Restaurant for dinner here - good food, efficient service, good prices.  I enjoy Uchi on the island... but I like a little neighborhood Chinese place to go to when I'm in Austin.  My son recommended Twin Lions in Austin...near his home.  Two thumbs up.  This allowed my hubby and me to shop (I'm sure he was thrilled) - we were going to a movie but the only thing we wanted to see was in 3-D...and I get nauseated watching 3-D movies.  Bummer.  I did enjoy getting a couple of kitchen gadgets...you will read about those in the near future I have no doubt :-)

We'll be stopping in Central Market on our way back to the coast in a few hours.  I always enjoy a walk through my favorite gourmet grocery.  Never walk out empty handed! 

Six hours up here on Saturday and six hours home on Sunday.  Lots of driving for a week-end...but it is worth it to spend my anniversary with my hubby and get to see my family (or at least parts of the family). 

All of that said...I'll borrow Leon Russell's fine words... "I hope you understand I just had to get back to the island..."

I'll be back in the kitchen soon...in the meantime, Bon Appetit, Y'all!!!

Saturday, February 26, 2011

RICOTTA VANILLA BEAN POUND CAKE

I made another batch of homemade Ricotta Cheese - but this time I used some whole milk that was on the cusp of going sour...I figured if I was putting vinegar in and making it curdle...why not?  I had two different containers of milk and some half and half and some cream...I just put it all together and followed the basic method of my previous post...same amount of liquid...just different mix-up.  I had six cups of milk products (whole, 2%, Half and Half, and Heavy Cream).  The only difference I see is it is slightly drier...but I did let it drain longer and used a finer mesh cheese cloth.  It tastes wonderful...just like fresh Ricotta should taste!

I considered making the Glazed Lemon Ricotta Cookies but I really wanted something new.  I saw Martha Stewart doing pound cakes on Martha Bakes and thought that would be grand...so I googled until I found a few pound cake recipes using Ricotta...and tweaked them enough to make it mine.  It is awesome tasting, if I do say so myself!  I elected to make a Bundt style cake instead of a loaf.  I really like that look.  Hope you like it!

Ricotta Vanilla Bean Pound Cake
INGREDIENTS:
1 1/2 cups of cake flour
2 1/2 teaspoons of baking powder
1 teaspoon of fine sea salt
3/4 cup unsalted butter, softened to room temperature
1 1/2 cups fresh Ricotta Cheese
1 cup of white granulated sugar
1/2 cup of light brown sugar - packed
3 large eggs - room temperature
1 vanilla bean (split and scraped)

One Recipe of Vanilla Bean Glaze (below)

Method:

Preheat your oven to 325 degrees F
Prepare a Bundt pan (butter and lightly flour - tap out excess flour).

In a medium bowl, sift together cake flour, baking powder, and salt - set aside.

In stand mixer bowl, cream the butter, well-drained ricotta, vanilla extract, and sugars on medium speed until smooth and light - about 3 minutes. Beat eggs in one at a time, scraping down the sides of the bowl afterwards...may look curdly, but it will smooth out with the dry goods. Split the vanilla bean, scrape out the seeds, and blend into the batter.

Using very sharp knife, slice the vanilla pod down the middle. 
I used the back of the knife to scrape with.
Scrape bowl again.  On low speed sift in the dry ingredients (a second sifting). Scrape down and beat until thoroughly incorporated...about 1 minute.
Batter changes from curdly to smooth with addition of dry goods


Pour batter into prepared pan, smooth surface with spatula. Gently tap to dislodge any potential bubbles in the batter. 
In the oven and ready to bake
Bake for 30 minutes, then rotate pan and bake 17-20 additional minutes until cake springs back lightly when touched in the center.  The sides should be starting to pull away from the pan and a toothpick inserted in the center should come out clean.
Sides pulled away from pan - center springs to the touch
Remove from oven and cool on a rack for 15 minutes and then turn out of pan onto cooling rack.  Allow to completely cool before glazing.
Turned out after 15 minute cooling onto rack for total cool down
VANILLA BEAN GLAZE

Ingredients:

1 cup+ sifted Confectioner's Sugar
1 Vanilla Bean - split and scraped
1/8 to 1/4 cup Half and Half (or water if you prefer)

Method:

While cake is baking, scrape the seeds from a vanilla bean pod into 1/4 cup of Half and Half and whisk together.  (or water is fine too...just get the vanilla bean seeds all loosey goosey in the liquid)
The seeds from the bean pod...black gold...
popped the two scraped pods into a baggie of sugar
to have Vanilla Sugar when desired!
Allow to sit in refrigerator while cake bakes....makes a nice vanilla tasting creamy liquid.

black flecks are the vanilla seeds once stirred into the Half and Half

When ready to glaze the cake, whisk the vanilla milk by tablespoonful into the sifted confectioner's sugar until smooth and desired consistency. Push through strainer if you can't get all the lumps out; you want a smooth glaze.  With cake on rack over baking sheet, drizzle glaze over cake with a teaspoon - allowing it to drip down the sides.  I wanted a thin glaze to nearly coat the entire cake...so I used all the liquid.  If you'd rather "see" your drizzle, use less liquid and make a thicker glaze which will stay mostly in a ribbon-like state.

Twice glazed - took the overflow and re-poured for nice glaze coverage
If you lose a lot of the thin glaze overboard, re-pour the glaze pooled below by replacing baking sheet under cooling rack and pouring from the corner of the original baking sheet over the cake again.  Glaze will eventually soak into cake and leave a very thin sweet vanilla coating - nearly invisible but shiny.  Gently transfer to serving plate (If cake feels too flimsy for any reason when transferring, slide a cake round underneath while lifting with your largest pancake turner - or a fish turner), slice and serve! 

Yummy...ready to serve.  With ice cream, with fresh berries,
with a hot cup of coffee...ahhhh
A scoop of Blue Bell's Vanilla Bean Ice Cream would not go awry on the side... neither would fresh berries and whipped cream.  Actually, if I had some leftover ricotta, I would mix it with some powdered sugar and some vanilla and put a little dollop on the cake slice when served...that would be mighty fine. 

This is a delicious cake...moist from the ricotta, with a crumbly crumb everywhere except where the glaze soaked in...that part is more dense....and very "vanillaey"...I know that's not a word.  But it's gosh darn good and worthy of a made-up word.  Enjoy!
Bon Appetit, Y'all

Friday, February 25, 2011

MIKE and CHARLIE'S CHICKEN SALAD

More fond memories from the Mike and Charlie's neighborhood restaurant and Emporium (their to-go adjunct to the restaurant).  This is the sandwich I ordered 95% of the time to go with their Cheese Soup.  Yummy.

I am swamped today and don't have the time to actually make this recipe...but I know from the ingredients, and many years of making different chicken salads, that this one has the ingredients I recall....the lemon juice, the dry mustard, the light garlic flavor...ummm, I can almost taste it.

I hope you try it... it's a chunky chicken salad, as opposed to Sandy's World Famous Chicken Salad, which is a spread.  The recipe says it makes enough for 6 people...but that's a pretty big chicken it calls for!  Sounds more like a roaster than a fryer!  It might make more than 6 servings.

I'd love feedback via comments if you make this recipe.  I have verrrry fond memories of this chicken salad sandwich on whole wheat bread!   Ohhhh, now my tummy is rumbling.   :-)

MIKE AND CHARLIE'S CHICKEN SALAD
from "Dining with Diane - The Austin Restaurant Cookbook"
by Diane Payton Gomez

Ingredients:

5-6 pound chicken
1/2 bunch celery, finely chopped
2 cups heavy mayonnaise (Hellman's is good)
1/4 cup lemon juice
1 teaspoon salt
2 teaspoons coarsely ground black pepper (this would be too much if you used fine grind)
1 teaspoon dry mustard
3/4 teaspoon garlic powder.

Method:

Put chicken in pot and cover with water.  Cut off the celery tops and add to pot.  Boil chicken until cooked through, about 1 hour.  Cool the chicken overnight in the broth.  Pick the meat off the bones and cut into fairly large pieces (it doesn't say - but discard the skin and fat...don't want that in chicken salad).  Mix together the mayonnaise and all the spices.  Add the chicken and celery.  Gently fold the mixture together, mixing well, but not over mixing.  Makes enough salad for about 6 people.

Geez, now that I've typed this up, I'm going to have to make chicken salad this week-end.  It just sounds too good not to make it!  Maybe I'll do that, and then use the chicken broth to make another batch of the Cheese Soup...I'm sure that will give it an even better depth of flavor!  It will also provide me a complete walk down memory lane!

Bon Appetit, Y'all!!!

Thursday, February 24, 2011

MIKE and CHARLIE'S CHEESE SOUP

Serving of Mike and Charlie's Cheese Soup
I have searched for over 25 years for the recipe to make this soup.  The long defunct Austin eatery, Mike and Charlie's, served this delicious soup and I've never found one to compare...and I've tried a lot of cheese soups!  I googled and googled and finally found a link to a 1987 cookbook called "Dining with Diane - The Austin Restaurant Cookbook" by Diane Payton Gomez who was a restaurant reviewer for the Austin American-Statesman.  The link had the words Mike and Charlie's in the descriptive text...woo hoo I yelled!  Further digging referenced the recipe for which I searched, could be found in an out-of-print cookbook.  I was ecstatic to hunt this book down and order it used from a bookseller on Amazon.com. 

I worked at a hospital around the corner from this great little neighborhood eatery and ate, on a routine basis, a take-out order of this soup paired with half a chicken salad sandwich.  (That recipe is ALSO in the cookbook so I really scored!)

It was the cat's meow...the bee's knees...whatever saying you want to use that means damn good...well, that's what this soup was.  Don't turn up your nose when you see the "American Cheese" ingredient.  I admit to being surprised... I expected Cheddar...but I'm not judging, 'cause it just tastes so darn good.  I had a little trouble finding a block of American Cheese...but the deli does have it at our local H.E.B. grocery store.  I found a pre-grated bag blend of American Cheese and Cheddar which I decided to use.  It worked fine, and the soup was delicious... but there was a subtle underlying flavor difference compared to my 1980s memories...just not quite the way I remembered it.  I guess I'll try it again with regular American Cheese (not Velveeta) and see if it is "exactly" the way I remember it.  Regardless, this recipe as I made it, even with the subtle difference was really delicious.  Warning...it takes 3 pans to make this...I'm such a dufus I had to draw myself a picture to make sure I had it right as I set up.  Sure enough...3 pans!

Here's the recipe.  I am so glad it wasn't lost to those of us who loved it so dearly.

CHEESE SOUP

Ingredients:

  • 4 tablespoons margarine (yep, it says margarine not butter)
  • 1/2 cup flour (this was too much for my roux...it only took slightly more than 1/4 cup - I actually had to discard the first batch of roux because I pushed the envelope and added the entire 1/2 cup and it was just a dry crumbly mixture...not the more "plaster-like" mixture that makes a good roux)
  • 1 quart chicken broth
  • 1/4 teaspoon white pepper (I think 1/2 teaspoon would have helped)
  • 1/4 cup chopped yellow onions
  • 1/4 cup chopped celery
  • 1/4 cup chopped carrots
  • 1 pound American cheese, grated (used Kraft American & Cheddar shredded cheese mix)
  • 1 cup heavy cream
  • 1/4 cup beer (used Dos Equis Amber - 'cause I AM in The Valley!  I wonder, though, what kind of beer they used...beers all taste so different this can have a big impact on overall taste)

Method:

Make a smooth light brown roux by melting margarine and stirring in the flour until cooked. 

this is with 1/4 cup flour
In another pan, pour half the chicken broth and boil vegetables until tender.


1/4 cup of each veg is not a lot...but just right
Whisk in the grated cheese.  When cheese is completely melted, remove from heat.  Be careful not to burn. 

Heat the other half of the broth and add the cream to it.  Slowly add the broth with the cream to the roux, whisking vigorously.  Add beer and pepper. 

Beer and Pepper added - Don't boil the cream and roux -
 just thoroughly mix - it will thicken the soup perfectly
Add to broth with vegetables, mix and heat thoroughly. 

All whisked together
Makes about 8 servings.

The author notes "Oh, is this ever good!  You can cut the recipe down if you want but this soup goes fast." 

I made a full batch...and I will likely have to share it with someone....maybe ;-)  I do think I'll re-test this recipe with 100% American Cheese as it calls for...that may just be the missing link in my memory of taste!  SCH friends...if you make it, let me know if it is as you remember it...and what kind of beer you use!


Ready to serve - it looks just like I remembered it!

I hope you enjoy this as much as I am!

Bon Appetit, Y'all!!!

Wednesday, February 23, 2011

Wheaties® DINNER ROLLS

Delicious hot out of the oven with softened butter
A different way to eat your Wheaties®!  I found a recipe I have been trying to locate for nearly 5 years...it was folded - upside down - underneath another recipe.  I pulled the recipe out that it was under...and viola...there was the long lost Wheaties® Dinner Rolls recipe...woo hoo!

I first had the opportunity to try these at a holiday dinner at the hospital where I worked for many years.  We used to get together and have a big Thanksgiving meal the week before the holiday...it was a great way to share recipes and try different things to possibly add to your own home cooked meal. This particular recipe was provided by an Occupational Therapy student back in 1994.  It makes some delicious, and fairly nutritious, rolls!  My family loved them.  I only made a half recipe this week and all of them were gone within 12 hours!

So here it is - yum - enjoy!

WHEATIES® DINNER ROLLS
Courtesy of John Hines

Ingredients:

2 cups warm water
1 package of dry yeast
1 egg
1/3 cup oil
3/4 teaspoon salt
1/2 cup sugar
4 cups Wheaties® cereal
4+ cups of flour

Method:

Mix 2 cups warm water with 1 package of yeast in the bowl of a stand mixer with dough hook attached.  Allow to activate about 5 minutes.

Mix together all of the remaining ingredients and add to the water with yeast.  Combine until a sticky dough starts to form, adding more flour until it comes away from the side of the bowl when nudged.  Scrape down and under the insides of the bowl.  Cover bowl with plastic wrap and let rise for 2 hours in a warm spot. 

Sprinkle flour over the top of the risen dough and punch down.  The dough is still very sticky.  Carefully remove dough from bowl by pulling away from side of bowl, bit by bit.  Place on floured surface and knead until dough is fairly smooth.  Shape into round and divide into 24 pieces.
Oops, a little blurry there.  This is a sticky dough,
so I used my bench scraper to section the dough
 into 12 pieces for a half recipe
Roll dough pieces into individual balls, place on baking sheet, and let rise for an additional 2 hours.  Yield:  24 rolls

Bake at 375 degrees F for about 15 minutes, until brown.

I made these to go with our Sesame Catfish dinner, but considering it wasn't a big old holiday dinner with my entire family... and I sure didn't need 24 rolls in the house, I decided to halve the recipe.  It worked well.  I used the following measurements for my half recipe:

1 cup warm water
1 package of dry yeast
1 egg
Scant 1/4 cup oil
3/8 teaspoon salt
1/4 cup sugar
2 cups Wheaties® cereal
2+ cups of flour (about 2 1/2 cups total - not including bench flour)

My hubby and the teen both give these big thumbs up...I served them with our Sesame Catfish dinner.  Pretty easy too!

Only have photos of the end of the process...I had to mix this up in about 10 minutes because it was a gorgeous February day...78 degrees and sunny...we were headed to the beach and I wanted these to do the 2 hour rise while we were gone for our walk.  No time for snapshots of the process!  The dough was perfectly doubled when we got back from the beach, two hours later :-)

Rolled and ready for 2nd rising - these are rustic rolls - not easily rolled into perfect
little balls - but don't worry - they look great when all is said and done!
After 2nd rising - ready to bake!

Bon Appetit, Y'all!!!

Tuesday, February 22, 2011

HEY TATER SALAD!

Everyone has a favorite potato salad...I sure do... love me some tater salad!  I have taken bits from my Mom's, a little from my ex-mother-in-law's, and a little from my favorite barbecue places to develop my own taste for potato salad.  One of those barbecue joints included my first place of employment, my parent's meat market. They had a big barbecue pit and I got relegated to making coleslaw and potato salad under the strict supervision of "Mr. Duck, Sir", Donald Kuempel.  "Mr. Duck, Sir" taught me a great deal about having a work ethic and not getting to slide because I was the boss's daughter.  Frankly I think he took delight in torturing me with doing gross tasks.  I was a brat and he was stuck with me most every Saturday for several years.  The barbecue side of the deal was a-okay though.  I enjoyed the food preparation part.  Slicing liver...not so much. 

Anyway, based on all of the different potato salads I had sampled, I created...years ago... my favorite potato salad.  I've switched it up a few times, but basically...this is just the way I like it.  Make it ahead for the very best flavor.  I like to make it no later than the morning of the day I'm going to serve it.  The onions and pimentos and pickles just get all cozy together and it is just delicious.

So, here it is:

DEBBI'S POTATO SALAD

Ingredients:

6-7 medium russet potatoes - boiled
3-4 boiled eggs - chilled and diced
1 boiled egg for garnish
1 2-ounce jar diced pimento
1/2 large yellow onion - diced
3 scallions (green onion) - chopped (whites and green parts) - optional (omit if you don't like a lot of onion)
3 whole sweet pickles - diced (not gherkins - altho you can use gherkins - just need a lot more)
3 whole kosher dill pickles - diced (this should be about double the amount of sweet pickle)
1 tablespoon sweet pickle juice from jar
1 tablespoon dill pickle juice from jar
1 to 1 1/2 cups Miracle Whip Salad Dressing - not mayonnaise
1/4 cup Yellow Prepared Mustard
Salt to taste (I used about 1 tablespoon kosher salt)
Pepper to taste (I used about 1/2 tablespoon fresh ground black pepper)

Method:

Boil potatoes with skin on until fork inserted removes easily (about 30 minutes for fork to insert all the way to the center and come out without resistance).  Drain and allow to cool just until they can be handled.  Peel with a butter knife - the skin should come off easily.  This method creates a drier potato that doesn't turn "mooshy" as easily as boiling peeled cubes of potato.


While potatoes are cooling to a "peelable" temperature, prep all other items.  You want to be ready to mix the potato salad as soon as you dice the potatoes so they don't oxidize.

Get all the ingredients prepped while potatoes cooling
Place prepped pickles, onions, pimento, and juices in large mixing bowl and set aside.

My Mom used to tell me I didn't use enough "condiments" -
I think I've fixed that problem :-)
When potatoes are peeled, large dice them (a steak knife works very well for this) and drop the diced potato into the pickle mixture as soon as you complete each potato - a bench scraper comes in handy for transfer (some of the potato crumbles - get everything from the cutting board).  Stir to coat potatoes with each addition.  The pickle brine you have added will help keep the potato from oxidizing and the warm potato will absorb the flavors.

Potatoes and pickles and all the other goodies
mixed together before adding dressings
Add diced boiled egg, mustard, salt, pepper, and 1 cup of salad dressing.  Stir gently.  You don't want mashed potatoes (well, I don't - I like chunky potato salad).  Add more salad dressing if needed, until the potato salad is the texture/creaminess you enjoy.  Taste for seasoning.  Add more salt and pepper if needed.

Cover mixing bowl with plastic and refrigerate at least 3 or 4 hours.  Before serving, re-check for seasoning and place in serving bowl.  I use a boiled egg slicer to slice the remaining boiled egg and place the slices on top of the potato salad before serving.

My family loves my potato salad (except the teen)... and I have to thank my Mom for making sure I used Miracle Whip and Barbara Harris for sharing the secret of both sweet and dill pickles.  Both of those items are key in my opinion.  I served it with out Sesame Catfish dinner this past week-end and also love it with hamburgers, hot dogs, barbecued anything, and a big baked ham.  It's a great southern side dish to have in your repertoire.  Hope you enjoy it!

BTW...You can imagine, it was probably a big headache having a 16 year old boss's kid underfoot and Don was such a trooper.  He got stuck with several of the Culp daughters over the year.  I think we all have very fond memories of our time under his tutelage.  I called him Donald Duck...He said, "that's Mr. Duck...SIR...to you" and forever more he has been Mr. Duck, Sir in my memory.  If he gets the opportunity to read my blog, I want him to know how much of an impact he made on my life...in a very good way.

Bon Appetit, Y'all!!!

Shared With:

Carole's Chatter: Food on Friday

Monday, February 21, 2011

Sabal Palm Sanctuary


A really nice Sunday morning/afternoon walking the forest and nature trails at Sabal Palm Sanctuary in Brownsville.  Just a short trek over to Brownsville and down to the Rio Grande.  Felt very safe and nice.  Beautiful birds, old growth Sabal Palms, a resaca, wetlands walkway, butterfly garden, gazebo next to the Rio Grande.  Off the beaten path...one of our true ecotreasures.

Enjoy!

SESAME CATFISH

It's another Saturday night dinner...the hubby was back home and I always like to make something "memorable" when that is the case :-)  Saturday's recipe was another from the Eastside's Inside Secrets cookbook.  It is described as "catfish fillet breaded with sesame seeds, parsley, and bread crumbs.  Grilled in butter and served with aioli".  You might recall my post about Eastside Cafe in Austin... they were the source of those fabulous jalapeno cheddar corn muffins I blogged about previously.  My side dishes were my homemade potato salad and some fresh green beans.  Yum.  I finally used the Basa fillets I purchased at the Delicious Seafood Market in Port Isabel back in January.  They'd been in the freezer patiently awaiting my use. 

So, here's the recipe to get started:

SESAME CATFISH
from Eastside Cafe, Austin, Texas
Eastside's Inside Secrets

CATFISH BREADING

1/2 cup fresh parsley, minced
2 cups plain bread crumbs (I used Ian's Brand whole wheat panko)
1 cup sesame seeds
1/4 teaspoon cayenne pepper
1/2 cup flour
1/2 teaspoon salt
1/2 teaspoon black pepper

Place all ingredients in a large mixing bowl and stir to combine.  Yield:  3 cups


The Catfish Breading includes fresh parsley!

AIOLI

1/2 teaspoon fresh garlic, minced
1 cup mayonnaise
2 tablespoons olive oil
1 tablespoon Creole mustard

Place all ingredients in a small mixing bowl and combine with a wire whip.  Yield 1 1/4 cup

ASSEMBLY

4 eggs
2 cups flour
1 recipe Catfish Breading
3 pounds catfish fillets (8 medium fillets)
4 tablespoons butter, divided
1 recipe Aioli


Set up the dipping stations for easy assembly

Beat eggs in a medium mixing bowl.  Place flour in a second medium mixing bowl.  Place Catfish Breading in a third medium mixing bowl.  One fillet at a time, dredge catfish in flour, then egg.  Make sure that the whole fillet has a coating of egg on it.  Hold fillet over egg wash for a moment until excess egg has dripped off.  Place the fillet in Catfish Breading until it is lightly covered.  Pat breading gently until the coating adheres well to catfish.  Set breaded fillet aside and repeat process until all catfish is breaded. 

In a skillet, melt 2 tablespoons butter over medium heat.  Cook 4 fillets for 5 minutes on each side until lightly browned.  Remove and hold cooked fillets in a 200 degree oven.  Repeat with remaining butter and catfish.  Serve with Aioli.  Serves 4.


Use a large skillet to ensure even browning.  Keep a close watch - the 5
minutes per side is just perfect if the pan is not over-crowded

OK - so I only had one pound of fish... which is generally adequate for the 3 of us.  The teen could eat a pound by himself - but that is not necessarily the healthy thing to do.  So - one pound it was.  I basically made 1 third of the recipe and cut my two extremely large fillets into 2 pieces each which worked perfectly...allowing the teen and his Dad to half the extra piece between them if they desired - which they didn't - because the one piece was large enough.  We decided not to make the aioli but instead served it with a side of Dijonnaise...which is similar minus the garlic.
What a great dinner.  The Basa was very mild yet tasty, the recipe was different than our traditional cornbread crusted fried catfish...I think everyone enjoyed it.  I think the teen prefers the plain crust we usually have - but he did eat his entire serving.  Both of the adults loved it.  A very unusual crust - really delicious.  You should try it!

As mentioned above, our dinner tonight included fresh green beans, homemade potato salad, and some deliciously different yeast rolls...you'll see posts on the potato salad and rolls over the next couple of days.  Keep an eye out for them!

Bon Appetit, Y'all!!!

Sunday, February 20, 2011

MICROWAVE S'MORES

Microwaved s'more with homemade marshmallows
After seeing the cute S'more Cups my friend Trina made, and finishing the blog about them...I started having a hankering for s'mores...but I didn't want a dozen of anything...and I didn't want any effort.  I decided to see if one of my homemade marshmallows would handle being melted in the microwave.  I figured worse case scenario...I'd have some cleaning to do (envisioning an explosion) and best case scenario would be that they melted gracefully. :-)

I tried one marshmallow on a paper plate...and it seemed to work!  Very gooey and hot...lots of stringy marshmallowy stuff - no campfire crust of course...but I figured it might just do in a pinch!

So, I set up two halves of a graham cracker with three rectangles of Hershey's milk chocolate candy bar on top of each, and I cut my big square marshmallow in half across the center (so it remained a square, but thinner) and placed one of each (cut side down) on each "serving.

I zapped them for just 10 seconds (I could see them expanding in size - almost exploding - yikes) and it was just perfect!  The graham cracker was still crisp, the chocolate was perfectly melted and the marshmallow was good and gooey.  My original intention was to sandwich them together like a traditional campfire s'more...but I ate them open faced instead.  Then, of course, I had to make another batch for another photo!  I will say this much (now that I've eaten both preparations) ... the open faced s'more is much easier to eat.  The traditional kind smooshed out the sides...and dripped all over me.  Maybe build a thinner treat if you are going to sandwich it...just half the marshmallow and don't put the chocolate in the microwave too.  I'd probably stop at the 8 second mark on microwaving the marshmallow as well.  I did NOT compare using store-bought marshmallows...they may perform differently.  My homemade marshmallows were sure tasty, though!!!


Heck, I can't believe I've been missing out on having s'mores for so long.  Admittedly, the crispiness of a campfire crust on the marshmallow is highly desirable... but this is a darn fine substitute... and I will now know what to do when I have a hankering for a s'more!

Bon Appetit, Y'all!!!

Saturday, February 19, 2011

S'MORES CUPS

Photo Source: Trina Muenzer
My friend, Trina M., was posting photos of their Super Bowl snacks...my eyes lit up when I saw her cute little S'more Cups.  I had recently made homemade marshmallows and was thinking this might be a great recipe in which to use my homemades...and I love s'mores... so win-win!

Trina sent me the recipe and I had planned to make this as a Valentine's Day treat...but I got filled up on sweets and decided I couldn't add any further sugar to the day. 

Today I was clicking through some of my old messages and I noticed Trina's message, remembering I had wanted to blog these.  So, I downloaded her photo, and copied her recipe from the message to share here with you.  She reports it is from the Pampered Chef Simply Sweet Cookbook. 

S'MORE CUPS

Ingredients:

7 whole graham crackers (1 cup, finely crushed)
1/4 cup powdered sugar
6 tbsp butter, melted
4 bars (1.55 oz each) milk chocolate candy, divided
12 large marshmallows

Method:

Preheat oven to 350 degrees.
Place graham crackers into a large resealable bag and finely crush into crumbs.
Combine graham cracker crumbs, powdered sugar, and butter in bowl.
Place a scant scoop of crumb mixture into each cup of a mini-muffin pan.
Press crumbs to form shallow cups with a mini-tart shaper.
Bake 4-5 minutes or until edges are bubbling.
Meanwhile, break two of the candy bars into rectangles.
Remove pan from oven; place one rectangle into each cup.

Cut marshmallows in half crosswise (can use kitchen shears dipped in cold water to minimize sticking).
Place one marshmallow, cut side down in each cup.
Return to oven for 1-2 minutes or until marshmallows are just slightly softened.
Remove pan to cooling rack and cook 15 minutes.
Remove cups from pan and cool completely.

Break remaining candy bars and place in microwave safe bowl.
Microwave on high 1-1 1/2 minutes or until melted and smooth, stirring every 20 seconds.
Dip the top of each marshmallow in melted chocolate.
Turn top-side up and let stand 40 minutes to 1 hour or until set.


Photo Source:  Pampered Chef website

Here's a photo from the Pampered Chef website of their product...and I have to say, I like the creamy looking marshmallow of Trina's photo best.  Trina also mentioned these got crumbly (the graham cracker crust) so she recommends possibly using mini baking cup liners for easier eating.

So, thank you Trina (and her mom, Michelle, because I think they were baking together that night)...this looks really delicious and as soon as I feel up to more sweets (which is never too long!) I'll be sure to try these.  You guys rock!

Bon Appetit, Y'all!!!

Friday, February 18, 2011

PIZZA

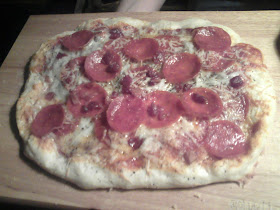
Just a quick follow-up on the second half of the Focaccia dough.  I froze it and, today, thawed it in a bowl covered with plastic on the stove top.  It doubled in size...so we split it...I made a pizza for the hubby and I (delicious) and the teen made one for himself.  He used the same technique as making Focaccia...but, of course, topped with pizza sauce, lots of cheese, his special herb concoction, and bacon as well as pepperoni.  His porky pizza.

I teasingly said "do you want me to take a picture"?  He laughed and said "maybe....yes"...so I grabbed my cell phone and snapped it.  It smelled delicious...and ours certainly tasted delicious.  His must have, as well...because he ate the whole thing :-)

Homemade pizza - so easy - and so tasty! 


Fresh and yeasty out of the oven!

Bon Appetit, Y'all!!!

CHICKEN STIR-FRY MY WAY

I have tried FOR YEARS to get my teen-ager to eat oriental food.  His idea of oriental is eating Beef Ramen.  He only tried that because some character in his manga books ate it voraciously.  He will eat ramen for breakfast, lunch, or dinner.  He also will not eat vegetables.  Intense payback for my my having been a picky eater as a child.

I decided to set up a stir fry "station" and call him into the kitchen to cook his own stir fry dinner one evening.  He had gotten where he liked green onions...he'd eat fresh basil...he liked limes squeezed on certain things...so I made sure to include those ingredients.  I started out with very thinly sliced chicken breast so it would cook fast, also had a little bowl of sliced crimini mushrooms, some zucchini, and some soy sauce.  I used olive oil (familiar to him and acceptable) for the frying medium.  The first time was not all that adventurous.  He doesn't like rice, so I boiled some whole wheat angel hair pasta and had it ready...explained the process...and he did it...with minimal ingredients...and he liked it. <big smile>  Lo Mein...he was eating Lo Mein!

That was about a year ago.  He's not all that more adventurous, but he's gotten flexible about using some chili garlic sauce, some sesame oil, a good amount of mushrooms, and he eats it with chop sticks!  I think if you keep trying (and this took me nearly 10 years to accomplish) kids will eventually find a way to include "different" foods in their diet.  The teen has Asperger's Syndrome...so trying new things is always going to be a challenge.  I just want him to be able to live on something other than pizza, spaghetti, macaroni and cheese, and hamburgers in his adult life.  I realized when I was throwing together our stir fry this week (we have it almost weekly now - it's a staple) that he'd really begun to enjoy this dish - not just tolerate it.  His knife skills are slowly improving despite fine motor deficits
(altho I've ordered a Kevlar glove for him to wear - not kidding you!) ...and he is learning about food safety...like preventing cross contamination.  He thinks, as do most teens, that he knows everything, and I don't know shit anything.  However, he's learning some solid kitchen skills - moms everywhere should get their sons in the kitchen cooking with them!

Here's our version of stir fry!

CHICKEN STIR FRY - OUR WAY

Ingredients:

4 Boneless skinless chicken thighs OR boneless skinless half chicken breast
6-7 Scallions (green onions)
6-7 large crimini mushrooms (gently cleaned with damp paper towel)
10-12 large basil leaves (chiffonade)
Olive Oil
Toasted Sesame Oil
Chili Garlic Paste (marked Vietnamese - available in ethnic section of the store)
Soy Sauce
Whole Wheat Angel Hair Pasta (Capellini)

Method:

Thinly slice your chicken and set aside (obviously, to avoid cross contamination, use a different cutting board and a different knife).

Clean and thinly slice mushrooms, scallions, and basil.  Set aside.

Quarter a lime and set out your liquids.

Set a pan of water on to boil (the pasta takes only 2-3 minutes).

In a large skillet (or wok) add enough olive oil to thoroughly coat the pan and sprinkle sesame oil (I use about a teaspoon of sesame oil).  Get the oil hot, but short of smoking.  I start with the chicken and stir fry it until it is about 1/2 done then add the mushrooms, and then all but about 1 tablespoon of the onions and about 3/4 of the basil.  Stir fry - keeping everything moving. 


Add garlic chili paste to taste (I use about 1/2 to 3/4 teaspoon, add a good amount of soy sauce (I use about 2-3 tablespoons) and squirt two lime quarters over it all.  Drop your pasta in the boiling water.  Set a timer so it doesn't overcook.  Continue stir frying until the chicken is done.  Add the drained pasta, the last of the onion and the last of the basil, toss to coat and serve in large flat bottom bowl (I use a pasta bowl - and this provides about 2-3 big servings).  Serve with a quarter of lime to squeeze over the bowl for a nice burst of flavor at the table.

We love this - like I said - it is now a week-night staple!

Bon Appetit, Y'all!!!

Thursday, February 17, 2011

FLIPFLOP WINES!

flipflop wines... my new favorite!
I recently had the opportunity to sample some really nice new California wine, produced under the label flipflop wines.  Now, needless to say, with that name, I was hopeful of finding a casual and appealingly "drinkable" wine.  I received 3 bottles and have sampled only one so far.  I was one tired baker at the end of nearly a week of non-stop daily baking...and last night I just wanted to put my feet up and have a cold glass of wine before bed.  So, I cracked open the Pinot Grigio....all I can say is "let's get these wines retailed in Texas"!!!  If I had been served this glass of Pinot Grigio in a blind sampling, I would have likely selected it over many $15-20 bottles of Pinot Grigio ... and guess what... it retails for $7/bottle!

For many years I have enjoyed having what I consider to be "my house wine" on hand.  First it was an Italian Pinot Grigio that I could only get intermittently at Central Market in Austin.  I bought it by the case when I could find it.  I then became enamored of New Zealand's Nobilio Sauvignon Blanc...almost always have it on hand.  My new choice for a house wine would definitely be the flipflop wine Pinot Grigio!  Actually, as soon as I finished the first glass, I got online to order a case...but gulp...found the shipping charge of $42 was a bit pricey for my current post-Christmas anemic pocketbook.  Perhaps I'll need to look at a smaller quantity ;-p and that is certainly available!

I'll be ordering though, as soon as my pockets are slightly more plumped up :-)  I will say, even with shipping...it's a good price per bottle...but it's more like $10.50/bottle $9.80/bottle (case discount) than $7.00/bottle when you add shipping to the tally.  THAT'S why we need local retailing!  Until then - it is available online through underdog wine merchants.  The only thing more I could ask for would be beach-size individual bottles...in plastic of course.  Some people like having a beer on the beach... I thoroughly enjoy drinking wine on the beach.  No glass on the beach prevents me from doing so unless I break down and buy mini bottles of a less tasty "other brand".  I know plastic bottles and white wine are not a good mix...so I'll likely be unsatisfied in this wish.

I don't have the wine palate that detects all those subtle flavors you hear "wine folks" talking about...hints of this and that... I'm much more of a plebeian connoisseur.  I just know "does it taste good?" ... and "do I want a second glass?"  The answer to that, with the flipflop winery's Pinot Grigio, was a resounding yes.  It's light, it's crisp - yet smooth - ...it's refreshing. Yum.

I particularly like the label art a LOT (flipflops of course) and I like the concept of the charity they support SOLES 4 SOULS... For every bottle of flipflop wine purchased, Soles4Souls
will distribute a pair of shoes to someone in need.
What a great concept!

*Up to 100,000 pairs in the first year

Also, note, these are screw top wine bottles.  Some turn their noses up at screw top bottles, but I actually prefer them for a crisp white wine.  I can't tell you how many glasses of wine I have picked pieces of cork from...a white wine, in my humble opinion, is absolutely fine sans cork.  I know there is debate over cork vs screw top... but, I don't care.  It's easier to open and I can screw the lid on easily when I want to finish the bottle the next day or use it in cooking.  Here's a good article that makes an easily understood explanation of both sides of the debate.

So, the Pinot Noir and the Riesling await my pleasure.  I'll get to those as soon as my hubby is here to share the goods.  He's the Pinot Noir afficianado... I'll be having most of the Riesling :-)

My favorite label is the Pinot Grigio...followed closely by the Pinot Noir
Very South Padre Islandish...don't you think?
CHEERS, Y'ALL

Dirty Al's - on South Padre Island

I've written several reviews about Dirty Al's - mostly have visited the Port Isabel location - but certainly have gone to the island location several times - but not in the past 6 months.  We live on the mainland side so Port Isabel is an easy destination for dinner.  Last Friday night, February 11th, we headed out to eat...kinda later than we usually go.  My hubby had just rolled in from Austin and was tired and we were all hungry.  I asked him what his preference was and he said "Dirty Al's".  We pulled into the Pelican's Station location to find the parking lot full and the waiting area filled.  We circled right on out of that lot.  My hubby said "just go on across"...so I turned right onto the causeway...and he said "I meant across to Pirate's Landing".  Uh, well, too late!  I told him if said to "go across" - to me that meant across the bridge!

We proceeded onwards to Dirty Al's on the island and, thankfully, they were not overcrowded.  Apparently they close a little earlier though, because we hadn't even gotten our food when they were turning off the open sign and flipping the signs to say "closed".  Whoa...it was only 7:45!  Anyway, Dirty Al's continues to provide the consistent good food we have come to expect...tonight I had an order of calamari for my main meal...with a small side salad.  Perfect.  Actually, there was so much squid I had to offer it up to the bottomless pits men at the table to help me finish it off.  The teen had his usual burger and fries, and my hubby had a boiled shrimp taco salad.  Pretty basic stuff - but everyone was happy with their orders.

One of the best things about eating on the island is I'm now to the point where I tend to see someone I know or at least someone I recognize.  This evening was no different.  Joni and Griff, from Paragraphs on Padre Blvd., were finishing up their meal.  Joni stopped at the table to say hi.  It's always good to see folks we know.  I finally feel like a local!  Love small town America :-)

So, there's the update on Dirty Al's...everything is copasetic!  Good grub as always.

Dirty Al's on Urbanspoon

Wednesday, February 16, 2011

MEXIQUITO'S REVISITED

I wrote previously about my happiness at finding good Tex-Mex food...FINALLY... in the South Padre/Port Isabel area.  I was happy to find a low-cost little place with dependable quality Mexican food that tasted good...every time.  Mexiquito's was the answer to my dilemma but I had not been there for a few months because of my busy baking schedule and the holidays.  Monday I was riding solo, doing errands, making deliveries... and decided to stop in for a late lunch (arriving around 1:20) before heading back home.  I was parched and tired and starving.

A couple of times I had thought about stopping and their few parking spaces were all filled up...or they were closed in the evening...so I figured late lunch time would be perfect.  I was not far off my mark :-)

I arrived to find the usually immaculately clean restaurant nearly empty of people...but filled with dirty tables!  OK, I was hungrily cranky, so I kept that in mind as I looked around for somewhere to sit.  The waitress said "just sit anywhere" then she looked around like "oh, no clean tables" and scurried to clean my chosen table.  She left a basket of half-eaten chips on the table and I was sure hoping she was not expecting me to eat those.  She came back in a few moments and got my order for a Diet Coke to drink, and delivered it rapidly.  I felt immensely better after slugging down a few drinks of that deliciously cold fizzy soda.  Now, if I could just get chips and salsa I'd be happy.  Another person was now industriously clearing all of the dirty tables...and I thought to myself... Valentine's Day lunch is always a busy day...bet they were slammed. (see my mood was improving due to re-hydration)  I decided on the white-board lunch special of the Mexican Plate...normally $8.99 but on special for $7.99.  Two cheese enchiladas, 2 beef tacos, a chalupa, beans, rice, and "salad" aka (I knew from experience) a small pile of lettuce and tomato.  Sounded great to me.  I was starved.  Gave my order and worked on reading my book trying to send mental images of chips and salsa to my waitress.  I purposefully was not asking for something that is always automatically provided there because ... well, I shouldn't have to.  Finally, a fresh hot basket of tortilla chips and cooked salsa came and the old basket was whisked away.  Ahhhh, heaven. 

My lunch came in a very reasonable amount of time...about the time I was telling myself to stop eating chips or I would be too full to eat my lunch.  Two full plates of food were delivered!  Everything was tasty as anticipated.  There was enough food for two people IMHO.  I ate half of everything and almost all of both tacos.  The tacos are softly fried (not crisp) and the beef was well-seasoned.  The chalupa was on a crisp fried tortilla base (as it should be) with refried beans, a generous layer of beef, lettuce, and cheese (I always ask for no tomato).  The beans and rice were tasty and the cheese enchiladas were as good as I remembered them.  A very satisfying meal.

Mexiquitos is not haute cuisine.  It is a great mom-and-pop place to consume filling and generously portioned Tex-Mex food in Port Isabel.  You won't be able to miss the bright green building on the south side of Hwy 100.  And remember, if you go to a restaurant at the tail end of lunch time on a holiday...you are likely to find tired staff ... if you go in hungry (like I did) and feeling irritable, hold your opinion until you get settled with a drink and a starter.  It will help adjust your attitude!  I'm happy they pulled it together for me and gave me the same enjoyable lunch as if I'd arrived at straight up noon on Valentine's Day. (after the bumpy start...which I'm not holding against them!)


SPI FLIP FLOP FOODIE RATING:

3 1/2 – Pretty Yummy - I feel my flip flops wanting to head back from time to time!
Mexiquito Restaurant on Urbanspoon